Gewehr ’98 Part 4

Custom builds, G98, Imperial Era, Rifles, Weapons, WWI

I used an epoxy putty to fit the buttplate due to the awkward shapes involved.

20160824_120737


20160824_120720

I also replaced the bolt handle, which had been secured with a small M3 screw which wasn’t solid enough to endure repeated use. Now it is secured with an 8mm plug and pinned in place. It is now also steel, so it shall wear better and keep its colour.

_dsf8141_dsf8317

I also replaced the front band/bayonet lug with an original, stainless steel one.

_dsf7903 _dsf7984

Pretty well finished now! Just got to put the band and top hand guard back together. Completed pictures to follow.


If you are interested in this project or have an idea of your own, drop us a line on enquiries.vintageairsoft@gmail.com to discuss. ‘Like’ our Facebook page or follow the blog to get regular updates on projects and interesting videos and articles.

You can also buy many of our finished products in our Etsy store.

Gewehr ’98: Part 3

Custom builds, G98, Rifles, Weapons, WWI, WWII

As this build seems to be coming to a close, it’s time to get the detailing right. In the fore-stock, there are two springs that keep the bands in position. These are laser cut to rough shape, then I used the grinder to mill in details such as the recesses the bands sit in. On the back of the piece is a smooth recess which combined with the correct tempering allows it to act like a spring.

_DSF7544

The front band viewed from the front. There is, annoyingly, a space between the barrel and the bayonet lug that needs fixing, but I am pleased with the difficult shape of the band itself.

_DSF7546

There are a few bits of etching on this gun, something I haven’t done before. I’m using a dremmel style tool with fine etching bits. To cut accurately I made templates in Qcad and glued them to the material with PVA. (This is a practice piece).

_DSF7523

Once dry, I could get to work removing the black areas.

_DSF7524

Then soak the part in warm water and detergent to remove the template.

_DSF7528

A bit of practice later and the templates are ready to be attached to the rifle itself.

_DSF7533_DSF7534

First pass with the dremmel has give a good outline! Hopefully a second pass will get it a little deeper.

_DSF7558

_DSF7560


Not too much more to do now! Looking forward to getting this one finished, it should be a very pretty rifle by the end of it!

Gewehr ’98: Part 2

Custom builds, G98, Rifles, WWI, WWII

The next trick is to attach the lengthened fore-end to the rest of the stock. To do this I inletted both parts down the centre and inserted a ‘biscuit’, a piece of wood that joins the two parts.

_DSF7345

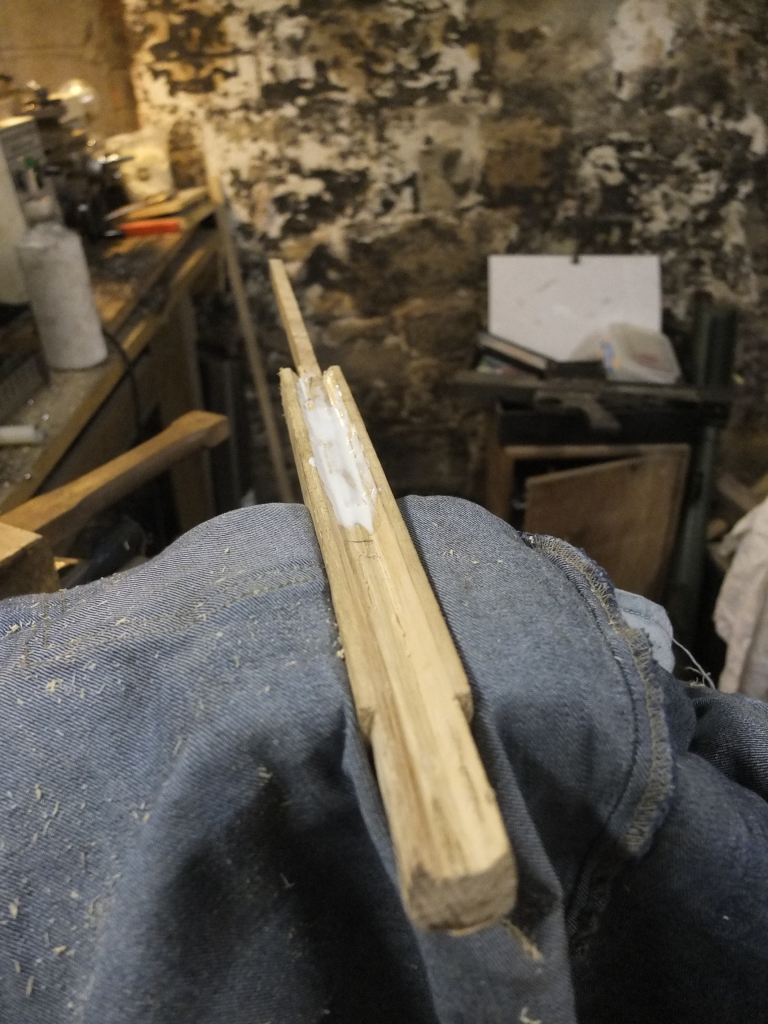
Once the two parts were joined, I removed the top part of the biscuit so that the barrel could fit in the groove originally cut for it.

_DSF7369

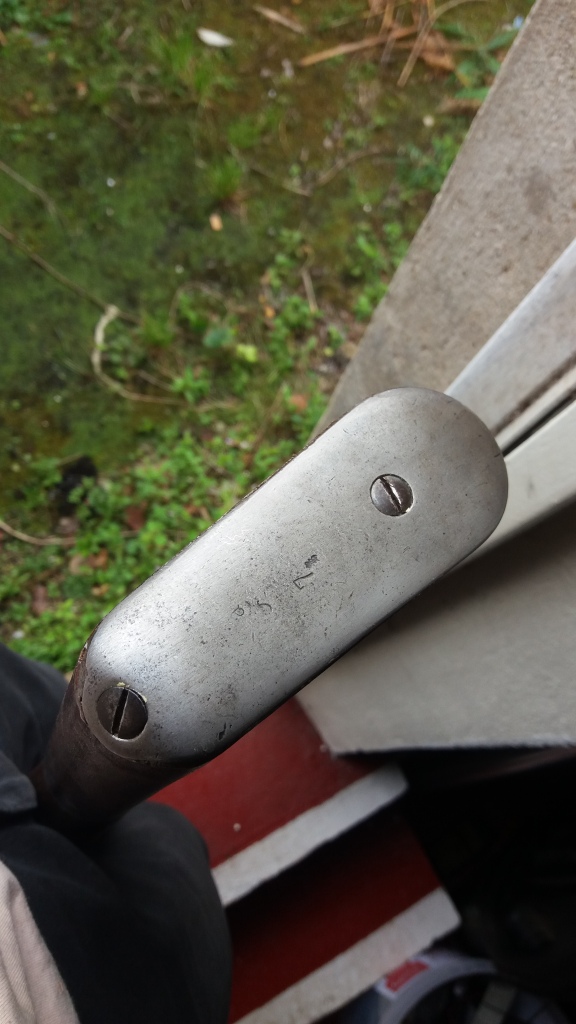
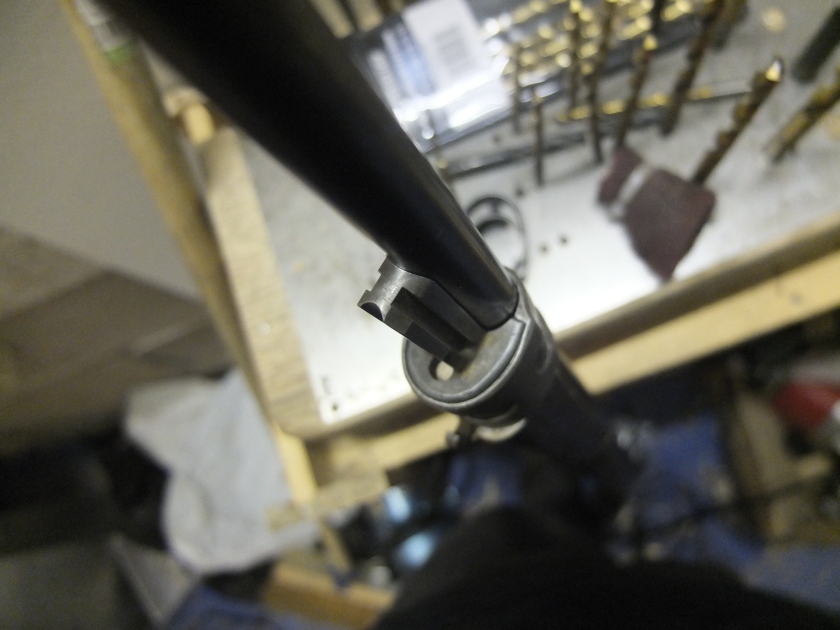
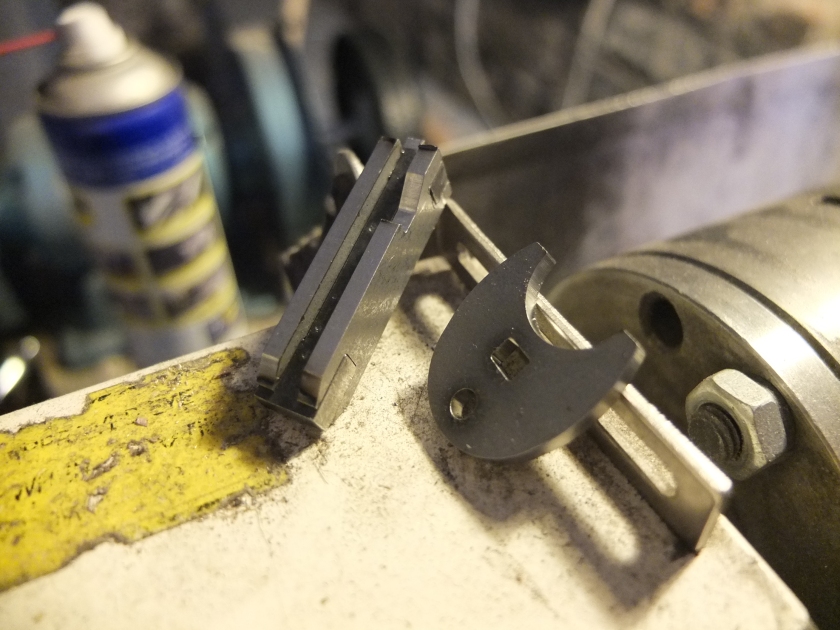
In the meantime, I taped up the bolt to protect the working parts from dirt ingress. I could then remove the bolt handle with the angle grinder.
_DSF7351

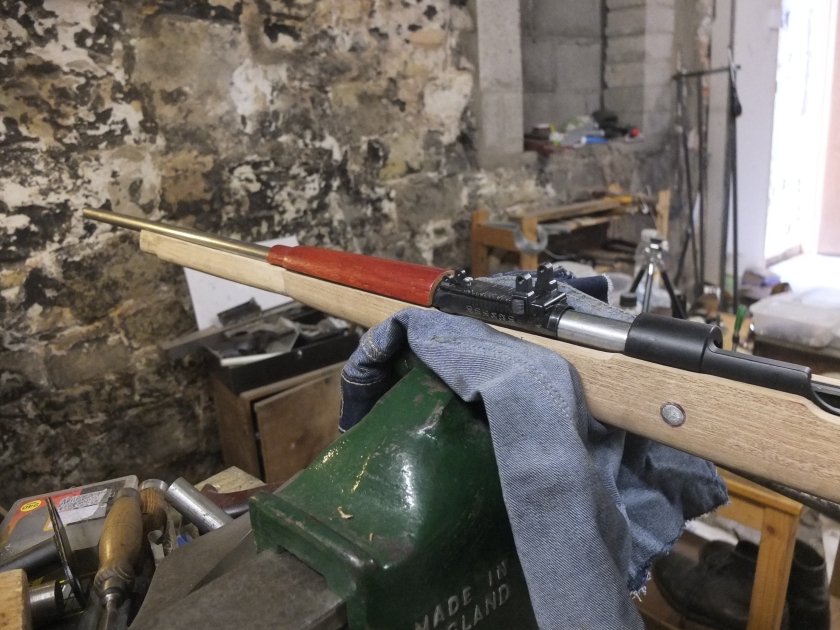
In order to fit the rear sight, some modifications are needed to the chamber. First, removing the rear sight unit and chamber cover, I then could grind down this screw thread until flat.

_DSF7356

The chamber cover can then be replaced with a piece of steel tube.

_DSF7366

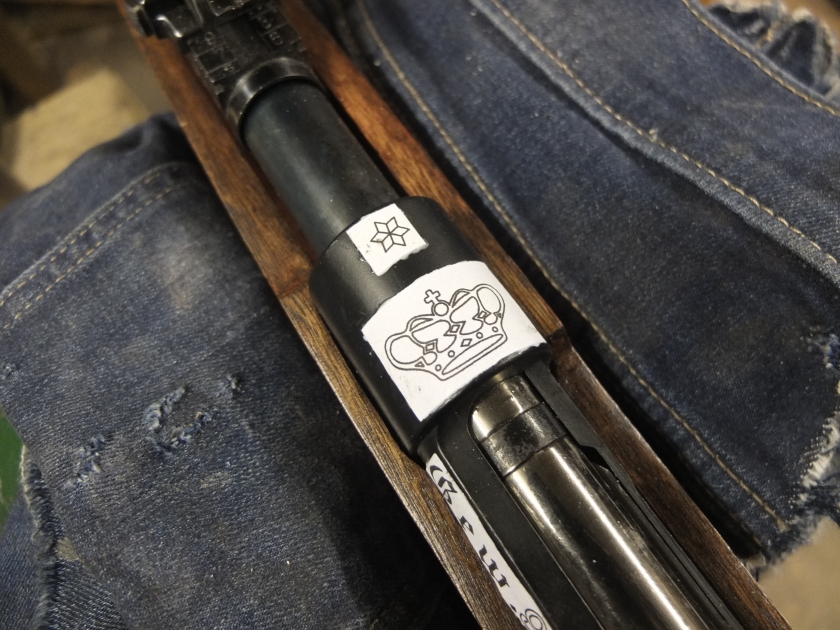
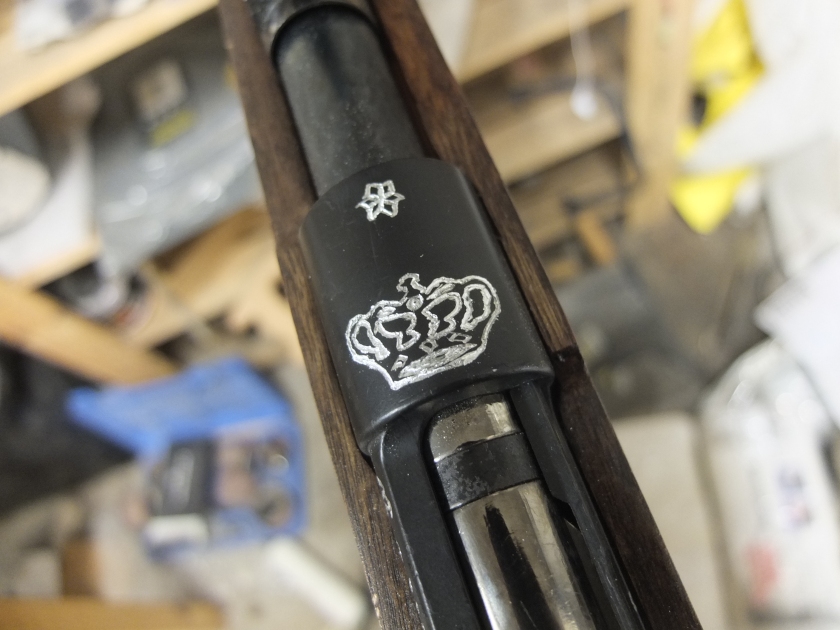
This is the correct diameter for the new Vizier rear sight. This is a reproduction one from the US.

To complete the work, I removed the top slide of the sight. To fit around the chamber I removed the bottom of the mounts. The built-in screw point holds it in position.
_DSF7368

There is a lug at the front of the sight which holds down the hand guard. This had to be modified slightly to fit around the tube being used to hold the rear sight.
_DSF7376

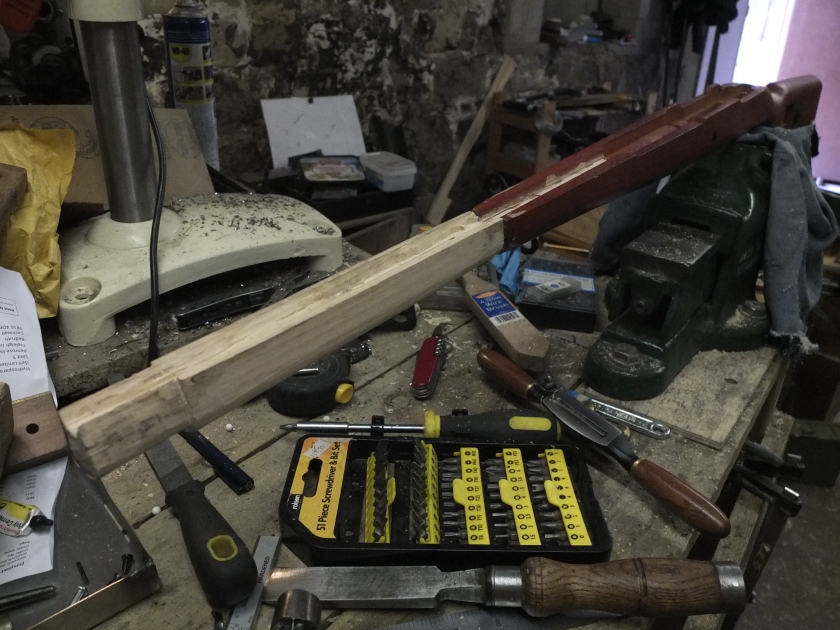
Next I filled in the cutaways for the bolt handle (on the K98k, the bolt handle is bent down so needs a cutaway, this is not needed on the straight-handled G98), the cut-through for the sling will be replaced by a standard sling swivel. When dry these blocks could be worked flat with the rest of the stock. I then lightly scored the surface in line with the grain of the stock so the stain would set more deeply and blend the two different timbers together better.

_DSF7380

Coats 1+2 of the stain, still some variation between the timbers. As I build up layer on layer the differences will become very subtle.

_DSF7388

While all this is drying, I could turn and attach the new bolt handle. The original plan was to use the cut-off bend bolt but this wasn’t going to be long enough to look right so I made a better one out of some brass bar I had to hand.

_DSF7379


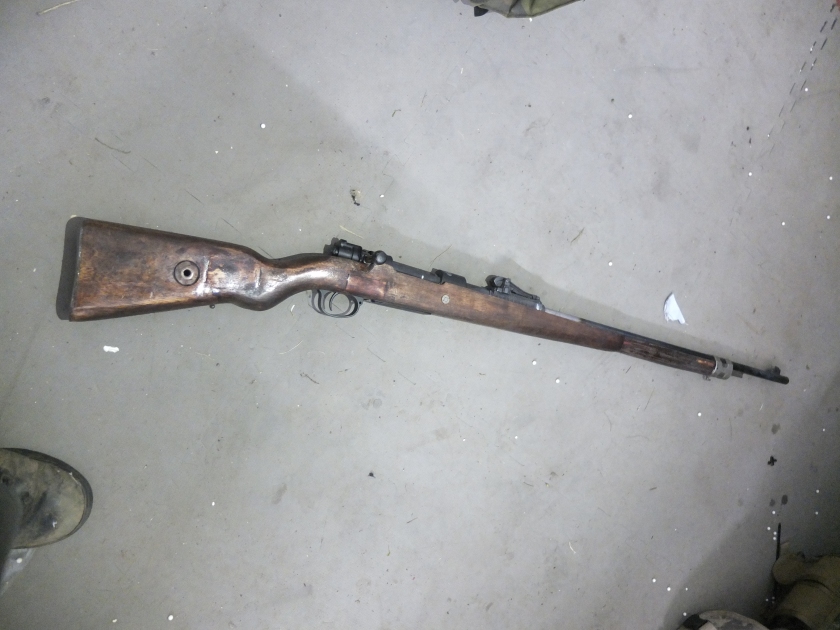
The next post should see the stock finished, the bolt handle blacked and everything assembled.


If this build has inspired you to want a gun of your own, do drop us a line on enquiries.vintageairsoft@gmail.com to discuss or find us on Facebook!

Gewehr ’98: Part 1

Custom builds, G98, Rifles, Weapons, WWI, WWII

Another custom build, another load of laser cuttings! Part of the brief for this build is to replace as many of the pot metal parts with steel as possible, so I have a lot of cosmetic work to do on this.

_DSF7232

First up is the fore-end, incorporating the bayonet lug.

_DSF7235

Bending the fore-end sleeve into place, using a couple of steel tubes and as a wooden die. I then welded the three parts together.

_DSF7305

I could then remove the back of the butt stock where it fills the K98k buttstock.

_DSF7315

And fit the flat steel replacement butt plate.

_DSF7316

I then glued two pieces of straight-grained ash together and planed both to flat.

_DSF7322

I could then shape the bottom edge and run a rounded channel down the top for the barrel to sit in. This part will be the new fore-end, bringing the rifle up to the full length it is supposed to be.

_DSF7329

Inside the action, two buffers will suspend the inner barrel in the outer barrel.

_DSF7330

Next step is to bend the middle band, ends first.

_DSF7331

Then bending the rest of the shape around the woodwork.

_DSF7332 And the front band in position, minus the bayonet lug.
_DSF7337

So the next steps are: to attach the bayonet lug, fit the new full-length outer barrel, put a straight handle on the bolt, join the stock and fore-end and fill in the spaces on the stock.


If this build is of interest to you, please do get in touch at: enquiries.vintageairsoft@gmail.com or join us on our Facebook page. Don’t forget you can buy many of our complete products via Etsy.

Gewehr ’98: Introduction

Custom builds, G98, History, Rifles, Weapons, WWI

Where to start with the history of the G98… Well it’s a very long story of development and really starts in the 1880s, when the French scared the living heck out of pretty well everyone by introducing the Lebel 1886: the first repeating, smokeless cartridge, ‘small bore’ military issue rifle in the world.

Everyone had to catch up, the British quickly brought in the Lee-Metford, the Swiss Schmidt-Rubins, Mannlichers dominated Eastern Europe and Russia bravely (or foolishly) went their own way with the Mosin-Nagant. Germany however, had Mauser. To cover this topic thoroughly, I refer you to C&Rsenal: an awesome channel for those interested in firearms history. The first two videos are on the 1888 rifles, the third is on the G98 itself:

A quick breakdown though, the G98 served Germany through the Great War and into the interwar period until it was replaced by shorter service rifles such as the K98b and K98k. In WW2 is was apparently brought out from storage for Volksturm use.

So skipping on a bit a client has asked for a shell-ejecting G98 replica! A D-Boys K98k will be the donor gun. Modifications will be made to the stock, all the metal fittings that can be replaced will be replaced with steel and the massive and distinctive Vizier rear sight fitted. The bolt handle will be straight as per the original.

fd68c7d6f87fa46873b838d7fd01d1f6

MG08/15: Bipod and woodwork

Custom builds, Machine-Guns, MG08/15, Weapons, WWI, WWII

_DSF5437

So, this is what the MG08/15 looks like now! As you can see there are a few changes. The main development of importance as far as I am concerned is the addition of the bipod. This gun finally stands up on its own!

_DSF5431

A close-up of the bipod mount in progress. A series of disks keeps friction to a minimum. I was thinking of using 6mm bearings but it runs smoothly as-is. Given the gun will be used in (very dusty) South Africa I reckoned on simpler being better.

_DSF5434
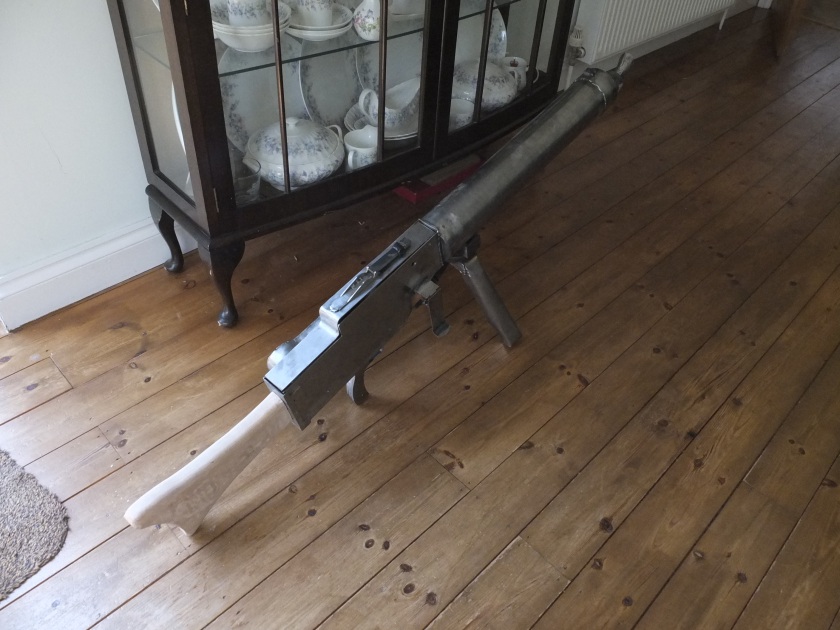
The bipod itself is folded 2mm steel sheet. Designed in CAD and laser cut, I folded it by hand. I’ve never been so hot in the workshop! This was then welded to the bottom of the pivot mechanism.

_DSF5425
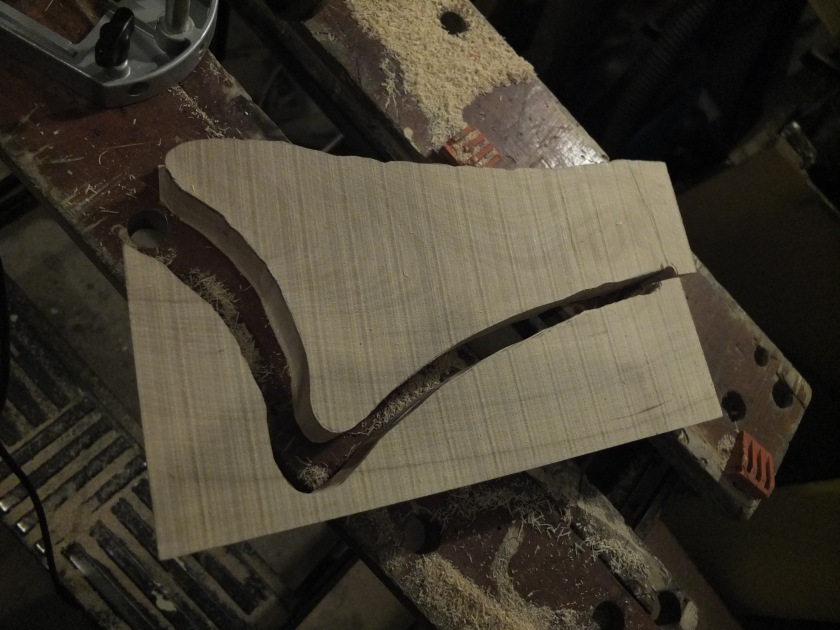
Woodwork is the other obvious development. Took delivery of some lovely Trend router bits that I have had my eye on for some time and set to work on the buttstock (rough cut above).  Using the convex curve of a Roman Ogee bit I rounded off the faces other than the front and back.

_DSF5436

Curved faces and Roman Ogee bit in the router.

_DSF5435

Another treat in the delivery: These rubber sanding drums fit in a standard drill chuck. A left hand thread puts pressure on the rubber to hold the sanding cylinders in place. Once you get used to setting them up, these are really effective for sanding large curved faces and even small flat faces.

_DSF5329
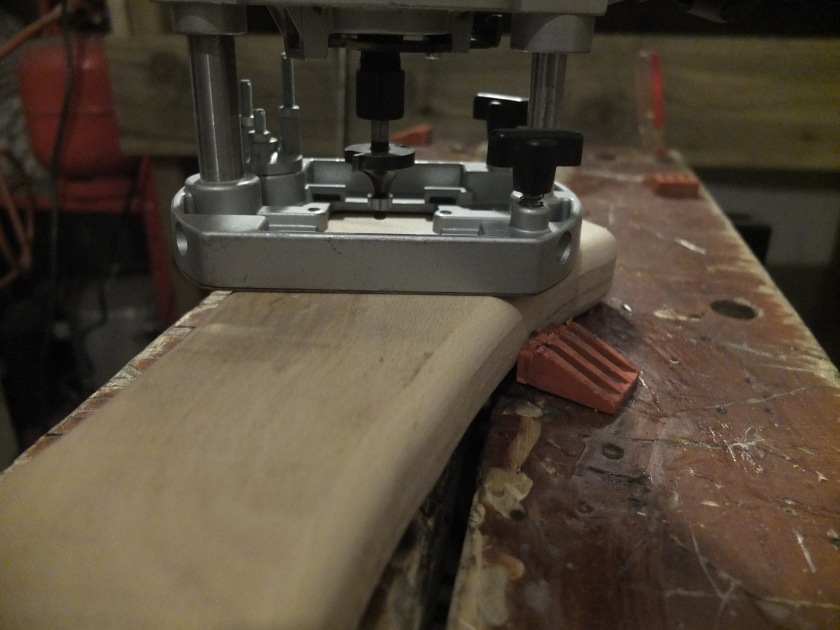
Now I just need to get the finished buttstock to match the staining job on the pistol grip covers!

Still to go: I need to fix up the feed mechanism. All the components exist, they just need fettling to get them all working together smoothly. Then attach the ports (in and ejection). With that it will be painting and testing!


If this has inspired you to want a gun of your own, let me know! Drop me a line on: enquiries.vintageairsoft@gmail.com, I’d love to hear from you!

MG08/15 shell

Custom builds, Machine-Guns, MG08/15, Weapons, WWI, WWII

Yes, you read the title correctly, more progress on the MG08/15!

External parts this time, the whole build  is really starting to come together now. It’s best expressed in photographs so I shall let them do the talking…

_DSF5327

Right side of receiver soon after welding the grip. On the right of the picture you can see the magazine mounting for the portable 100 round ‘snail’ magazine (technically it isn’t a snail magazine, it is a belt box, I refer to it as a snail to differentiate between it and the box magazine I am building for fixed positions).

_DSF5328

A slightly soft-focus shot of the left side after tinkering with the safety switch mounting.

_DSF5326Close-up of the pistol grip. This shows the back where you can see the screw used to attach the trigger mechanism inside the gun.

_DSF5329

The first bit of woodwork for the gun, carefully shaped grips. This wood is ash stained with a blend of dyes to pick out the details. I’ll be needing to order in a special piece for the buttstock as the pieces I have are fractionally too small.

_DSF5318

Flash hider, carefully hand-cut and hammered into shape.

_DSF5331

Flash hider so far. The cone has been welded to a piece of tube that supports this component. The bulk of the rest of this part will be polymorph (the large black part here) which is still undergoing some shaping.

_DSF5333

And finally for this update, the cooling jacket. This close-up shot of the back-end shows the cover plate that attaches to the front of the gun and the hole through which the inner barrel will run.


As ever, if this post has inspired you, do drop us a line at enquiries.vintageairsoft@gmail.com!