At the end of the last instalment, the G43 looked like this:

Since then it’s improved a lot. Now I know what shapes are required it is possible to get neater pieces laser cut. As before, I bent sections for the top of the receiver over wooden formers.

This time however I had some checking jigs to ensure that bends were executed correctly and precisely. This will help to reproduce accurate results time after time.

This means that the bent parts neatly fit their neighbouring components and can be welded into place.

Checking the fit of the chamber cover:

One of the nice bits about this stage of development is that everything has its place and you know with a fair degree of certainty that parts will fit together with a minimum of fussing. This is why custom builds take so long, just because there is only one piece produced at the end doesn’t cut out all of that prototyping work!

Once the receiver unit was assembled, I had to attach it to the action. A nut captive in this piece of polymorph holds it in place. The polymorph (low softening point plastic) is epoxied in place onto the top of the M14’s outer barrel.

Below is the bottom part of the rear sight unit on first (dry) assembly. You can see clearly that it is made from five separate pieces, slightly differently shaped to make the rough shape of the sight unit. These are then screwed together to make the unit. They could be welded but for this job a tidy and correct appearance could be achieved by countersinking and flattening off the screws.

A close-up of the tapped hole. Tapping is a relatively simple process that cuts a female screw thread into a piece of material. This means that a much neater appearance can be achieved than by using a nut.

One of the distinctive features of the G43 is the scope rail that comes pretty well as standard except on the earliest few hundred models produced. One request the client made for this was that it could be used in the DMR role so a scope mount was needed.
No picatinny rails here though. The scope will mount on the side rail. A piece of 6mm steel with holes corresponding to two holes on the receiver makes the rail, I had to put a chamfer on by hand so that the scope will slot on without falling off the side. There was quite a bit of trial and error needed to achieve a fit close enough to allow the scope to be accurate but loose enough to allow it to be removed.

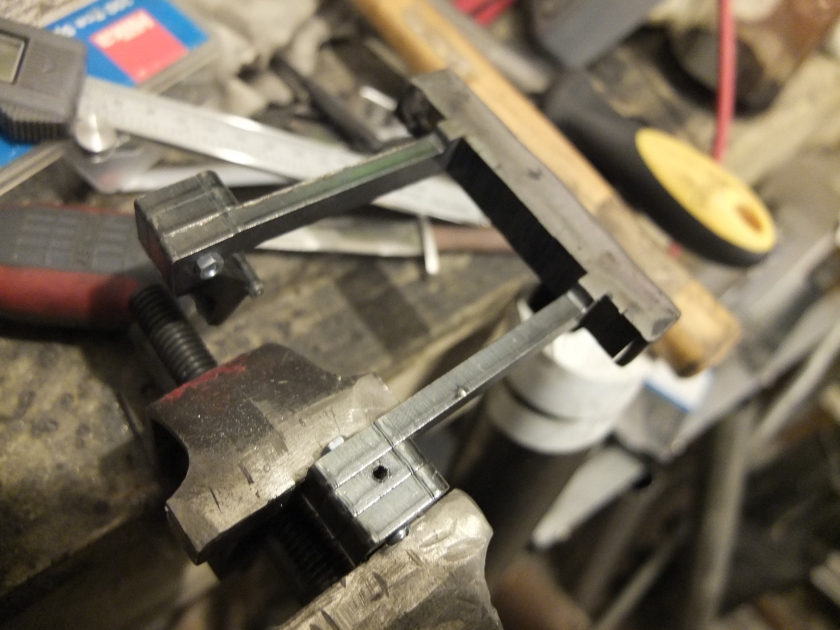
For those of you who were paying attention earlier, you will remember the use of different shaped pieces being assembled to create a part. The scope mount is a great example of this being used. A 3mm steel plate is used to align and assemble all the parts, of which there are three types. The front cap you can see here, behind it are parts that slot over the bevelled scope rail and the two vertical posts that take the scope are similarly equipped.
Once all the parts are assembled, I could tap the holes in the sides.

These take the spring steel clips that lock down the scope.

The assembled scope mount with scope.

My last job for today on this was to oil black some of the smaller parts. This was my first time oil blacking with spent motor oil. In the past I have experimented with WD40, linseed oil, veg oil etc… all of which produce slightly different results.
I use a MAPP torch to heat the parts, though propane or oxy-acetylene (if you are a lucky sod) will also work. I heat up the parts and watch the colour change as the metal heats. It’s important to make sure the metal is clean of grease and rust to prevent an uneven finish.

When it is the dark grey shown below it is the right temperature to dip.

The first time you drop a part in cold oil it produces a thick cloud of white smoke. Each time afterwards it produces less smoke as the oil heats up.

After the first dip, the part is reheated, dipped a second time and heated again.

The last heating it is heated until a black, powdery residue is formed. when the part cools this can be brushed off and the finish is left intact.

The front band:

The assembly so far:

Sadly the big parts won’t fit into any suitable container I have. However in my next laser cutting order I have added an oil blacking station which will take all but the biggest parts I do.
This project has sparked a lot of interest so this model will be available as a kit. If this post has inspired you to want a gun of your own, do drop us a line on enquiries.vintageairsoft@gmail.com to discuss or find us on Facebook.
