Japanese T89 ‘knee’ mortar

Area effect, Area-effect, Complete builds, Custom builds, Inter-War (1918-1939), T89 'Knee' Mortar, Weapons, WWII

I was recently given this replica T89 mortar replica to convert to fire TAGS. I hope someday to make my own from scratch with a bit more detailing and moving parts.

_DSF8460 copy

The first step is to fit a firing pin. This is quite simple, I tapped two disks and threaded them onto a bolt to create a stable unit. This can be pushed down to the bottom of the barrel.

_DSF8462

The shells are steel tubes with custom-made caps. This is the prototype, there is a second hole in the production versions to allow quick refiling of the TAGs. The bottom plate is held on by spring pressure.

_DSF8463

There are two rows of spacers. The bottom one keeps the shell centred in the barrel, the top, thicker row allows the user to line up the shell before dropping it into the barrel for firing.

_DSF8464

The completed shells.

_DSF8681

I’ll be taking lessons learned from this design to apply to my other mortars and heavy weapons. I’ll also be offering these quickfill shells as an alternative to the standard 2″ mortar shells I’m providing with the SMBL mortar.


If you want a mortar of your own, please do get in touch at: enquiries.vintageairsoft@gmail.com or join us on our Facebook page. Don’t forget you can buy our complete products via Etsy.

Lanchester Build: Part 1

Custom builds, Lanchester, Sub Machine-guns, Weapons, WWII

First things first, I draw out the stock template on the wood.

I took the drill to the stock and took out the detailed bits, then sawed through the rest. I’m very much looking forward to the day when I have a bandsaw to do this job…

Over in the metalshop, I bent, tacked and welded the steel parts together. On this build I am making a new magwell, but will be using the original magwell sleeve.

The fore-end of the Lanchester, showing the foresight and sight guards. These will need to be hardened to be much use I think.

Fitting the action to the stock. This is always a long job, but having recently got a hold of some lovely blue oil paint I’m improving my fitting technique and speed quite a lot!

Showing the bottom plate, which I am going to draw around to cut a nice, deep recess for.

I have cut the recess for the bottom plate deep so that the trigger reaches through to the correct depth in the trigger guard. I may need to tweak the trigger design though as at present it is a bit sticky. Far from ideal in an automatic airsoft gun!

I can finally get to my favourite bit: Shaping the stock. The Lanchester has a very slim, feminine wrist on the stock reminiscent of a P14/17 rifle. As a result it will have to rely on Lipos in the back of the receiver which is unfortunate but better than sacrificing the stock strength at the weakest point further. Even when I have carefully selected the grain to flow down through this for maximum strength there’s only so much you can do to keep it strong.

The Lanchester, pretty much roughed out. Now onto the rear sight, locking lugs and detailing!


If you are interested in this project or have an idea of your own, drop us a line on enquiries.vintageairsoft@gmail.com to discuss. ‘Like’ our Facebook page or follow the blog to get regular updates on projects and interesting videos and articles. 

Don’t forget you can buy our complete products via Etsy.

FG42: First production model: Improvements

Battle Rifles, Complete builds, Custom builds, FG42, Weapons, WWII

First things first, a locking system for the bipod. It flopped around a lot on the pre-production version so I have added locking lugs. This should hold it in both deployed and carry positions.

The new receiver and trigger group. The shape has been changed significantly, losing the fore-end entirely which allows for a much stronger wood fore-stock. The back has been extended to fill out the buttstock and support it fully.

The pistol grip has also changed to fit the new grips I am making.

I bought in some repro grips from the US and modified them with polymorph to fill in the air gap and make them really solid.

I then made rubber moulds of these modified grips and poured copies.

The new magazine well is a big improvement. It locks up very tightly on the magazine.

I have modified the Sten barrel to fit an extension. The gas port is welded directly onto the receiver.

The new foregrip in place. This is much more solid than the first version and will have a correct-looking curve across the top.

I sanded down the woodwork and stained it. Finishing it with hardwax oil.

I then cut a slot matching that in the receiver up into the gas tube for the operating handle in order to allow it to move.

Some of the new parts having their first coat of paint. I’m looking into 3D printed versions of some of these, but need to test out the strength of the parts.

_DSF8940

In position on the gun. 

20170328_200027

The bipod locked down, so far, so good!

20170328_200210

The new gas tube cover.

20170328_200228

There are a few other small changes, but this article covers the vast majority. I hope to have the first  production model completed this week!


If this build is of interest to you, please get in touch at: enquiries.vintageairsoft@gmail.com or join us on our Facebook page. Don’t forget you can buy our complete products via Etsy.

L42A1: Build 2

Cold War, Custom builds, L42A1/Enfield Enforcer, Weapons

Since the last post, some of the 3D printed parts have arrived. The scope mount isn’t bad, the receiver is OK (not shown here) but both need a few tweaks to be perfect.

I’m very pleased with the shape of the 3D printed bolt parts, some minor tweaks and they will be perfect. I need to work out how to get them made in metal though as plastic simply doesn’t have the strength required for the job.

In the meantime I’ll keep using the steel handmade bolts for testing.

The receiver side plate painted. Although this will do for now I have a new design for a side plate integrated with the receiver itself.

_DSF8932

Moving the outer barrel off-centre means a new spacer, but it does improve the aesthetics of the rifle massively. I have also tapered the woodwork a lot more to allow use of the iron sights.

_DSF8933

I am also making new scope mount screws that look more the part than the temporary ones. Deep knurling makes then very nice to grip to tighten and remove, these will be oil blacked for wear resistance.

20170328_190252

The new screws in place. I’m going to re-dip them as the oil loosened up the flux on the joint.

20170401_220449

The bolt is a temporary measure, it will be replaced with a cast one once I have the kiln working.

20170401_220504

In the meantime it looks OK and will be oil blacked to tidy up.

20170401_220520

I have some tweaks to make to the receiver design and scope mount but this is the majority of the work done. The new receiver will have a steel side plate for the scope mount. I hope in the future to cast the rest of this piece.

20170406_231711

As you can see, it takes an original rear sight leaf. while it’s nice and secure for the battle sight, I need to make a locking system for the ladder.

20170406_231723

You can see the other rifle builds here and a potted history of Lee-Enfield development here.

If you are interested in this project or have an idea of your own, drop us a line on enquiries.vintageairsoft@gmail.com to discuss. ‘Like’ our Facebook page or follow the blog to get regular updates on projects and interesting videos and articles. 

Don’t forget you can buy our complete products via Etsy.

L42A1 Build: Part 1

Cold War, Custom builds, L42A1/Enfield Enforcer, Lee-Enfield, Rifles, Weapons

screen-shot-2017-03-06-at-06-20-53

With some dimensioned parts, I could get some bits laser cut and underway…

Receiver and scope mount first, this is a pretty simple tap, screw and weld together job by my standards!

_dsf8782

Once this was done, I marked out the lower stock, indicating the depth for each section.

_dsf8784

I then drilled to each depth to rough out the space for the internals. Once I made my way around the outside of each section, I took the rest out by chisel.

_dsf8803

Once it was roughly fitted, I scooped out the lower to expose some more of the receiver.

_dsf8812

I made a spacer/mount for the outer barrel. These parts will all be screwed into place and covered by the top guard.

For the curious, this is the magazine well design for the production rifles I intend to make for customers. I’ve played about with it a bit and it allows for a pretty fast reload with only a little practice, which makes it somewhat better suited to those up-close and personal moments than most VSR builds.

The top guard in place, waiting to be shaped.

So far, the main thing that is annoying me about this build is the barrel, which is a bit too low in the stock. I may have to revisit this at a later date and fit a wider diameter barrel higher in the woodwork, with the inner barrel off-centre.

This replica will make extensive use of 3D printed parts for the detailing. The foresight is closely related to the Sten MkV foresight I produce. The receiver and scope mount are new designs, which should fit around the existing metal parts. Although it is possible to purchase an all-metal replica L42 scope bracket it would cost almost as much as an authentic scope, so this will take a small bore scope suited to the period, maybe with some cosmetic modifications.


You can see the other rifle builds here and a potted history of Lee-Enfield development here.

If you are interested in this project or have an idea of your own, drop us a line on enquiries.vintageairsoft@gmail.com to discuss. ‘Like’ our Facebook page or follow the blog to get regular updates on projects and interesting videos and articles. 

Don’t forget you can buy our complete products via Etsy.

Spring SMLE: Complete.

Complete builds, Imperial Era, Lee-Enfield, Products, Rifles, SMLE, VSR SMLE, Weapons, WWI, WWII

At long last, the first spring rifle is complete! I’m quite pleased with my first attempt at a VSR based SMLE, though there are a few tweaks I shall be making to production versions.

_dsf8813


_dsf8814

I think in future versions I shall sit the action lower down in the stock to achieve a lower profile. Then I can add things like a charger bridge, maybe even splitting the back of the receiver for added authenticity.

_dsf8816

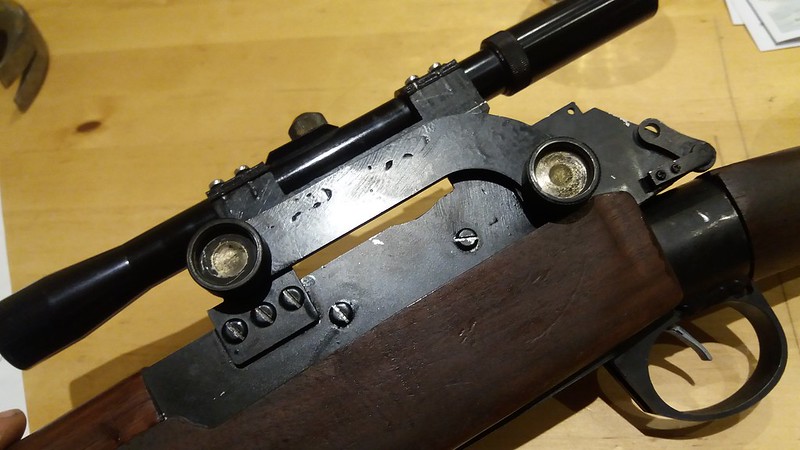
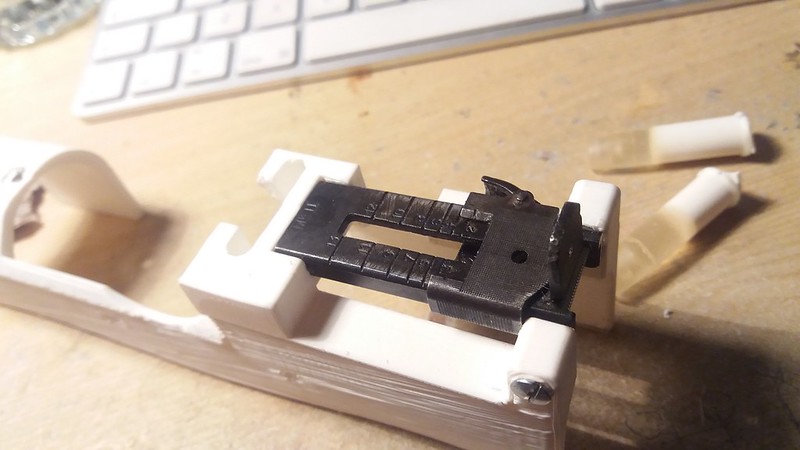
This example is using an original rear sight leaf. In future versions I hope to make reproductions to minimise the number of irreparably modified originals. The rear sight will also host the TDC hop adjustment mod, saving you a helpful upgrade.

_dsf8817

I may have to use No. 4 Enfield swivels unless I can find a way to reproduce these, swivels are becoming harder to come by.

_dsf8818

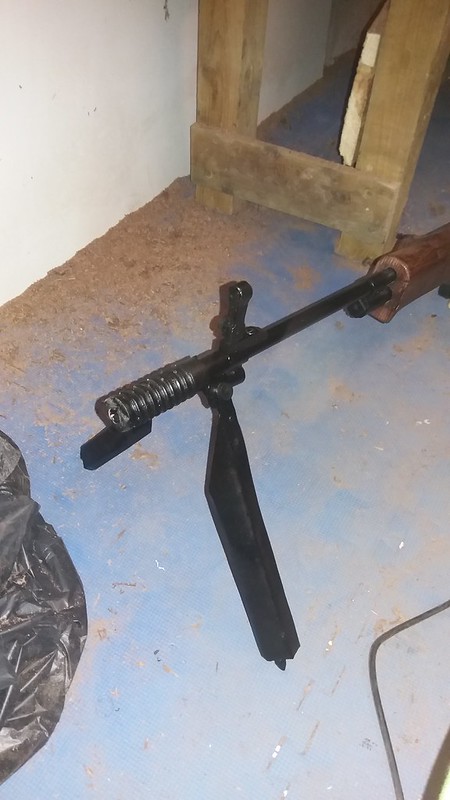
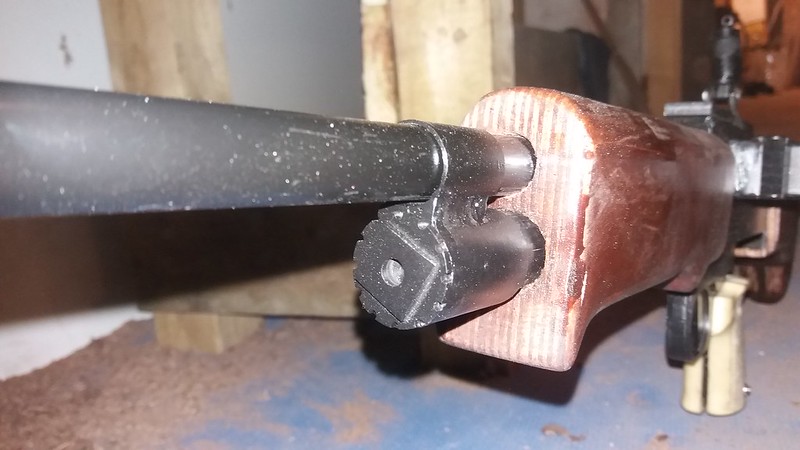
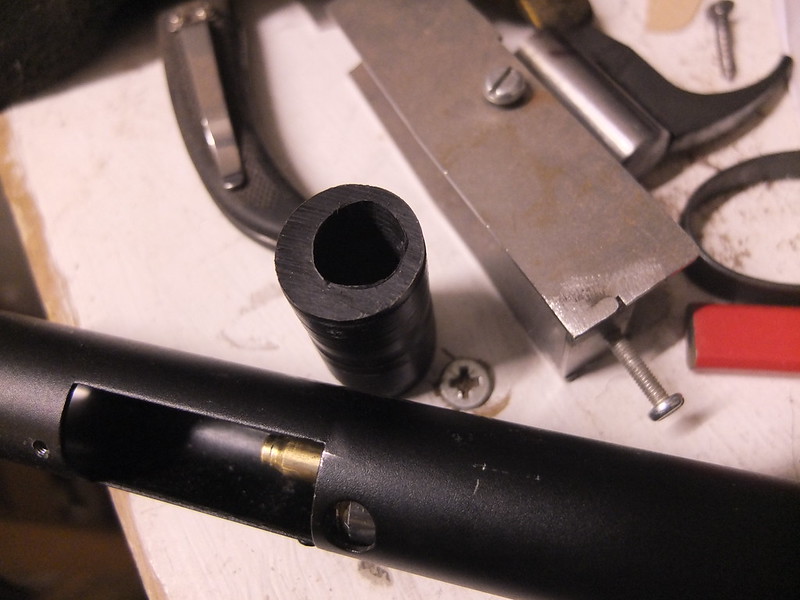
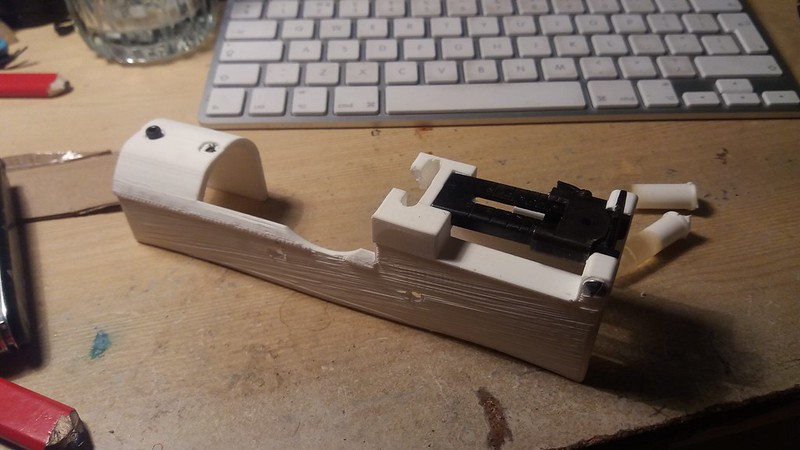
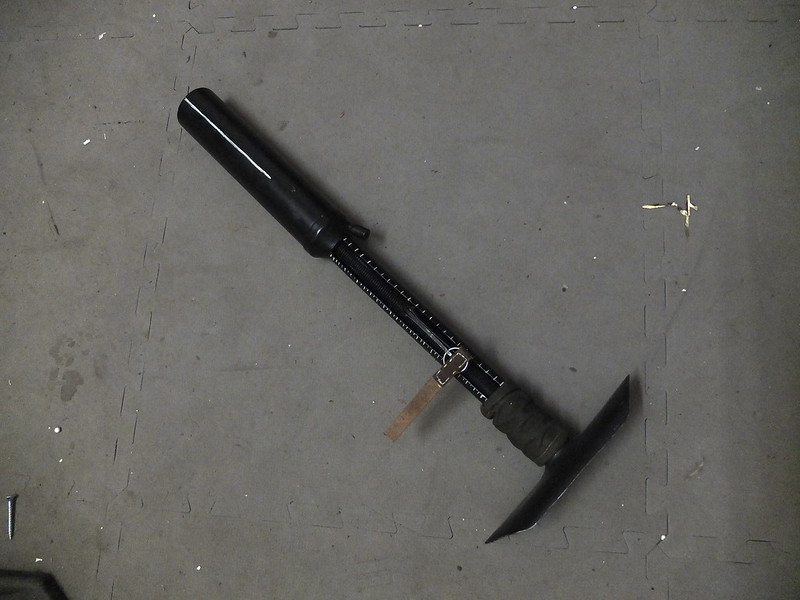
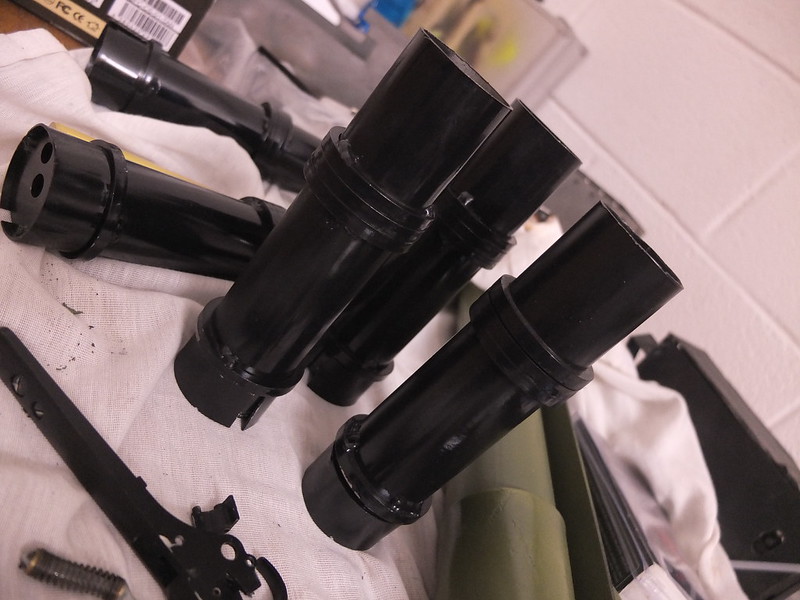
After the success of the 3D printed Sten MkV foresight, I have continued to use this technology here to create the outer barrel impression and foresight unit.

_dsf8819

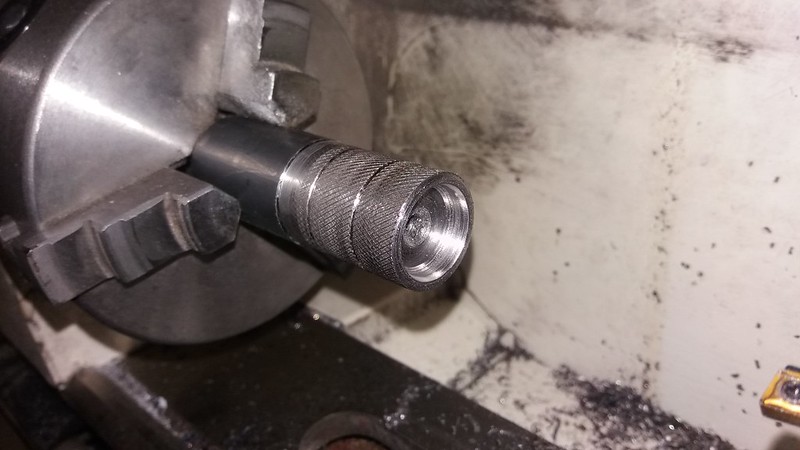
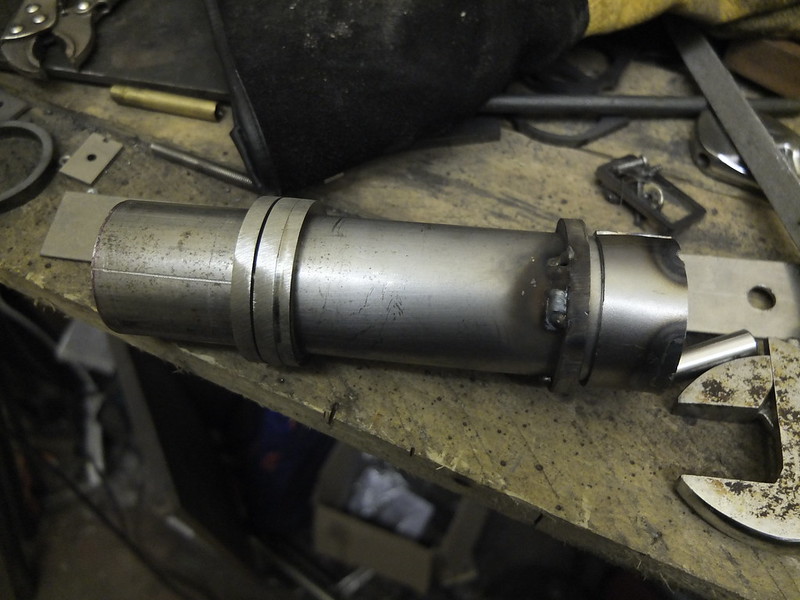
The barrel has been trimmed down to fit. The VSR barrel is a little long so I removed it, cut and re-crowned it on the lathe.

_dsf8820

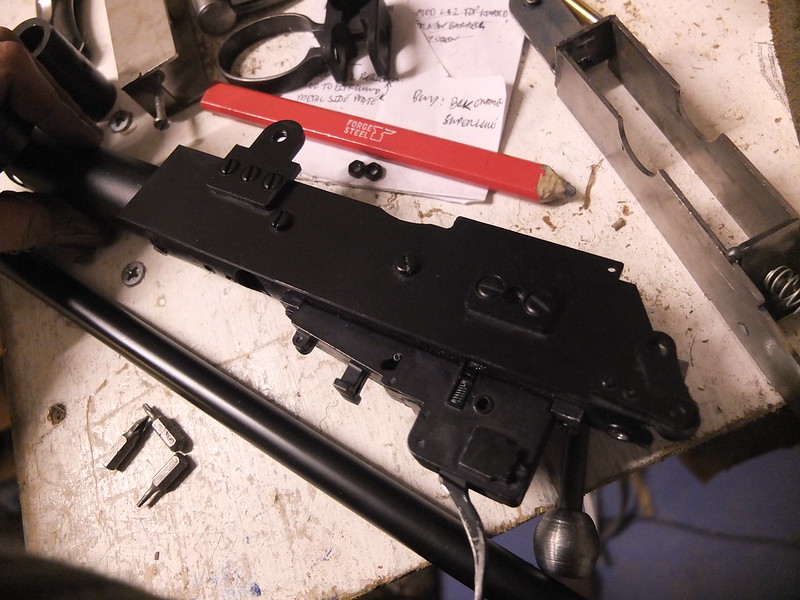
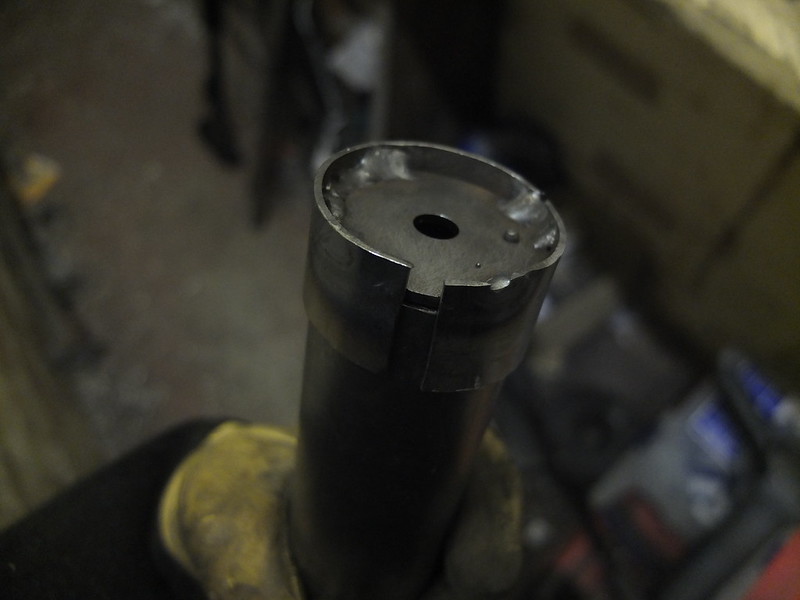
Here’s an important feature, I have lined the magazine well with steel which means magazine release should be consistent and not pinched by the wood. Other VSR Enfields don’t have this lining and I have seen magazines get stuck. There is a new design for this which I will use in the production versions to allow very fast magazine changes.

_dsf8821

The fake magazine is solid resin, painted to look right. There is no need to destroy a perfectly good magazine for this build!

_dsf8822

The original buttplate. I’m hoping to make reproduction ones for future versions. As this is an original buttstock you would still be able to fit an original if this happens.

_dsf8823

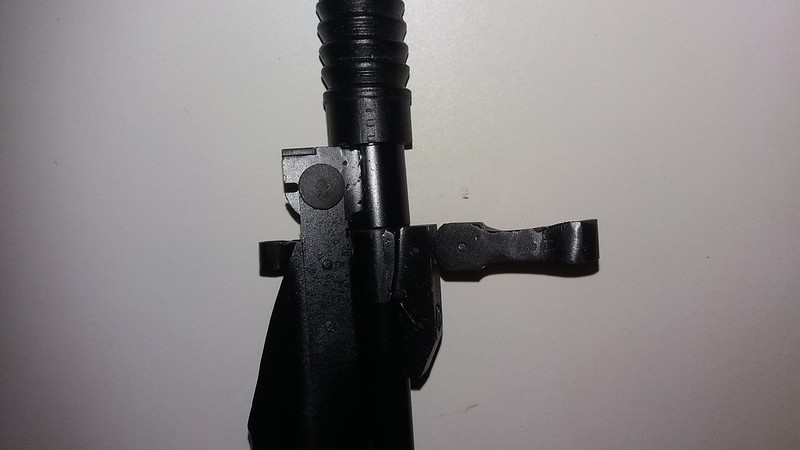
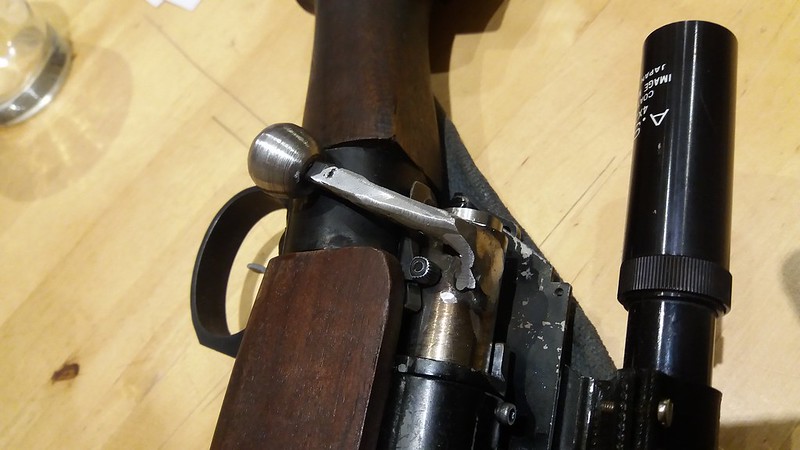
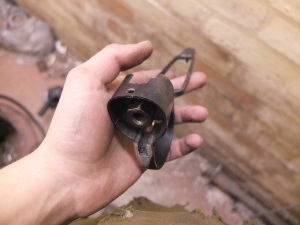
I’m hoping to improve the bolt handle and back of the bolt shape. However I am pleased with where it now sits, nice and authentic on the rear band you can achieve quite a good rate of fire.

_dsf8824

So, there are some changes to come for production but I’m very happy with this first go!

You can see the whole VSR SMLE build here and a potted history of Lee-Enfield development here.

If you are interested in this project or have an idea of your own, drop us a line on enquiries.vintageairsoft@gmail.com to discuss. ‘Like’ our Facebook page or follow the blog to get regular updates on projects and interesting videos and articles. 

Don’t forget you can buy our complete products via Etsy. This will be available soon.
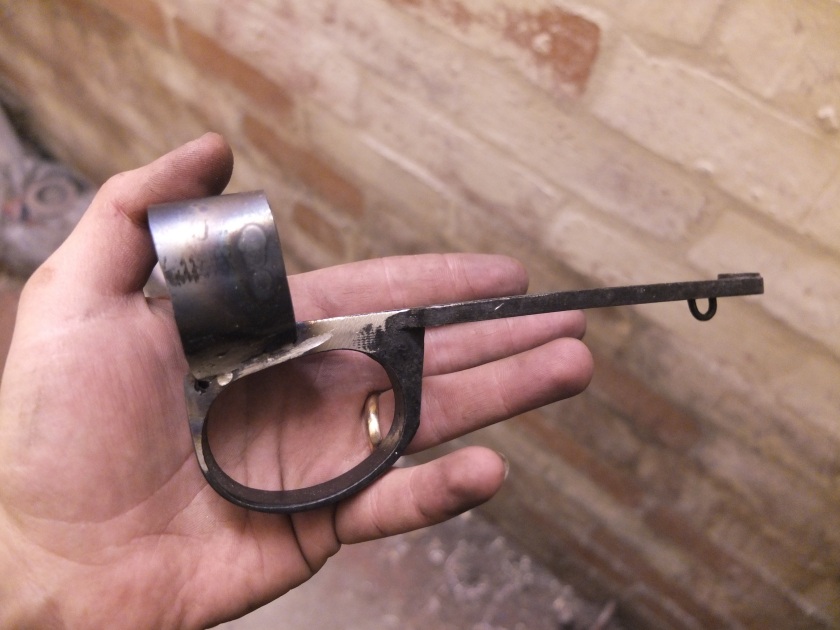
Spring SMLE: Part 4

Imperial Era, Inter-War (1918-1939), Lee-Enfield, Rifles, SMLE, VSR SMLE, Weapons, WWI, WWII

I’ve had the mould sitting about from previous projects for SMLE magazines. I took a resin cast from this, cut it down to size and added some screws into the top to secure to the gun. I painted it with acrylics, which are great for getting metallic and weathered finishes.

_dsf8698

I’ve removed the rear band assembly to do some detailing and finishing work.

_dsf8716

I thought I would attach a few pictures of the band before being cleaned up here as I forgot to show the build process for this part. I’ll let you work out the details…

_dsf8717 _dsf8718

Markings will be kept simple for this, no attempt to replicate the originals as they would require a very random set of stamps.

_dsf8719

As I’m replicating various Mks of firearm I can’t use the Mk system to denote changes in the designs of the airsoft versions as ‘SMLE No.1 MkIII MkI’ is a bit confusing! However I’m not going to stamp ‘V0.1’ onto this as it would look out of place, so it will be denoted as MkI. Confused yet? Yeah, me too.

_dsf8720

Now it’s clean and marked up, it’s heated up and into the oil it goes for that lovely, black satin finish.

_dsf8721 _dsf8735


Finally, screwing on the buttplate and some last finishing touches before assembly….

_dsf8810


You can see the whole build so far here and a potted history of Lee-Enfield development here.

If you are interested in this project or have an idea of your own, drop us a line on enquiries.vintageairsoft@gmail.com to discuss. ‘Like’ our Facebook page or follow the blog to get regular updates on projects and interesting videos and articles. 

Don’t forget you can buy our complete products via Etsy.