For those of you who have seen the intro piece and follow the Facebook page, you will know that an FG42 is in the process of being developed. We’re nowhere near finished yet, but I thought I would share a bit of progress with you!

Last month I took delivery of the largest load of laser cuttings yet, among which are many of the parts for the FG42.

A few days later, 3m of steel tube arrived, which had to be cut to size in order to even fit in the workshop!
 The first job was to build the receiver. As with the original, everything attaches around this piece. Lessons learned from previous projects were applied here: chiefly that access is king! The whole right side of the receiver comes off to access the hop unit and gearbox space.

The outer barrel and gas port fit into the holes at the front of the receiver, this photograph is from before they were welded in place. In future models these may be bolted in for packing down easily but this hasn’t been finalised yet.
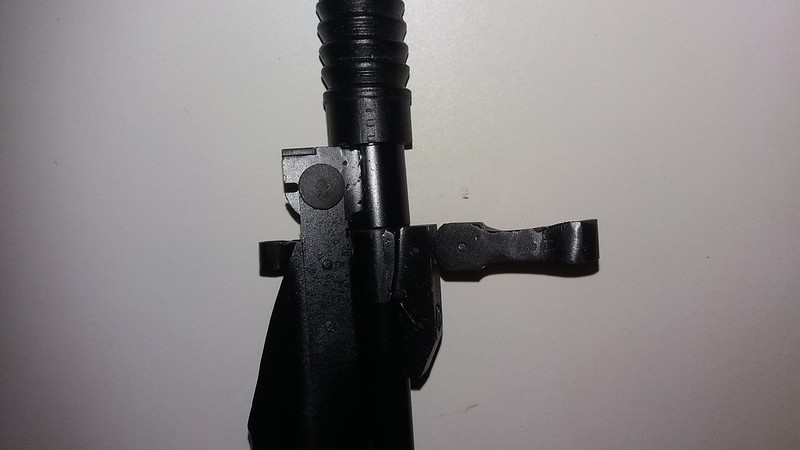
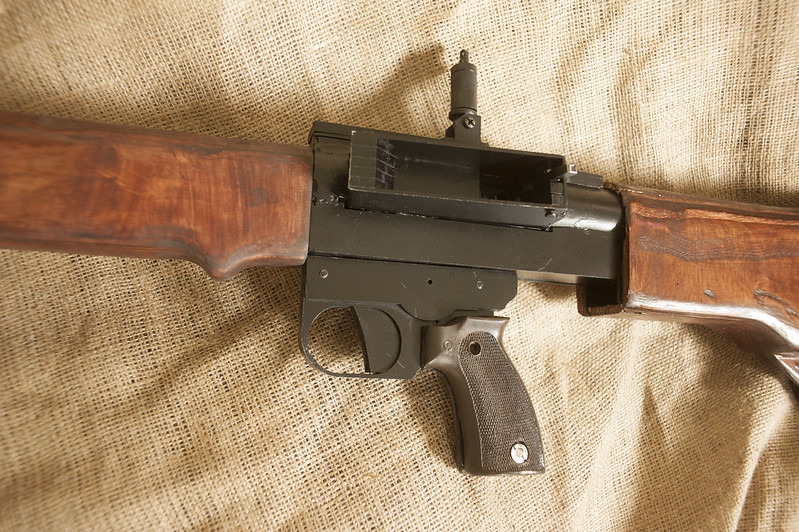
 The two lugs you will have seen in the photos above take the pistol grip and trigger assembly, quite authentic to the real thing! This unit strips down from the side so that all parts can be accessed while in situ. This unit will be lightened for production as it is currently quite a lump!

The magazine well next. The FG42 has a very distinctive magazine well: not only because of its location on the side of the gun but also its shape. The box magazine was also quite large and there isn’t a readily available direct airsoft substitute. The solution I came up with was to use a reversed M14 magazine which is slightly smaller and keep the original mag well size. An extension can be added to this magazine for aesthetic purposes but these magazines can be used ‘naked’ until enough extensions can be bought.

In situ on the gun, the picture shows the bottom half of the magazine welded in place but before the top cover is attached. On the left side you will see the magazine catch and the partially compressed spring that operates it.

The top is clamped in place ready to be welded. In this photograph you can see the screw that runs up from the bottom of the well, this holds the protrusion on the back of the magazine (now reversed to be the front).


The buttstock was a challenge, I got tired of cutting the shape (see top photo) by hand so after the first two butts I bought a bandsaw which I had been after for a while anyway. The third piece came together MUCH faster funnily enough!

The third piece, a complex shape. One side has to open in order to allow easy access to the back of the gearbox.
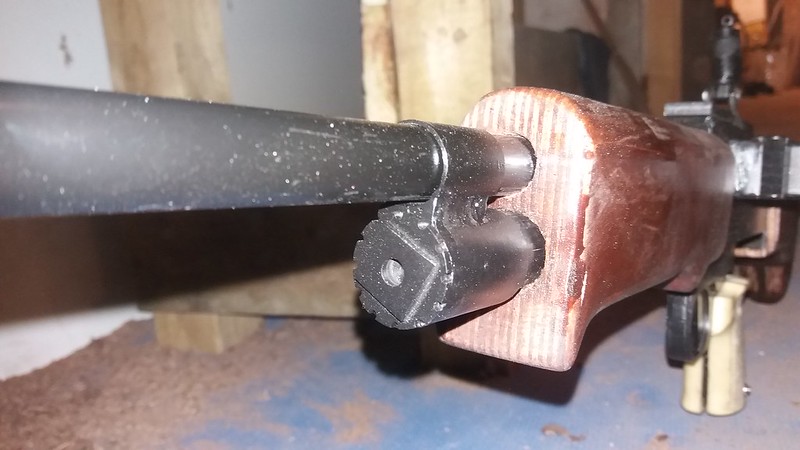
 The buttstock in place on the gun. Add the back and this part isn’t far off completion. it will have to be rebated for the rear sling swivel and a nose cap put on to hold the front snug and closed, no big deal as this cap is true to the original.
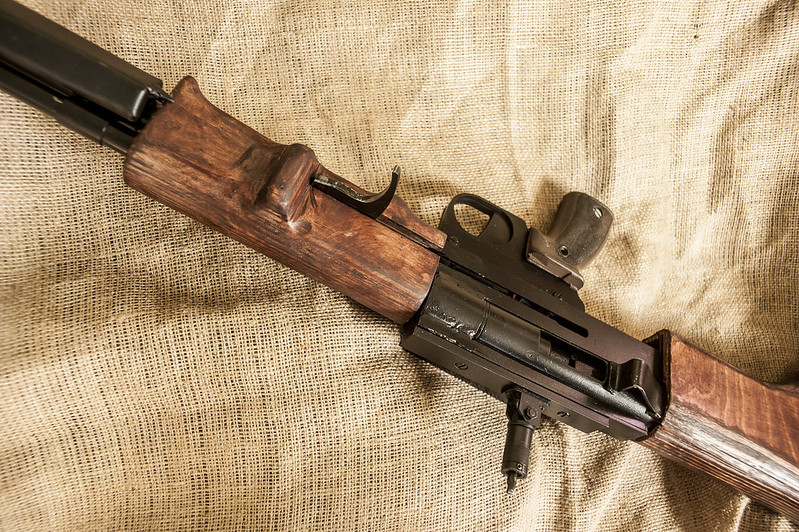
 In spite of not having my lathe working at the moment, I decided to have a crack at the rear sight unit as well. Although this will look much the same as the original it is much simpler to make. Although I could possibly make these like the originals it would cost a LOT to do so and an extra £50-odd per gun for a sight feels like a push.

The brass barrel is secured in place with a screw that ports into the pivoting unit in the sight base. Elevation is adjusted through turning the top section which is independent of the brass barrel, a screw thread moves it up and down. This needs a bit more work, once the lathe is working again I can complete the shaping and a bottoming tap will allow for a far greater range of elevation adjustment. It does of course fold down like the original.

I must have forgotten to take pictures of the foresight unit in construction, apologies! The bracket for the front swivel is made of 2mm steel cold formed in a vice. For this prototype I have only made it fit around the barrel and have a slot for the karibiner that takes the sling. I need to work out how to make this strong enough to also take the bayonet.
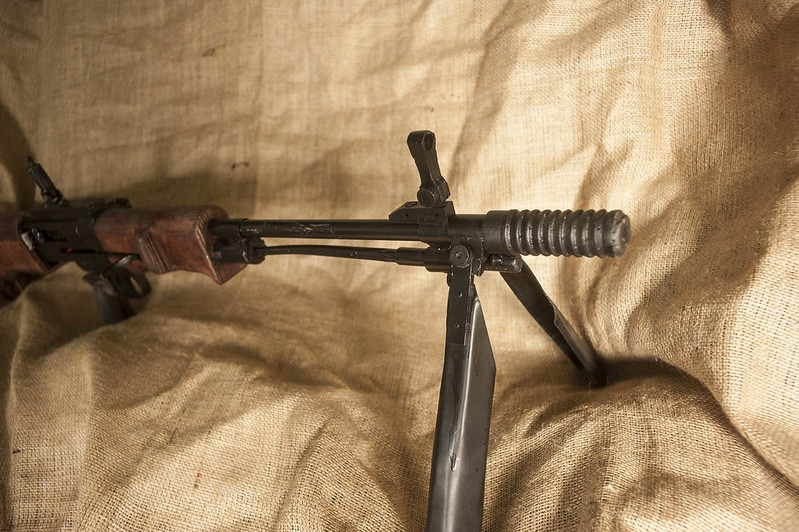
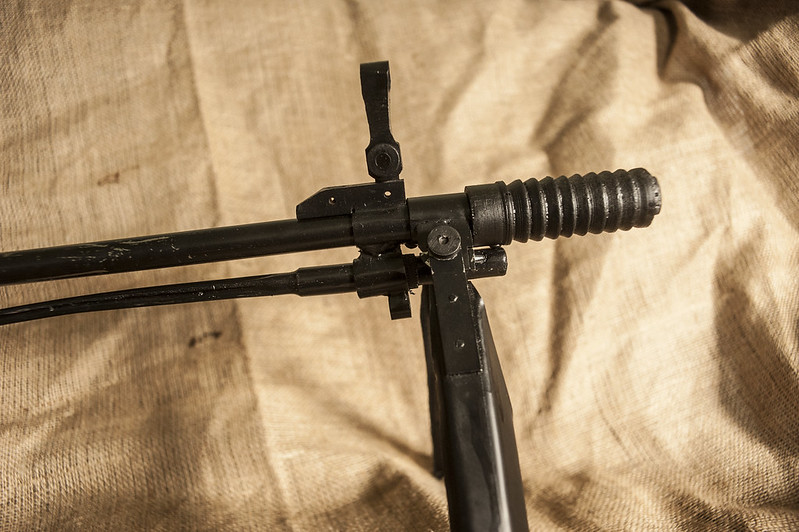
Welded on top of this bracket is the foresight unit which like the original folds down out of the way. Windage is adjusted by loosening the screw at the front and moving the ghost ring from left to right by hand.

Other points of interest: the cocking handle is stationary at the moment, I do have plans to spring-load this however in V0.2. You can also see the scope rail on top in this shot, at present it has an 11mm scope rail though I will be offering 11mm and 22mm. Anyone using a scope with this will need a set of VERY high mounts! I may even make a set of correct-looking mounts if I can find a suitable scope to base it around.

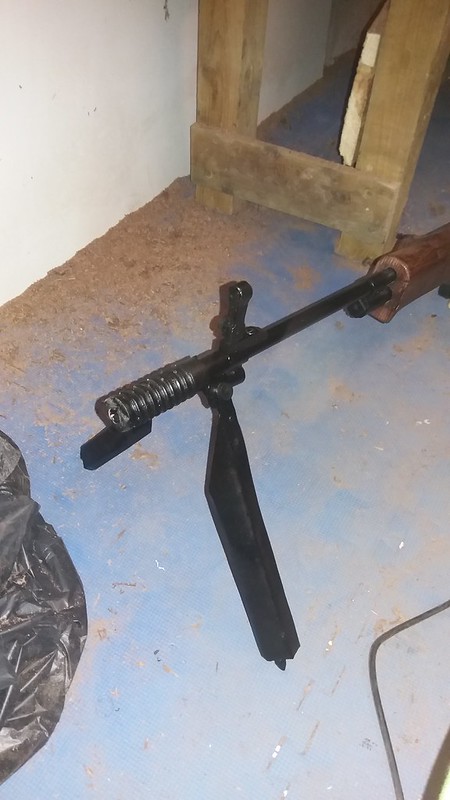
So, that brings us about up to date! It is starting to look like an FG42 now, once the bipod is cut and welded to shape it’ll be pretty well complete externally.
Internally, although I have made a temporary hop unit out of polymorph I am getting a permanent one 3D printed. I also need to source a mosfet and make a semi/safe/auto switch.
If you are interested in this project or have an idea of your own, do drop us a line on enquiries.vintageairsoft@gmail.com. Also, ‘Like’ our Facebook page to get regular updates on projects and interesting videos and articles on unusual or interesting weapons and bits of history!

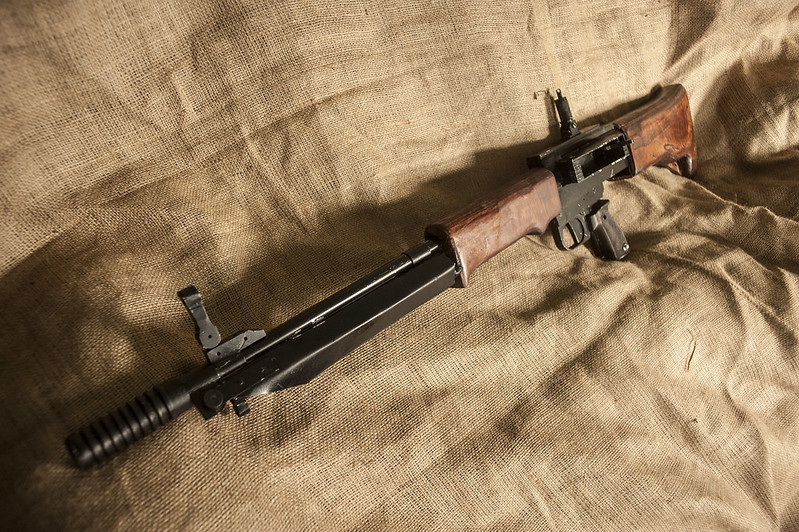


 The new receiver and trigger group. The shape has been changed significantly, losing the fore-end entirely which allows for a much stronger wood fore-stock. The back has been extended to fill out the buttstock and support it fully.