Pritchard-Greener Bayonet: History & Build

Edged Weapons, pistol, Pritchard Bayonet, Weapons, webley, WWI

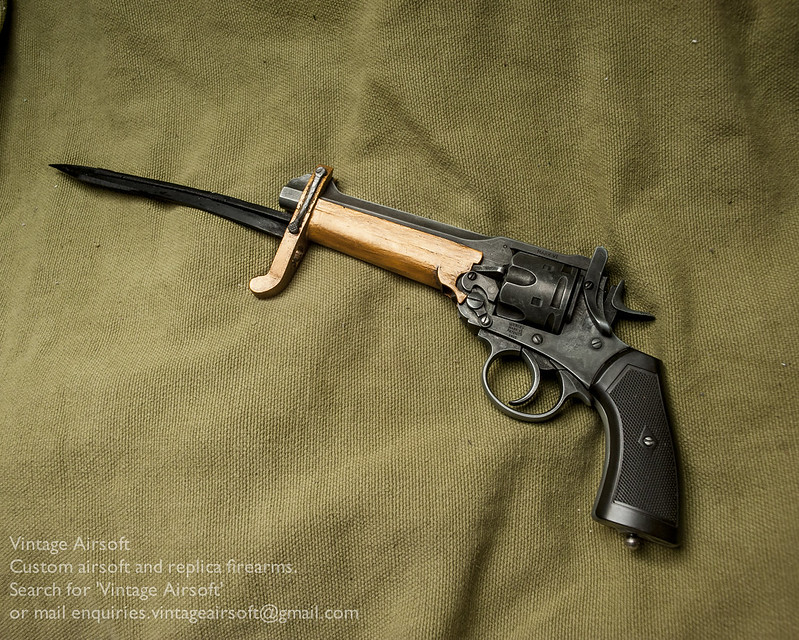
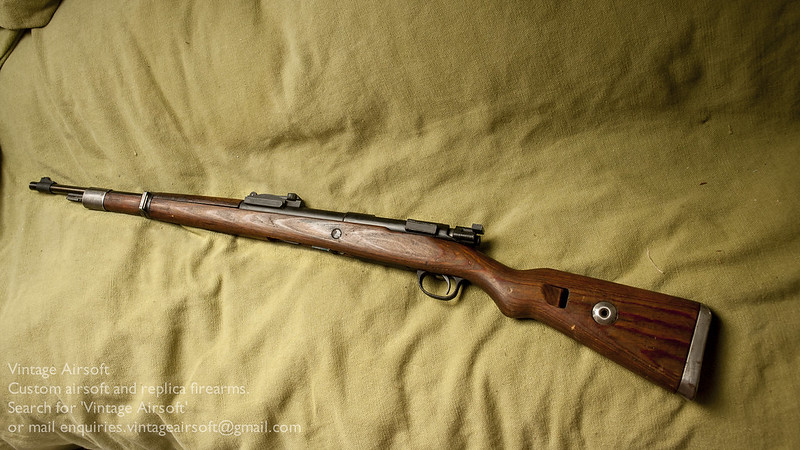
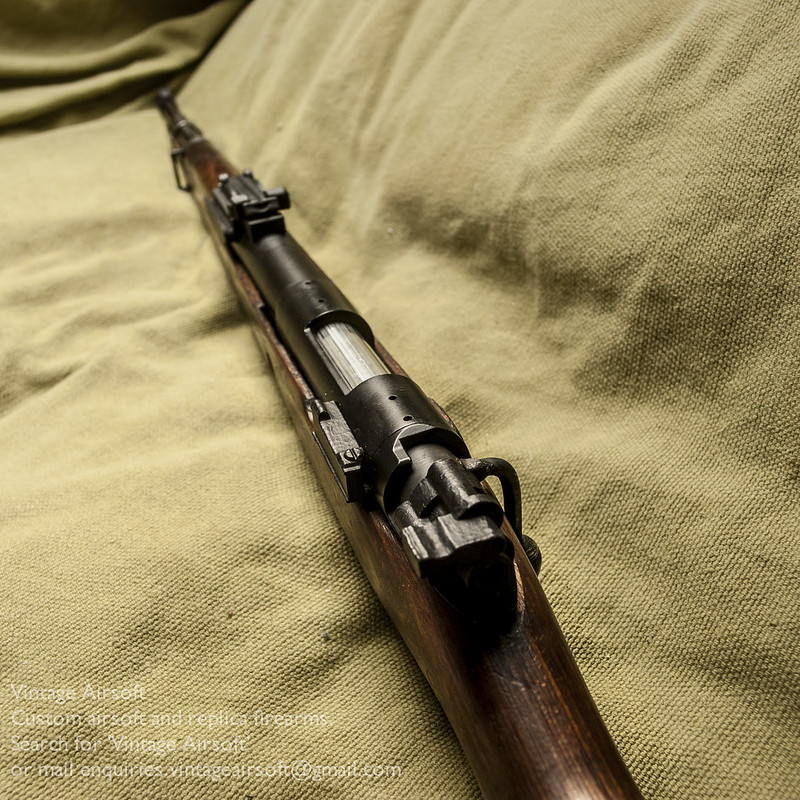
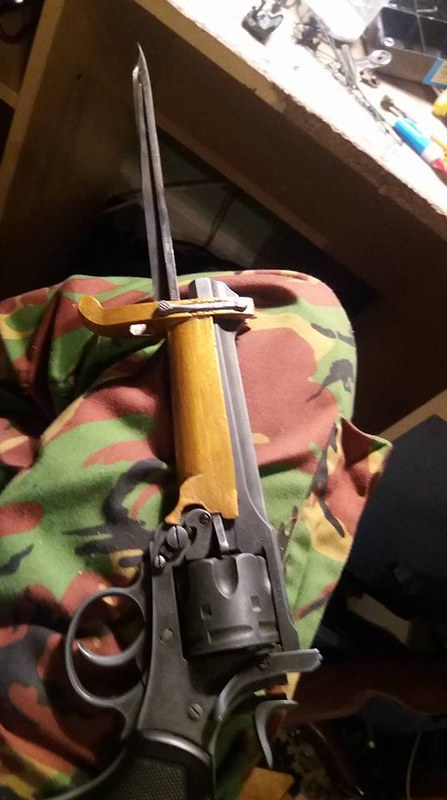
The Webley Mk VI .455 service revolver is an awesome bit of kit. It is the iconic sidearm of British and Empire forces during the Great War.


Incredible stopping power, six shots in single and double action and very handy used as a club. What could make it better? A bayonet of course.


958613-artwork-military-soldiers-world-war

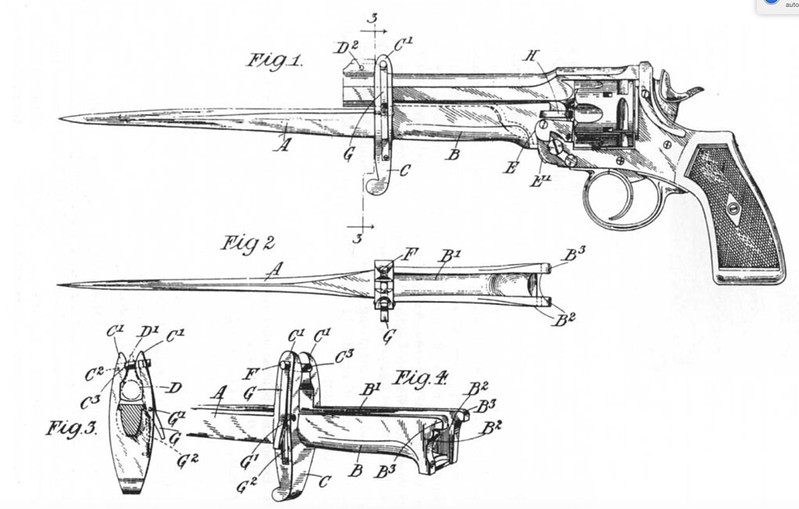
Arthur Pritchard enlisted in 1915, was commissioned as a 2nd Lieutenant in the Royal Berkshire Regiment and rose to Captain by Armistice. In late 1916, Pritchard approached Wilkinson and their cutlery division produced a prototype (using the tip of an 1897 Pattern infantry sword). However Wilkinson’s factory was at maximum capacity producing bayonets and Cavalry swords and were unable to put the production time aside for this exploratory project.

webley


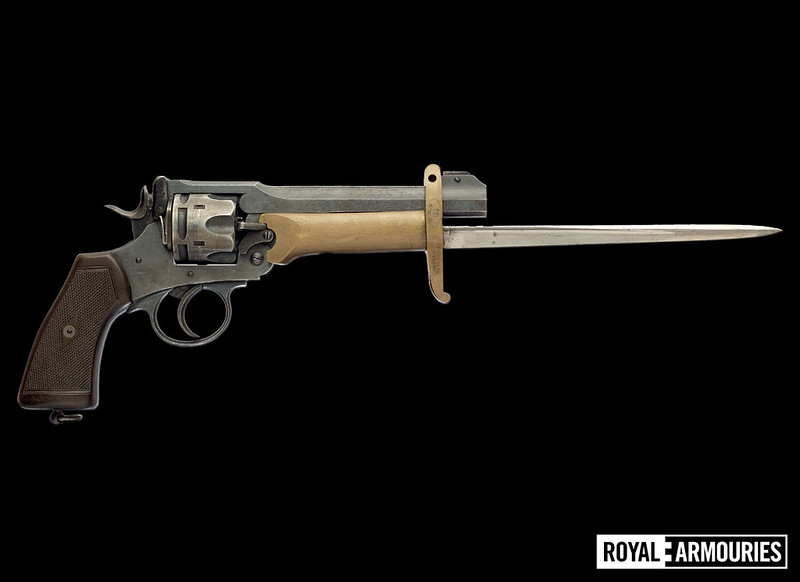
Pritchard then went over the road to Greener, a long-time competitor to Wilkinson, who had the time and facilities for the project. As 97 ptn. swords were still technically in service, cutting just the tip off for use in this wasn’t really efficient. However Greener did have a respectable supply of disused Gras bayonets purchased from France which made an excellent replacement.

This design was patented and sold as a private purchase item. This was never issued, nor was it designed to be used alongside the slightly more common carbine stock, in spite of suggestions made by the ill informed to both. The maximum number confirmed produced is 144 by serial numbers, though some confirmed originals have no serial number. It is fair to say that more replicas have been produced than there ever were originals.

Screen Shot 2015-05-13 at 08.32.11

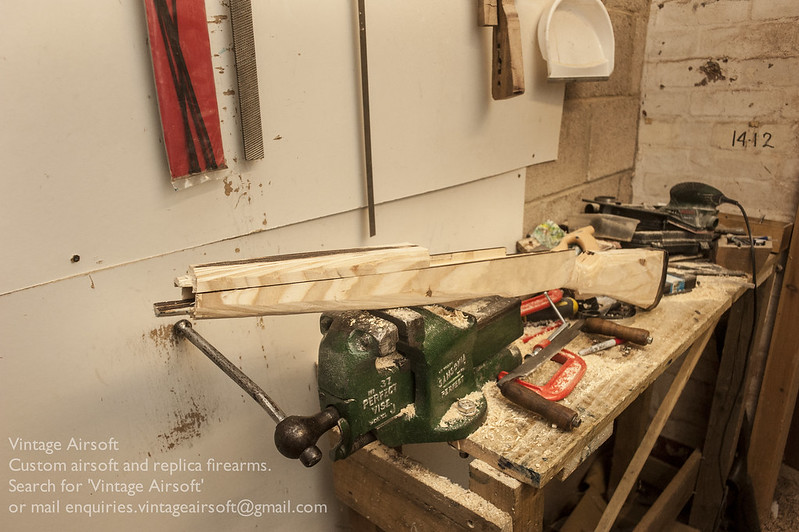
Anyway, I’ve been working on a replica for a long time, trying to work out the best way to produce an airsoft safe one.

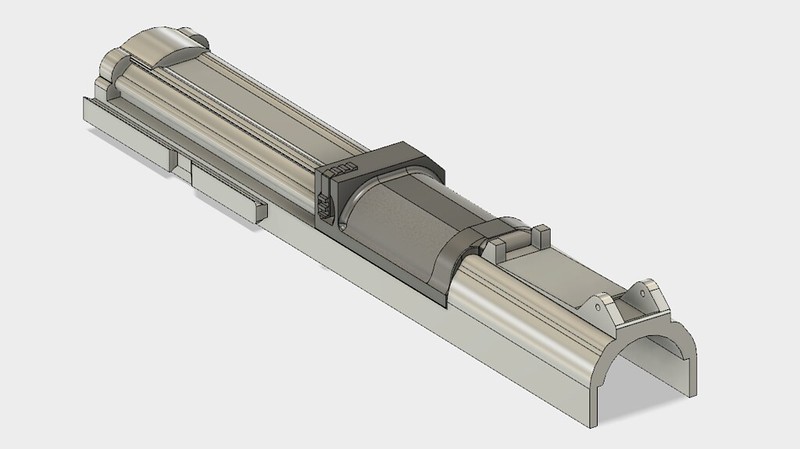
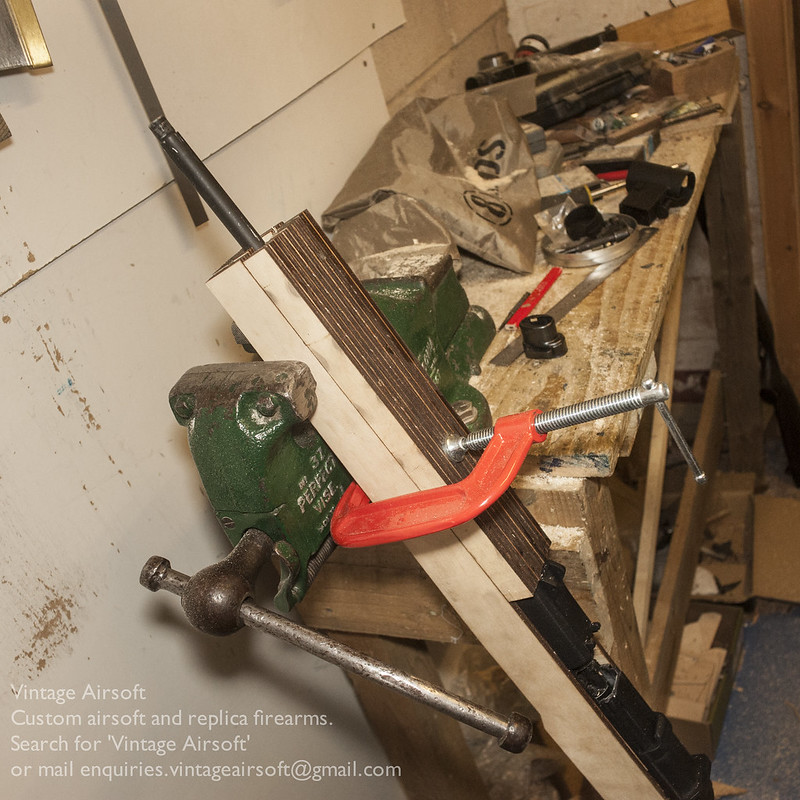
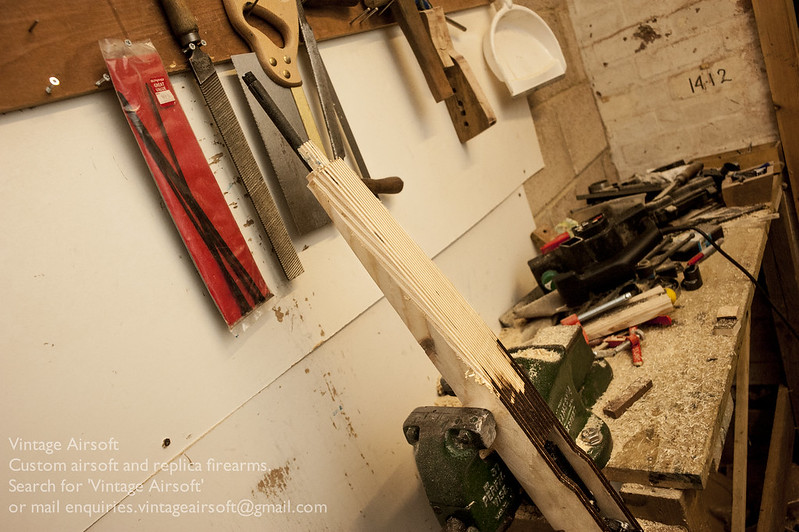
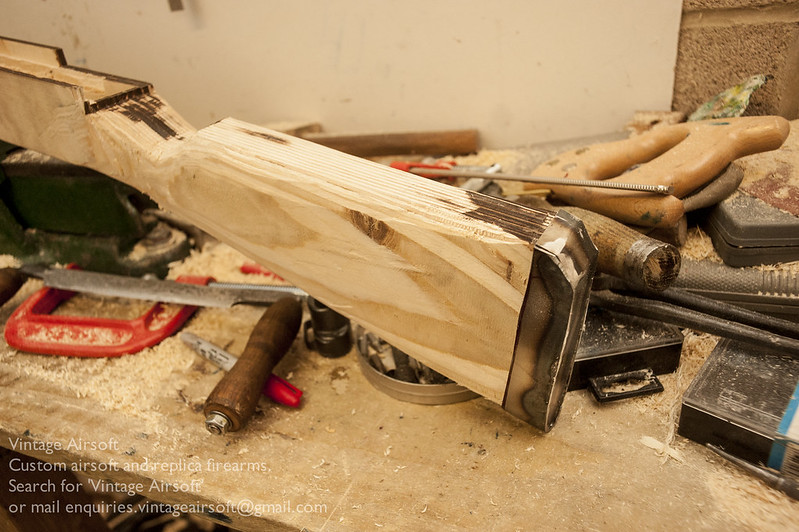
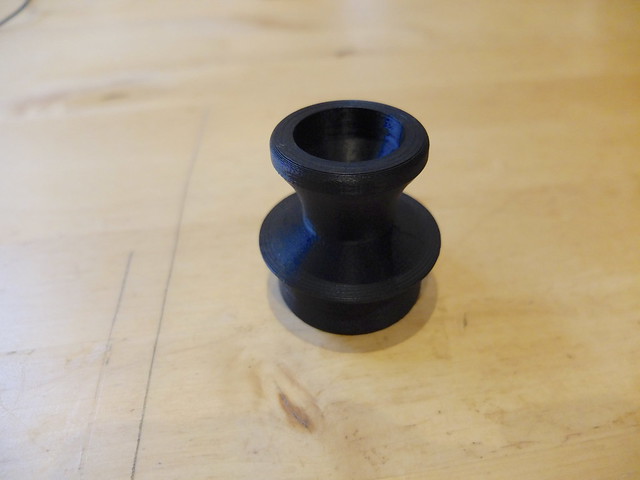
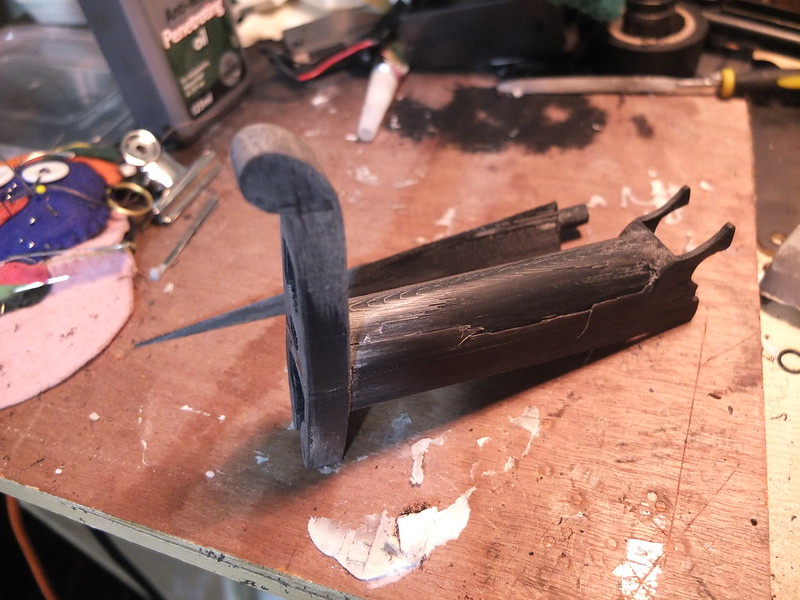
When I started, I made parts by hand, but this wasn’t practical for producing an accurate replica with so many curves.

_DSF5283

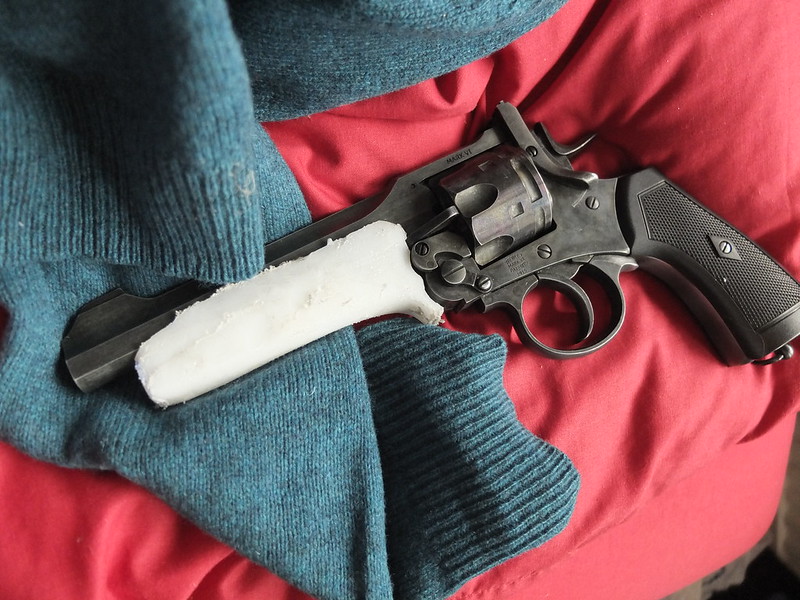
So I drew out a 2D design and commissioned a friend to make and print a 3D model (this was before I learned 3D modelling myself).

16231164_575010932688333_1134692282_o

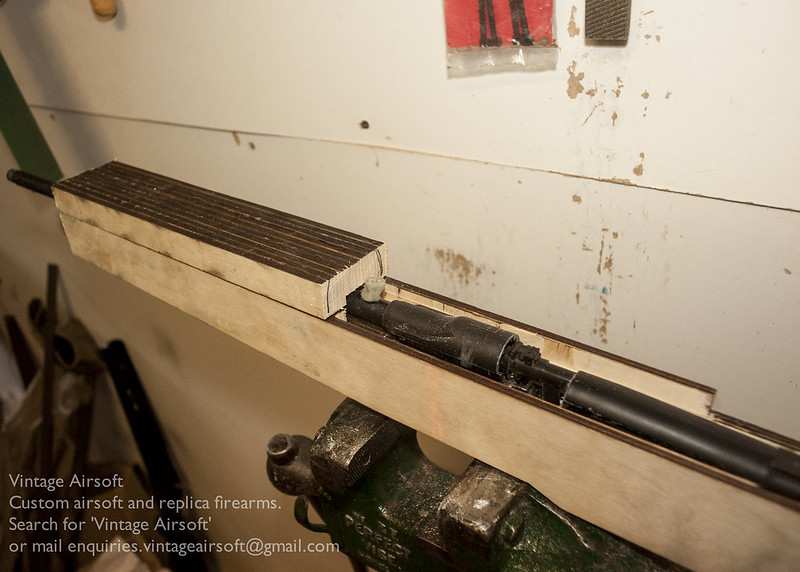
Once printed, I sanded it down to a smooth finish. If I were doing it again I would use filler paint as I do now on my other 3D models as it would give a nicer finish.

_DSF8587

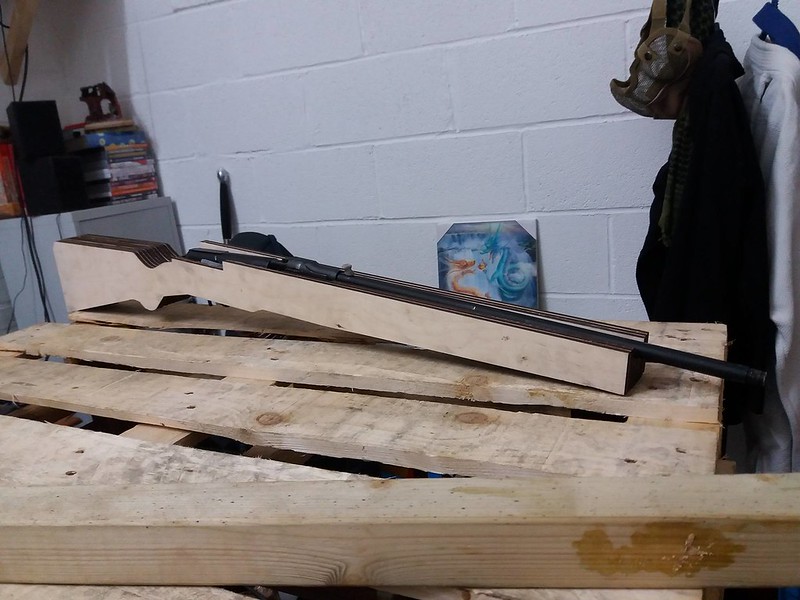
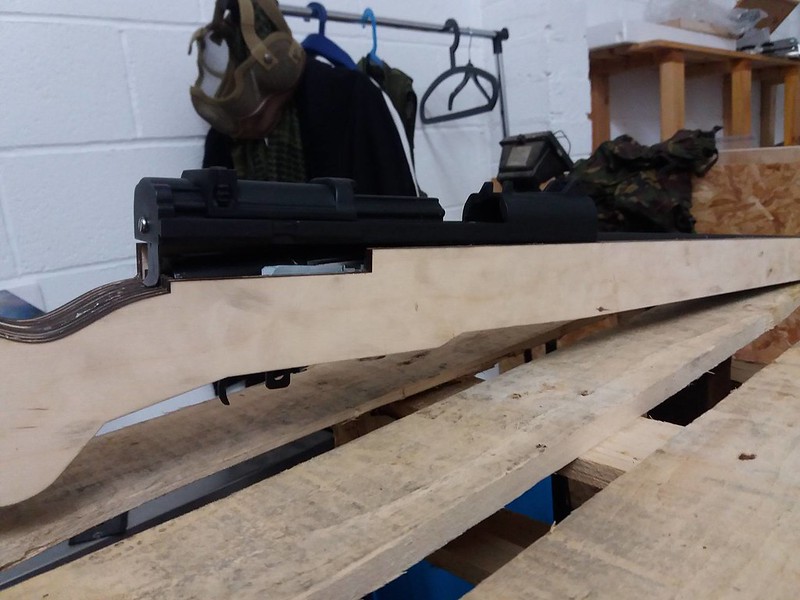
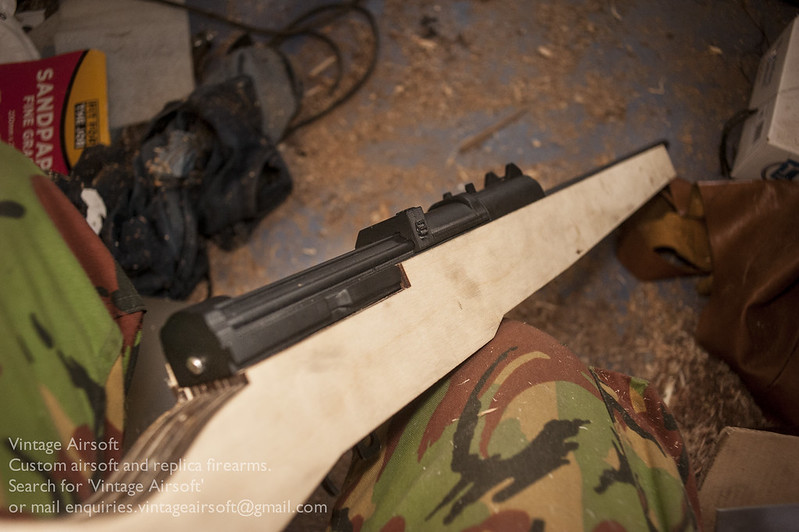
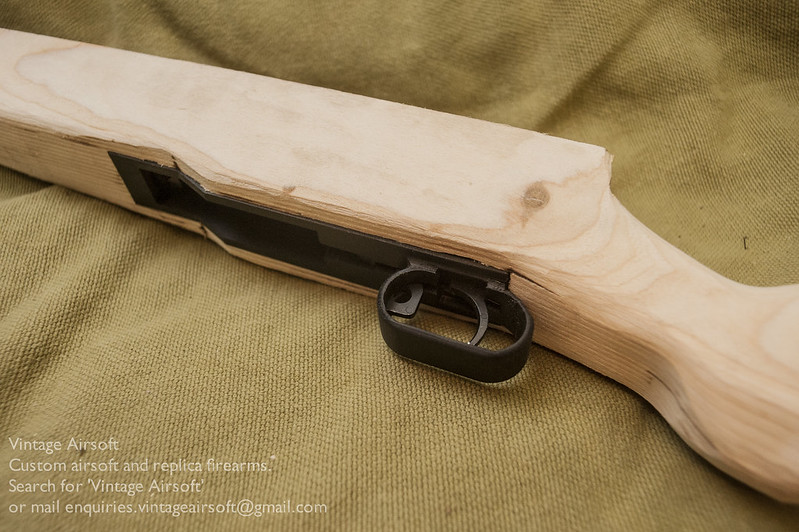
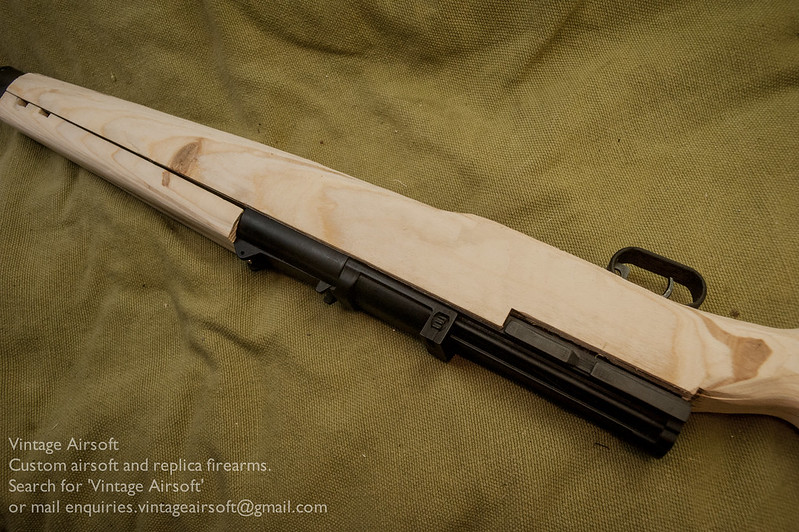
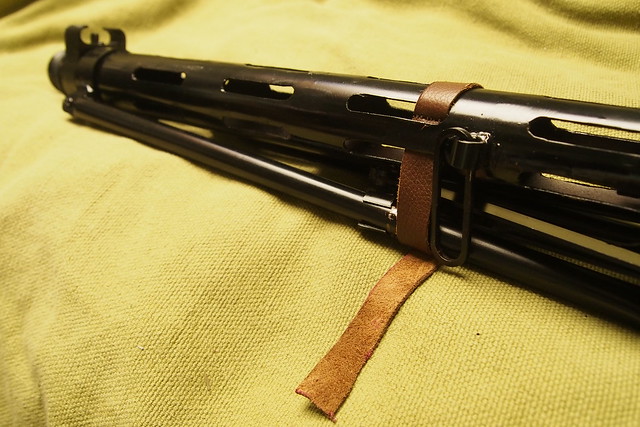
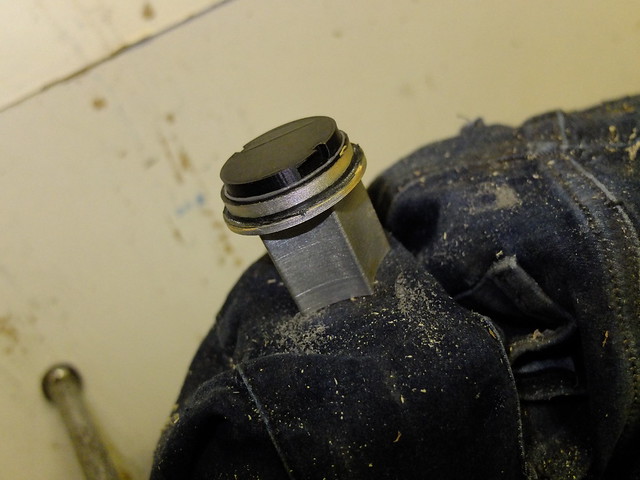
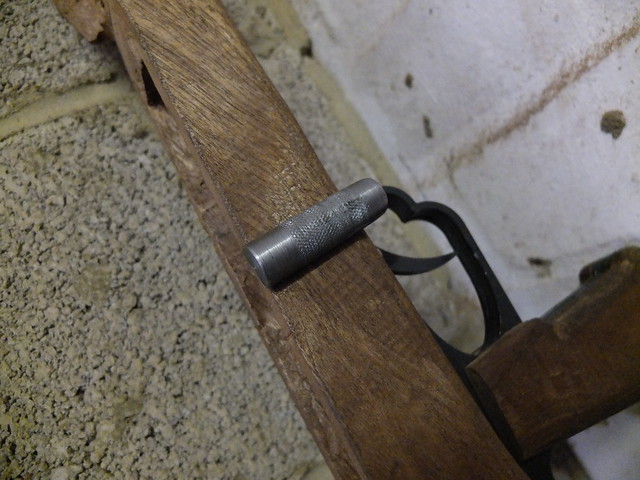
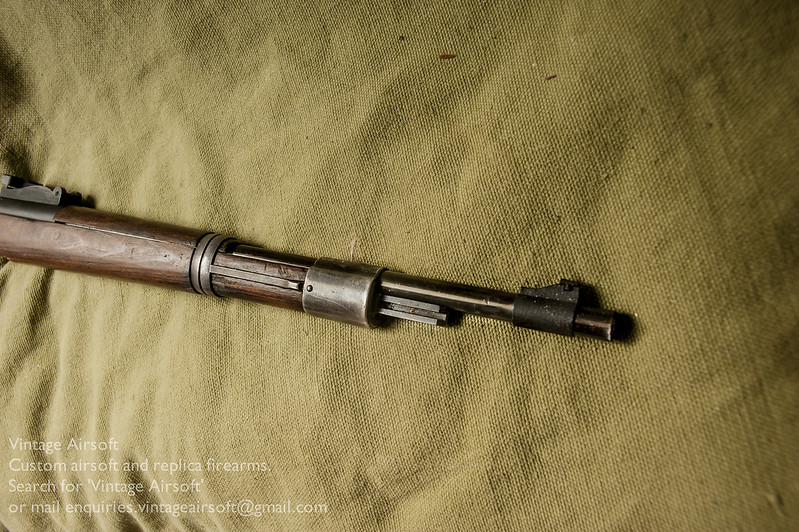
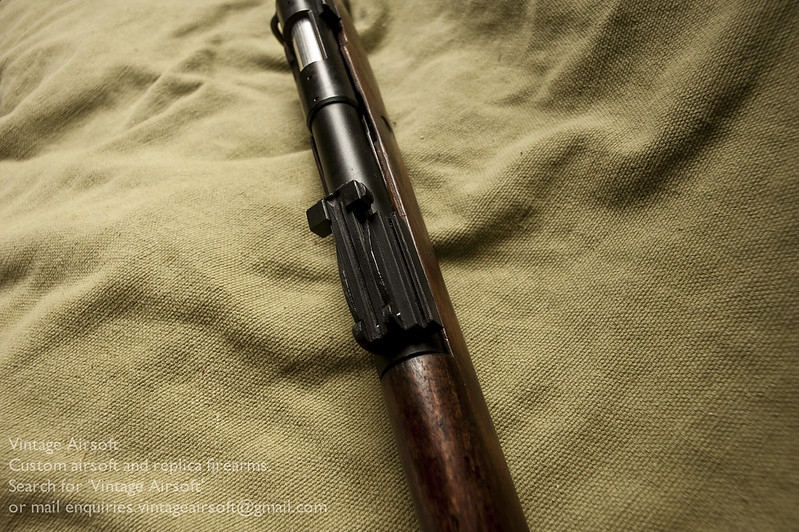
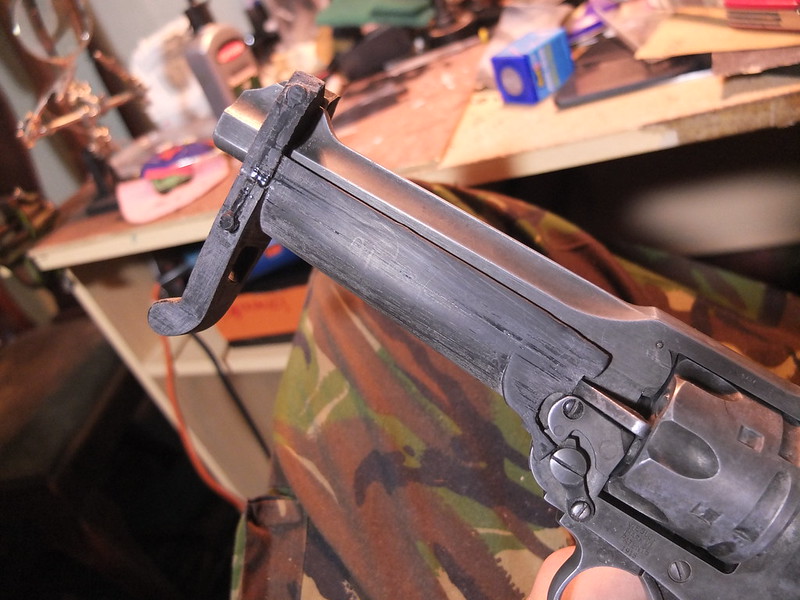
As per the original, this needed a little hand fitting to the gun. I knew it wouldn’t be perfect on the first attempt with so many nooks and crannies.

_DSF8588

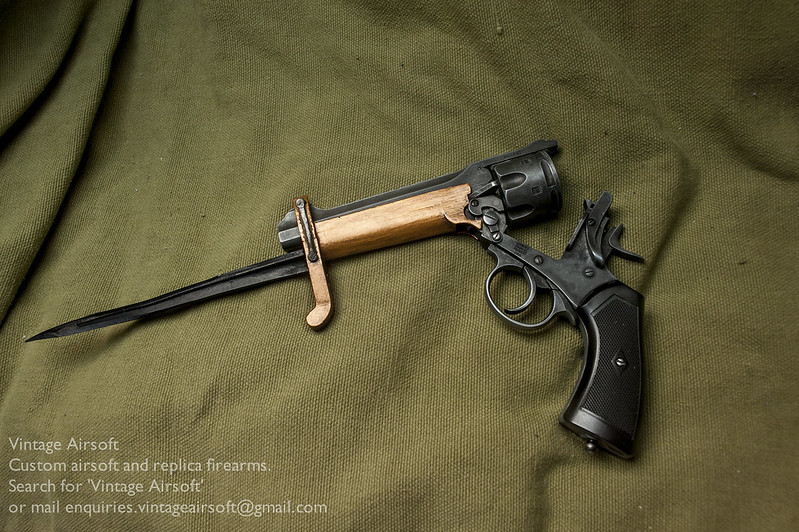
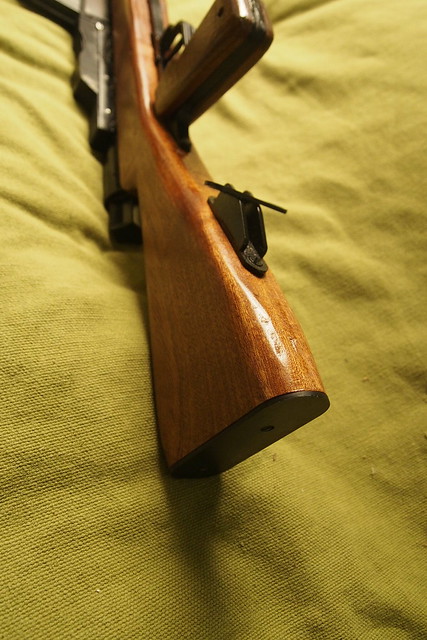
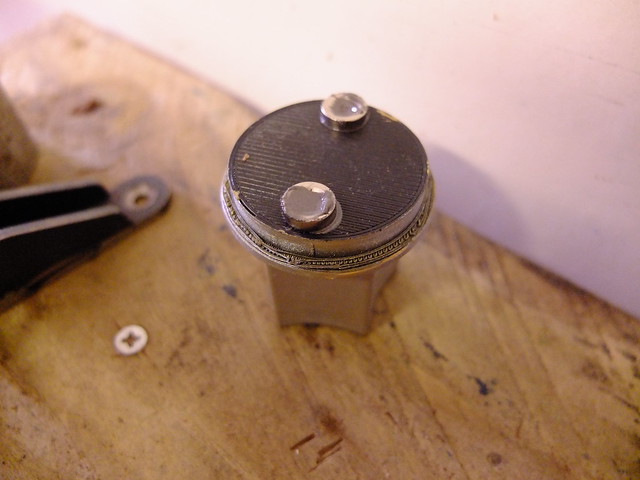
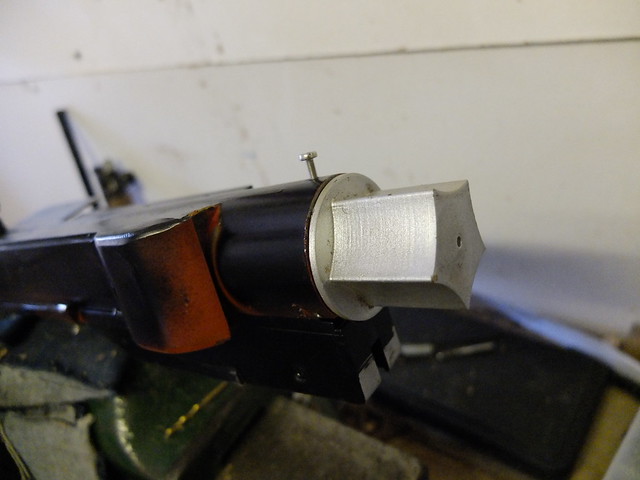
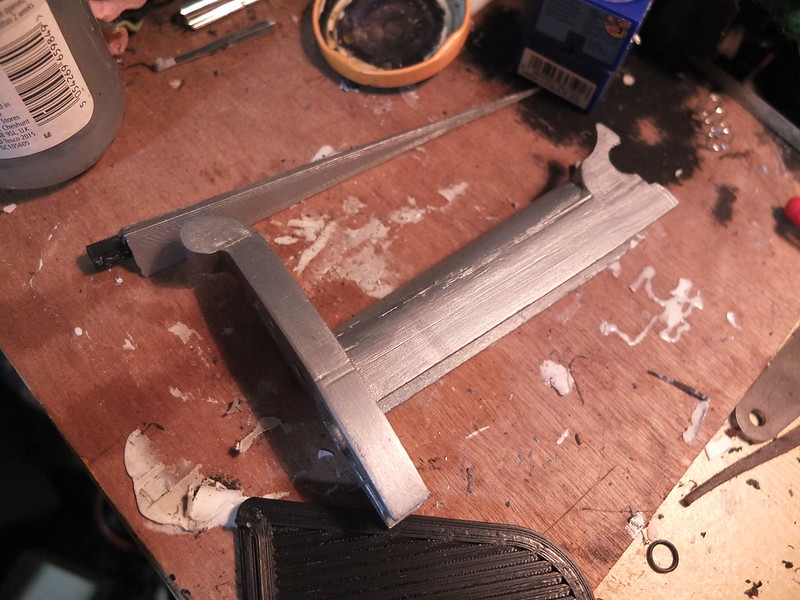
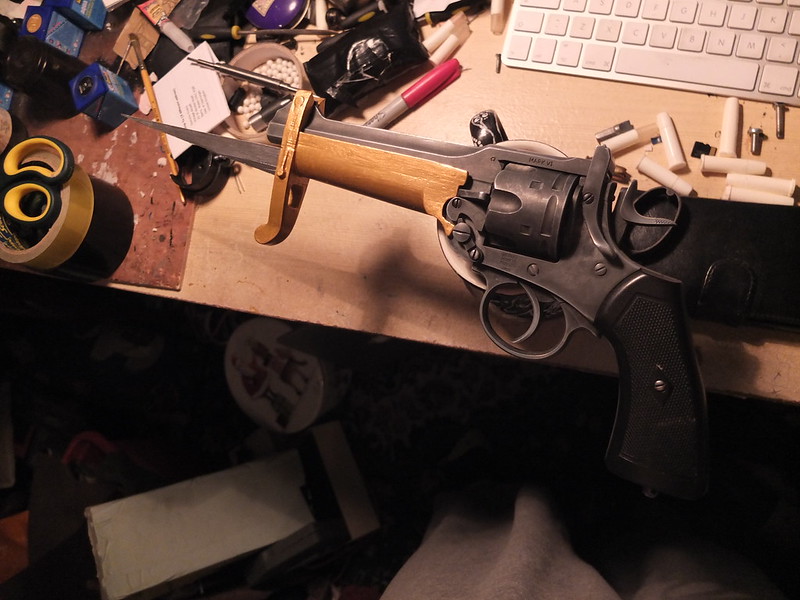
Once fitted, I could paint up, the base coat silver before painting the handle in a brass top coat.

_DSF8589

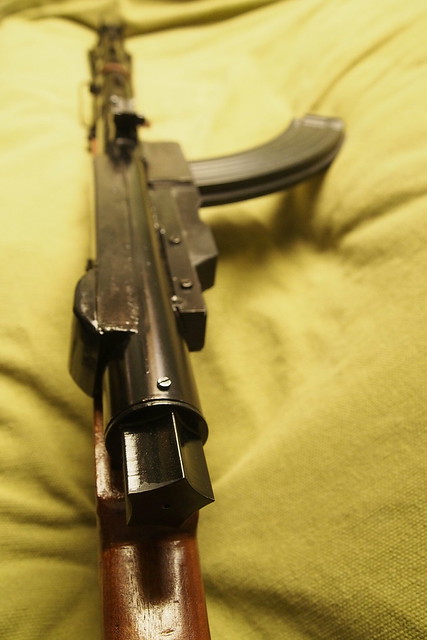
In place on the gun, it is taking shape.

_DSF8678

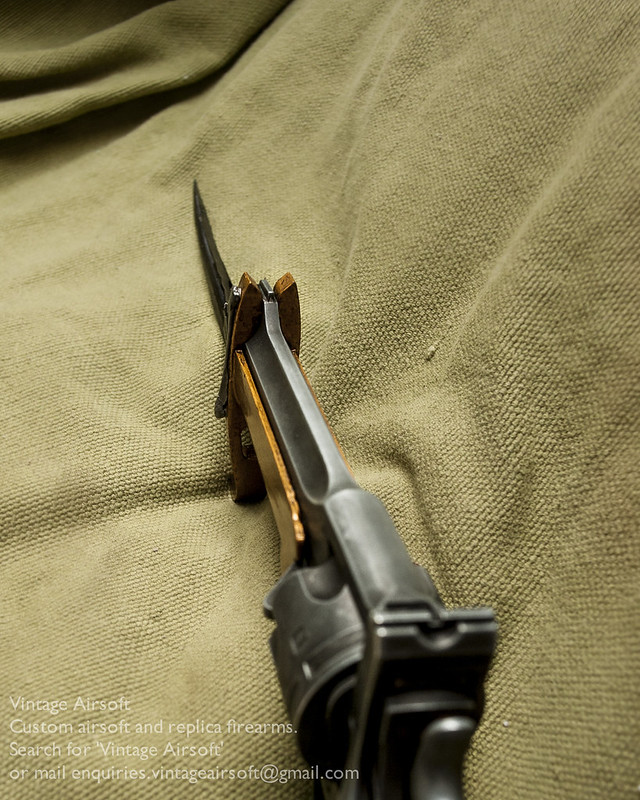
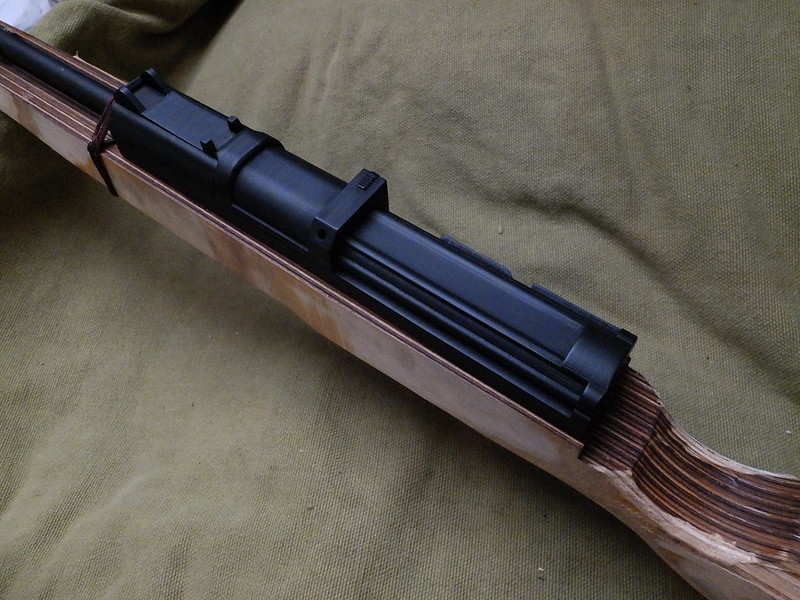
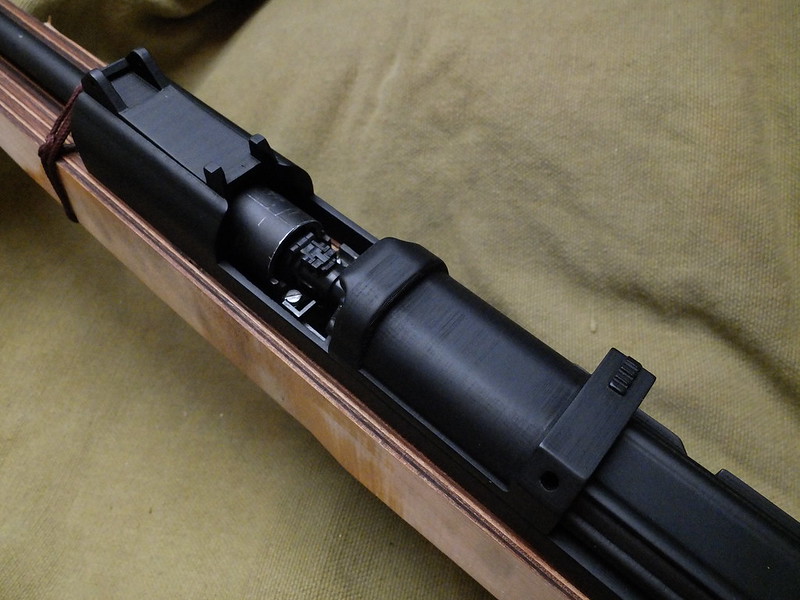
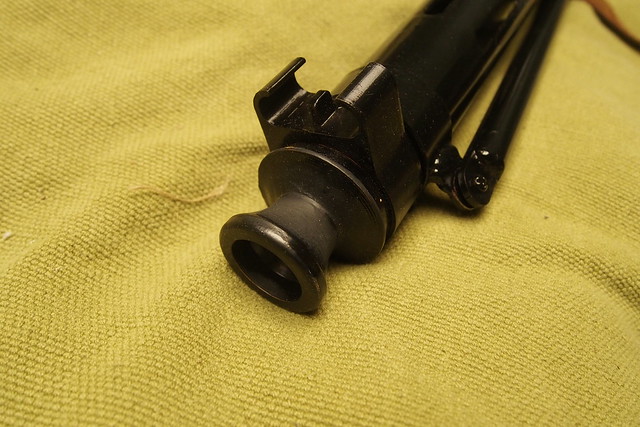
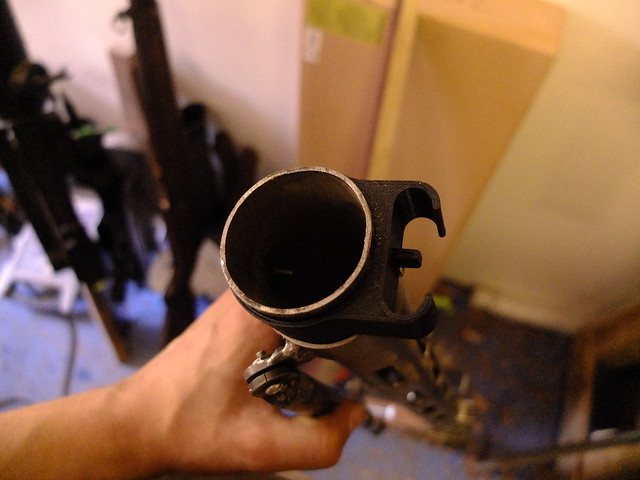
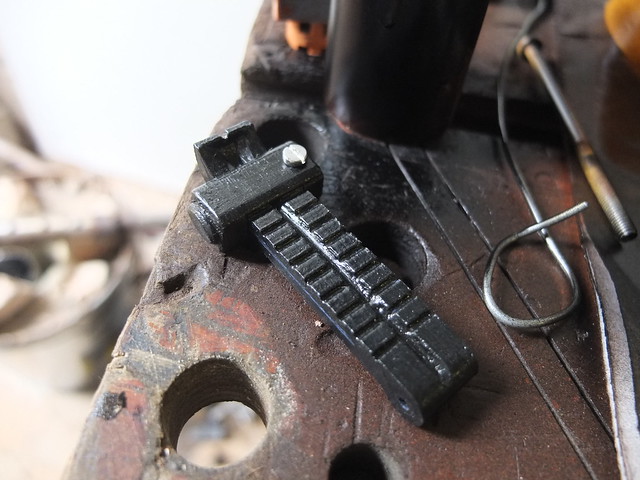
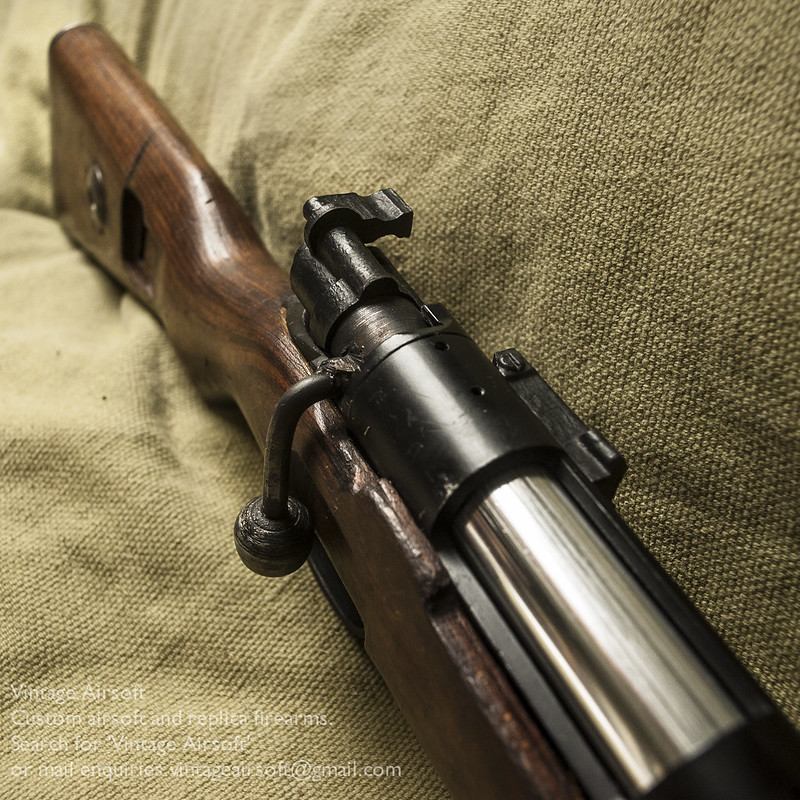
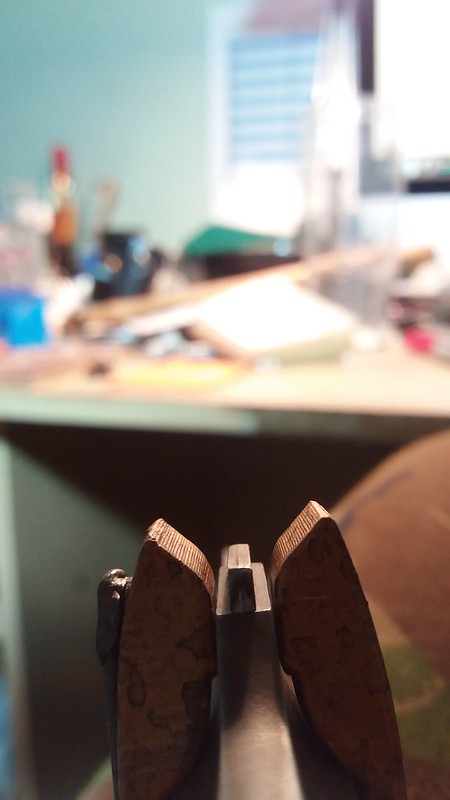
Once nice touch of the Pritchard is the sight picture it gives you. You may still use the foresight blade for precision but for snap shooting you can just drop your target in the ‘V’ and pull the trigger.

20170210_005700

I added a little detail to the locking catch to replicate the chequering on the button.

20170210_005721

I made a new blade in steel that is a more authentic shape, which really improves the look of the thing. To make it safe I shall make a rubber mould and cast blades for customer versions. The grips will have to be 3D printed as they will be a bit awkward to cast.

21935270_10212771003102695_314496624_n


So the next post ought to be a finished piece!


If you like this project or have an idea of your own, drop us a line on enquiries.vintageairsoft@gmail.com to discuss. ‘Like’ our Facebook page or follow the blog to get regular updates on projects and interesting videos and articles.

If you would like to see more builds from the Great War era, you can find them here.

Don’t forget you can buy some of our complete products via Etsy


Pritchard-Greener Bayonet: Complete

Complete builds, Edged Weapons, pistol, Pritchard Bayonet, Weapons, webley, WWI

The Airsoft Pritchard-Greener is finished, after some significant time!

I’ve been looking forward to this for so long, I can’t wait to use it in the field.

_DSC7262

This one is mounted on my trusty old Wingun. The rubber blade holds its shape well, but like my knives is soft enough to be safe to use on people.

_DSC7265

Although there is no locking catch on this, the friction of the holding spring and the close fit keep it securely in place.

_DSC7266

As mentioned in the build post, the sight picture of this is excellent. That deep ‘W’ shape is great for dropping people into and firing.

_DSC7267

And like the original, the revolver can still break open to reload.

_DSC7270
You can find the build and history post here.

If you like this project or have an idea of your own, drop us a line on enquiries.vintageairsoft@gmail.com to discuss. ‘Like’ our Facebook page or follow the blog to get regular updates on projects and interesting videos and articles.

If you would like to see more builds from the Great War, you can find them here.

Don’t forget you can buy our complete products via Etsy.

G43 AEG Build 2: Part 2

Battle Rifles, G43 MkII, G43/K43, Weapons, WWII

The first job for this part of the build was to modify my receiver design to fit the gearbox with comfortable space around it.

Screen Shot 2017-09-26 at 00.32.57

Effectively I added a slither of extra space down the middle to add width.

Screen Shot 2017-09-26 at 00.33.05

Once printed, it all fits quite nicely. The slide moves freely, needing only a slight tweak to put it in place.

_DSF9817

While there isn’t a function to the action opening, it’s one of those things that is nice to have.

_DSF9816

I decided at this stage to get the stock parts recut to improve the shape slightly.

22712793_10213000894729842_2029052712_o


The action now fits deeper inside  the stock and the receiver needs fitting into the woodwork rather than sitting on top.

22766334_10213000892009774_536645344_o

I routed out the top so that the receiver fitted snugly in. As before it hooks onto the back and screws down at the front.

_DSC7307

I routed out the top guard to fit the barrel and marked out cut lines.

_DSC7311

I marked out some of the shape for the top guard at the same time.

_DSC7314

Fitting the front cap provided by the client, the top guard is partly secured in place here and will be at the back as well.

_DSC7312
With this in place, I can rough shape the stock itself. The top and bottom are rounded off for comfort as far back as possible.

_DSC7317

Even at this stage the stock is developing a pattern quite pleasingly similar to the original!

_DSC7318

I welded up a buttplate, the battery compartment needs still more work to fit an original alas.

_DSC7319

With some careful design, the first version of the trigger guard and magwell just slots straight into the stock. Two screws in the front will hold it in place along with two lugs at the back.

_DSC7327

The build is now starting to look distinctly G43-ish.

_DSC7329

The magazine is a snug fit, but the catch engages nicely.

_DSC7331

A little test piece to see what the varnish/stain will do to the woodwork.

_DSC7338

Much of the rest of the work on this is painting and finishing work with just a few details to add.


If you are interested in this project or have an idea of your own, drop us a line on enquiries.vintageairsoft@gmail.com to discuss. ‘Like’ our Facebook page or follow the blog to get regular updates on projects and interesting videos and articles. 

Don’t forget you can buy our complete products via Etsy.

LMG25: Complete

Complete builds, Custom builds, Inter-War (1918-1939), LMG25, Machine-Guns, Weapons, WWII

The finished LMG25 is a funny-looking beast!

_1010002

The magazine isn’t quite right, the one shown is a standard stamped metal AK magazine. The plan is to modify some more modern AK magazines to resemble the smooth sided LMG mags.

_1010003


_1010004

The leather strap to hold the bipod is correct. Most guns use a mechanical latch to lock bipods in place, but this system overcomes the risk of undetected corrosion or dirt ingress.

_1010005

The foresight and muzzle.

_1010006

Now they’re painted up, they blend in quite nicely with the rest of the gun.

_1010007

The bottom strap on this securely holds the receiver in place.

_1010009

The extremely wide rear sling swivel is for a two-piece sling, which allows the gun to be work like a pack.

_1010011

The only part I’m not 100% happy with is the magazine well. If I were to do this again, I would attach it straight through into the receiver tube with bolts, rather than with protruding lugs welded on as I did here.

_1010012

The trigger placement is strange, but authentically so. This gives it an odd trigger pull, but it is comfortable enough once you get used to it.

_1010013


If you would like to see the build posts for this, you can do so here.

If you want to know the history of this obscure Swiss Light Machine-Gun then you can check out the pre-build piece here.

If you enjoyed this content join us over on Facebook and check out our Etsy store. If you have an idea for a custom build of your own get in touch on enquiries.vintageairsoft@gmail.com.

LMG25: Build 3

Custom builds, Inter-War (1918-1939), LMG25, Machine-Guns, Weapons, WWII

I wasn’t quite happy with some of the pictures from the build post, so I’ve taken some more and added to them.

The bipod, now largely finished, I have welded the ring that goes round the cooling shroud shut and screwed the bipod in place. In some pictures of the LMG25 in use the bipod has been removed and it seems to be used like a heavy assault rifle of sorts, so I’m hoping to keep this removable.

_DSF9294

A better picture of the foresight, the print quality on this piece is really clean and the part is surprisingly solid.

_DSF9295

This was my initial idea for attaching the back-cap/battery compartment cover. Two neodymium magnets (which are very, very strong for their size) meeting the steel receiver. Unfortunately, it isn’t quite strong enough and would fall off easily when running about. I’m adding a bayonet lock for this to keep it solidly attached.

_DSF9340

The bayonet lock is attached to the back cap with araldite. I’ll put two screws into the receiver for them to lock into.

_DSF9647

With the majority of the parts done, I started to prime them to keep the rust at bay.

_DSF9657

The rear sight has been 3D printed in ABS, along with the sight adjustment. I’ll be flipping it upside down so the screw head isn’t visible.

_DSF9704

In situ on the receiver, this gives a surprisingly nice sight picture! The V-notch itself is a little on the small side, but the high position means you get a very nice view of the periphery.

_DSF9710

The back cap locks in really solidly using the new bayonet mount. I’ll have to trim down the securing screw so it sits flat of course.

_DSF9711

The cocking handle has been turned on the lathe, in steel. This was then drilled and tapped blind on the back side so it could be screwed onto the wood.

_DSF9712

The muzzle has been 3D printed in ABS, it will be painted up and secured in place with a screw. The last few bits are just finishing touches, so this is the last build post for this project!

_DSF9793

If you have a thing for obscure Swiss Light Machine-Guns then you can check out the pre-build piece here.

If you enjoyed this content join us over on Facebook and check out our Etsy store. If you have an idea for a custom build of your own get in touch on enquiries.vintageairsoft@gmail.com.

M2 60mm Mortar: Complete

Area effect, Area-effect, Cold War, Complete builds, Custom builds, M2 60mm Mortar, Products, Weapons, WWII

The mortar is finished, and what a beauty she is too, though I say so myself.

P1010094 copy

The adjustable windage is quite smooth, the folding handle giving adequate purchase and leverage.

P1010095 copy

While the leg spreading system has its advantages, I can’t help but feel there are simpler designs that would have had the same result. Perhaps the reasoning is plainer with a live firing version.

P1010096 copy

The baseplate has a 3D printed socket for the ball to slot into. On the original this is stamped into the plate design and features a lock, but here the ball is left free so that the barrel can be quickly upended and spent shells ejected.

P1010097 copy

The spikes on the bipod should keep it raised just high enough to give access to the elevation control in the centre.

P1010099 copy

A top-down view, showing the windage lever in the stowed position.

P1010101 copy

Once packed away, this mortar isn’t actually too bad for portability. Considering the complexity and the precision you could achieve out to a respectable range on the original, you can see why modern light mortars are more closely related to this package than the T89 or SMBL 2″ families. While they may have portability and speed on their side, the ability to fine-tune fire for only a little extra weight and bulk certainly has its appeal.

P1010103


If you liked this project or have an idea of your own, drop us a line on enquiries.vintageairsoft@gmail.com to discuss. ‘Like’ our Facebook page or follow the blog to get regular updates on projects and interesting videos and articles.

You can find the build posts for this mortar here.

Don’t forget you can buy some of our complete products via Etsy. If you would like to commission a build like this, please drop us a line on the above email.


K98k: Complete

Complete builds, Custom builds, K98k, Weapons, WWII

The VSR K98k is now finished, and she is a pretty one.

_DSC7255

From the outside, the only major giveaway that this is not a real K98k is the VSR magwell in the belly. The eagle-eyed may notice the bolt handle being set back a little (alas unavoidable). 

_DSC7261

The oil blued barrel fits in with the existing metalwork and furniture nicely. As it dulls with age it will fit in better.

_DSC7256

The 3D printed rear sight, which is part of the kit I will be offering people who want to do their own K98k conversion

_DSC7257

The back cap looks the part, even if it doesn’t function. It is certainly an improvement on the original VSR cap!

_DSC7258

Likewise the bolt stop, has no function on this but really adds to the replica. For the uninitiated to the Mauser system, this catch holds and releases the bolt during use and disassembly respectively.

_DSC7260


If you are interested in the history of the K98k, you can check out the introduction article here, or see the whole build process here.

If you like this project or have an idea of your own, drop us a line on enquiries.vintageairsoft@gmail.com to discuss. ‘Like’ our Facebook page or follow the blog to get regular updates on projects and interesting videos and articles.

Don’t forget you can buy many of our complete products via Etsy.