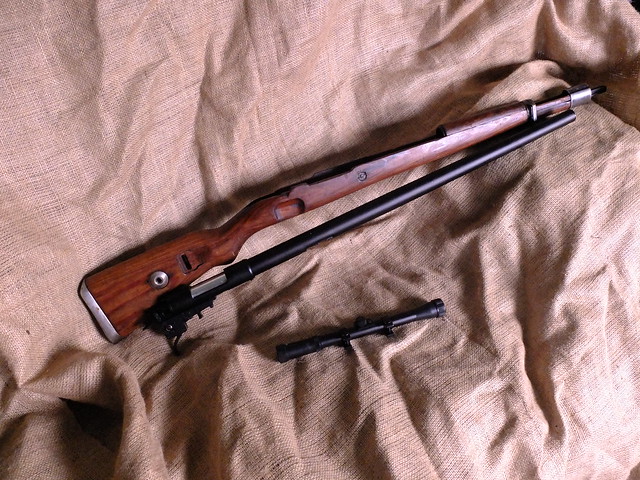
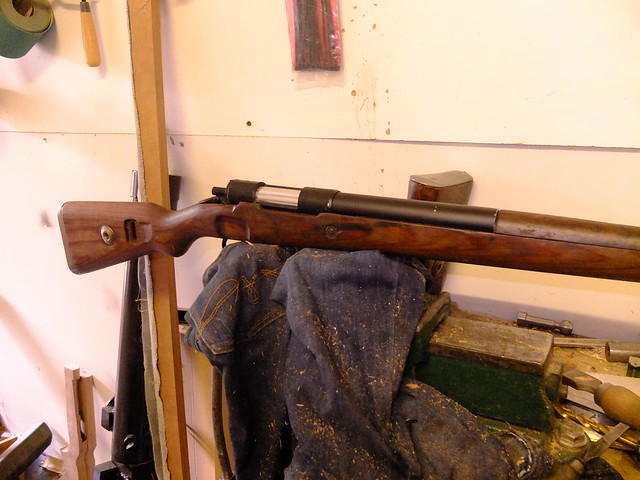
G43 AEG Build 2: Part 1

Battle Rifles, G43 MkII, G43/K43, Weapons, WWII

The aim of this build is twofold. In the previous G43 build it was a conversion from a wood-stocked M14. There were two problems with this:

  1. The M14 stock isn’t quite the right shape
  2. Wood-stocked M14s have become almost completely impossible to find

So as the G43 is one of my most asked-for builds I have finally come up with a solution. Making a stock from scratch is the simplest way to go, this one has taken a bit of time to get right but I now have a design I’m confident of.

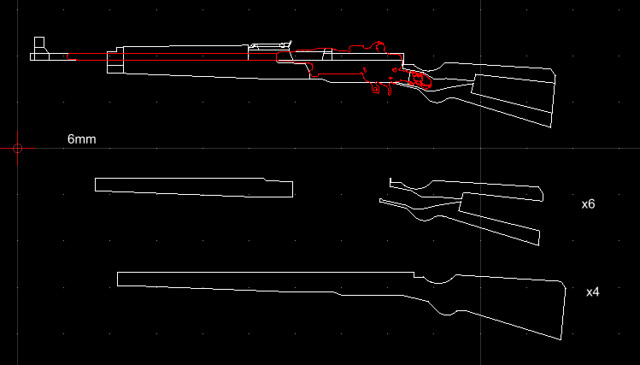
Screen Shot 2017-07-26 at 23.14.34

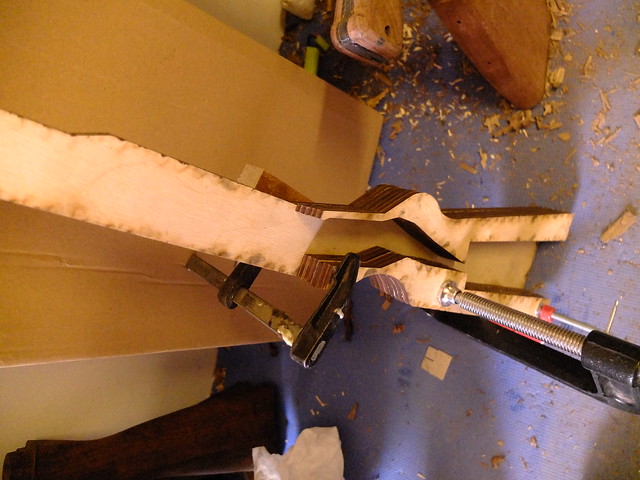
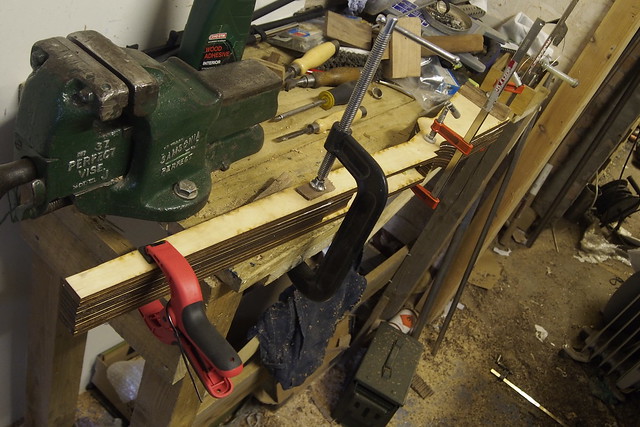
Laser cut from ply, the parts are stuck together one layer at a time.

_DSF9293

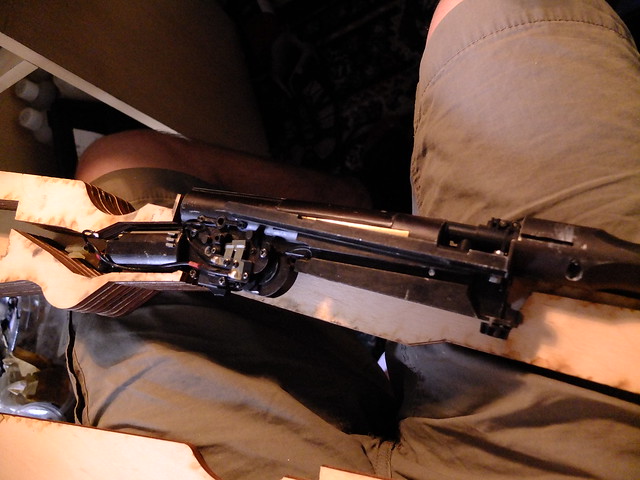
Checking the fit, the ‘lightly’ modified M14 action slots in. At this stage my main concern was the motor space as it is snug by necessity for strength.

_DSF9332

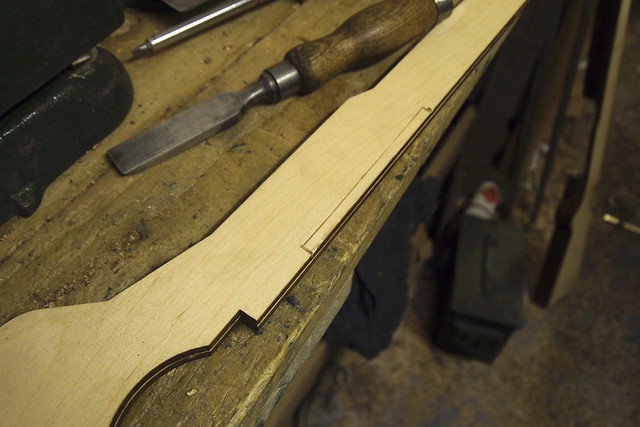
Out of the second side, I have to cut a section to fit part of the M14 receiver. This is chiselled out and is invisible from the outside of the rifle.

_1010019

In situ, the only part out of place here is the rear-wiring, which would normally live inside the stock. However it needs re-soldering on the motor here and doesn’t go in easily as such. This will be solved easily enough though.

_1010020

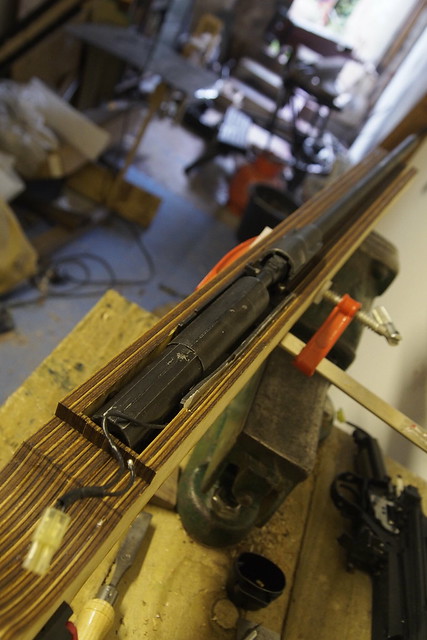
The second side glued and clamped in place. I’ve put the battery transfer wire through from the battery compartment (in the buttstock) through to the motor housing. 

_1010022

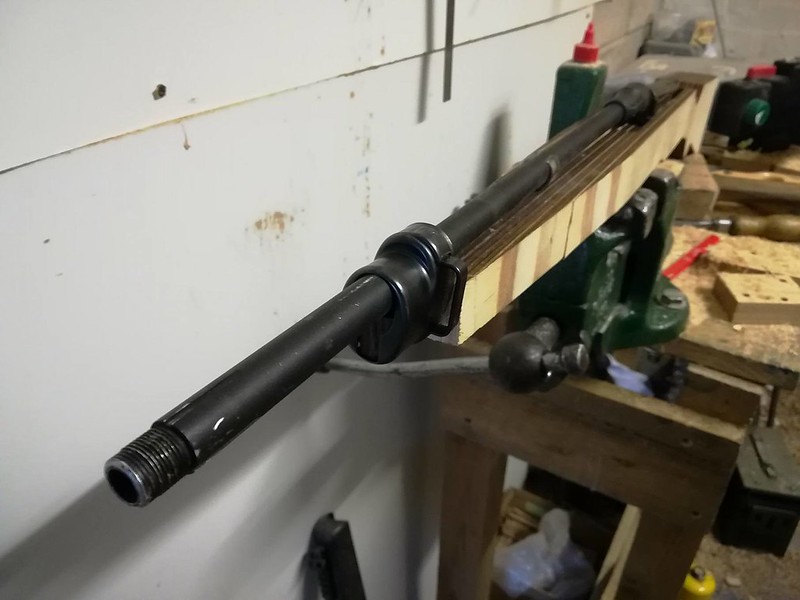
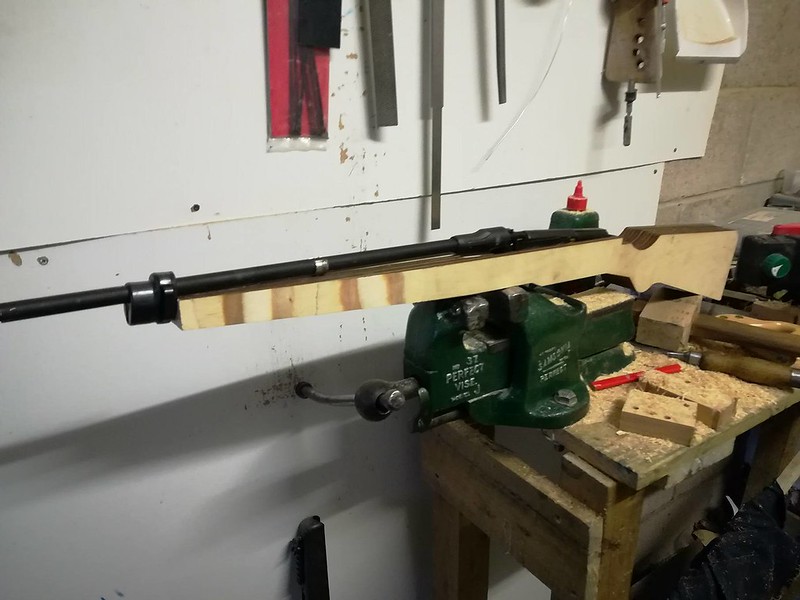
The action fits in snugly, and I fit the repro front cap provided by the client.

22015636_10155935933208623_1262394515_o
Although the donor action looks weirdly bent, that is the shape of an M14 once you strip the receiver bits off. The nozzle goes up into the feed ramp at an angle. It’s weird, but it works.

22050766_10155935933123623_1511603968_o


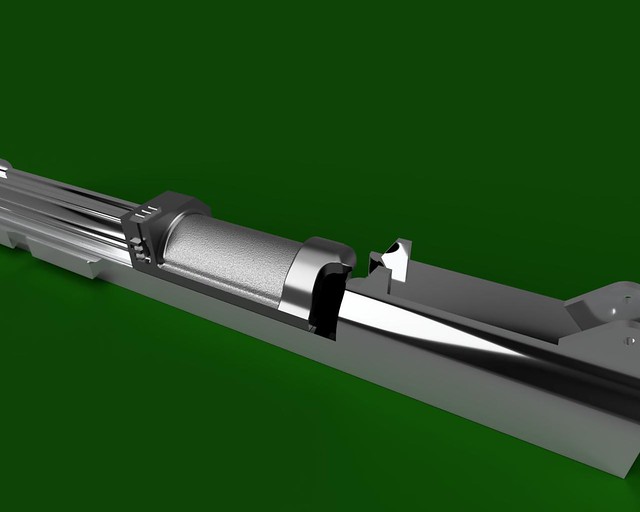
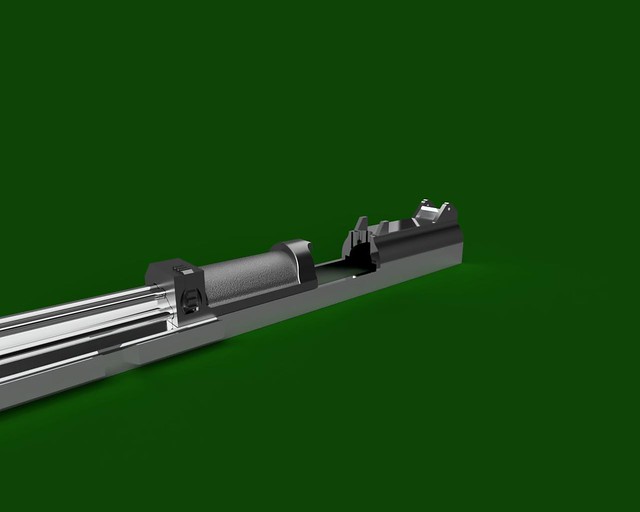
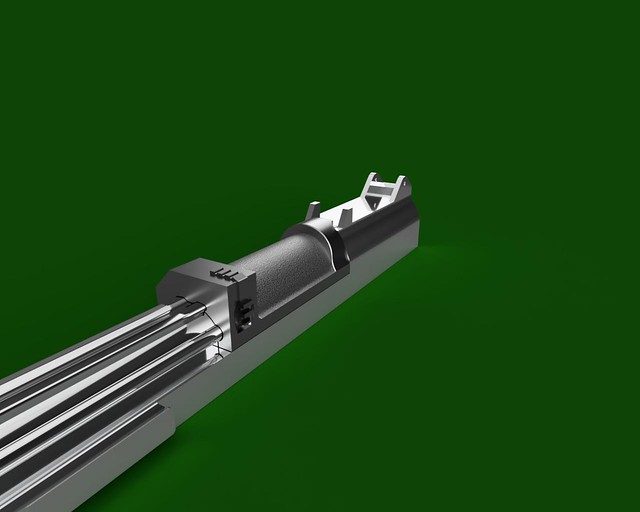
The next step is to create the faux receiver. I designed it for 3D printing. It may need a little tweaking to fit around the gearbox.

Screen Shot 2017-07-26 at 23.14.20

G43_parts_2017-Jul-26_09-29-28PM-000_CustomizedView29517140883

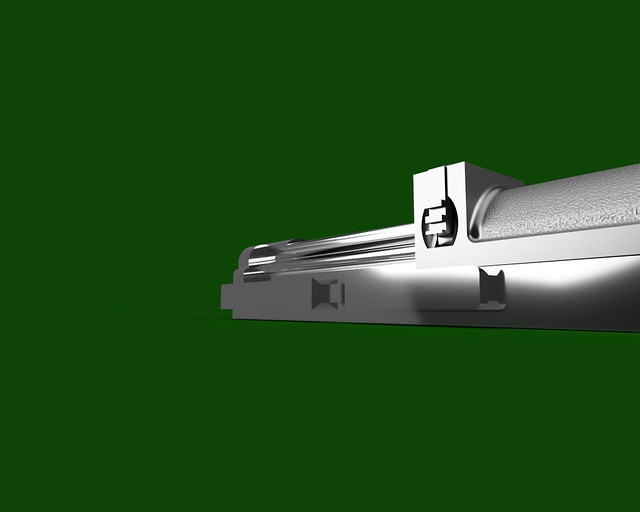
My initial design will need a little tweaking to fit around the gearbox mounting but the majority of the work is done.

G43_parts_2017-Jul-26_09-18-23PM-000_CustomizedView20191270454

I am hoping to have an opening receiver. Although it’ll have no function, it’s one of those touches that is nice to have.

G43_parts_2017-Jul-26_09-17-25PM-000_CustomizedView1136747149

G43_parts_2017-Jul-26_09-16-48PM-000_CustomizedView14882526777


More of this build coming soon!


If you would like to find out some of the history of this rifle, you can see my long-ago written intro to the G43 here.


If you enjoyed this article, join us over on Facebook and check out our Etsy store. If you have an idea for a custom build of your own get in touch on enquiries.vintageairsoft@gmail.com.

Creating an impression: 82nd Airborne, Italy 1943-44

Creating an impression, WWII

This is part of a new series, written by contributors outside of Vintage Airsoft itself (though I am sure I and some friends will have to do some of our own as well). Although I edit, pictures and words are from them and they have done their own research. Accreditation is at the bottom of the article.

82nd Airborne: Operation Avalanche

A less common impression in both the reenacting and airsofting community, as most loadouts are based on the Normandy Campaign.

The equipment pictured can be used for Operation Husky (Invasion of Sicily), Operation Avalanche (Invasion of Italy), or Operation Overlord (Invasion of Normandy). As the war progressed, the standard M42 jump uniform, as well as most of the equipment was phased out in favor of the M43 field uniform.

This is the one of the earliest variants of the U.S. airborne uniform that saw combat during WWII, with most jump uniforms being reinforced after the invasion of Italy in late 1943.
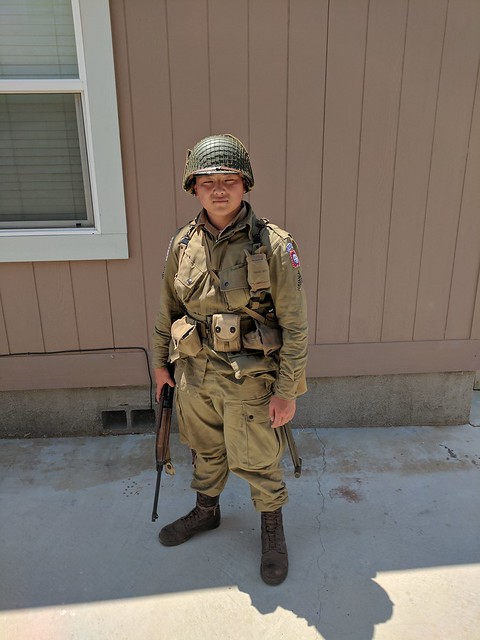
IMG_20170715_115645


Head

M1C/M2 Helmet: $99.99-345.00 (UK approx £200 from Soldier of Fortune)

The standard U.S. airborne helmet used throughout the war was the M2 “D bale” helmet. This helmet differs from the standard infantry helmet in that it uses curved fixed bales that resemble the letter “D.” This design was eventually decided to be inadequate as the bales that secured the chinstrap would often break in the field, necessitating constant repairs to helmets when returning from the field.

Due to large demands for airborne helmets, a number of standard M1 infantry helmets were converted with a jump liner and paratrooper straps to meet the demands for M2 helmets.

Eventually the M1C jump helmet was introduced to replace the M2, and added swivel bales to the helmet to prevent the bales from snapping off; however, they were not common until late 1944.

All versions of the jump helmet usually also had an airborne jump liner, which was a standard infantry liner with the addition of “A yokes” to hold the leather chinstrap. This chinstrap was used to secure the helmet to the paratrooper when jumping from aircraft.

The helmet pictured was compiled from various auctions on eBay, full M2s or M1Cs can be found at: At the Front, Jmurray and Soldier of Fortune
IMG_20170715_115650

Uniform

M42 Jump Uniform: $150

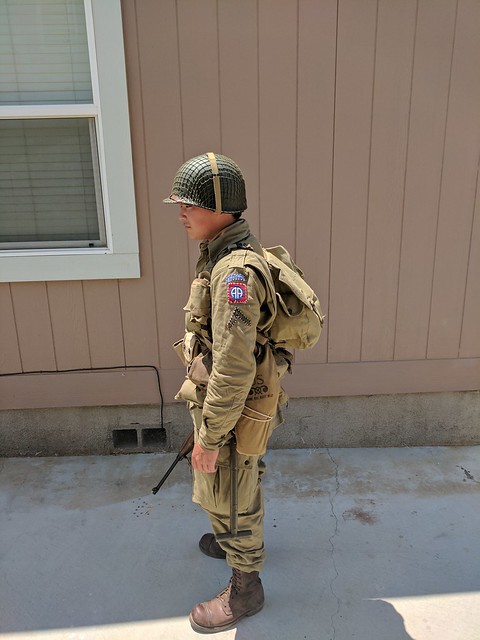
The M42 jump uniform was the standard uniform for paratroopers during 1943. The uniform was later upgraded with reinforcements at the knees and elbows, and later replaced by the M43 uniform.

The uniforms are common, however At the Front has the most durable and accurate for their price.


Khaki summer shirt: $50

The khaki summer shirt was often worn by airborne and infantry under the M42 jump uniform during the summer months. While technically not permitted, this was a common practice due to the hot climate of Italy in late summer.

What Price Glory is one of the few vendors to still sell khaki summer uniforms. (the one pictured is an original)

1937 wool shirt: $50

The standard regulation shirt (not pictured) was worn under the m42 jump uniform. This is the same shirt used under the M41 jacket by infantry; however, there are several photos of paratroopers wearing khaki shirts under their M42s instead of the wool shirt.

At the Front, What Price Glory, and other vendors have reproduction wool shirts, and originals are still plentiful.


Insignia

Sewing patches: Each paratrooper was to sew on their own insignia to their uniforms, this lead to a variety in the manner in which the patches were affixed to the uniform. Some would spend time meticulously sewing intricate patterns for their insignia, like the cross stitching pictured, while others would attempt to quickly sew insignia to the uniform, creating a sloppier look to the uniform. Others, especially units like the 509th parachute infantry regiment chose not to sew on a unit insignia.
IMG_20170715_115658

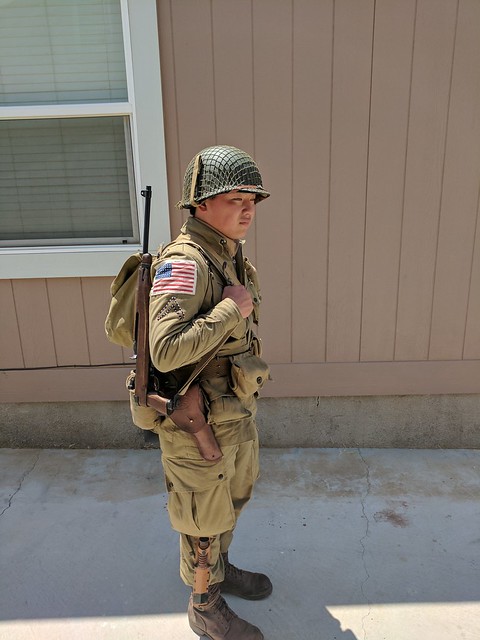
Divisional patches should be sewn onto the left shoulder, approximately the width of two fingers below the shoulder seam. American flags should also be sewn two finger widths below the right shoulder seam. Rank patches should be sewn approximately one finger width below the unit patch or halfway between the elbow and the bottom of the unit patch.

At the Front makes quality patches for uniforms, as original airborne patches are nearly impossible to find.

82nd Airborne Patch: $10
The 82nd Airborne was the first airborne division to see combat in the European theater in WWII. The division fought in Sicily, Italy, France, Holland, Belgium, and Germany.

PFC Stripes: $5
Private First Class stripes, added to denote rank of private first class.

48 Star American Flag: $5
American flags were commonly sewn on the arm of invasion forces, leading to several variants of patches or armbands to be attached to paratroopers. Often, these patches would be removed after landing, so their inclusion is not necessary.

Feet

Corcoran Jump Boots: $125-256
Jump boots were issued to U.S. paratroopers throughout WWII, and are still used today. These jump boots are taller than most other boots to secure them to the paratrooper when jumping. The boots should be polished to a shine, as this was a common sign of pride among paratroopers. WWII jump boots should be brown, and polished to a dark brown shine.

At the Front, Amazon, and most other WWII vendors sell brown Corocan Jump Boots.


Field Gear

For the invasion of Italy, all field gear should be OD3 (khaki), there should not be any OD7 (green) field gear, as OD7 was not common until D-Day.

Webbing set: (pistol belt, rigger pouches, canteen, entrenching tool) $175
The standard web gear for U.S. airborne in 1943 consisted of a 1936 pistol belt, rigger pouches which could hold four enbloc M1 Garand clips or five M1 Carbine 15 round magazines. The canteens should be stainless steel, as original aluminum canteens contain large amounts of aluminum oxide. The T-Handle entrenching tool allowed soldiers to dig foxholes, clear brush, and could be used as a weapon of last resort. In 1943, the standard T-Handle or shortened airborne T-Handle shovels would be appropriate.

Much of the web gear pictured are originals, the e-tool was from At the Front, and the rigger pouches were from Man the Line

1936 pack system: $60
The 1936 Musette bag and suspenders are an important part of any airborne impression. The system allowed the paratrooper to be able to jump while carrying a pack, and was issued throughout the war to U.S. Airborne forces.
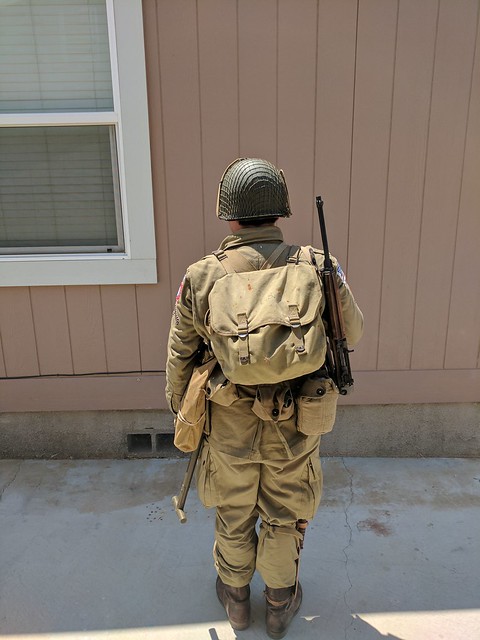
IMG_20170715_115702

The pack and suspenders pictured are both originals.

1916 holster: $30
The 1916 holster was designed to hold the 1911 handgun, and was issued to officers, machine gun crews, and other units who were not given an M1 Garand rifle. Additionally, U.S. paratroopers often acquired 1911s from various sources and were able to keep them for the Italy jump.

The holster pictured is an original.

Gas mask bag: $20
The 82nd Airborne jumped into Sicily and Italy still using their training gas masks. These were usually discarded soon after the jump upon the realization that the Germans were not using poison gas. These training masks were replaced by the M6 gas mask and M7 rubberized gas mask bag for the Normandy invasion.

Parachute first aid pack: $14
The parachute first aid pack was a small first aid kit for the individual’s use should they be wounded in action. Soldiers were also issued a separate bandage and pouch, however during the Italy invasion, the content of the second bandage pouch were often stuffed into the M42 jacket pockets.

The one pictured is an original.

At the Front, Man the Line, What Price Glory, World War Supply, and other vendors sell quality reproduction field gear. I would recommend against buying off eBay, as reproductions are often poorly made and poorly dyed.


Weapon

M1A1 Carbine (King Arms): $350
The M1A1 Carbine was a M1 carbine with a wire folding stock to allow easier use when jumping from aircraft. The rifle was folded and placed in a scabbard secured to the parachute, and unlike the M1 Garand, could be immediately used upon landing. Carbines were usually issued to machine gun crews, officers, and radiomen; however, there is evidence that some riflemen were issued carbines.

The King Arms M1A1 is CO2 powered, full metal and real wood, giving it a similar feel and weight to the real version. Unfortunately, King Arms did not base their model off the WWII version of the M1A1, and therefore the rifle needs modifications to bring it closer to WWII specifications. Additionally, the rifle shoots at 487fps using .2 bbs, making it difficult to use at normal fields.

KAAG127_3


1911 (WE Tech): $95
The Gen3 WE Tech 1911 GI model is an affordable, reliable sidearm. The handgun shoots reliably and possesses a 15 round magazine. A very capable sidearm, and one of the few 1911s made to WWII specification.

M3 Trench Knife: $50
The M3 trench knife was issued to U.S. soldiers who did not have an M1 Garand bayonet. This knife was used as both a fighting and utility knife from 1943-1945.

Rubber knives can be found on eBay for $40, while the M6 scabbard can be found on eBay separately for $20. 

Editor’s note: Other suitable main arms would of course include the M1 Garand, M1 or M1A1 Thompson. You can of course find some rubber knives in the Vintage Airsoft Etsy Store.


Vendors

There are a variety of vendors from which to source a U.S. Airborne impression, for simplicity’s sake, the links to quality vendors of reproduction equipment in the United States will be listed instead of the prices for individual items, which are subject to change at any time.

US: At the Front: www.atthefront.com 
World War Supply www.worldwarsupply.com
Man the Line www.mantheline.com

US/UK: What Price Glory www.whatpriceglory.com

UK: Soldier of Fortune www.sofmilitary.co.uk


As a rule of thumb, At the Front has the highest quality reproduction uniforms and field gear, however they are more expensive. Man the Line and World War Supply have some items that are of high quality, but others that tend to fall apart quickly. What Price Glory offers a larger selection of uniforms than At the Front, but often are lower quality.

Original items will vary in price greatly, and generally sell for approximately the same price of At the Front. USThey will be the highest quality, and most accurate, but due to age, they may not be as durable as good reproduction gear.

Editor’s note: Apart from strong items like helmets or garments not exposed to the elements such as shirts, I’d personally avoid using original items in the field as they are likely to succumb to wear or loss and it’s sad to lose a piece of history! That said I wear original uniforms for airsoft myself sometimes, just bear in mind historical value.

Text by Jacob Riley
Photos by Roger Harris

Edited by Dominic Evans
G98 VSR: Part 1

G98, G98 VSR, Imperial Era, Inter-War (1918-1939), Rifles, Weapons, WWI

The start point for this project is the G98 Dboys shell ejecting model. A VSR base for this rifle would make it much more practical and skirmish able.

_DSF8004

The first step is expanding the recess for the magazine This necessitated the removal of the front securing lug for the original magwell and trimming down the metal lining of said magwell to fit the new VSR parts. Rather pleasingly the trigger sits quite naturally in the trigger guard with minimal modification.

_DSF9133

The fore-end is unchanged. I’m using the same outer barrel and fittings.

_DSF9134

The bolt handle will be another custom piece.

_DSF9136

The bolt handle will screw in and be thread locked in place. If at a later date I decide to make a bent handle for use as a sniper rifle I can just swap it out.

_DSF9137

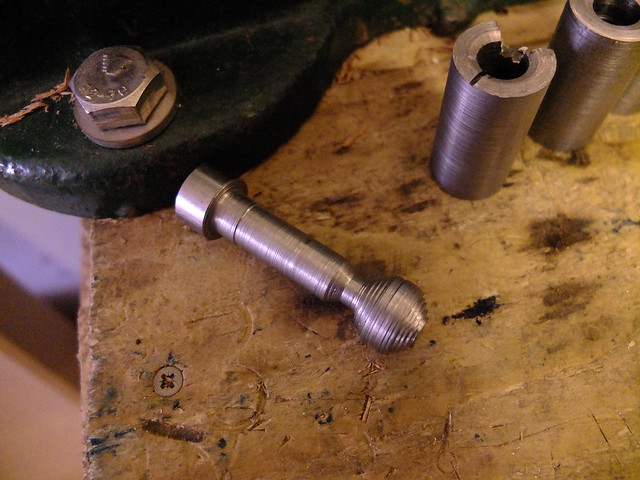
The bolt handle part-made. At this point I had to take it off and make some other parts and the lathe broke down, so I’ll have to come back to this later!

_DSF9138

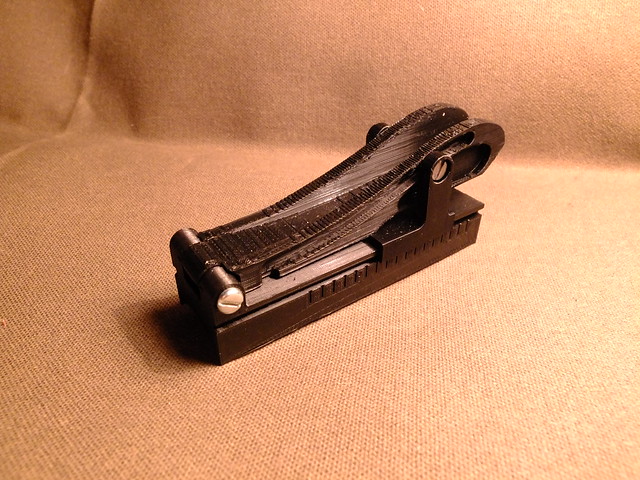
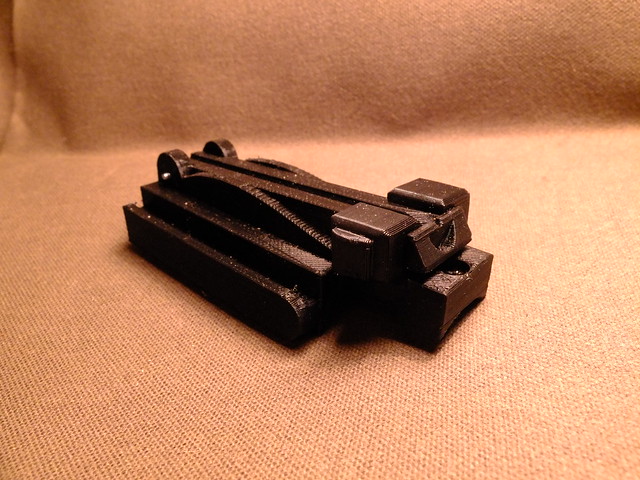
The rear sight for this is 3D printed, the repro I used won’t fit over the larger receiver. Although it looks a little rough here, once painted up it’ll look the part. In the longer term I hope to cast these in aluminium.

_DSF9365

In place on the rifle, it is secured by two screws. The small hole in the middle is for hop adjustment (I fit a TDC hop mod to all VSR builds).

_DSF9372

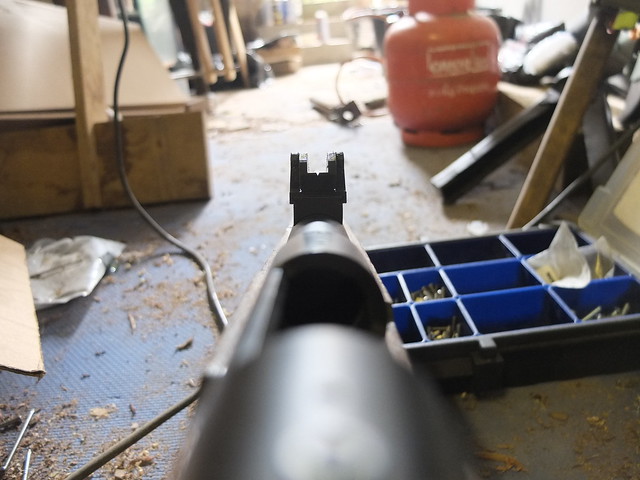
Viewing down the rifle, that Vizier rear sight give a really distinctive sight picture!

_DSF9376

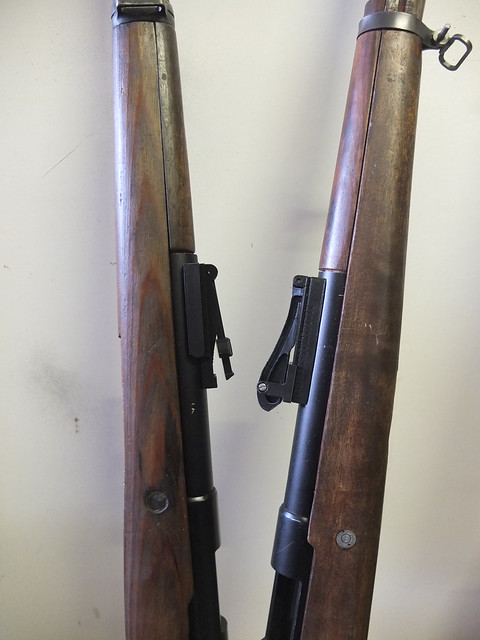
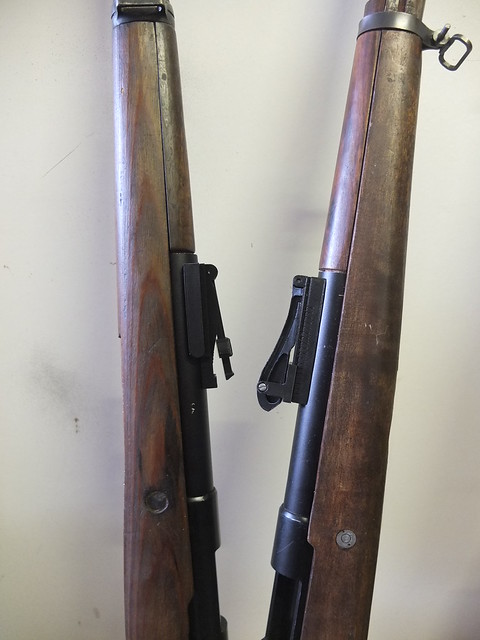
Next to its nephew, the K98k VSR build in the workshop.

_DSF9375

A bit of epoxy resin to smooth off the rougher surfaces. When sanded down and painted up it’ll really look the part.

_DSF9418

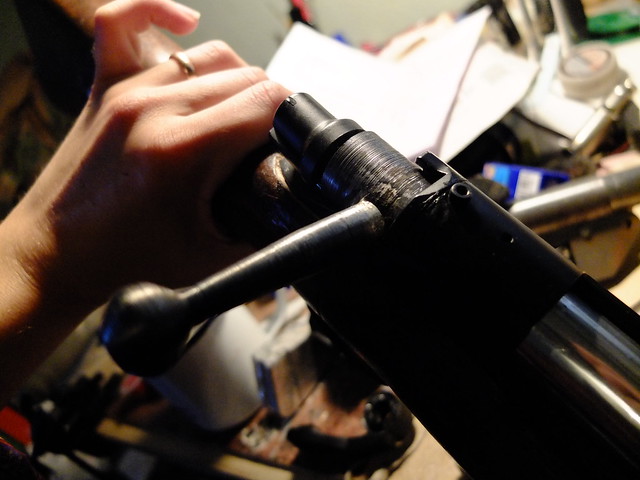
With the lathe FINALLY fixed I could finish off the bolt handle after looking at it half finished for about two months (truly torturous). Now I just need to finish the back cap and the rifle itself is done.

_DSF9638

Then there are a few optional extras which I’ll be fitting before finishing entirely. So far though, I am delighted with how this conversion is going.


If you would like to see the little intro I wrote for the first G98 build you can see it here.

If you like this project or have an idea of your own, drop us a line on enquiries.vintageairsoft@gmail.com to discuss. ‘Like’ our Facebook page or follow the blog to get regular updates on projects and interesting videos and articles.

Don’t forget you can buy our complete products via Etsy.

Kar98k: Build 1

Custom builds, K98k, Weapons, WWII

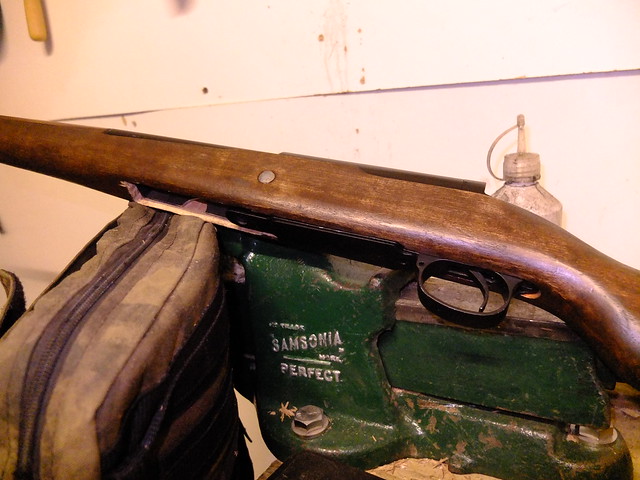
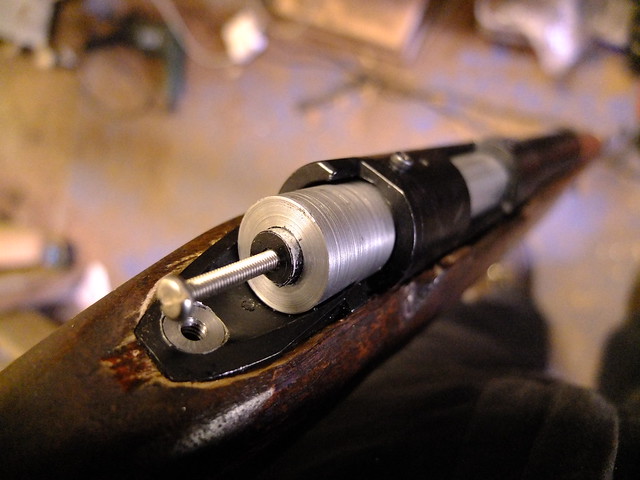
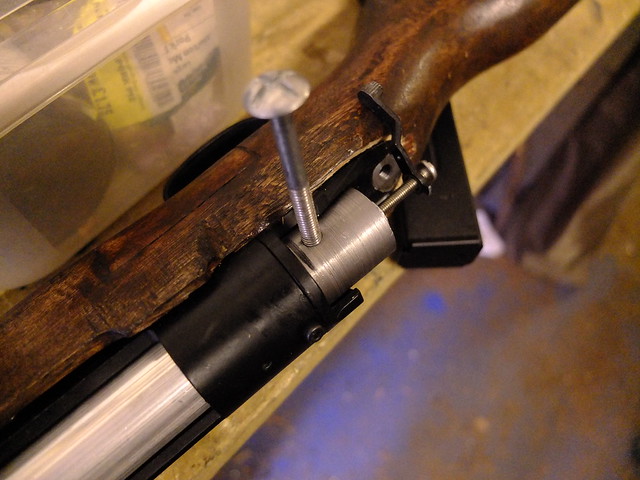
Now, this is a build I’ve wanted to do for a while. Having found a keen customer who had all the parts it is now nicely underway!

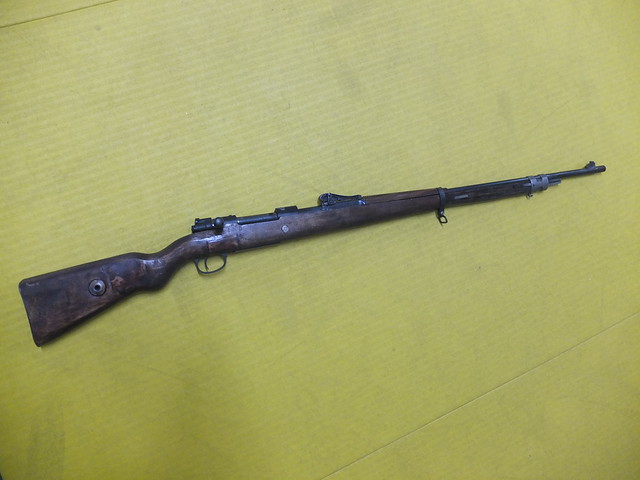
This is a VSR-based build, the most practical option for a spring-powered bolt action rifle. I’m using an original stock which will be modified to take the new parts. You will be glad to hear that it isn’t a WWII period stock so far as I can tell.

_DSF9191

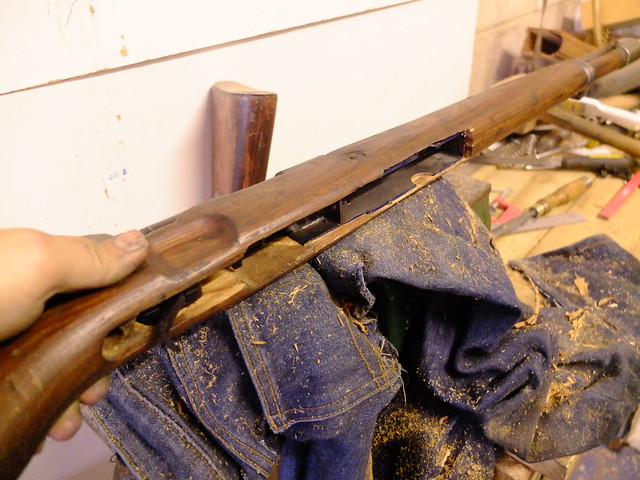
The action dropped in fairly easily, a square cut for the fore-end, the back being scooped out carefully to fit snugly.

_DSF9202

A view inside.

_DSF9204

The barrel, naturally, goes through the barrel recess.

_DSF9205

I then chased out part of the fore-end of the action recess all the way through the stock for the magazine well. The one slight faff with doing VSR Mausers in this way is that the faux magwell meets the real one but this is not a major issue as I’m expecting to make a new faux magwell from scratch.

_DSF9206

The outer barrel is a piece of ERW tube, which is the perfect size to use the original fittings. This will be cut to size closer to the end of the build.

_DSF9348

The VSR based rifles are still experimental at this stage, I’ve produced about four or five different magazine catch designs which I am putting into different guns for customer feedback.

_DSF9349

I’m very please with my rear sight design for this build. 3D printed, once painted up this will really look the part and gives the user elevation control.

_DSF9363

Best of all it will fit snugly onto the receiver with minimal faff. It would be nice once my casting setup is complete to make this in aluminium.

_DSF9364

On the rifle with its Uncle the G98. What you can’t see is the TDC hop mod which is part of the sight unit. This disposes of the rather finicky and annoying side adjustment arm that is the weak point in a normal VSR system.

_DSF9375

There’s still a good bit more to do on this rifle, but the framework is all there. It’s really, really comfortable and I can’t wait to get the bolt handle in place along with the last external parts and start shooting.


If you are interested in the history of the K98k, you can check out the introduction article here.

If you like this project or have an idea of your own, drop us a line on enquiries.vintageairsoft@gmail.com to discuss. ‘Like’ our Facebook page or follow the blog to get regular updates on projects and interesting videos and articles.

Don’t forget you can buy many of our complete products via Etsy.


M2 60mm Mortar: Build 1

Area-effect, Cold War, M2 60mm Mortar, Weapons, WWII

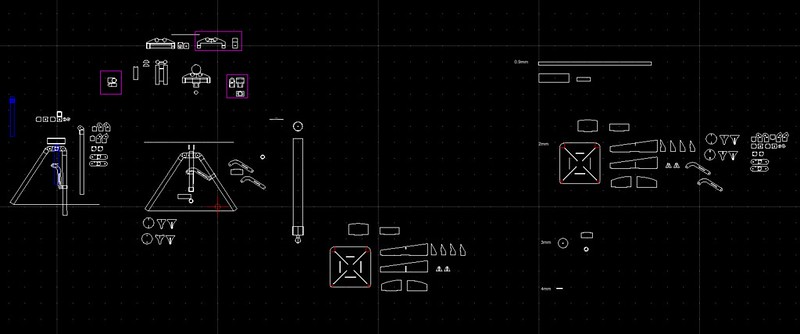
The project started with a good deal of research, finding pictures of all the component parts. From this I calculated dimensions and drew up plans.

The M2 is quite a bit more complicated than the SMBL 2″ used by the British. For my flat laser cut parts, I’m looking at around 3x as many pieces: plus a number of cast or printed parts.

Screen Shot 2017-06-19 at 15.08.39

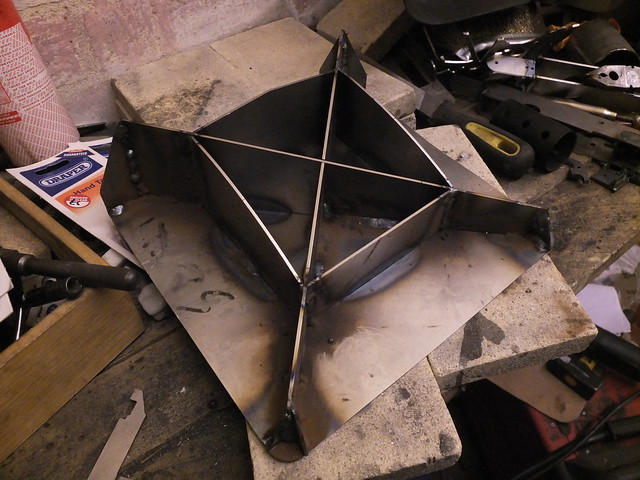
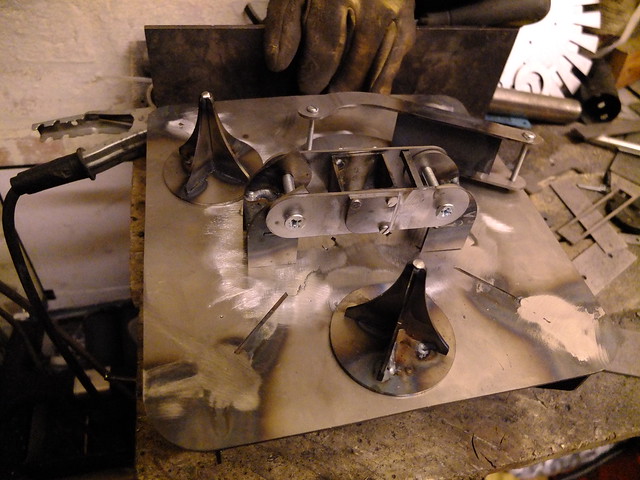
The baseplate is the first component to be assembled. This heavy plate is designed to stick into the ground to control and direct the recoil.

_DSF9085

Then the feet for the bipod legs and the hinge parts, Although the M2 is complicated, it does fold down quite tidily, which means a lot of moving parts.
_DSF9124

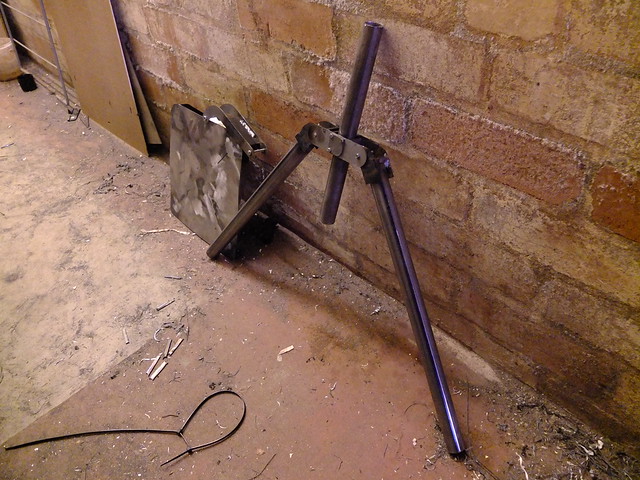
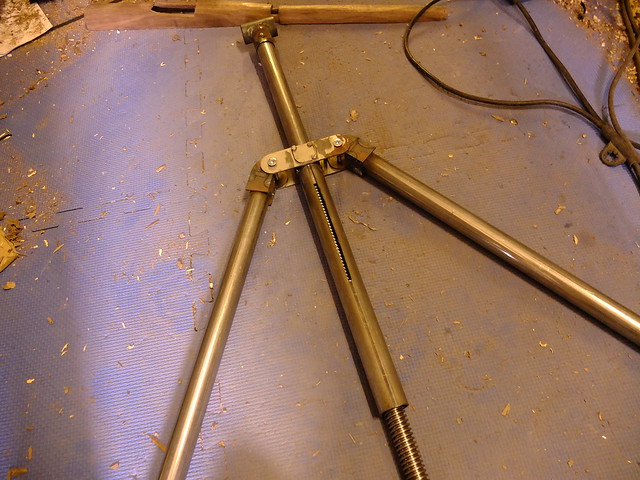
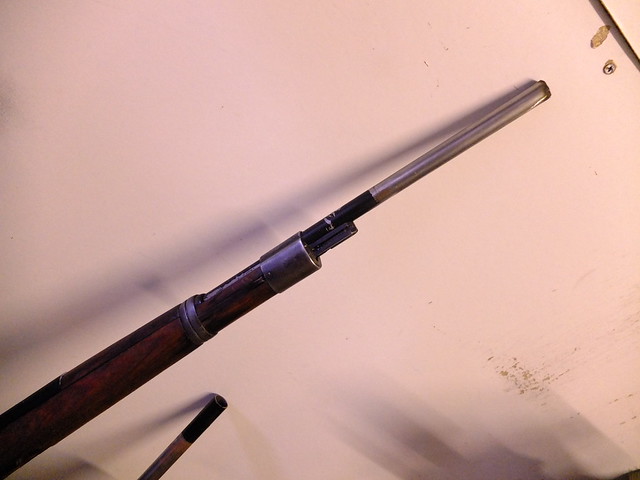
With the legs in place, the mortar starts to take shape. The tube through the middle will have the elevation control going through it, at the top of it will be the T-piece where the windage adjustment will sit.

_DSF9159

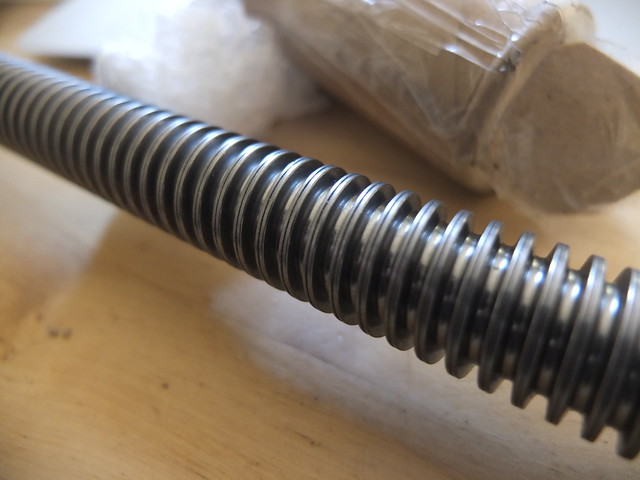
The thread arrived, it is a 20mm trapezoidal threaded rod which should be coarse enough to allow quick adjustments to be made, but fine enough to allow for accurate fire adjustment.

_DSF9259

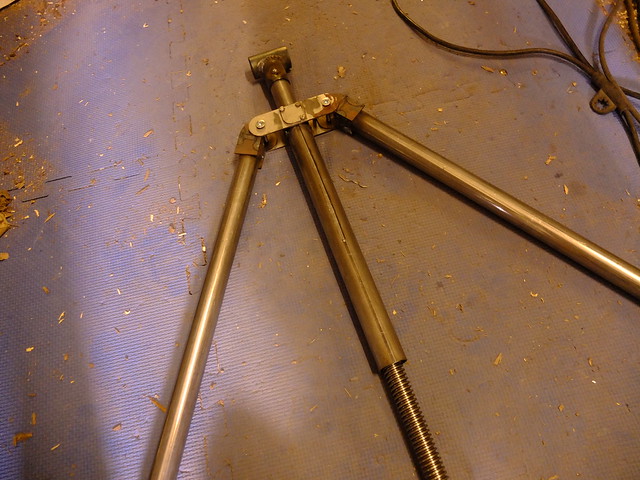
The elevation adjustment screw in place and the T-piece at the top of the column (where the windage screw will go). There is a slit in the back of the column in which a screw sits that locks the inner column into the outer and engages the screw thread.

_DSF9302

When the elevation is raised to maximum, you can just see the thread through the slot at the back, but this will effectively be hidden by the barrel.

_DSF9303


The next components will be the windage adjustment and endcaps. These are going to be 3D printed in ABS for strength and will also have the barrel clamp.


If you are interested in the history of the M2, you can check out the introduction article here.

If you like this project or have an idea of your own, drop us a line on enquiries.vintageairsoft@gmail.com to discuss. ‘Like’ our Facebook page or follow the blog to get regular updates on projects and interesting videos and articles.

Don’t forget you can buy our complete products via Etsy.

Lanchester MkI*: Complete

Complete builds, Custom builds, Lanchester, Products, Sub Machine-guns, Weapons, WWII

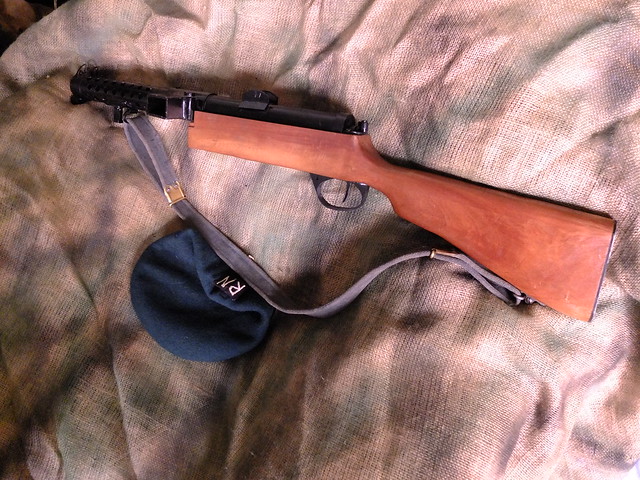
So, the Lanchester is finished! And I am in love, though I say so myself.

_DSF9334

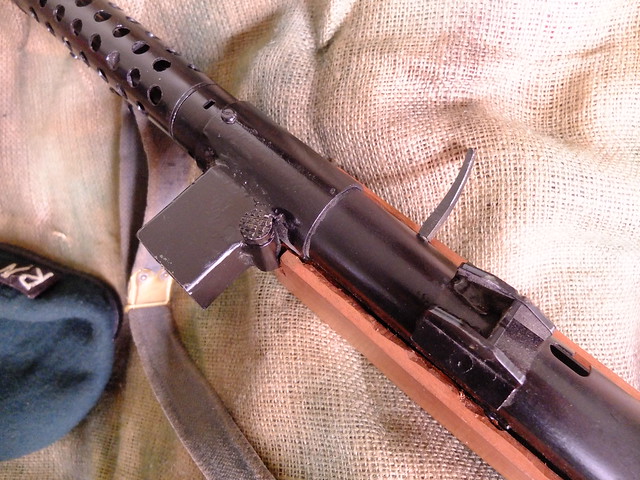
Details, the new magazine well closely resembles the original and is an improvement on the Sten original. I have brazed the mag catch head so that when it wears it looks brassy.

_DSF9335

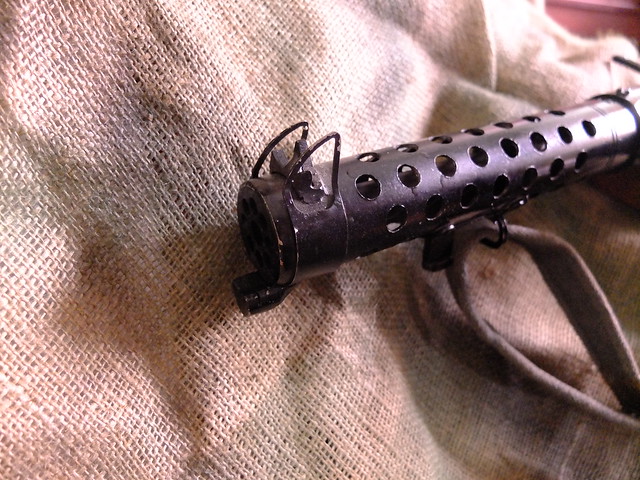
The foresight and bayonet lug. This should take a rubber SMLE bayonet if the owner decides to do so!

_DSF9336

The trigger is set back, the pull is a little unusual but not bad.

_DSF9337

The buttplate, steel, though a brass SMLE buttplate could be substituted in here.

_DSF9338

The rear locking lug is just for looks on this. A hinge is quite hard to do but may be doable in the future. For now you can remove the lock and back cap to replace the battery. Unfortunately the wrist of this stock is too slim to drill through to a larger battery compartment in the buttstock.

_DSF9339


You can check out the build process for this gun here.


If you like this build, you may like to take a look at where it came from, the MP18 and its extended family.


Don’t forget to subscribe to the blog or join us on Facebook for more! You can buy some of our ready-made products on Etsy. You can also email to enquire about custom or special builds on enquiries.vintageairsoft@gmail.com.


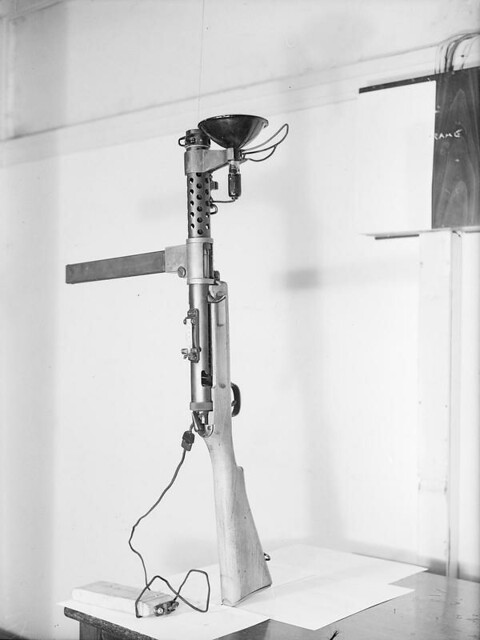
P.S.: If anyone wants a Lanchester with this awesome period tac-light please DO get in touch. 

Fighting_in_the_Dark._2_January_1943,_Liverpool,_the_Navy's_Lanchester_Gun_Fitted_With_Illumination_Attachment_For_Night_Operation._A13831

Lewis Gun: Build 1

Custom builds, Inter-War (1918-1939), Lewis Gun, Machine-Guns, Weapons, WWI, WWII

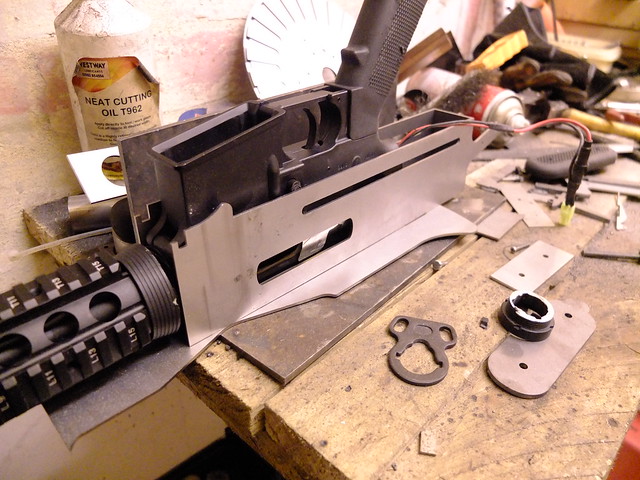
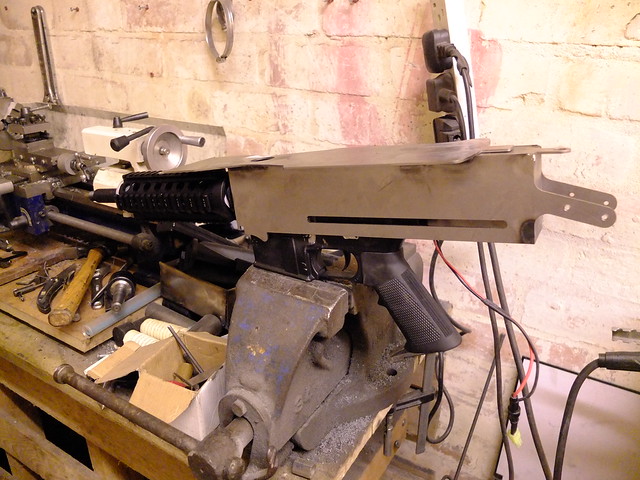
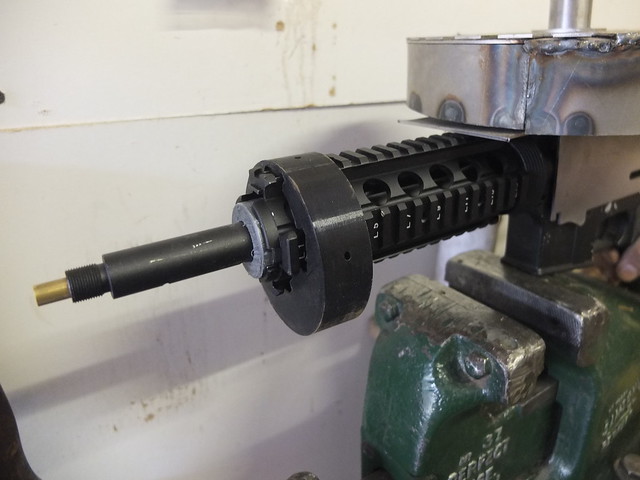
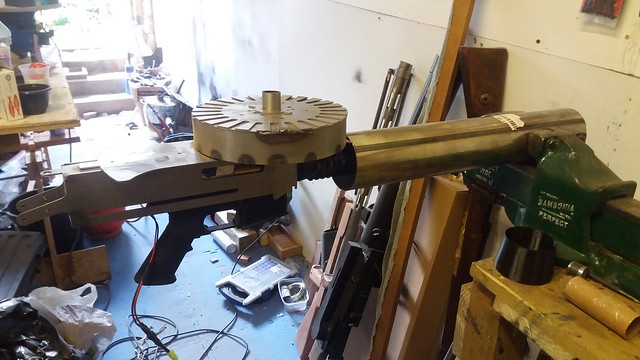
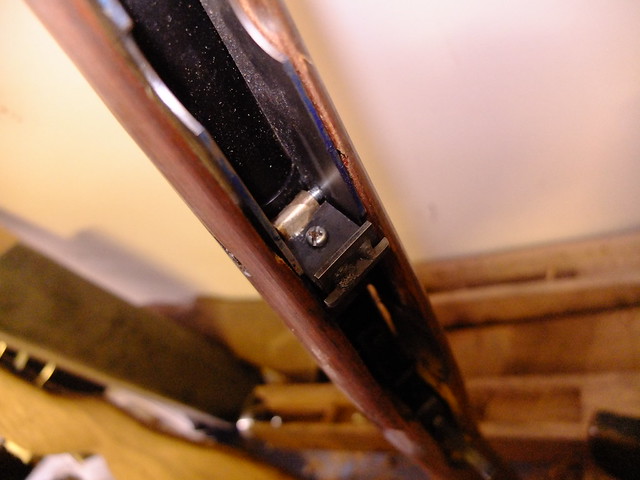
The base gun for this build is an M4. Nothing too fancy, but with lots of options for upgrade parts if needed. The first step to making the transformation into a Lewis is to build the receiver. I have modified plans I was given some time ago to build a replica to take the donor and be made from steel.
_DSF9122

Inside this I will fit a ‘harness’ to hold the donor.

_DSF9123

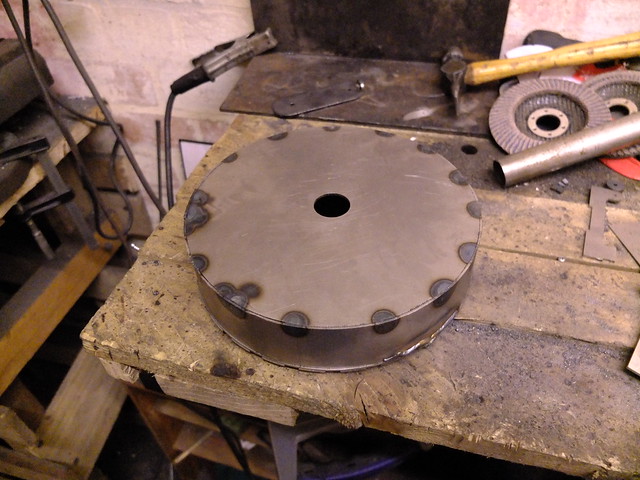
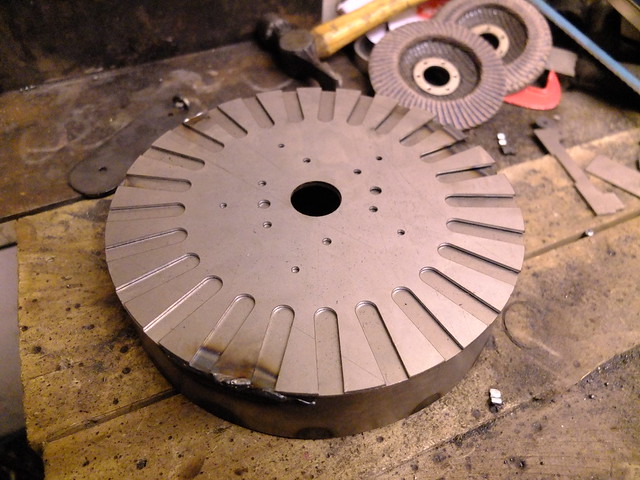
The drum magazine, on this I’m not sure if it will be functional, but it will be removable so I may do a very high capacity magazine in the future.

_DSF9126

The external detailing is welded on.

_DSF9127

I designed this spacer to mount on the rails, there are two of them to steady the barrel shroud.


_DSF9256

Dry fitting the parts, you can see the space where the rear end of the cooling fins are to go.

20170615_153236

I’m also making use of 3D printed parts for the taper on the fore-end. This part was simply much too big to make on the lathe and this system keeps the cost and the weight down.

20170615_155354

The bipod is the next major component. It will need some feet, and hinges made up for the top, which will have to come in a later instalment.

_DSF9296

Also for the next instalment, the design for the back of the cooling fins is complete (a long day’s work making this!) and it will be 3D printed much like the spacers before being painted to look like aluminium. It may even be a project for the new furnace.

Lewis_cooling_fins_2017-Jun-27_06-18-25PM-000_CustomizedView8964933988


If you are interested in the history of the Lewis, you can check out the introduction article here

If you like this project or have an idea of your own, drop us a line on enquiries.vintageairsoft@gmail.com to discuss. ‘Like’ our Facebook page or follow the blog to get regular updates on projects and interesting videos and articles. 

Don’t forget you can buy our complete products via Etsy.