G98 VSR: Complete

Complete builds, Custom builds, G98, G98 VSR, Inter-War (1918-1939), Rifles, Weapons, WWI, WWII

After the last build post, the G98 is finished! Time to take a look at those last details.

_DSF9746

The fore-end is pretty much unchanged externally.

_DSF9747

At the back, the new back cap crowns the rear of the bolt. Although entirely decorative, it does make a difference to the look of the thing.

_DSF9748

There is also a faux bolt release, used on the real thing for disassembly.

_DSF9749

The Vizier rear sight.

_DSF9750

Which is capable of full elevation adjustment.

_DSF9751


_DSF9752

The bayonet will be a useful addition, especially when this is used as a musket for American Civil War airsoft. This is a new design I’ve not tried before and will be trialling it on this and the SMLE.

_DSF9753

Making longer bayonets that are stiff enough to look the part and work safely for airsoft is quite tricky: rubber is too floppy, wire stiffening isn’t strong enough and most fibreglass stiffeners are too hard for guaranteed safe use.

_DSF9757

I feel this plastic blade has the balance of flexibility and stiffness just right. For this and the SMLE bayonets it’s about right, though for longer bayonets it may need a couple of layers of lamination to hold shape. That said, there are only so many bayonets that are longer than 17″ for the eras I cover!

_DSF9758


If you like this project or have an idea of your own, drop us a line on enquiries.vintageairsoft@gmail.com to discuss. ‘Like’ our Facebook page or follow the blog to get regular updates on projects and interesting videos and articles.

If you would like to see the little intro I wrote for the first G98 build you can see it here.

To see the build for this rifle, see here.

Don’t forget you can buy our complete products via Etsy. If you would like a build like this, please drop us a line on the above email.

Kar98k: Build 2

Custom builds, K98k, Weapons, WWII

The next step was sorting out the fore-end. The foresight was 3D printed in ABS, I used filler paint to hide the layers and give it a textured look. It is screwed down to the barrel. The barrel is a piece of steel ERW tube, polished on the lathe and oil finished. This gives it a nice, subtly shiny finish that looks rather like a deep bluing.

_DSF9715 2

A closer look and you can see the adjustable foresight blade.

_DSF9720

A quick view of the bottom, showing the new fake magwell and real magwell. The receiver screws down into the back of this section, the front of it is supported by the metal frame of the VSR magwell.
_DSF9719

The next step is to make the bolt handle unit. This is made in four parts. I turn the ball on the lathe, drill through it to fit a narrow diameter round bar which is brazed in place. I attach it to another part made on the lathe, which surrounds the haft of the bolt and has a cutout for the out of battery safety.

_DSF9777

The back cap is cast from my original 3D printed model used on the G98.

_DSF9778

And that, pretty well, is that. Just a few last bits of touching up paint here and there. I’ll also be making a scope mount for this soon, once I have worked out how to make one that looks ‘right’.

Finished pictures to come!

If you are interested in the history of the K98k, you can check out the introduction article here.

If you like this project or have an idea of your own, drop us a line on enquiries.vintageairsoft@gmail.com to discuss. ‘Like’ our Facebook page or follow the blog to get regular updates on projects and interesting videos and articles.

Don’t forget you can buy many of our complete products via Etsy.


G98 VSR: Part 2

Custom builds, G98, G98 VSR, Imperial Era, Inter-War (1918-1939), Rifles, Weapons, WWI

My first major improvement is the back-cap for the bolt. This one is in two parts, to allow friction to be between these two lubricated steel parts rather than on any soft aluminium bits.

_DSF9642

At the front end, I am replacing the biscuit that joined the front and main parts of the stock with a steel tube. Apart form being very strong, this will also allow me to stow a full-length ramrod in the rifle. Although this is far from necessary for use as a G98, I’ll be using this as a musket for American Civil War airsoft until my dedicated musket is finished.

_DSF9658

With enough material removed, I epoxied the steel tube in place.

_DSF9659

In place on the rifle, I leave it overnight to set.

_DSF9661

At the back end of the bolt, I’ve had a 3D printed cap made to replicate the rear of the Mauser bolt. This will go on the K98 builds as well.

_DSF9680

The bayonet is going to be very useful when the rifle is used as a musket, so it’s important to get it right. The grips are 3D printed (dimensions scaled from a photograph) and screwed together. The blade is replaceable and flexible, but not so much as to be floppy.

_DSF9684

When painted up it improves the look, at least from a slight distance. It would be ideal if I could get it to a mirror finish on it to get that threatening flash as it catches the light.

_DSF9697


And that is pretty much that. Just the pictures of the finished item to go!

If you would like to see the little intro I wrote for the first G98 build you can see it here.

If you like this project or have an idea of your own, drop us a line on enquiries.vintageairsoft@gmail.com to discuss. ‘Like’ our Facebook page or follow the blog to get regular updates on projects and interesting videos and articles.

Don’t forget you can buy our complete products via Etsy.

Creating an impression: British Infantry, Temperate Climates 1969-1985

Cold War, Creating an impression

First things first, this uniform is an approximation for airsoft purposes, it’s still a working progress (as any impression should be). It is absolutely not the typical British soldier in several respects, which I will detail.

My reason for putting this load out together was to have something which complimented my M16A1, which really didn’t work well with my WWII British Battledress and 37 Pattern Webbing. I’ll refer to the M16 from this point on as ‘Armalite’, as this was how it was largely referred to by the British at this time.

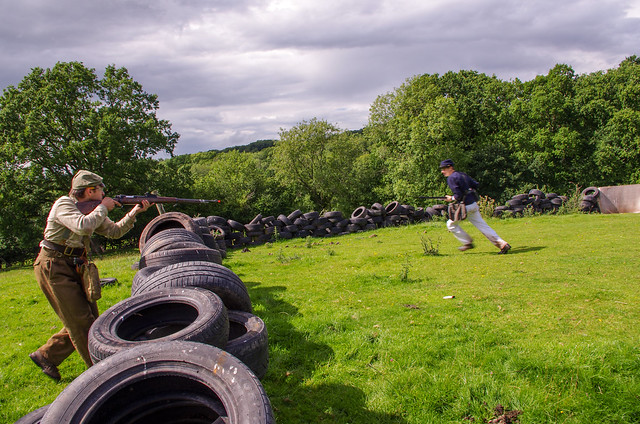
Also, there is no magazine in the rifle. I know this, I was in the safe zone, hence no magazine in the gun!

Research

Contrary to expectation, British forces have used the Armalite rifle since pretty early on. While the Self-Loading Rifle (SLR)* is the iconic British service rifle of the Cold War, there have been roles where the Armalite has been used as an alternative. These fall into two categories:

  1. Where a lighter rifle with lighter ammunition is required
  2. Where select fire is needed to provide automatic fire where a light machine gun would be unsuitable

The majority of the former situation applied only really to Special Forces units, the SAS, SBS and Pathfinders for example. I’ll do these as separate impressions as there are many variations between operations.

14291797_10205456373328271_8751738197624849664_n

The latter situation applied in a couple of places, Northern Ireland and the Falklands. Although not in every case, some units were given an Armalite for every ‘brick’ (which was the term used for a group of around four men). This was typically carried by the section commander as a little extra firepower, one supposes as an upgrade on the Sterling SMG, which by all accounts was not popular.

Brit_solja

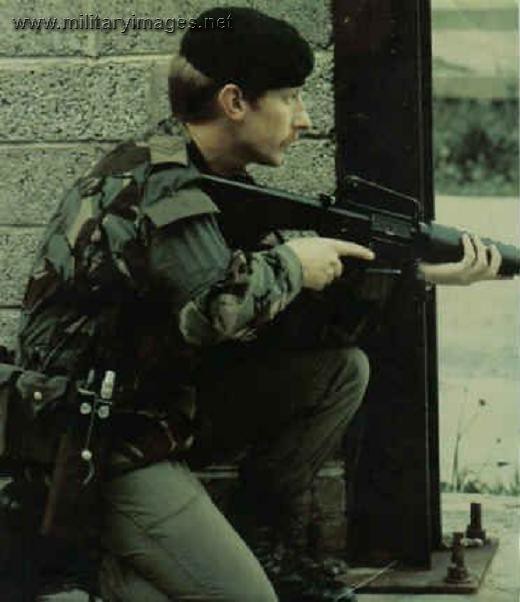
Northern Ireland, as a Corporal, this chap was probably in charge of a brick, hence the Armalite.

The picture above is pretty typical of urban Northern Ireland in the 1970s, at a later date I shall came back and do this load out as well.

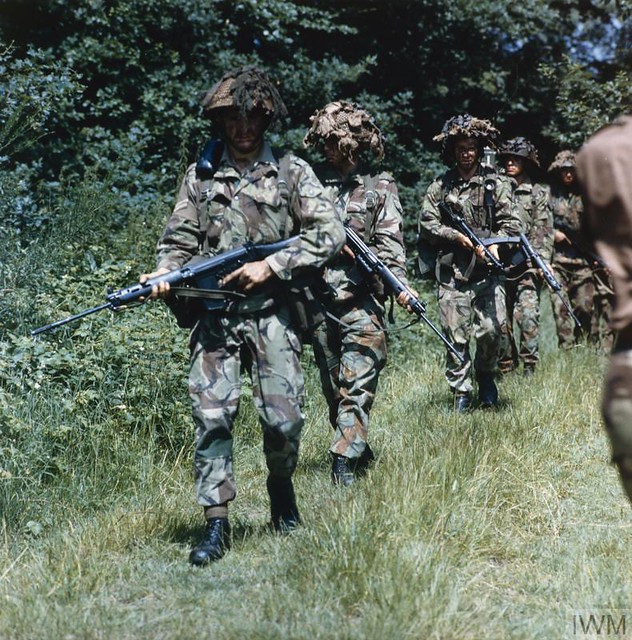
Although Trousers, Lightweight (plain, Olive Drab/OD and DPM 68 pattern smocks were commonly mixed, soldiers also wore matching 68 Ptn Jackets and Trousers, along with mashups including but not limited to: wooly knitted pullovers, trops (tropical issue trousers), flak jackets, private purchase para smocks, not to mention an assortment of water and wind proofs.

PA-1703356-1024x850

Lieut. General Sir Harry Tuzo, GOC Northern Ireland, (centre) with a Military Police escort in Newry.

Headgear varied depending on the conditions. Berets were common headgear, comfortable and fairly warm. When patrolling through streets on peacekeeping operations these were seen as more ‘normal’ and approachable than a steel helmet, and certainly more comfortable to wear for prolonged periods.

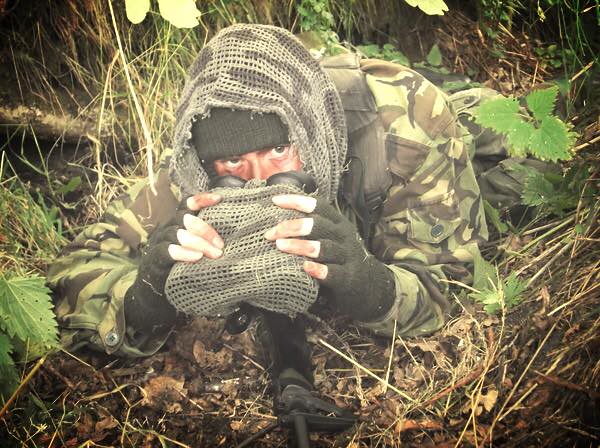
Steel helmets were often worn with nets and heavily scrimmed, as you can see below, however they were worn without scrim during riots,  replaced with a visor.

BRITISH ARMED FORCES IN GERMANY 1945 - 1975

On the feet and ankles, DMS (Direct Moulded Sole) boots were the norm, though private purchase boots were sometimes worn. DMS boots were just to the ankle, so puttees were worn as extra support and theoretically sealing boots against dirt ingress (apparently this is effective against sand). During Second World War, puttees were largely replaced with anklet gaiters, which were much quicker to put on and take off and did not require careful tying. For reasons best know to the higher-ups, after the war the army went back to puttees.


*For those outside the UK, you would better recognise the SLR as the FN-FAL, though locked to semi-automatic only.
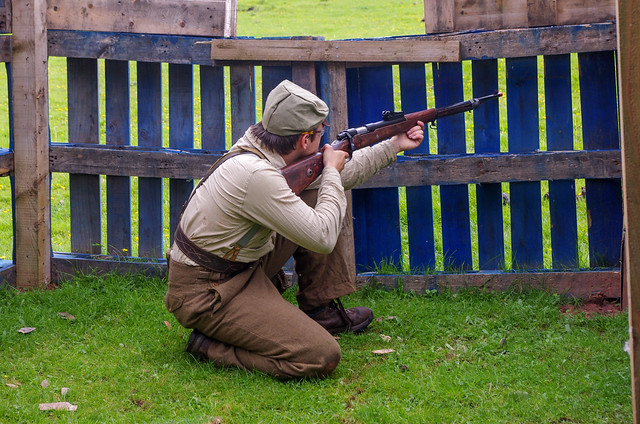
 

The Impression

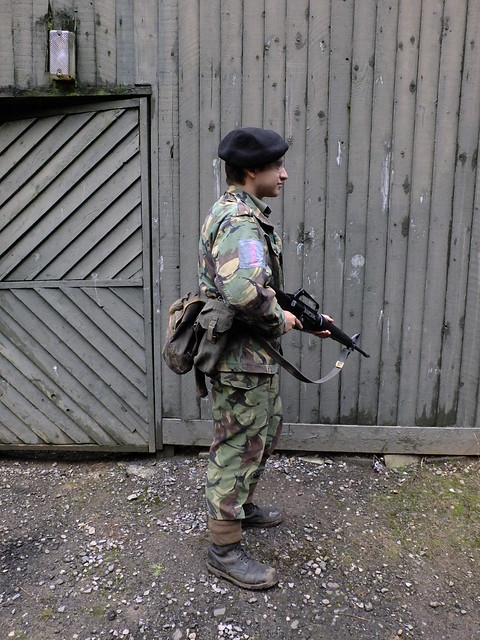
This is an approximation for an infantryman not in a frontline role where combat was imminently expected.

On my head, I have a black beret with General Service Corps badge. This is sufficient for now until I decide what regiment to portray. If I wanted to add camouflage to this, loosely folding a scrim scarf over it to cover the colour and break up the outline is historically valid.

_DSF9596

The General Service shirt should, for other ranks, be worn over the collar of the combat jacket.

_DSF9597

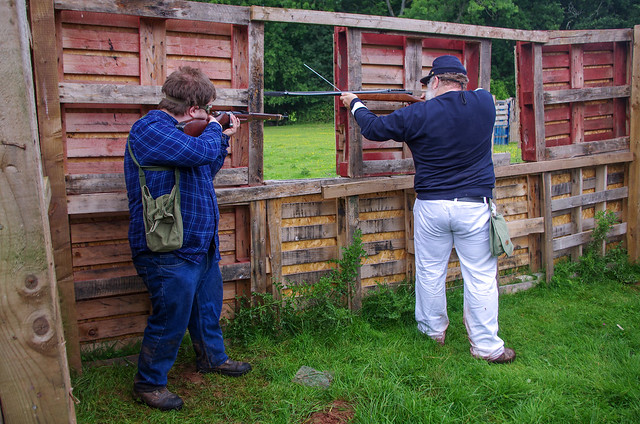
The webbing setup is a light belt kit, as used in Northern Ireland where patrols were not usually longer than a day and threats were within a fairly limited scope. This belt did have a First Field Dressing (FFD) attached with electrical tape for fast access near the buckle. Most of this is 58 pattern, with a few exceptions.

The pouches visible in the photo below are from left to right: Left ammunition pouch (with loops for bayonet), compass pouch, 37 pattern ammunition pouch and holster for .455 Webley (this is of course not standard issue, but when running a sniper rifle in airsoft it is  good manners to carry a sidearm). This will be replaced in time with a Browning Hi-power and suitable 58 pattern holster. On the right is a later-issue S6 gas mask bag. When skirmishing I use this to carry my scrim scarf as a gas attack is unlikely, and it is more comfortable to fall on than an S6.

_DSF9598

The trousers are the 68 pattern type. Until you have worn these, it’s not obvious to someone who is used to more modern equipment why ‘lightweights’ were so named. These are more closely related to the Battledress trousers of the last war than to modern issue, they are very thick and heavy, supported by braces and high-waisted. An FFD pocket is stitched on the front like battledress.

_DSF9599

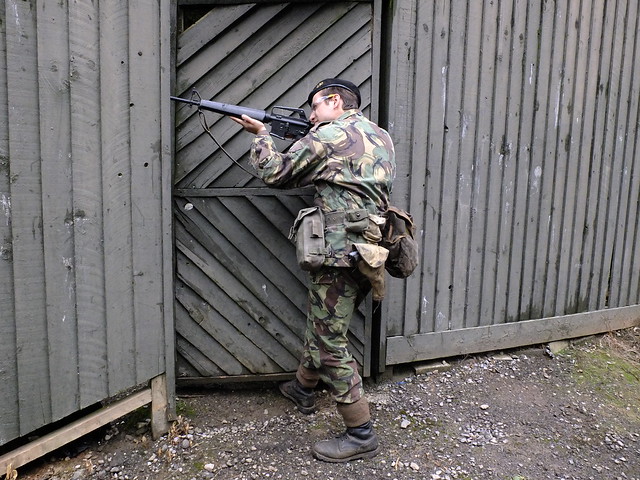
The TRF is a fictitious one, just to complete the look. Under this are corporal stripes that came with the jacket.

In use, this setup is very comfortable in cool, wet conditions. When moving through thick brush and thorns, the jacket and trousers provide very good protection. Even running around quite a lot, I found the clothing breathable and fast drying. I’m yet to try it on a hot day.

_DSF9600

Personally, I am quite fond of the puttees. They provide a little extra support, even with the high-ankle boots. However the trousers do pull out easily, though this may just be that they are on the short side.

With the webbing, it is quick to get magazines out but hard to close in a hurry. I’m producing a set of reproduction M16 pouches to play with to see if they are an improvement.

_DSF9601


Equipment and sources

Most of this equipment is not available as reproduction.

Webbing

In the UK, it is easy to find sets of 58 pattern webbing for next to nothing. Not so long ago people struggled to give it away, but now you can buy sets online easily for £10-25 in worn condition. Silvermans usually has some, and if you want them in brand new they have those too… at a price. They also have some rare trials versions produced in nylon, which was one attempt to make it more suitable for use in NBC warfare.

If you shop around on eBay and collectors groups, you may find it for less.


Berets

Berets used in the 60s-80s are much more like modern berets than those used in WWII. A modern one is pretty close, though if you can find a beret with a slightly large crown it’ll look better. With cap badges, make sure they are for a unit/regiment that existed, there have been many amalgamations since the end of WWII.

Helmet

If you wish to wear a helmet, the MkIV turtle helmet is your best option. You can find them in various conditions from £25-40. A helmet net and scrim is used for anything outside of fighting in built up areas.

Puttees

For puttees you want the short, ankle type rather than the long, knee-length ones. You can find these on eBay for £10-15 a pair. If you are buying used ones, make sure the ribbons you tie them with are intact. They should be about 70cm long ideally.

Boots

DMS boots are easily had, for £15-20 used if you shop around. If you want to buy new, Soldier of Fortune have them for £40.

Clothing

GS shirts are available very cheaply, even the most expensive used ones are £7 or so in the UK. At Varusteleka they had some selling for £3 each a while ago. If you can’t find some for some reason, you can also legitimately use ‘Shirt, man’s, combat’ (known as the Hairy Mary), which is a green wool collared shirt. Itchy as buggery, but warm. Nice when you get used to it.

Some soldiers also replaced their issued shirts with US-made ones.

The 68 Pattern outer layers will be the most difficult to find. Looking on eBay will be your best bet, expect to pay £15-30 for trousers and about the same for a jacket. Absolutely DO NOT FORGET to buy a pair of braces. Grey elastic and leather braces as issued can be found for £5-10. Beware of retailers selling items as 68 Pattern when they are not, later patterns of DPM are darker and with chunkier splotches. You can avoid wasted funds by comparing the offerings to the patterns on Camopedia.

Scrim scarves of this era are two-coloured, a sort of weak green-black or green-brown, almost blue-tinted. They are found on eBay, Web-Tex make a good version.

Weapons

Your options for a typical British Soldier are reasonably broad for this era.

L1A1-10

The SLR

Ares produce an L1A1 SLR replica which I’ve heard many good things about. You can get it with a wood stock for early impressions and it comes with black plastic as standard.

L1A1-11

The Armalite

There are of course countless AEG M16A1s that would be suitable and endlessly modifiable. My M16 is a WE gas blow-back, with modified nozzle to remove the locking lugs (which cause no end of problems) and flat hop.

The Sterling

If you want a sub-machine gun, the Sterling was widely used by those in support and command roles. It was also widely detested. Airsoft versions seem to have a custom gearbox so be prepared to modify standard parts for repairs.
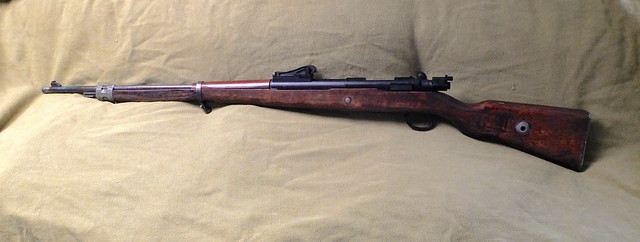
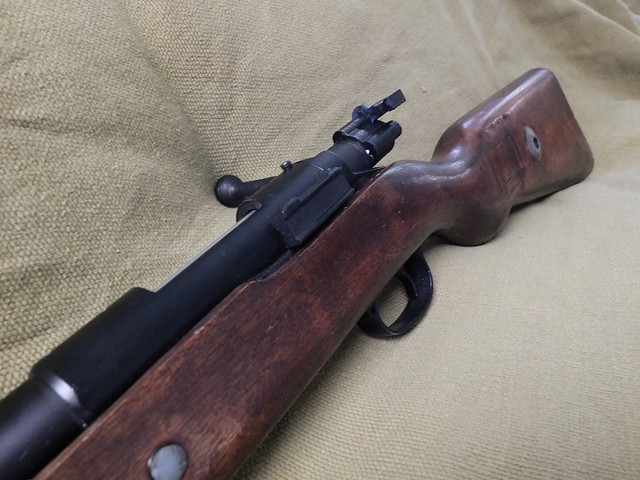
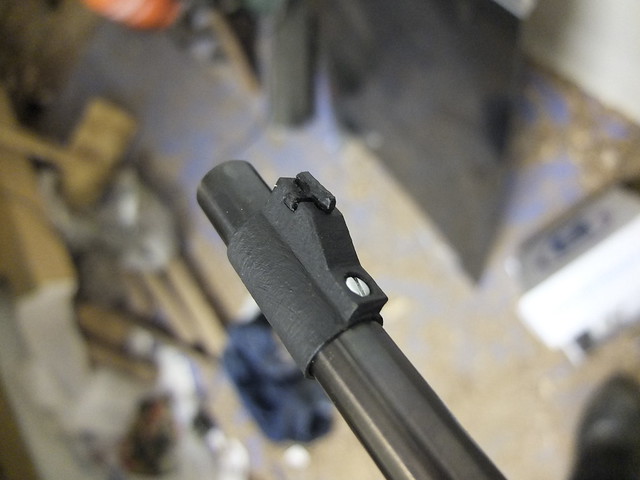
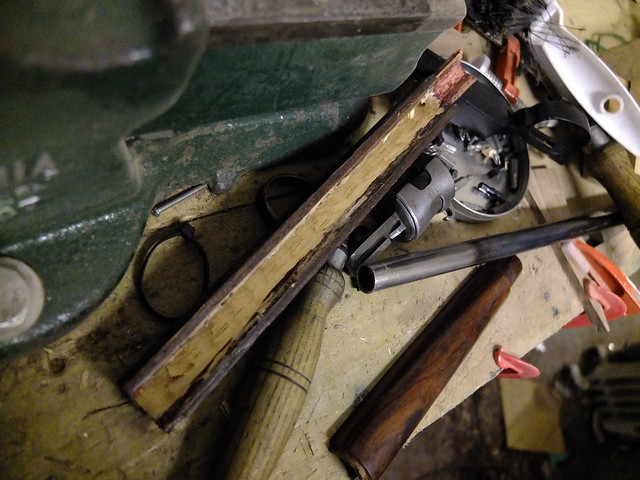
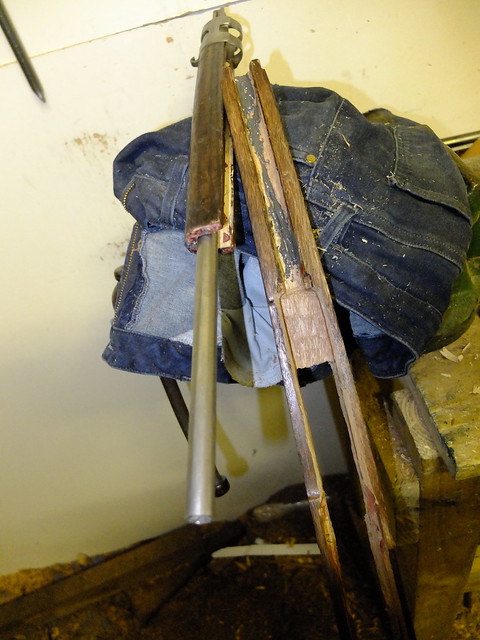
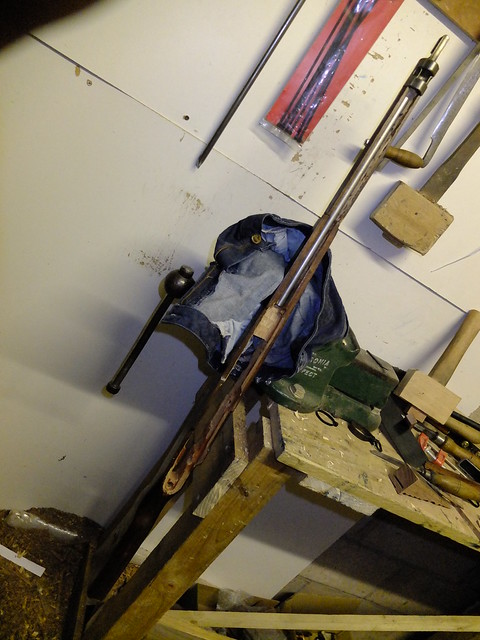
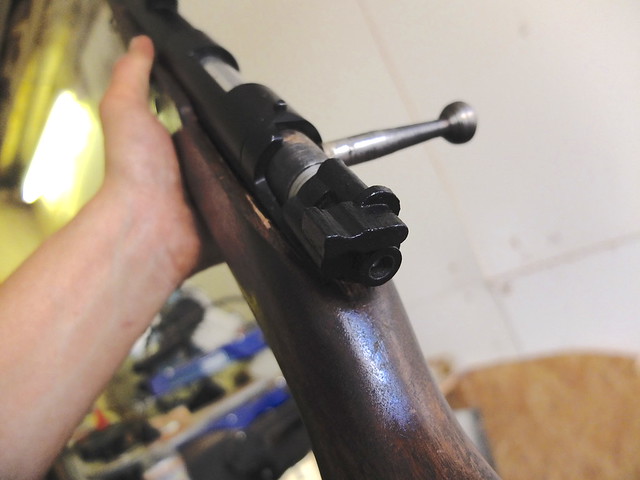
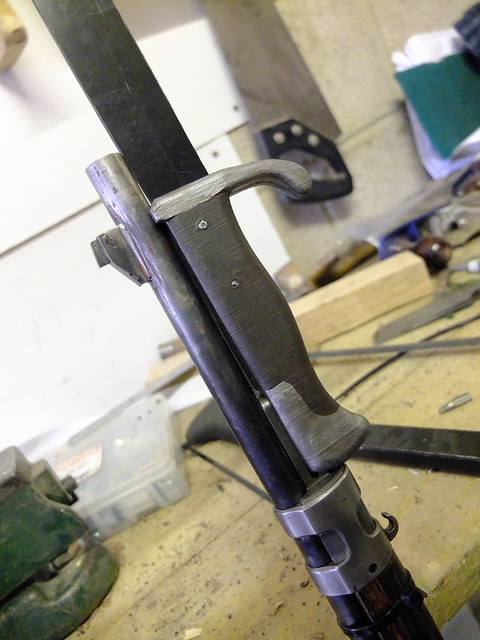
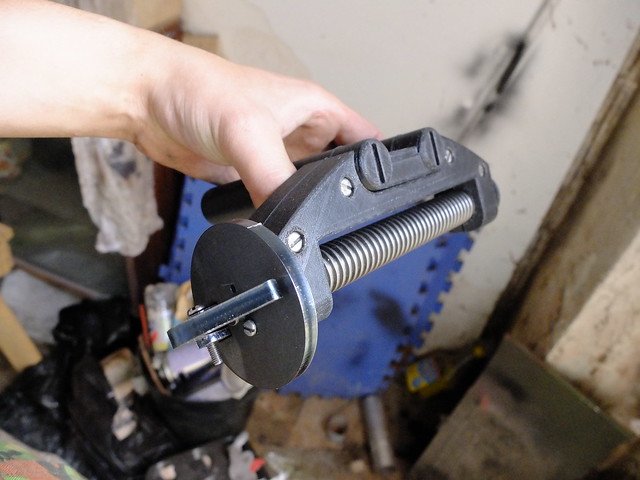
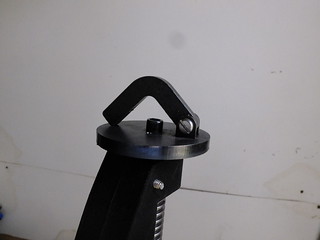
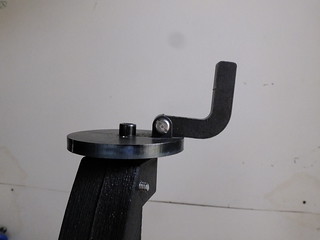
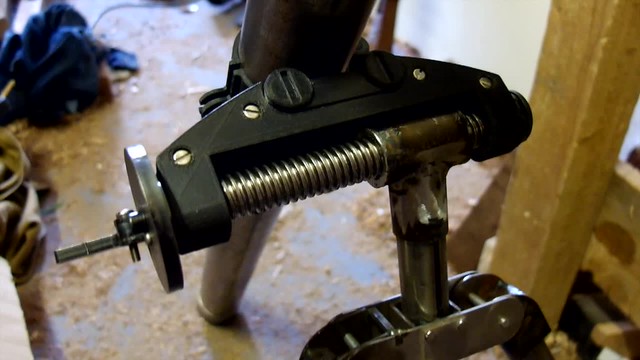
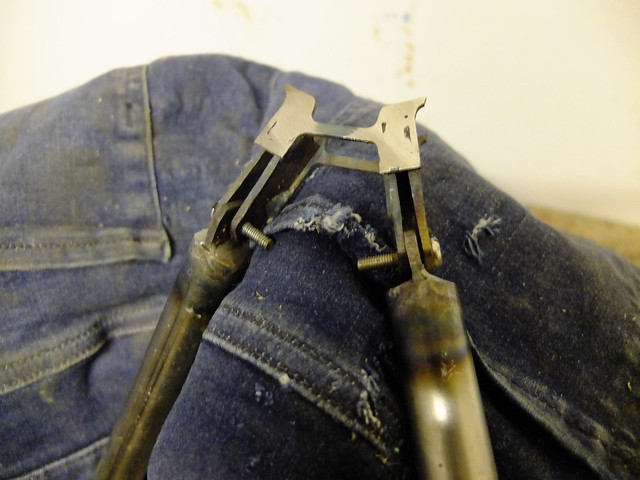
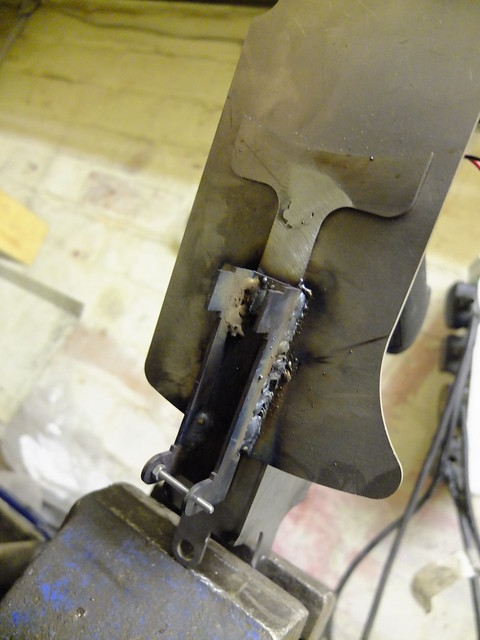
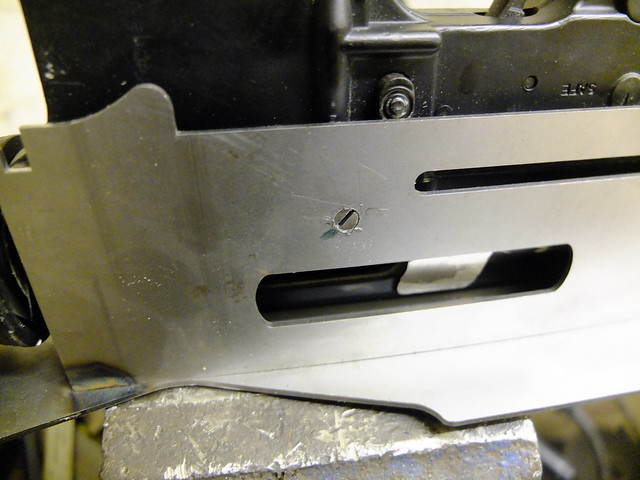
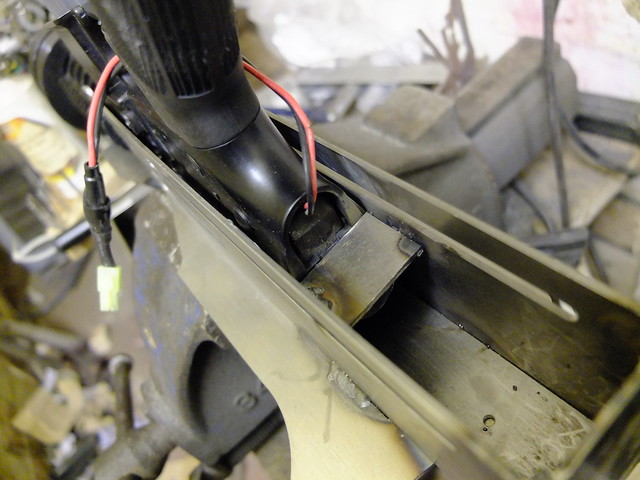
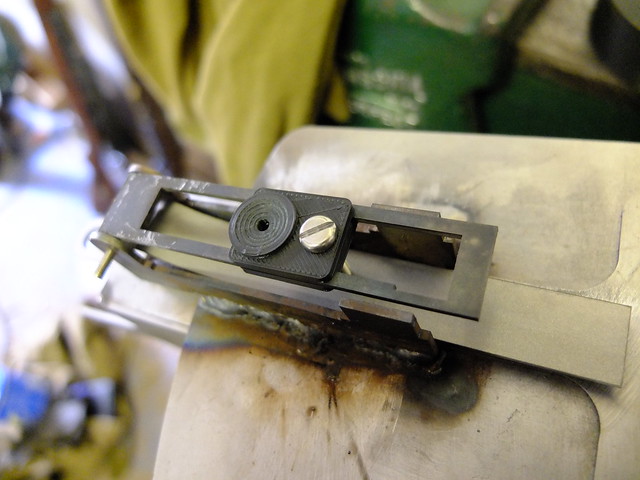
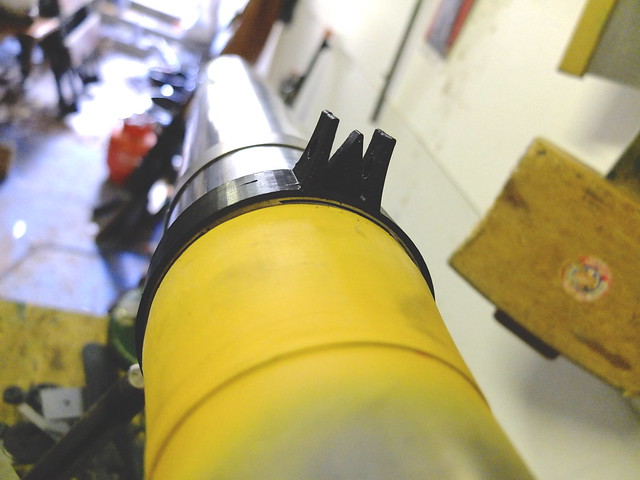
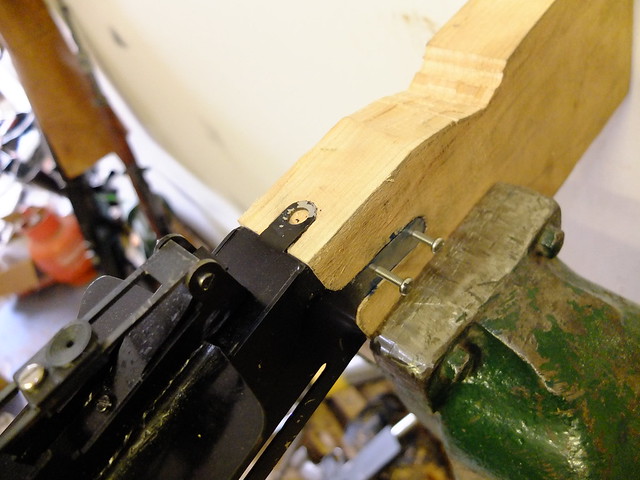
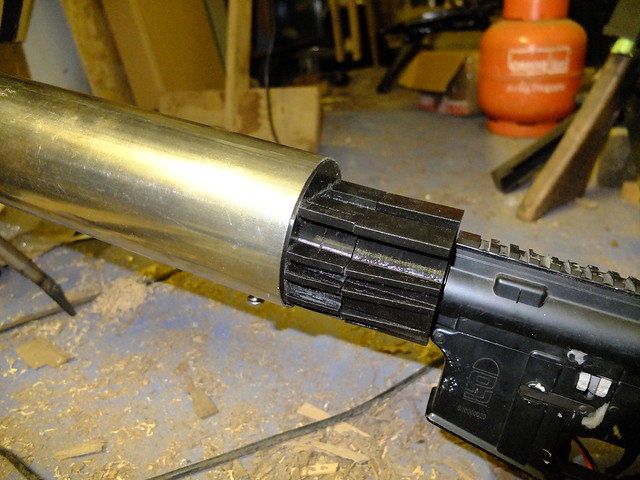
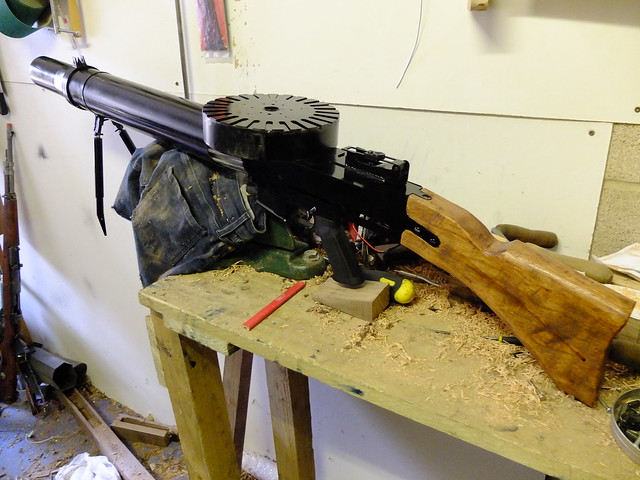
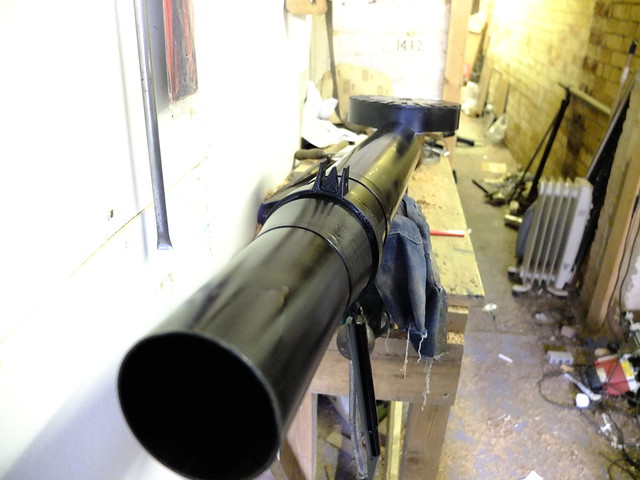
The L42A1


This was the standard sniper rifle of the Army from 1970, taking over from the No.4 (T). It was a re-chambered No.4 to 7.62 with a new magazine and the No. 32 scope modified for the new cartridge. You can see the progress of the L42A1 being made here at VA.

Side-arms

Side-arms were not issued as standard to British forces, they were for support, command and special forces types. However for Airsoft it’s considered good manners to carry a side-arm if you have a rifle running above 350fps. You can carry a Browning Hi-power in a 58 pattern holster or a revolver as I have. Privately purchased pistols were carried, though frowned upon, bans being enforced more or less depending on circumstances.


If you enjoy this content, ‘Like’ our Facebook page or follow the blog to get regular updates on projects and interesting videos and articles. 

Don’t forget you can buy our complete products via Etsy.

M2 60mm Mortar: Build 2

Area effect, Cold War, Custom builds, M2 60mm Mortar, Weapons, WWII

The first job of the next leg is to fit the leg limiter. This has two lugs on the centre column and on the left leg. Between this and the attachment at the head of the tripod it helps the user to keep the elevation adjustment vertical, even on sloped or bumpy ground.

_DSF9611

When deployed, the limiter sits pretty much horizontal. The collar it is attached to on the leg slides up and down, with a stop at the top of its travel to make it level out. In these two pictures you can also see the elevation adjustment handle. This piece of steel bar was bent and is screwed and pinned in position so that it can’t rotate without operating the elevation screw.

_DSF9626

The feet are welded onto sockets that fit over the bottom of the legs.

_DSF9627

And are in turn are spot welded onto the legs. These feet will allow the operator to dig the legs into the ground for stability when firing.

_DSF9631

The windage screw has a metal sheath, which I’ll be adjusting to be a nice, close fit. It will also have to have a tooth of some kind to work against the screw.

_DSF9628

With some rather happy timing, these 3D printed parts then arrived. Printed in ABS for strength, if they prove to not be up to the task I shall try casting them in aluminium. I suspect they’ll do beautifully though, these are very solid shapes.

_DSF9640

Roughly put in place, the mortar is really taking shape now. To finish off these parts, I need to fit a large screw to the barrel clamp and screw together the two halves of the windage unit. The windage screw also needs a little modifying to remain locked into the unit, rather than walking out either side.

_DSF9645

The two halves of the windage unit screwed together. This is a very rigid unit, as it needs to be to function. The screw thread is very stiff and it will need a little modification to work smoothly.

_DSF9652

With a little time on the lathe, I reduced the ends of the screw thread down so that they ran smoothly in their mountings. I also drilled and tapped each end for the stoppers that prevent it from leaving the windage control.

_DSF9653
The windage adjustment dial has a folding handle, like the original.
_DSF9655 _DSF9656

In place, it sits well and works quite smoothly. I think the barrel vise will need a little re-enforcing for use but it’s not bad even as is.
_DSF9770

A quick demo, it’s a bit awkward videoing and operating it at the same time but it’s easy to use.

M2 mortar windage
 

The last bits are the baseplate and baseplate ball, plus a fair bit of finishing. This thing will take some serious painting!

You can see the previous build post here.

If you are interested in the history of the M2, you can check out the introduction article here.

If you like this project or have an idea of your own, drop us a line on enquiries.vintageairsoft@gmail.com to discuss. ‘Like’ our Facebook page or follow the blog to get regular updates on projects and interesting videos and articles.

Don’t forget you can buy many of our complete products via Etsy.

Lewis Gun: Build 2

Custom builds, Inter-War (1918-1939), Lewis Gun, Machine-Guns, Weapons, WWI, WWII

At the end of the last build post, I had made the bipod legs but not the bipod itself. I designed the bipod leg mounts and assembled them. I missed out the hinge on the cut list (something has to be missed out, it’s Sod’s law) so had to hand-make them.

_DSF9392

The distinctive bands at the front of the Lewis cooling jacket are welded into place. The rear one will also house the bipod unit made previously.

_DSF9393

The rear sight block is another piece of laser cut steel, welded into place at the back of the receiver. I’m going to braze together the sight leaf itself together and use a 3D printed aperture to give elevation adjustment. (P.S.: Yes to other welders this weld is obviously pretty dire, I literally ran out of gas on this seam, I’ll clean it up).

_DSF9394

The donor is held in by two screws pinching it from either side…

_DSF9396

And a plate that will be welded into place at the back that holds under the buffer tube mount on the AEG.

_DSF9395

I brazed together the parts for the rear sight leaf. The aperture is adjustable and is based on an ‘upgrade’ Lewis sight that gave a clearer field of view in low light conditions. The flat spring underneath locks it into upright or stowed positions.

_DSF9604

The foresight is also 3D printed, this was by far the simplest way to get the weird shapes around that front post. This is secured by a screw and will be painted up to match the rest.

_DSF9603

The buttstock is quite a simple one, secured by machine screws running through from one securing tang to the other. Once shaped it will be stained and finished with hardwax oil.

_DSF9613

At the front end, the 3D printed cooling fins have arrived. They fit well, once painted up they will serve very nicely for the detailing purpose they are designed for.

_DSF9615

Painting up and assembly under way, I have to touch up a couple of areas previously missed.

_DSF9621

Once painted up, you can appreciate the sinister, gaping mouth of the cooling jacket.

_DSF9625

Finished photos to follow!

If you are interested in the history of the Lewis, you can check out the introduction article here.

If you like this project or have an idea of your own, drop us a line on enquiries.vintageairsoft@gmail.com to discuss. ‘Like’ our Facebook page or follow the blog to get regular updates on projects and interesting videos and articles.

Don’t forget you can buy our complete products via Etsy.

American Civil War Airsoft: A treatise on the test day

Game write-up, Get into airsoft series, Imperial Era


When I talk to people about the idea of 19th Century Airsoft, the overriding response I get is: “Why would I want to stand in a line, in a field, and be shot at?” This is not an unreasonable question. This would be a very tedious day of airsoft.

It is also completely unlike the day of play we had. This game day was one of the most dynamic and varied I’ve ever had. I won’t give an in-depth blow-by-blow account of the day, but I hope to give some idea of why this style of play is worthwhile and highly enjoyable.

When it comes to historical airsoft, one major concern is that if you turn up to an event you’ll not have the right kit and be looked down on. The group shot we took at the start of the day will give you an idea of the level we’re aiming to start off with. We had no-one with 100%, truly authentic historical repro kit. What we did have was a bunch of guys who did the best they could with the kit they had.ACW Photo Day-6028

On the Union side, we had a mix of jeans and decorator’s trousers with blue shirts and tops.

On the Confederate side, a couple of the guys wore WWI/II German trousers, one a pair of green civvies and I wore a pair of British 49 pattern BDs. For the top I wore a cotton khaki shirt, the other guys wore either old grey uniform jackets/shirts and even a red cheque. We used a mix of satchels/belts and leather pouches to carry ammunition. The only period-specific equipment we had were the Kepis, which are pretty inexpensive to buy. I made my own Kepi from canvas, I’ll be making another from felt and may even offer a sew-your-own Kepi kit.

Airsoft gun wise, most of us used bolt-action rifles. Several guys used the stock, basic, unadulterated VSR knockoffs that sell for about £50-60 on the continent. They got kills with them too, using iron sights at the ranges we were playing at (typically 20-80 yards) they are perfectly usable. There are also rules for AEGs and gas guns, but if you are able to buy or borrow a bolt-action I would recommend it as it is a much nicer way to play.

ACW Photo Day-6111

Enough on kit for now. Let’s talk about game play. We headed off to the first game start point. It was a simple attack-defend points game, the Union had two spawns, Confederates had one.

ACW Photo Day-6040

The Confederate spawn was slightly uphill. The Union forces pushed through the trees, while we Confederates went further uphill and took the ridge. We put fire into their flank, taking out a couple of guys. At this point I was killed, but being in the middle of the battle area I could watch the events quite well. The Union took our spawn, pushing round our left. However their spawns had been left entirely unguarded and a couple our guys came round their rear, took the spawns and shot the Union out from behind.

ACW Photo Day-6064

We then played a couple of games running through the village. On the face of it, the defenders should have the advantage when they have cover and the attackers are covering open ground to assault them. In reality, due to the controlled rates of fire, the attackers can fire and move from cover to cover with a minimal chance of being hit. In the meantime the defenders can only hold a certain position. For some time, I was in the building in the picture below duelling the guys in the next picture.

ACW Photo Day-6163

These guys (Ryan, left and Kim, right) kept me pinned for several minutes. Another of my team was going in on their left while two others were taking a spawn behind them. In the end, their undoing was Ryan advancing on my position, taking a couple of shots from close range in cover before being forced back and shot in the back as he retreated. At this point Kim was left on his own, with 3-4 guys coming at him from all sides all firing at his building and he attempted a retreat to the next building, which had more open ground around it so would have been harder to attack. Unfortunately for him, 2/3rds of the way across I let a BB fly and it curved beautifully into his hand.

ACW Photo Day-6164

That’s the beauty of this style of gameplay. If you want to hold a position, you need to stick together and work together. There’s no chance a single person can keep a whole team pinned with a flurry of automatic fire in about the right direction every now and then. Fire and manoeuvre is needed and actually has a chance of working without the unlimited ammunition and rates of fire in a normal skirmish.

The next game was a sort of collapsing defence game. The Confederate objective was to push through and clear a corridor of Union Spawn points. Once a spawn was taken, it could not be retaken, but the Union were able to advance as far forward as they liked.

ACW Photo Day-6177

The result of this was that although the Confederacy took each spawn, we were brutally flanked and taken from behind a couple of spawn points in.

ACW Photo Day-6180

This series of pictures really drives home what’s special about this gameplay. It is not staged. I had charged, noisily round the left of the fort to draw fire and attention away from my Confederate buddies.

ACW Photo Day-6186

I reached the fort and found it still quite occupied. Two of the nearest Union boys shot at me and missed.

ACW Photo Day-6187

I shot at them and missed. In normal airsoft play at this point one player or the other would sprint straight at the wall and hose over it on full auto.

ACW Photo Day-6190

Instead, there was a brief consideration of whether or not to reload, before deciding that at this range, let’s just go in with the steel. I only just managed to land a stab on Aidan, at which point I ducked back down to reload.

ACW Photo Day-6192

At this stage, my distraction had served its purpose and my team had pushed up and shot one of the others. We didn’t realise there was a third hidden away in the corner, who had to be dealt with as we climbed in.

ACW Photo Day-6193

Once in the fort, it was a case of attempting to repeat the flanking action on the next group of buildings. This proved much harder as they had several angles to fire from and each flank covered. We had to take them in a certain order, so couldn’t just come in round the back.

ACW Photo Day-6194

Now, with regards to marching in line and standing in a field; have I persuaded anyone yet that there’s much more to this type of play than just being a target? Because that isn’t exciting for anyone.

Now let’s talk about line fighting. ‘Cause this is exciting, even if it doesn’t sound like it would be.

ACW Photo Day-6118

For normal airsoft, advancing across open ground and firing in lines would be useless and painful to boot. With two opposing lines of even numbers, the chances of one side wiping the other out in shooting at range is unlikely. You have to get close to increase the chance of hits, even then there’s no guarantee and when BBs are coming in at near 400fps at close range the pressure is on to reload. Reloading under that sort of pressure is surprisingly hard!

ACW Photo Day-6114

If the attacking force do so with determination and vigour, using a little work on the flanks, they can get to grips ‘properly’. Melee is not just a nice addition to this type of fighting, it is a necessity.

ACW Photo Day-6145

The artillery is a nice touch too, advancing into it is unnerving. The only time the Confederates had to take it on was over relatively covered ground, but with the shells coming in around you and not being able to tell where they were coming from or landing was distracting. TAGs make a very, very loud bang by airsoft paper pyro standards. I’m told that advancing toward it over open ground is also unpleasant.

ACW Photo Day-6104

There’s a great deal of satisfaction in this type of game. Because of the higher-powered rifles there is more of an adrenaline rush when playing close up, the pressure to reload or charge is intense. The lack of automatic fire means you have to pick your shots, pick your targets. It means you can move from cover to cover without being pasted.

ACW Photo Day-6184

If you think this type of game could be your bag, I would wholeheartedly encourage you to give it a go.


You can join the British 19th Century Airsoft Association Facebook group for reports and updates on the battles and events being held and to meet the community (top blokes all). You can get first word on events on the organisation page here.


Commentary on the American Civil War test day at C3 Tactical in Monmouthshire, August 2017. Photo credits to Luna Chapman.