
At the end of the last post, I had the receiver tube cut, the stock made and a gearbox partially modified.


Since then, I have realised that the receiver tube isn’t quite right, the gearbox modification is a pain in the neck to get working and as a result the stock is too shallow to take the gearbox in its native configuration. This has put the project back a bit.
To save time and get a working gun I am scrapping the modified gearbox. I will keep the incorrect receiver tube for now and treat it as a prototype so that all the parts fit and the newer correct one leaves the workshop clean and not abused.
On to progress!
The new magwell is very slick and the mechanism is really solid in comparison to my first attempt. For those who don’t recognise them, the magazines are identical to those used for the Sten and MP40.
The next step was to fix this to the receiver. At this point though I say so myself I am quite good at rolling and bending steel accurately! I rolled a collar in steel around a spare piece of 38.1mm tube (the same as the receiver tube).

This could then be tacked and welded in place.

Some work with a hammer later, I managed to get it off the tube former and polished it inside with the drill drum sanders I have for jobs such as these. I kept going until it fitted just on the end of the receiver tube with a little friction.

In order to get it all the way down the required location, I also had to take a sheet of wet and dry paper and sanded the receiver tube down. The main issue was the little rises around the cooling holes (you can see the little white rings in the photo below).

With a little work, it slipped on comfortably.
As you can see, the holes are not perfect, but they will also be invisible once assembled. I wanted to give a little extra space to ease aligning them.
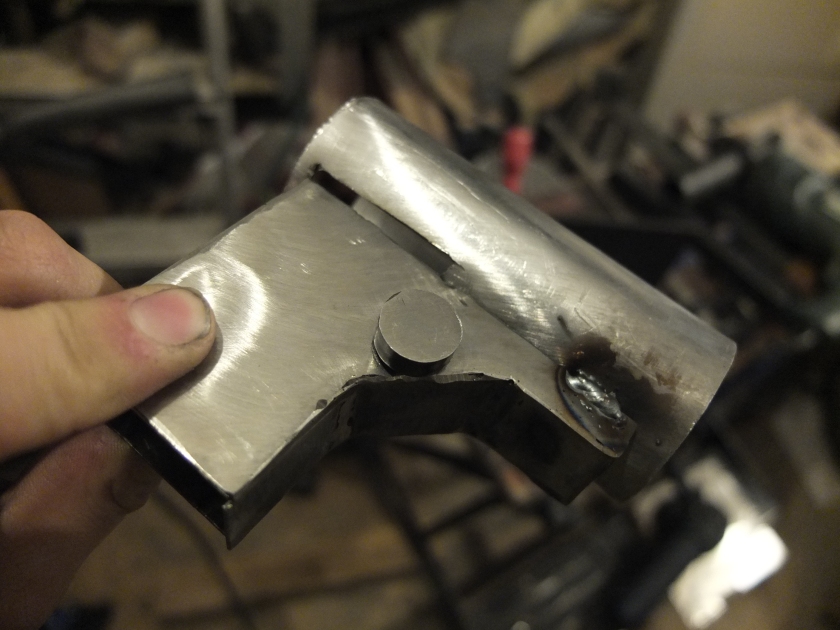
I could then clamp the magwell to the tube and tack it in place with the MIG welder to test it before going to town and welding it permanently in place.

I’ll grant, not that pretty yet. With jobs like this I like to leave plenty extra weld on top so that I get minimal porosity on the part that will be visible when I grind it smooth into shape.
And ground and polished roughly into shape:


So, progress is slowly being made. At least I have been able to discount a few options in this deign and I have a nice spare stock! Hopefully this build should speed up a little now as I have done a lot of the design work for the improved version.
