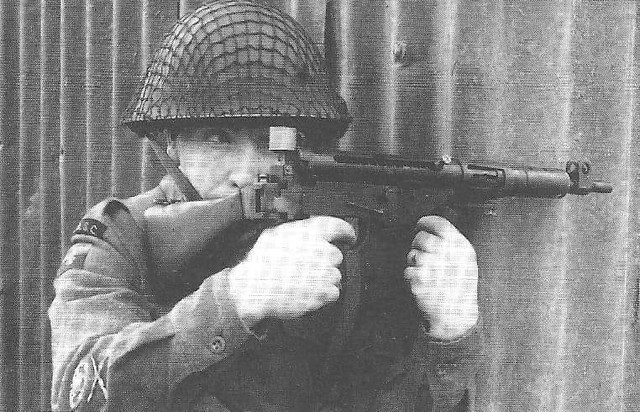
On a Facebook group a few months ago, someone shared a picture of something I had never seen before. As time has gone by, it has become rare for this to happen to me in the world of firearms.
Yes, that is a Sten Mk5. Yes he is shooting it around a corner using a folding stock.
Although it’s not really practical for airsoft, where shooting without looking (blind fire) is a banned practice, it was such a distinctive and interesting idea it had to happen. This is what a Cornershot carbine looks like in the late 1940s.
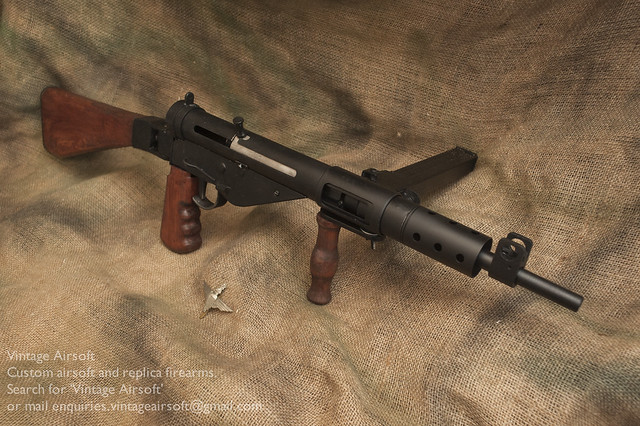
At first glance, it looks like a standard Sten Mk5. I turned down the barrel to make it slimmer and more shaped like the original.
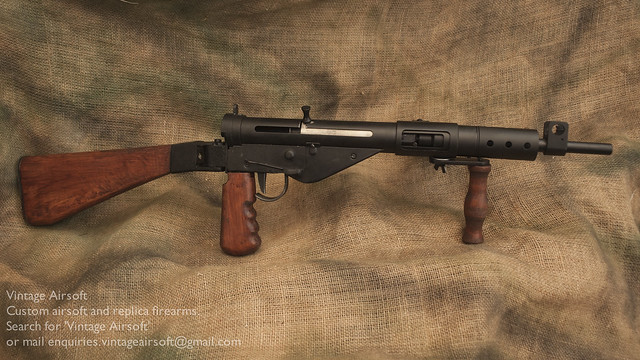
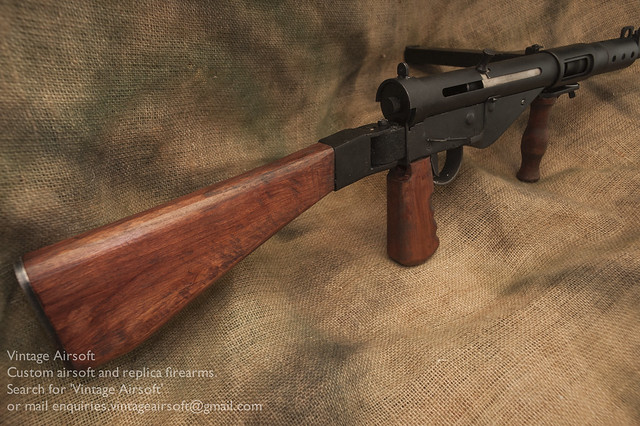
From the side, you can see the slightly longer joint for the buttstock.
The wood pattern is pretty much identical.
The swivel function is controlled with the silver button. This is depressed, the stock is swivelled 90º one way or another and the spring-loaded button locks into place. At the same time, the foregrip is loosened with the thumbscrew, moved into place and tightened down. This is one area where I have deviated from the original which used a hex nut: carrying a spanner around in the field wouldn’t be practical.
You will notice that there is no prism sight on this. I looked into getting a pentaprism as used by the original, but the cost would have nigh-on tripled the price of the build.
To round off: a couple of views of it folded different ways.
So far as I can tell these were never properly trialled beyond the one prototype. I imagine that managing recoil and maintaining a sight picture would have been tricky, the prism would have been expensive and limited the soldier’s field of view.
If any reader has any information on these carbines, better quality original photos or recognises the magazine the snippets above have been taken from I would be very much obliged if you would get in touch on the email below.
If you are interested in this build you can see the rest of the project here. If you have an idea of your own, drop us a line on enquiries.vintageairsoft@gmail.com to discuss. ‘Like’ our Facebook page or follow the blog to get regular updates on projects and interesting videos and articles.
Don’t forget you can buy VA products on the website where this will be available.
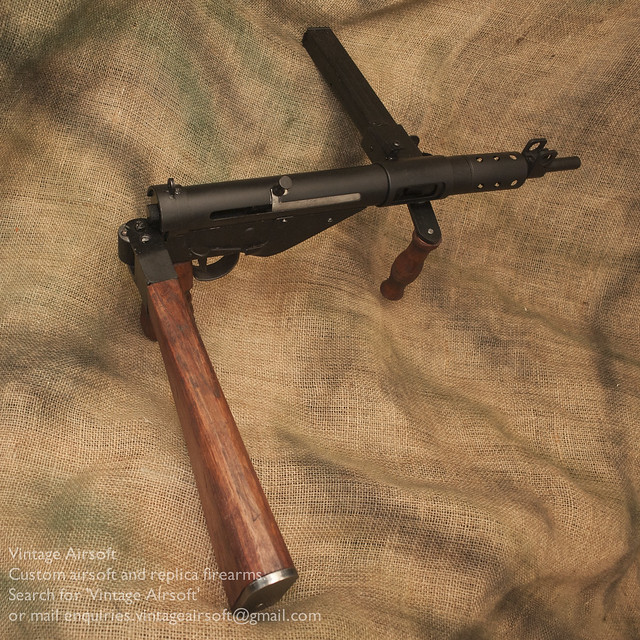
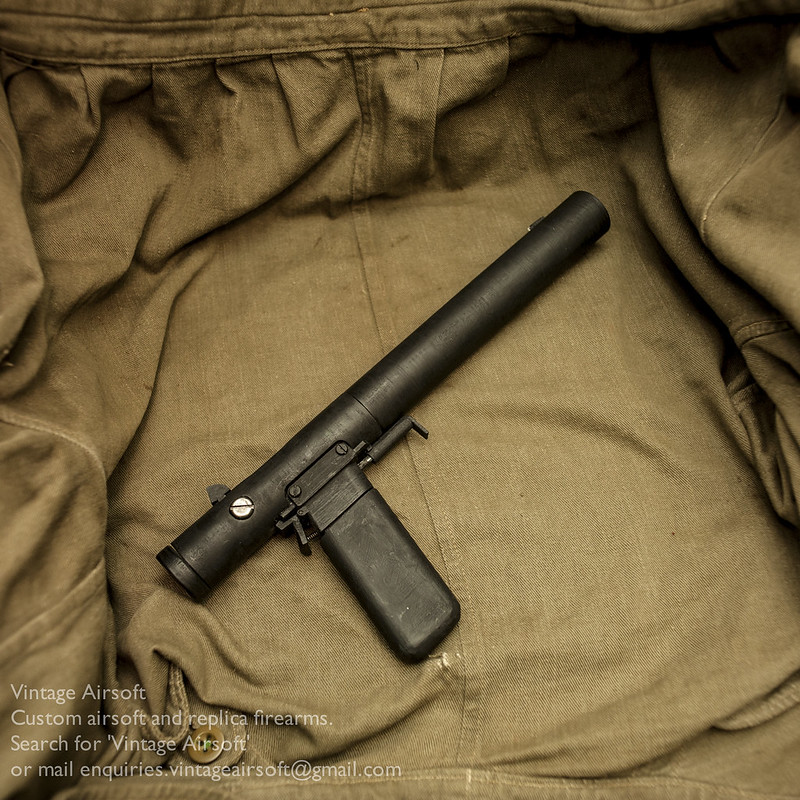
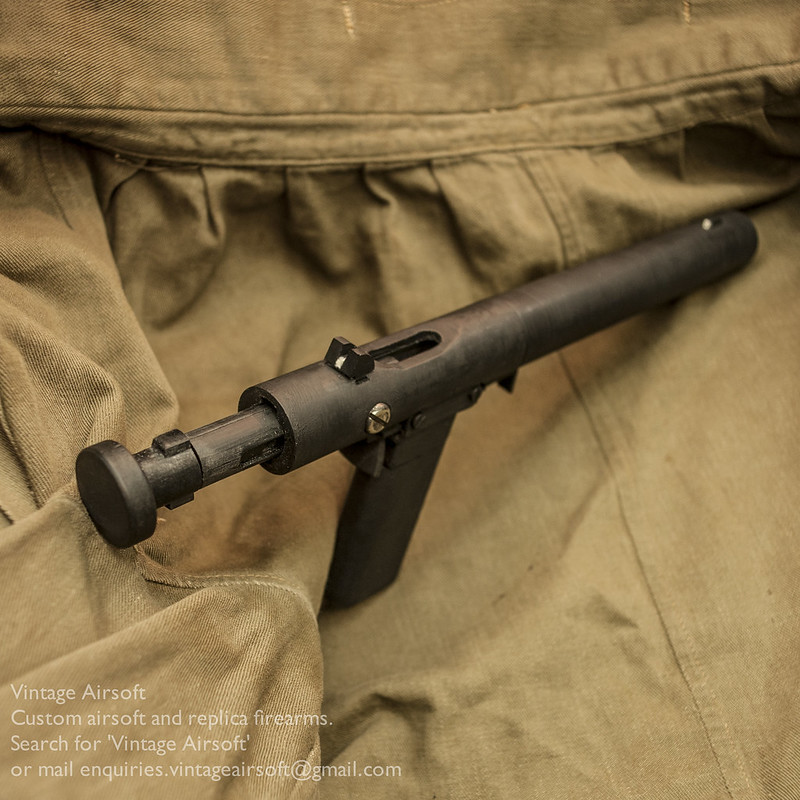
This is a little side-project I have been working on due to several requests. This replica Welrod is almost entirely 3D printed. I’ll be offering it in kit and complete form.
The trigger and grip safety are both sprung.
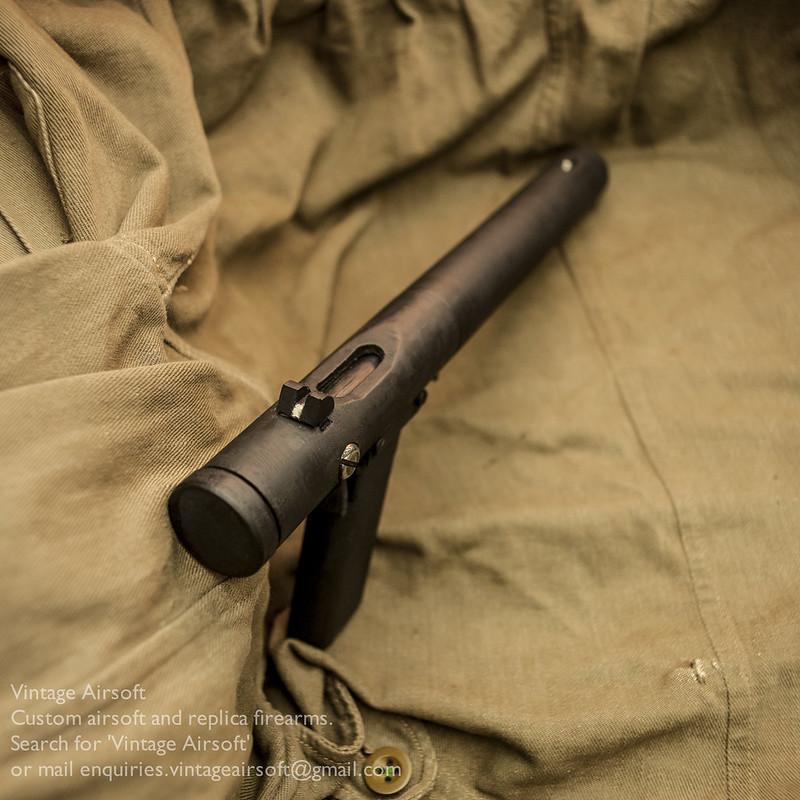
Both rear and foresight have blobs of phosphorescent paint to simulate the glowing radio-luminescent sights
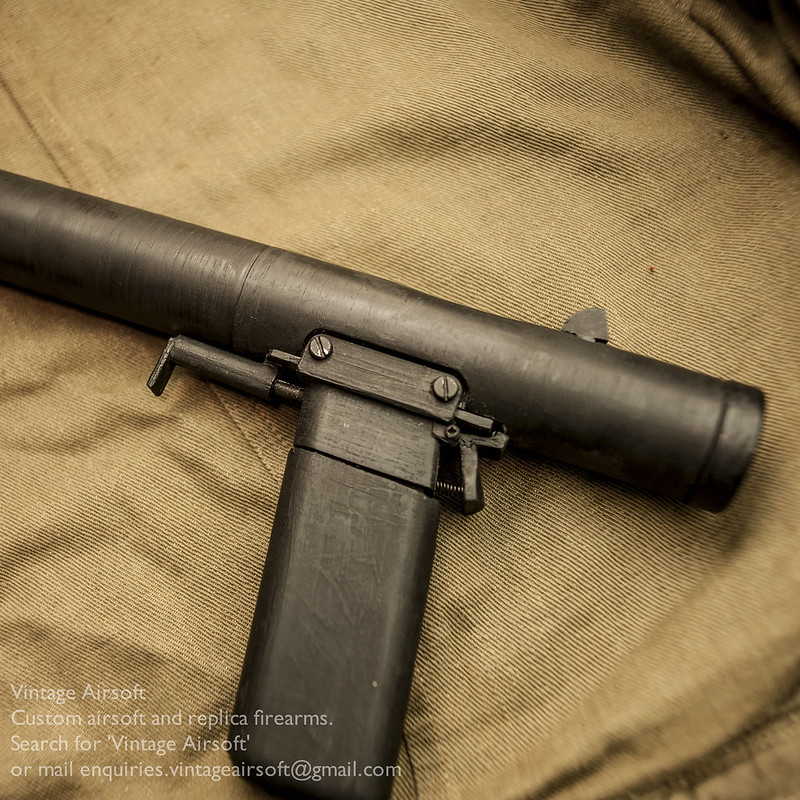
The bolt opens and locks like the original.
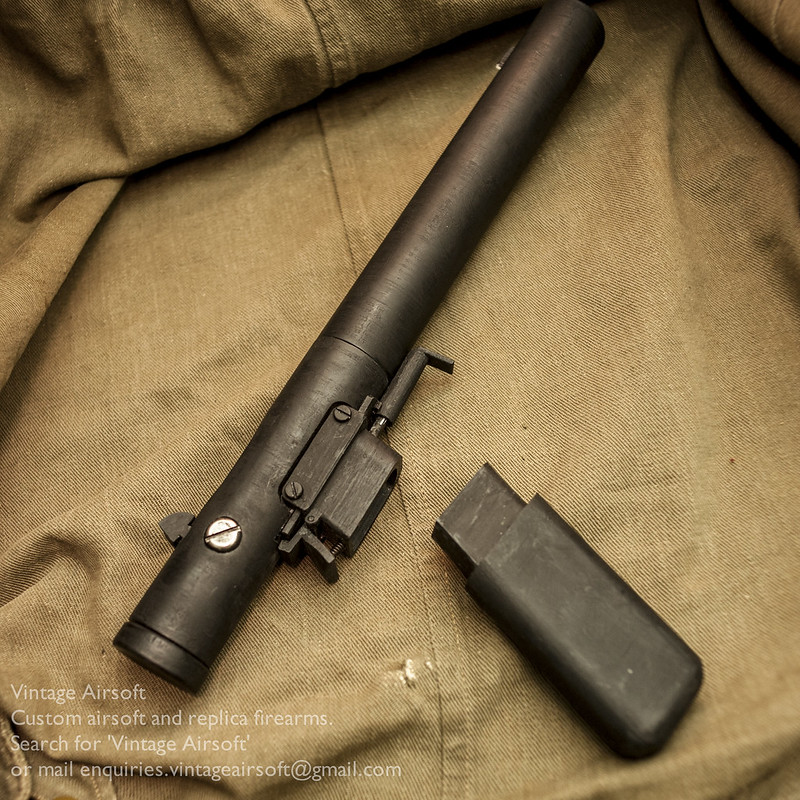
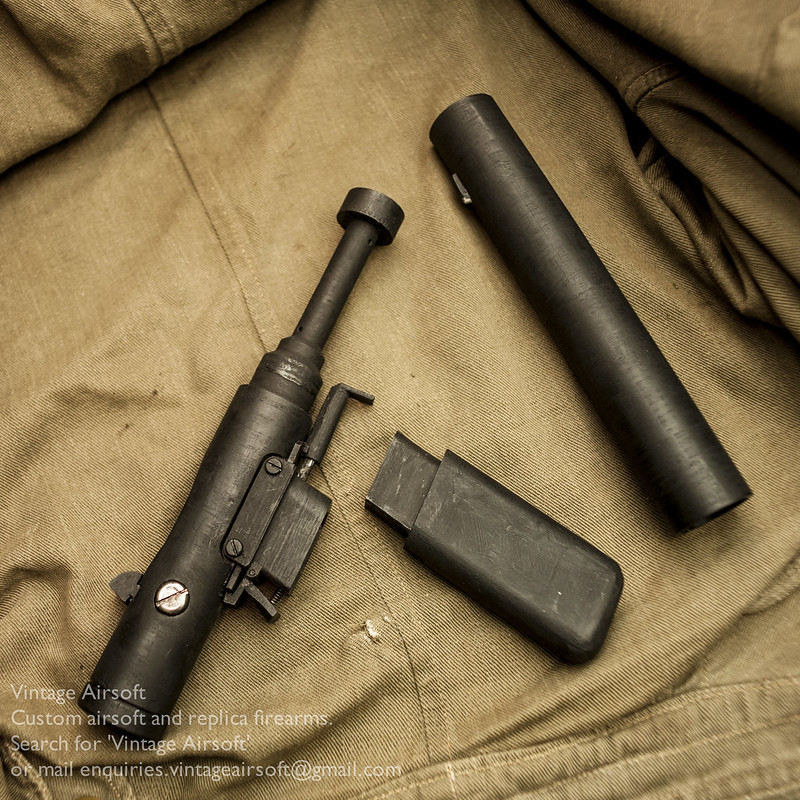
It has a detachable magazine.
And the shroud can be removed to access the suppressor and barrel.
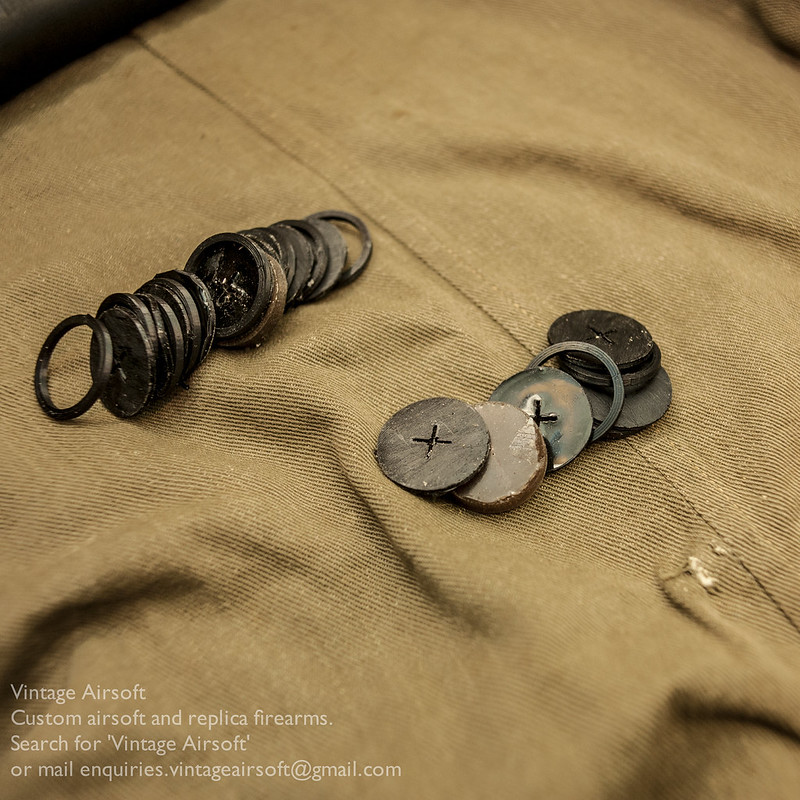
The suppressor internals, showing the spacers, rubber wipes and washers.
And the rebated muzzle, which allowed the gasses to expand a bit for a slightly tidier kill when used pushed up against the body of an unsuspecting target.
If you are interested in this project or have an idea of your own, drop us a line on enquiries.vintageairsoft@gmail.com to discuss. ‘Like’ our Facebook page or follow the blog to get regular updates on projects and interesting videos and articles.
Don’t forget you can buy our smaller items via Etsy. Our larger items can be found here.
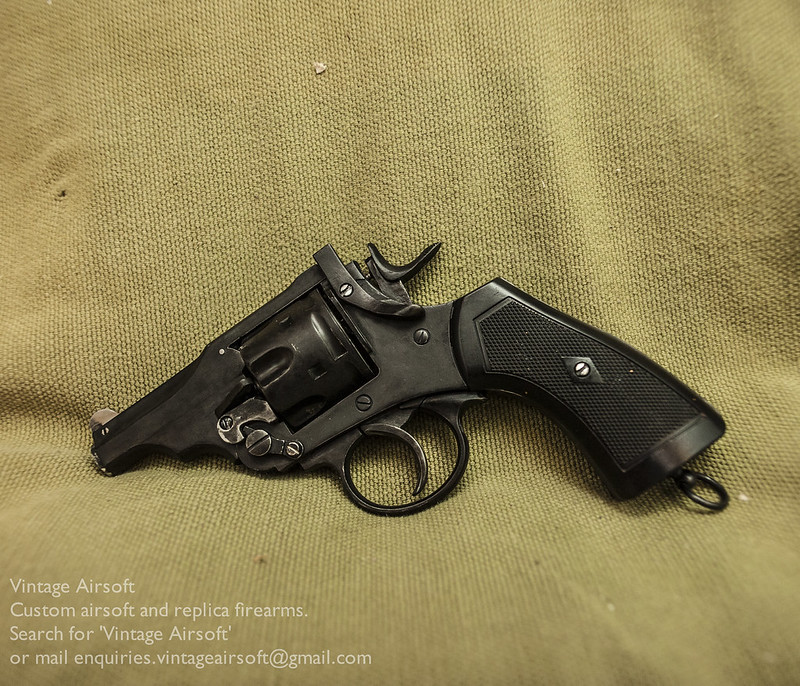
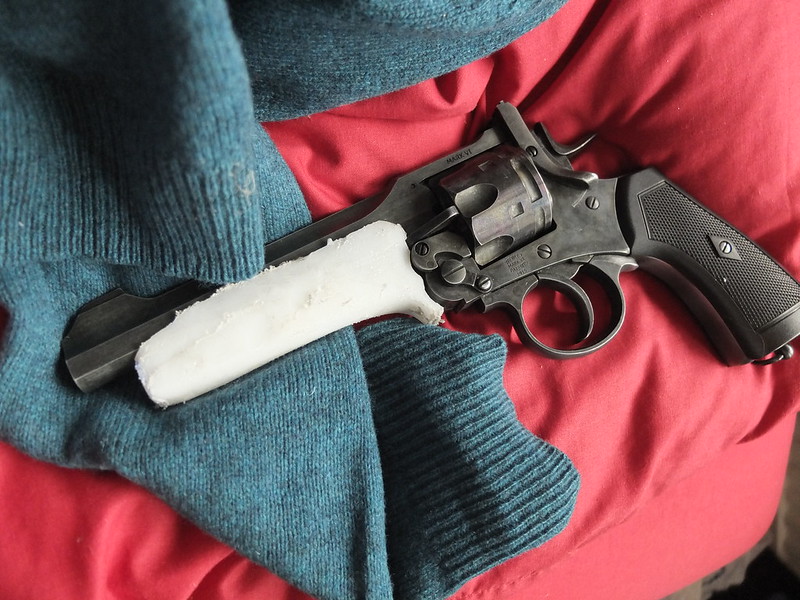
As this build was a pretty quick one I didn’t take many pictures. It all started with a spare Webley revolver that wasn’t perfect (being the Well model) but I wanted to do something interesting with. So, I marked a line on the barrel and…
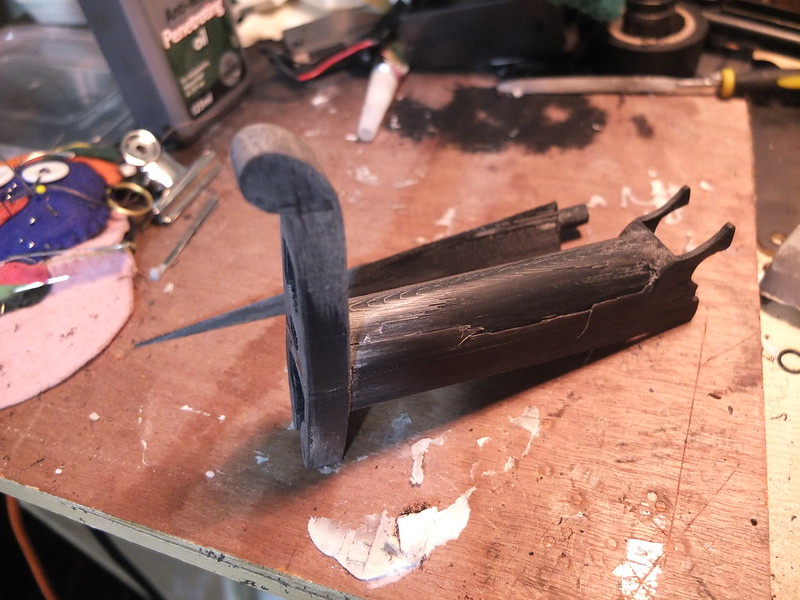
Chopped it off. Now, there was a bit more to the job than that.
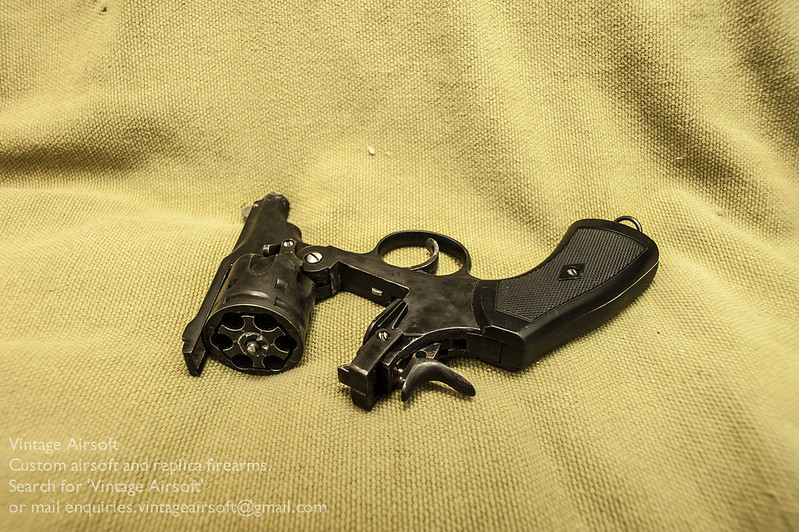
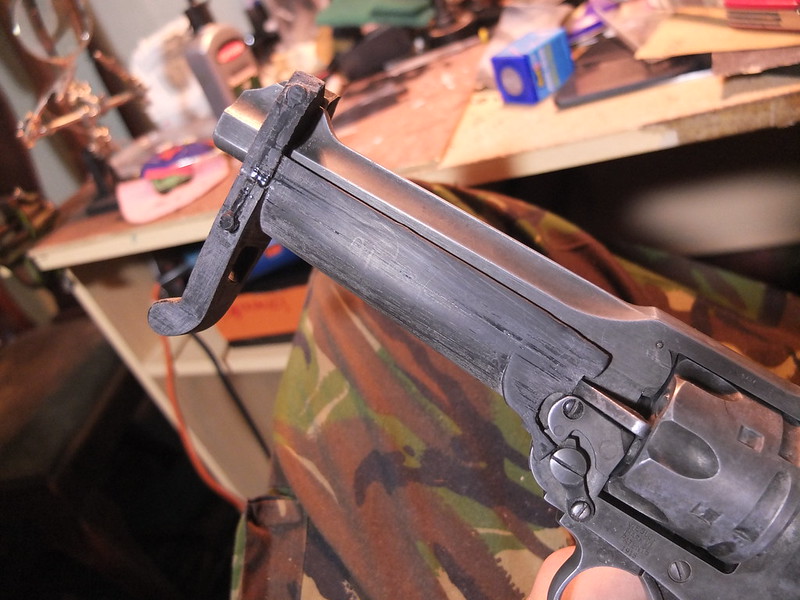
I had to make a new foresight, held in place by two screws. There is a new muzzle, which supports the inner barrel and keeps the barrel return spring in place. The inner barrel had to be shortened and recrowned on the lathe, as well as having the barrel return spring guide cut into it.
The eagle eyed will also spot that the rear sight/locking bridge has been shortened to make it easier to draw from a concealed holster. Due to the paint finish being damaged in the process of chopping the barrel off, I decided to take it all off. It looks good in silver.
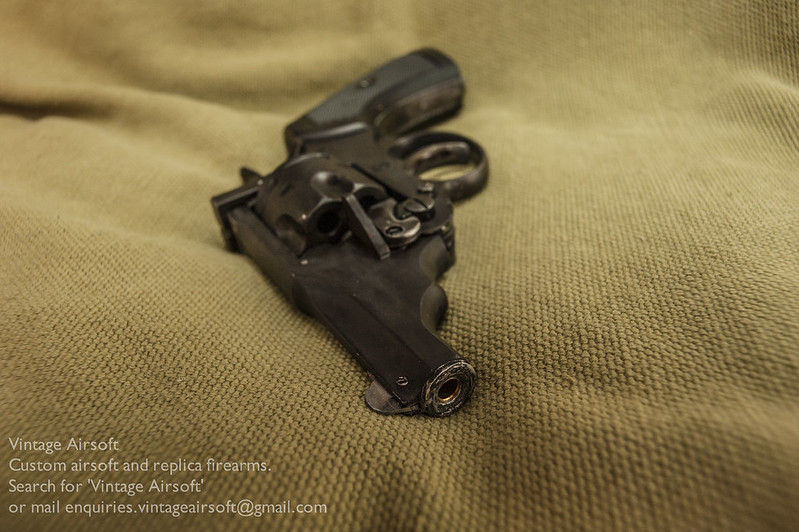
But it looks better blacked. This is my first attempt with Birchwood Casey’s Aluminium black. It’s pretty good, better than I expected for sure. It was improved massively by a thin coat of silicone oil rubbed into the surface with a dry cloth, bringing it up to a dull shine rather than just a drab finish.
As you can see, there are a few spots around the muzzle where it hasn’t reacted properly for some reason, but I can touch it up later if I feel the need. To be honest I think it helps give it a bit of a worn look, a snubnose shouldn’t look pristine, they’re a working gun.
I left the foresight silver. Being steel, I’d need to apply a different finish (oil finishing if I were inclined to do so). However the big silver wedge in my sight picture gives me a nice aiming point even on such a small gun.
Just some last pics from a couple more angles…
I’m very much looking forward to using this. I may need a 1920s Gangster or Communist load out for it to look the part. Or just tuck it into my BD jacket for if I get captured.
If you have enjoyed this project or have an idea of your own, drop us a line on enquiries.vintageairsoft@gmail.com to discuss. ‘Like’ our Facebook page or follow the blog to get regular updates on projects and interesting videos and articles.
To see more Webley related builds such as the carbine conversion, shotgun shells and Pritchard Bayonet take a look here.
Don’t forget you can buy our smaller items via Etsy. Our larger items can be found here.
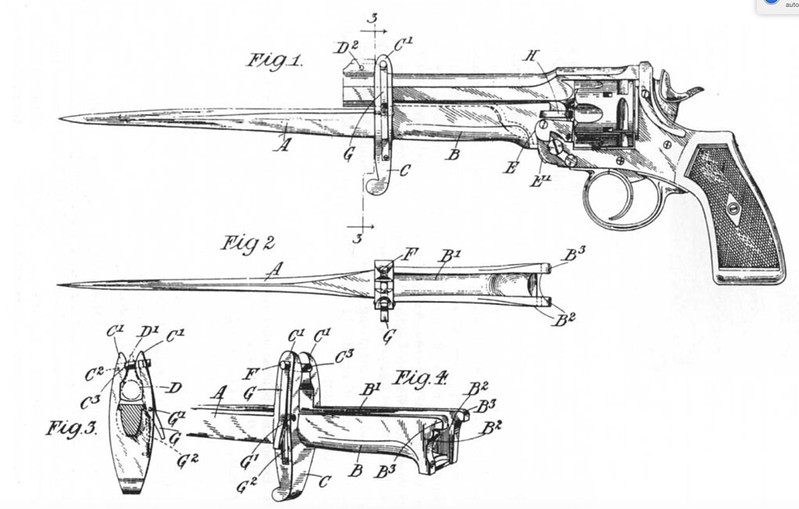
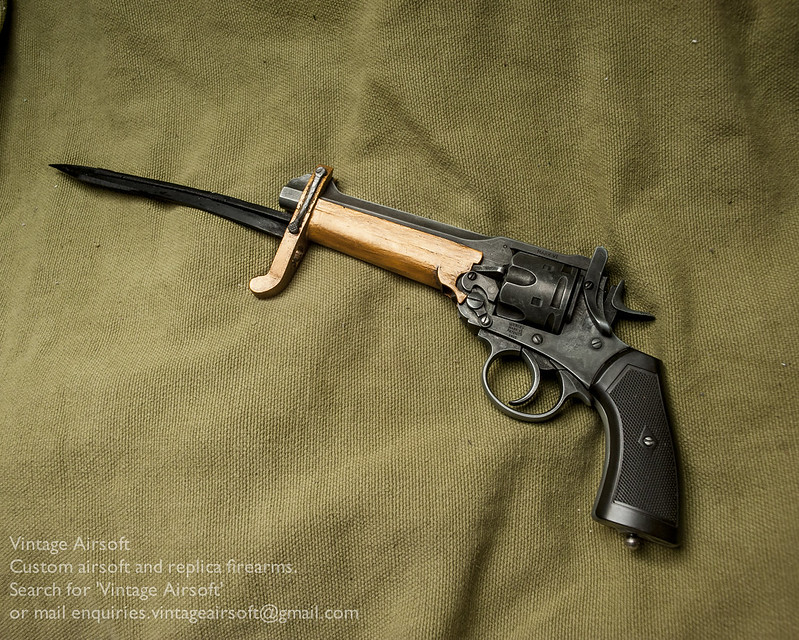
The Webley Mk VI .455 service revolver is an awesome bit of kit. It is the iconic sidearm of British and Empire forces during the Great War.
Incredible stopping power, six shots in single and double action and very handy used as a club. What could make it better? A bayonet of course.
Arthur Pritchard enlisted in 1915, was commissioned as a 2nd Lieutenant in the Royal Berkshire Regiment and rose to Captain by Armistice. In late 1916, Pritchard approached Wilkinson and their cutlery division produced a prototype (using the tip of an 1897 Pattern infantry sword). However Wilkinson’s factory was at maximum capacity producing bayonets and Cavalry swords and were unable to put the production time aside for this exploratory project.
Pritchard then went over the road to Greener, a long-time competitor to Wilkinson, who had the time and facilities for the project. As 97 ptn. swords were still technically in service, cutting just the tip off for use in this wasn’t really efficient. However Greener did have a respectable supply of disused Gras bayonets purchased from France which made an excellent replacement.
This design was patented and sold as a private purchase item. This was never issued, nor was it designed to be used alongside the slightly more common carbine stock, in spite of suggestions made by the ill informed to both. The maximum number confirmed produced is 144 by serial numbers, though some confirmed originals have no serial number. It is fair to say that more replicas have been produced than there ever were originals.
Anyway, I’ve been working on a replica for a long time, trying to work out the best way to produce an airsoft safe one.
When I started, I made parts by hand, but this wasn’t practical for producing an accurate replica with so many curves.
So I drew out a 2D design and commissioned a friend to make and print a 3D model (this was before I learned 3D modelling myself).
Once printed, I sanded it down to a smooth finish. If I were doing it again I would use filler paint as I do now on my other 3D models as it would give a nicer finish.
As per the original, this needed a little hand fitting to the gun. I knew it wouldn’t be perfect on the first attempt with so many nooks and crannies.
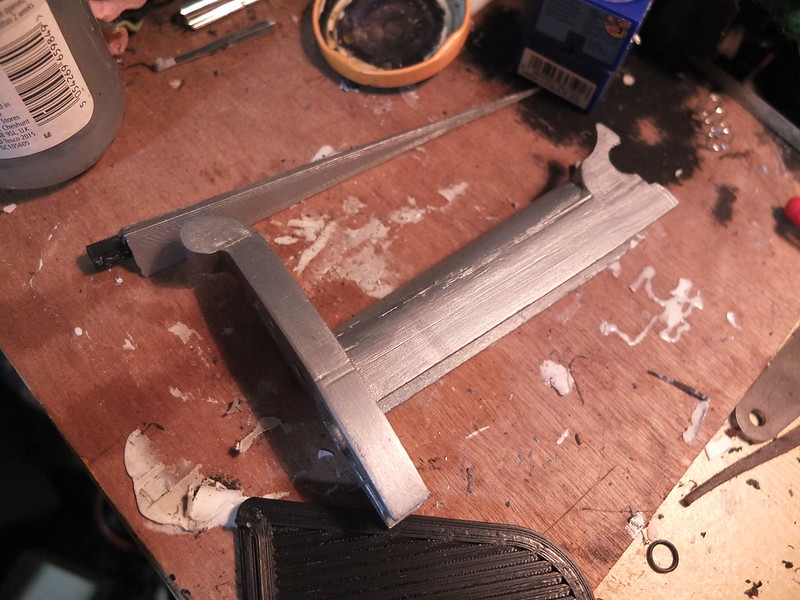
Once fitted, I could paint up, the base coat silver before painting the handle in a brass top coat.
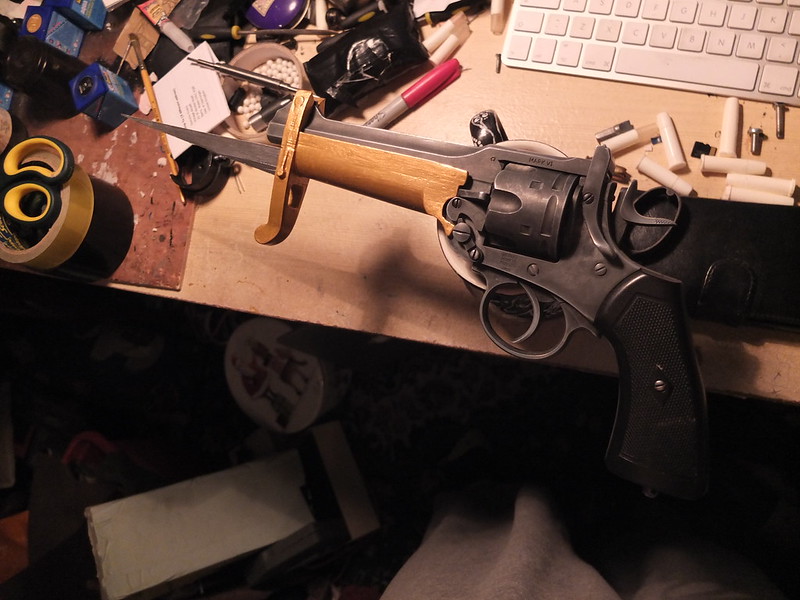
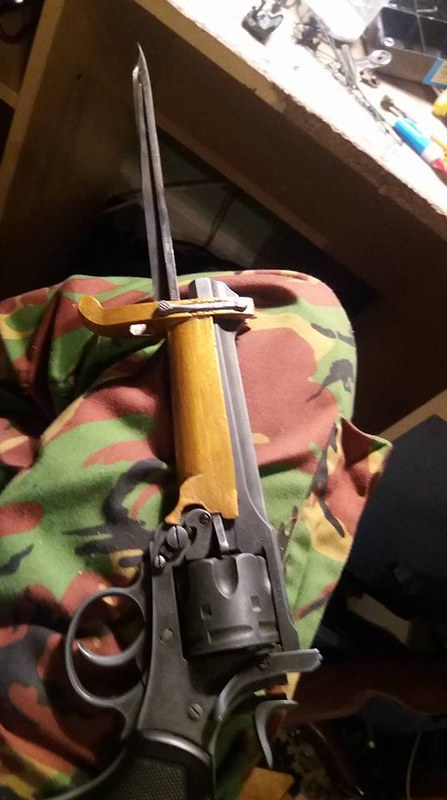
In place on the gun, it is taking shape.
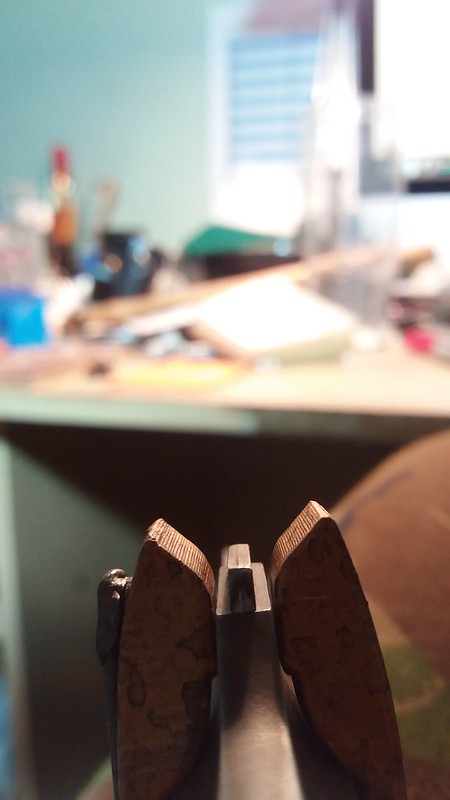
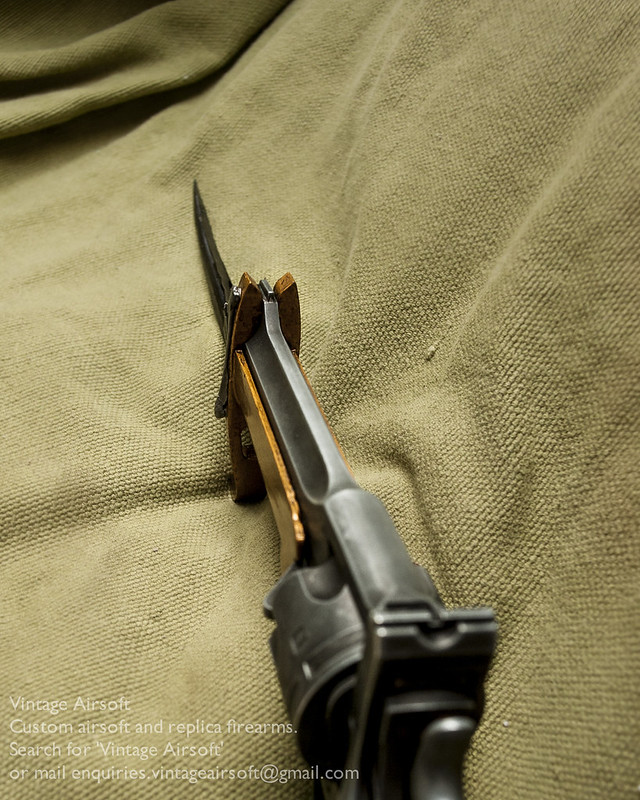
Once nice touch of the Pritchard is the sight picture it gives you. You may still use the foresight blade for precision but for snap shooting you can just drop your target in the ‘V’ and pull the trigger.
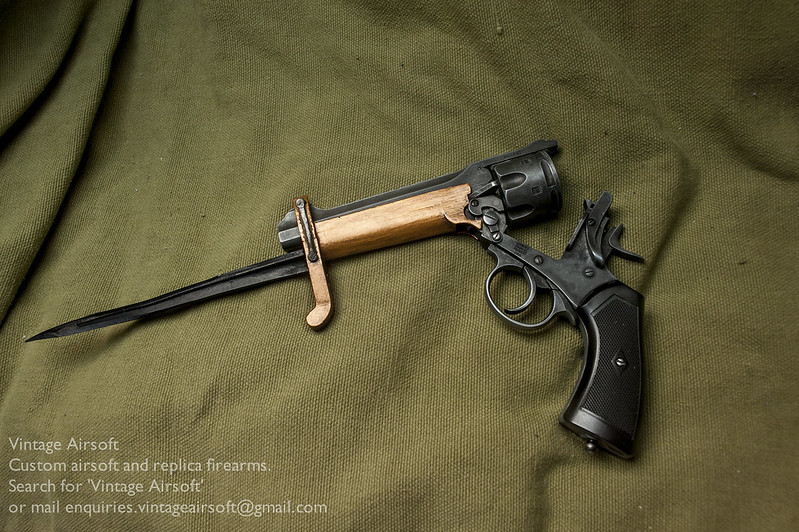
I added a little detail to the locking catch to replicate the chequering on the button.
I made a new blade in steel that is a more authentic shape, which really improves the look of the thing. To make it safe I shall make a rubber mould and cast blades for customer versions. The grips will have to be 3D printed as they will be a bit awkward to cast.
So the next post ought to be a finished piece!
If you like this project or have an idea of your own, drop us a line on enquiries.vintageairsoft@gmail.com to discuss. ‘Like’ our Facebook page or follow the blog to get regular updates on projects and interesting videos and articles.
If you would like to see more builds from the Great War era, you can find them here.
Don’t forget you can buy some of our complete products via Etsy.
If you like this project or have an idea of your own, drop us a line on enquiries.vintageairsoft@gmail.com to discuss. ‘Like’ our Facebook page or follow the blog to get regular updates on projects and interesting videos and articles.
If you would like to see more builds from the Great War, you can find them here.
Don’t forget you can buy our complete products via Etsy.
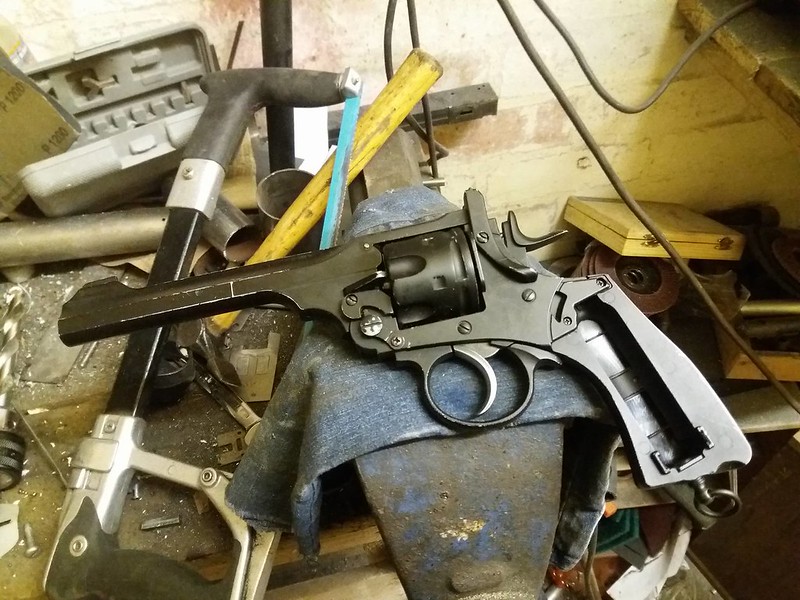
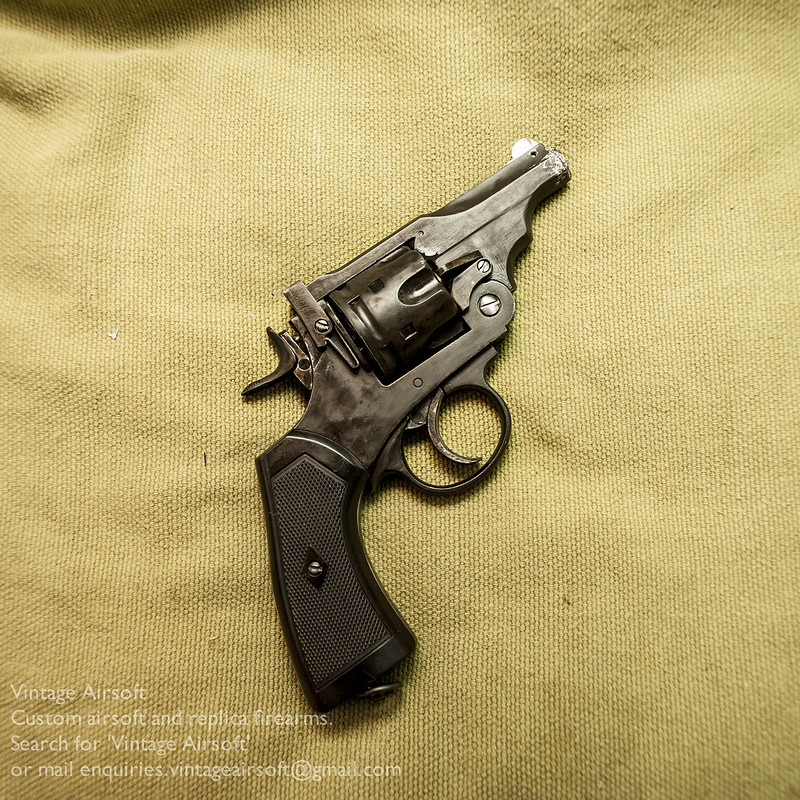
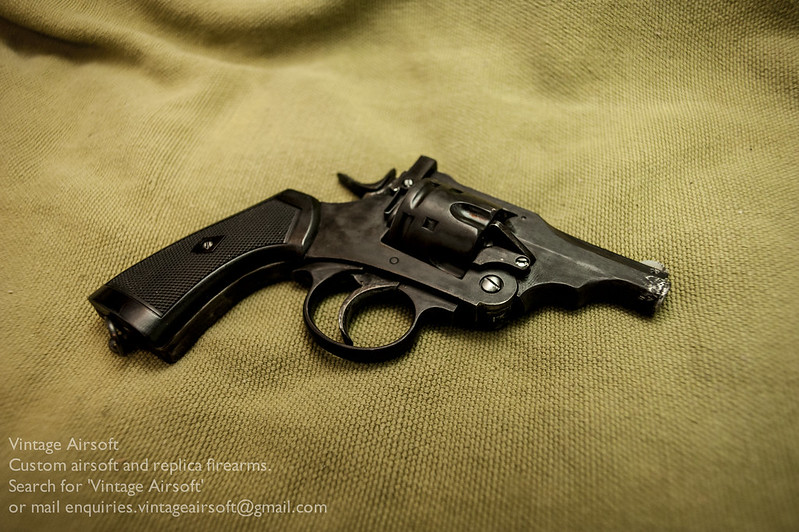
I thought it was about time that I took a look at the new Well Webley. Having owned a Wingun for some time and having seen the incredibly low price point of the Well I had to see what it was like.
First impressions:
Side by side, these two guns look very similar in shape. It’s clear that the Well is a plain clone of the Wingun, differing in a few small details, other than the obvious differing finish. Although the Wingun is available in a black finish, I’ve never had one to compare to this.
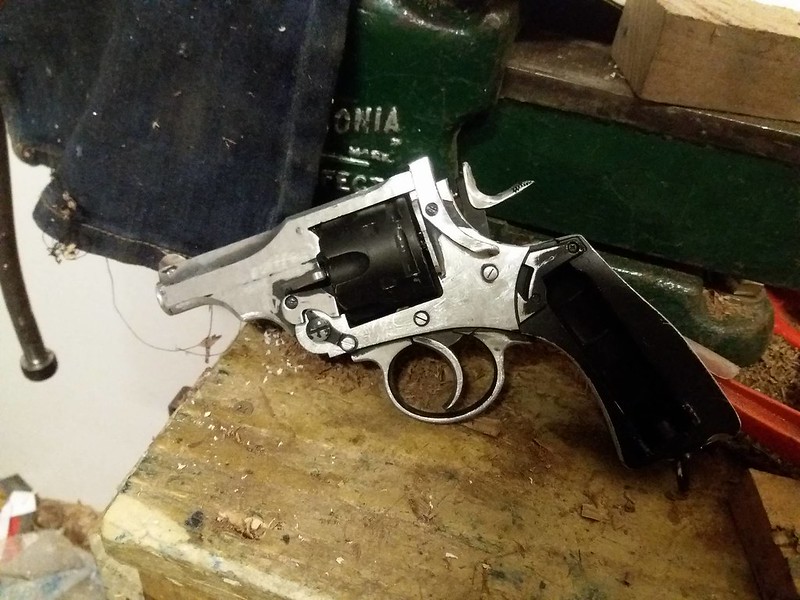
The Well finish is thick, when you first get it it needs breaking in a bit to make the action smooth both in the hammer, trigger and break-action.
The Well lacks the detail of trademarks, but in use these are not things you will realistically notice. It does however have some seamlines which would need filing off for the optimal aesthetics.
Weight-wise they are very similar, with similar heft and balance. On the scales, there is only 10g between them. It is quite clear that the Well is a direct clone on the basis of this. Aside from the finish and trades, the only clear identifier of the Well is the screw that controls the cylinder lock. This is a Phillips head rather than a flat head. I have no idea why they chose to do this as they use flat head screws elsewhere.
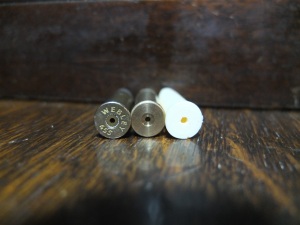
The shells appear to be interchangeable (however see below for more detail on this), I can drop Wingun and Well shells into each revolver with both cycling absolutely fine. The Wingun shells are better fitted and finished, with the heads of the Well shells being a little more rough and a little softer. The Wingun shells also have ‘Webley .455’ written on the back, which may seem to make them more authentic at first glance, this is disregarding the diameter of the shells being .38.
In terms of feel, both are pretty much identical. The Wingun is perhaps a little smoother, but to be fair it has seen heavy use ever since I bought it, meaning any rough edges have long since worn off. The break action is slightly easier on the Wingun, which isn’t necessarily a good thing. I have had this revolver open on me in the field: resulting in either spilt shells or a delay while I close it in order to fire. The Well appears to have a little nodule on the action lock which gives a slightly more positive lock-up.
The Well, on first opening the revolver, had a very loose fitting cylinder. The cylinder lock does not work like the original (which is very well replicated on the Wingun), but appears to be entirely reliant on the two screws that hold the locking piece itself. These were initially far too loose, meaning that the locking piece did not grip the cylinder. On tightening, the cylinder no longer fell out, however it became unreliable to cycle in double action. Loosening the cylinder lock slightly allowed the cylinder to remain locked in place and cycle fairly reliably.
The auto eject works well on both guns. The Well is perhaps a little heavier, but again this could be due to wear on the older Wingun. The barrels, on all airsoft revolvers I have experience of, move forwards and backwards with an attachment that interfaces with the cylinder to provide a seal and reduce gas loss. On the Wingun, this is aluminium. On the Well it is some kind of rubber. I’m yet to see if it actually makes any difference in wear over time but it does seem to make single action use slightly heavier for the Well. Not so much that you would notice in anything other than a precision shooting environment, which these replicas are really not designed for.
On the note of precision, the Well has a feature the Wingun is seriously lacking. The Well comes with a fixed hop pre-installed in the barrel. Although it is not a majorly difficult feat to install a fixed hop using either the o-ring method or a flat hop, it is nice to be saved a job, especially given it would not have been a difficult thing for the original manufacturers to do.
Testing
Conditions of testing:
Chronoing and accuracy testing will be with .25g BBs. The Wingun is not in stock configuration, it has had an o-ring hop added. The temperature outside hovered around 1 degree Centigrade. It was probably colder in the workshop.
Time for the fun bit. Firstly, I loaded a new CO2 cartridge into each gun, fired off 12 shots from each to take the edge off (good practice when you are shooting at people!) and loaded the shells. I started with the manufacturer provided shells, then shot some of the Vintage Airsoft single and shot shells
The results were… interesting and somewhat unexpected. To the point where I will probably retest at a later date. It was VERY cold in the workshop which will account for some of the results but not the inconsistency.
After firing off a couple of batches of shells it felt like the Well was low on power, so I put it aside to run the same tests on the Wingun. When I finished two Wingun tests, I picked the Well up to continue testing and it was back up to strength. Interestingly it seems like the Well suffered from cooldown much more than the Wingun, which considering their build is near-identical is surprising.
Accuracy:
Accuracy tested at 5m, obviously you will generally be further than this. I may come back and do further testing on this at a later date.
On these Huns head targets, the bull is 30mm, the second ring is 70mm.
The Well:
The Wingun:
In this test, the Wingun produced a significantly smaller group. In fact the first Well group was largely not on the paper. Further testing is definitely required.
Notes on use:
The extractor of the Wingun is a a bit more positive. The Well sometimes fits the shells and sometimes does not. It seems random as to when it does or does not, I presume this is due to cylinder movement as described in the first part of this review. It is hard to see the spacing issue with the VA shells due to their being white, in the picture below you can see that the rims sit proud of the cylinder. It’s no more than a millimetre but it prevents rotation and even lockup.
How it should look:
Also, when loading the CO2, the Well grip panel did not click back into place easily. I had to bend the spring clip a few times to try and get the correct angle for it to fit into the lock and hold the grip in place properly.
Another issue I had with the Well was that it did not always cycle reliably, the hand would push the cylinder but not push it all the way around somehow.
After using the Well for a bit, this happened:
The extractor snapped. Hence having to come back later.
Summary
In summary… if these revolver were the same price, from my experience of these two samples, I would say the Wingun edges it. It is more consistently reliable and hasn’t broken in my extensive use of it whereas the Well example I have broke in the testing phase.
The Well does have a more positive lockup, which is nice. Also the ready-fitted hop is a good thing, though when firing the shot shells it appeared to have very similarly tight groupings to the Wingun with its o-ring hop.
So the difficult bit is that they are not the same price point. The Well is, at the time of writing, 1/3rd of the price of the Wingun (on a good day). It is hard to say that you should spend so much more even when out of the box reliability is such an issue.
I am sure that the Well could be made reliable, but it will require time and effort. The Wingun is a pick up and play gun with minimal maintenance required to keep it going.
If this content interests you, subscribe to the blog or join us on Facebook. Don’t forget you can buy some of our ready-made products on Etsy, including our own Webley shells.
Our willing volunteer to have a hop added is this gorgeous blued Colt Single Action Army.
First step, remove the side plate.
Then take out the spring and the hand (the part which pushes the cylinder round).
You can then pull out the centre pin and the drum.
There is a pin at the top of the barrel in the frame, push this out with a punch and a second pin that holds the ejector unit in place.
With both of these removed you can take the barrel off.
You can then slide the inner barrel out. At this point get out the o-ring and round needle file. The o-ring should be 1-2mm thick.
Then, start working on the barrel. Keep the channel the file produces on one side, by the time you work through to the inside you want about 3-4mm of the circumference removed from the inside. You may wish to give yourself a little extra space on the outside to hold the o-ring. Use a very sharp knife to cut the rubber roughly to size.
Once in situ, use the knife again to chamfer the edges of the o-ring so that it sits fairly flat against the barrel. There should be minimal space between the rubber and the barrel to preserve the gas seal. Through the barrel you should see just a flat, small line of rubber across the top. It doesn’t need to be much, just enough to catch the BB as it passes. If you can’t see it, file away a little more but go slowly, you can’t add material back on.
Use the collar at the back of the barrel to hold the o-ring in place. Check inside the barrel to make sure the o-ring hasn’t slipped in. It should be firmly wedged in place by the collar, depending on the pistol you may wish to seal it with electrical tape or PTFE.
Some pistols have a locating lug on this collar, which keeps the barrel oriented in a specific way. This gun does not, but if yours does then make sure the hop window is oriented correctly to the top.
Put it back in place, make sure the hop window is at the top.
Re-assemble the gun, there aren’t really any specific tips to put the SAA back together. While you have it open however, oil the moving parts with a little light oil (3-in-1 is perfect) and if you haven’t a CO2 cartridge in, put silicone oil into the cartridge pin and on the seal. Revolvers don’t need a lot of maintenance, but a bit of oil every now and then keeps them going nicely.
If you are so inclined, you could use a flat file and install a flat hop instead, though this fixed hop is quite adequate.
If you found this article of interest, consider subscribing to the blog, or join us on Facebook. Don’t forget you can buy some of our ready-made products on Etsy.
Having finished my P04 Naval Luger, I had been tucking it into my belt for a few weeks and needed a better carrying solution. There are a few holsters about and I picked this one up from Ebay from a seller based in India called ‘Fabricators’.
At £27, free postage I thought it was worth a punt. If it was truly dreadful I could send it back or sell it on easily enough!
On the back, there are two loops to hang it on a belt. There is no way to stop it moving on said belt, but that is the way of German webbing. British webbing kind of spoils you !
The quality of the stitching is very good overall, there are no places where I am anxious about it coming loose.
Down the side, there is a space for a cleaning rod. This is one aspect I was nervous of: in the picture on Ebay the Sam Browne stud was not well fitted. In the example I received it was however and the slot to close the flap well sized, not too tight or loose.
Inside the flap of the holster, there is a pouch for the disassembly tool.
And as a rather nice touch, it came with the disassembly tool! The pistol is a good fit, it sits deeply in the holster.
On the side there is a tab, which you pull to lift the pistol and grab the grip.
So, the downsides. The quality of the finish of the leather is not the best. It is painted on and not deep set within the material. In the picture above you can see a line above the cleaning rod pouch where it has flaked a bit, which is how it came rather than wear. Also, there are a few spots where glue has been slightly misplaced.
However, for a hard leather holster for an unusual pistol I am pleased with it for the price. My main kit is British, so it will only be used when I fancy a change or when I’m playing CQB and am not using the Webley.
I’m not going to score items when I review, the numbers are subjective and meaningless. Instead, I judge items by whether a) I would buy it again if I needed another and b) whether I would recommend it to a friend. In this case, the answer is the same to both: Yes.
This may not be the best quality bit of kit out there, but it is a very fair price for what it is. To get better, you would have to spend a good deal more money-if you could even find one for this particular pistol.
If you liked this content and want to see more like this, why not follow the blog or join us on Facebook?
You can buy many of our finished products in our Etsy store.
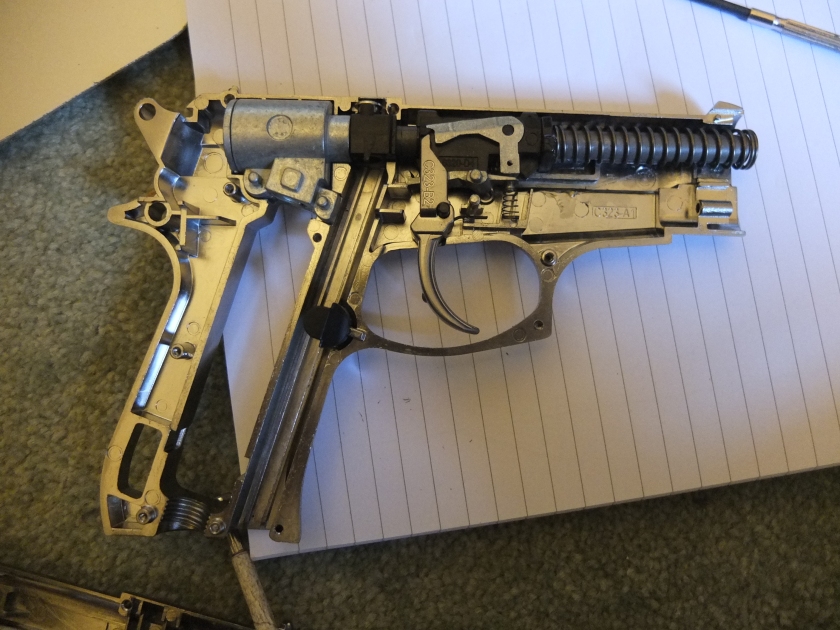
While the initial project was for an airsoft model, it ended up being an inert replica for the client in question. Well, the Welrod is back for another attempt at the quietest airsoft pistol around!
The base gun for this is a double-action non blow back CO2 pistol. For those of you who like the internals of guns here is a picture!
In order to keep things simple (K.I.S.S. or Keep It Simple, Stupid is my motto), I’m keeping as much of the frame as possible as it does a good job of holding the internals and designing a new frame… well suffice to say that life is short. The red coloured areas will be removed over the course of the build.
The donor with several of the red panels cut away on one side. I actually quite like the slightly steampunk aesthetic of being able to see some of the internals.
The receiver in progress, the first step is to cut out a recess for the donor.
Which, with both halves now matching, fits in very nicely. Inside the tube is a buffer that holds the front of the barrel and stops the mainspring. In theory this could be adjustable to make the barrel unit strike the valve harder/softer to control FPS. I’m not sure at this stage how feasible this would be though.
The front cap and back cap, freshly turned on the lathe! Both parts are in mild steel so will match the rest of the receiver nicely when all finished. The dip around the muzzle is to disperse the muzzle blast more effectively when used at point-blank range. Which it often had to be as accuracy was pretty appalling with the original!
A close-up of the back end.
The next stage is to make the trigger guard and housing unit, then modify the pistol grip.
If you would like to discuss commissioning a gun of your own or want to see more content like this,feel free to drop us an email at: enquiries.vintageairsoft@gmail.com to discuss or join us on Facebook!
You can buy many of our finished products in our Etsy store.
Some pictures of the completed build! It’s not 100%, I think I will re-visit the rear sight at some point in the future and improve on the shape a little.
With the exception of the areas left in the white, there is a thin coat of paint over the whole pistol in a dark blue, to try and simulate the blued effect of the original. It is quite successful, though the dream is to have an all steel model that is correctly blued!
The text is slightly highlighted with off-white paint to improve visibility as well as authenticity.
The original magazine plugs of the era were wooden, sadly this can’t be achieved with this model but I have painted them to give some of the effect for now until I can find a solution.
And the DWM mark on the toggle lock. I need to find a way to fill this more effectively with paint, for some reason the usual technique isn’t working so well but the etching itself was satisfying!
If this post has inspired you to want a gun of your own, drop us an email at: enquiries.vintageairsoft@gmail.com to discuss or join us on Facebook!
You can also buy many of our finished products in our Etsy store.
To see the whole of this build from the start, you can see it here.