New pattern K98k and K98k scoped

Add-on kits, Complete builds, K98k, Products, Rifles, Weapons, WWII

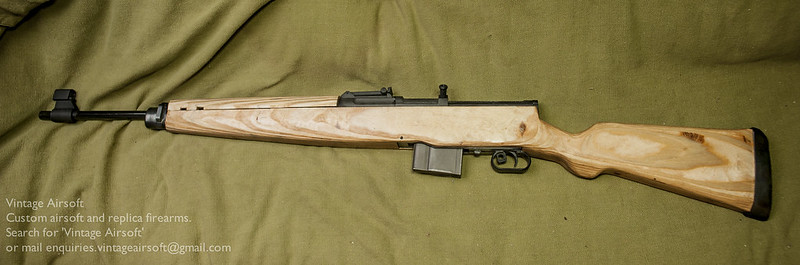
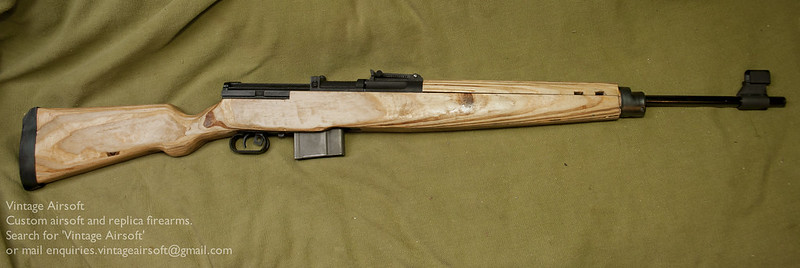
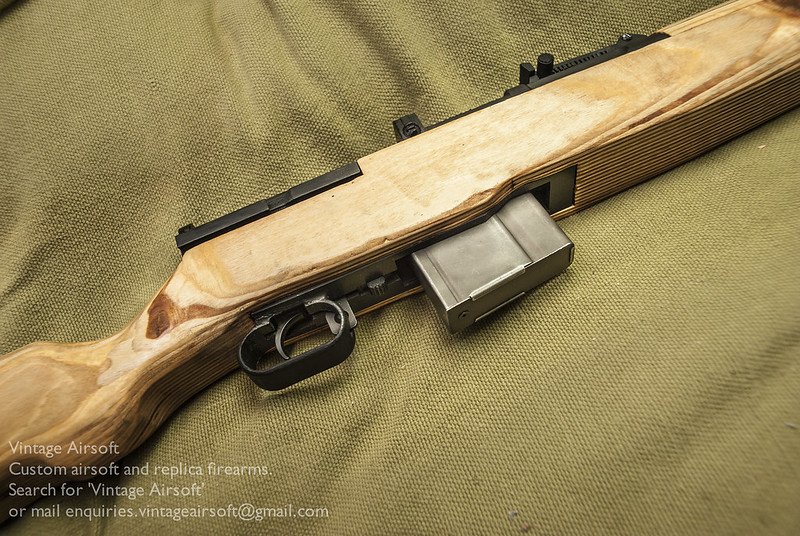
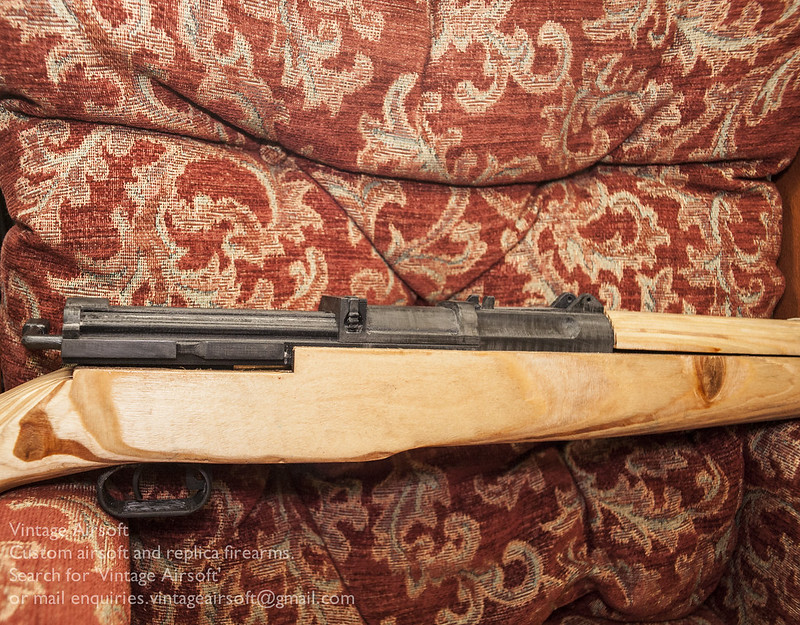
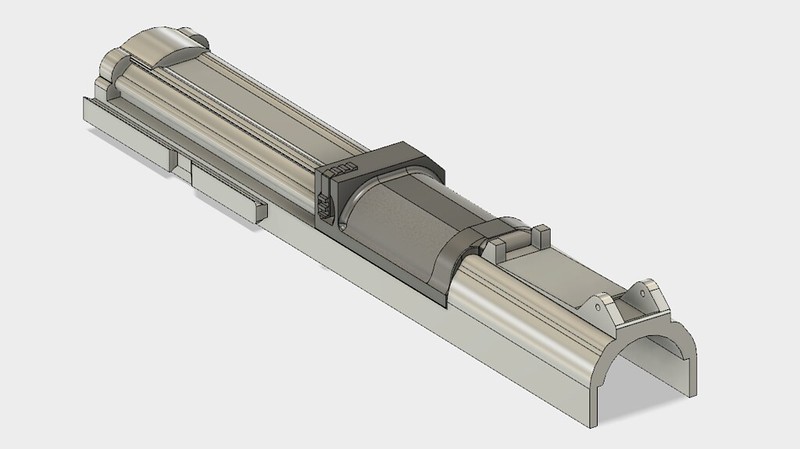
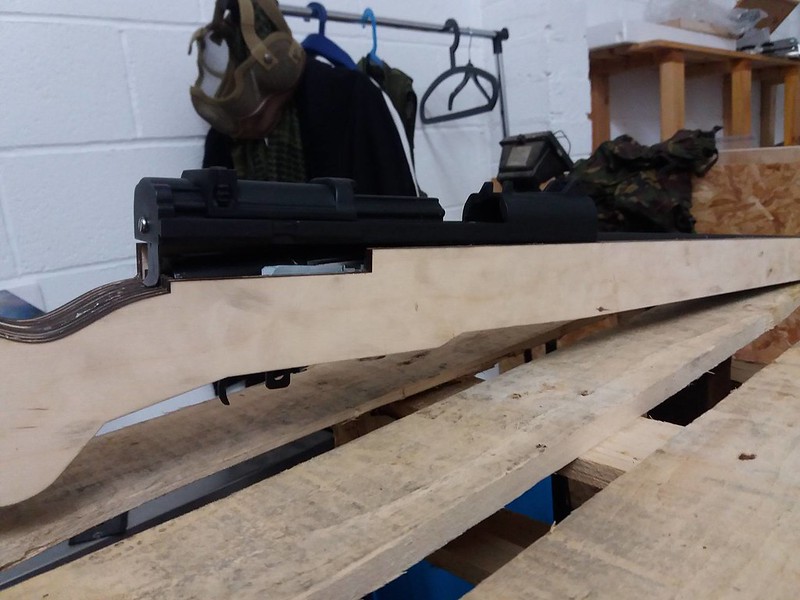
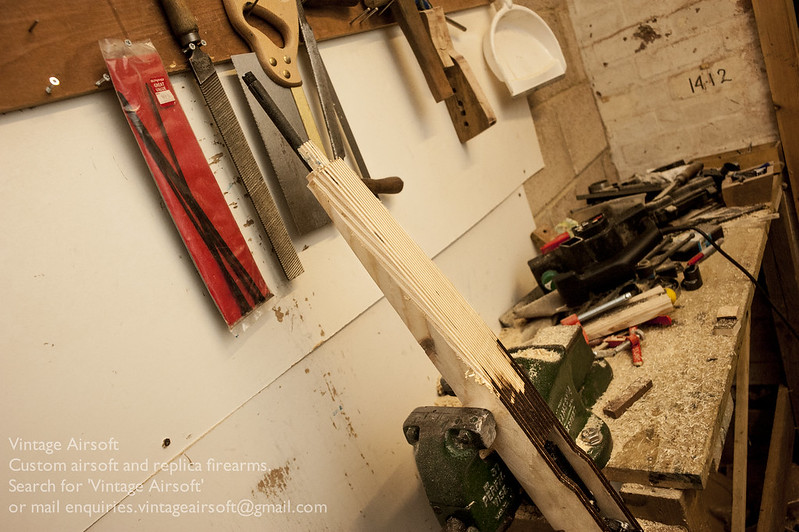
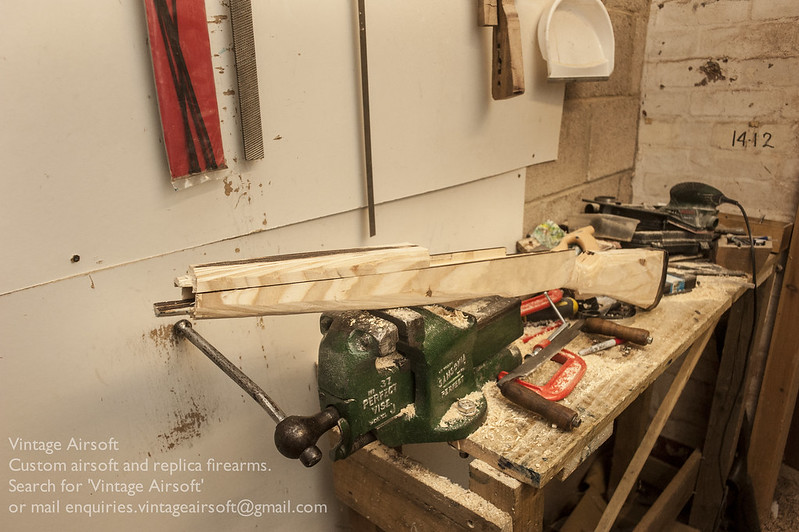
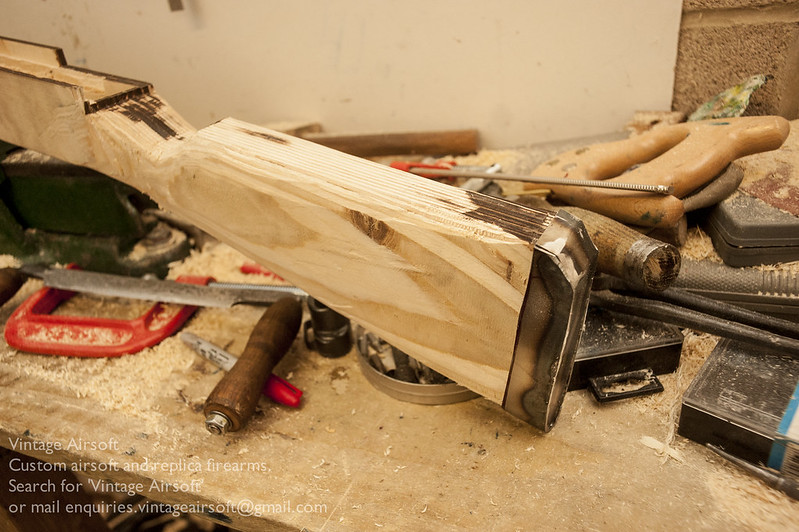
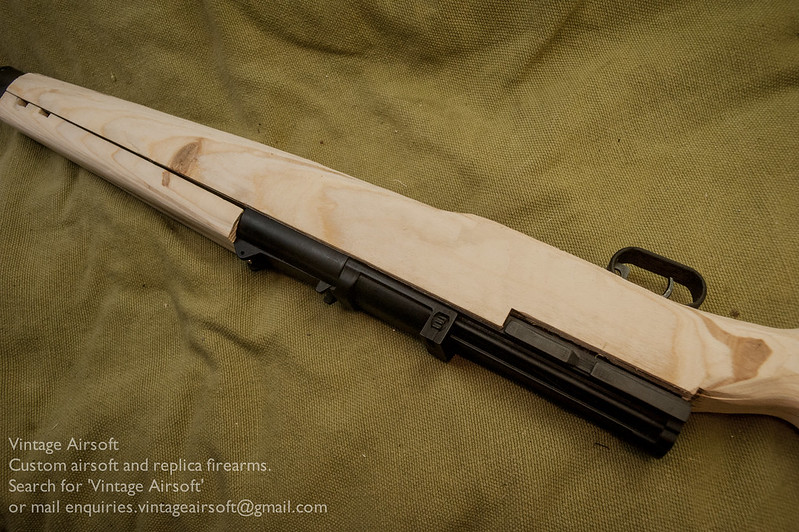
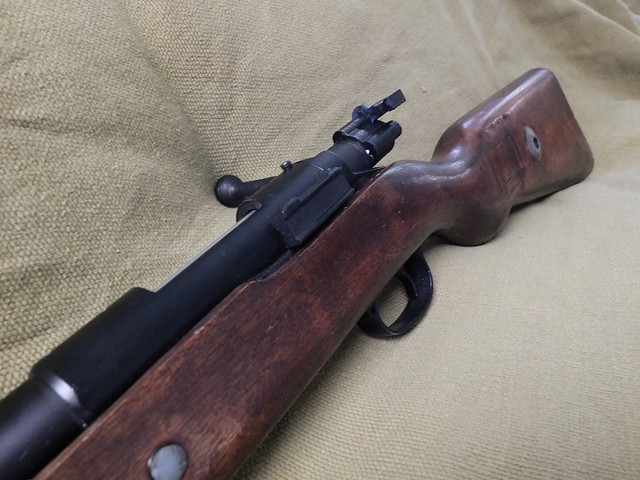
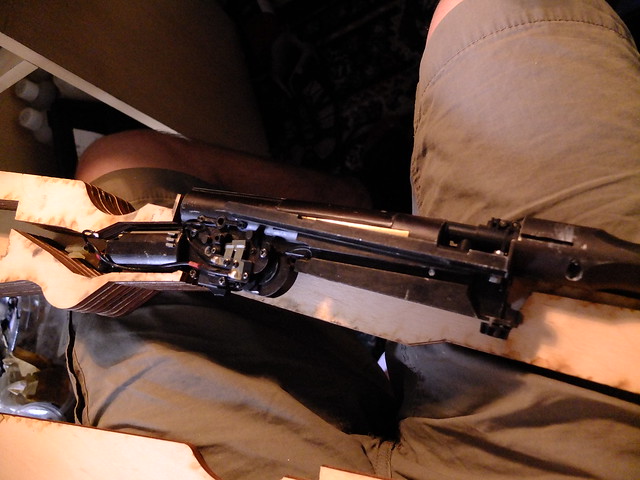
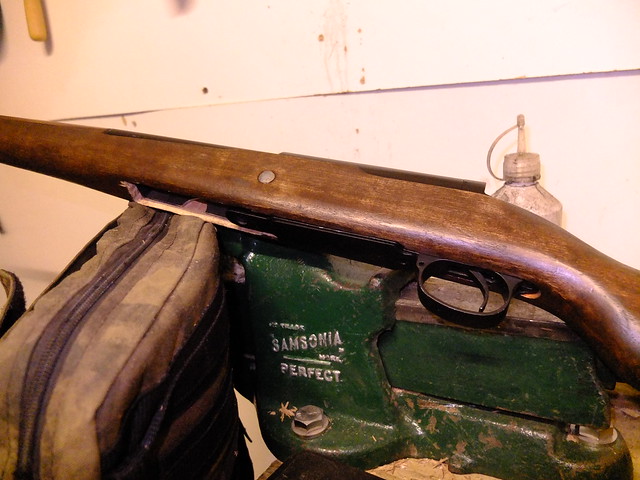
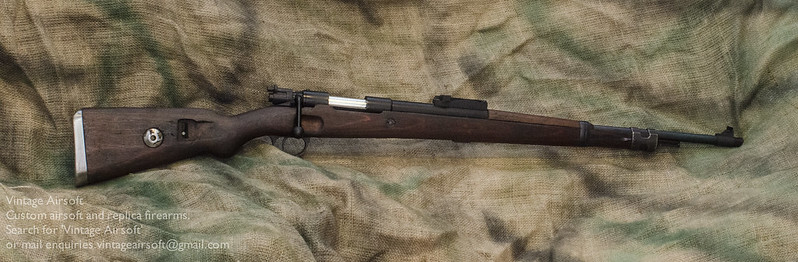
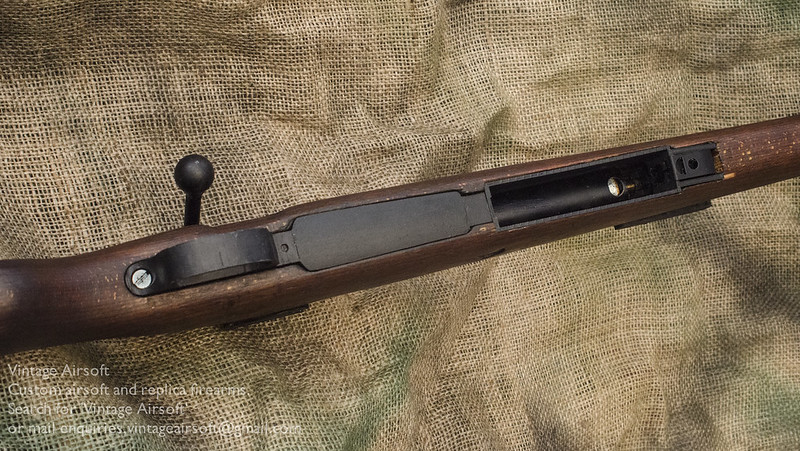
Most of the previous model of VSR K98k has been carried over to the new design, the only major change is the magazine well.

_DSC6273

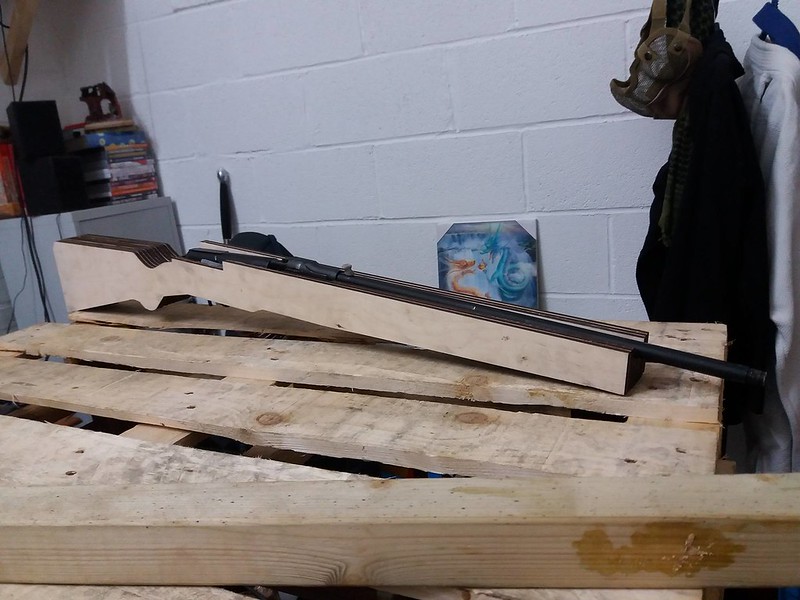
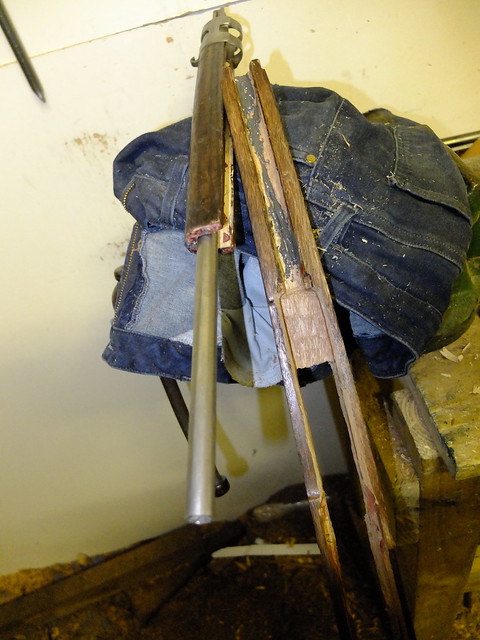
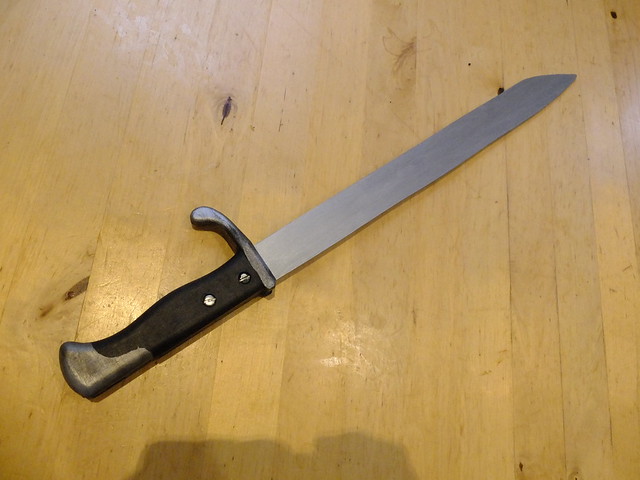
But I never pass up the opportunity to share more pictures of pretty pewsticks.

_DSC6274


_DSC6275

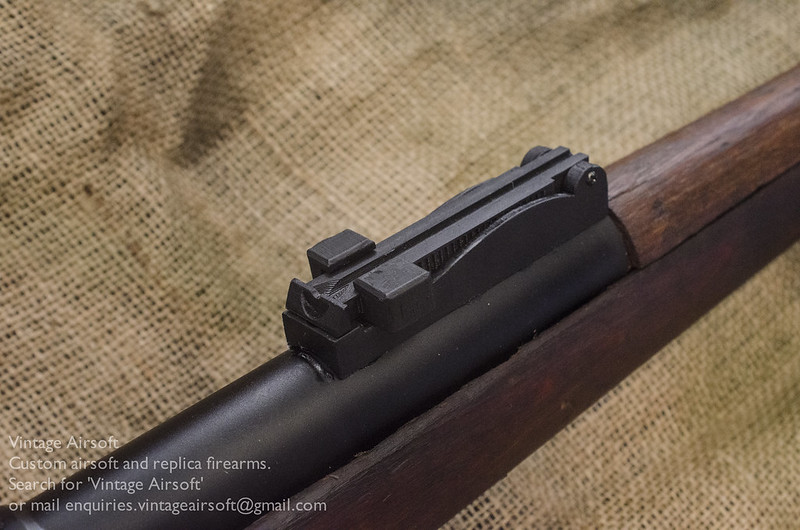
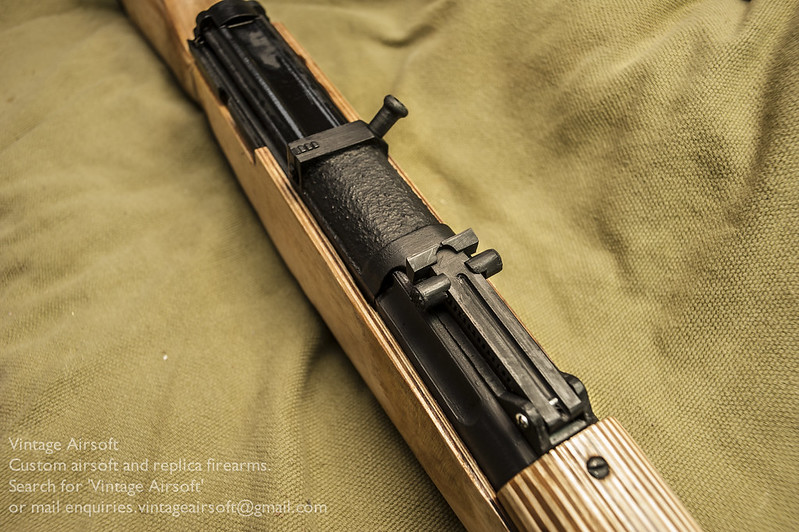
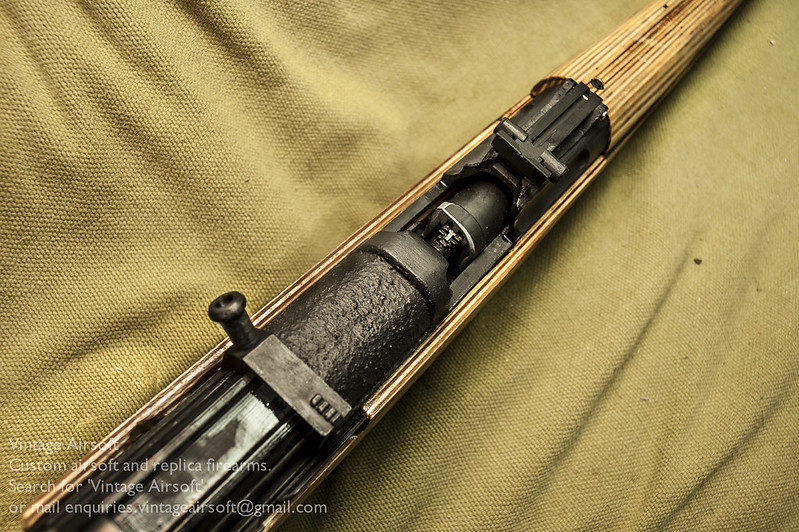
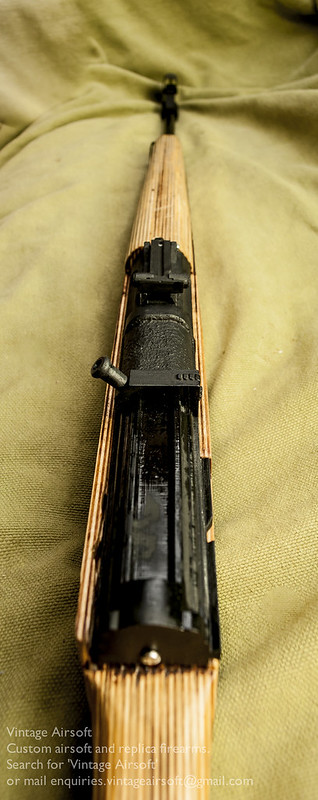
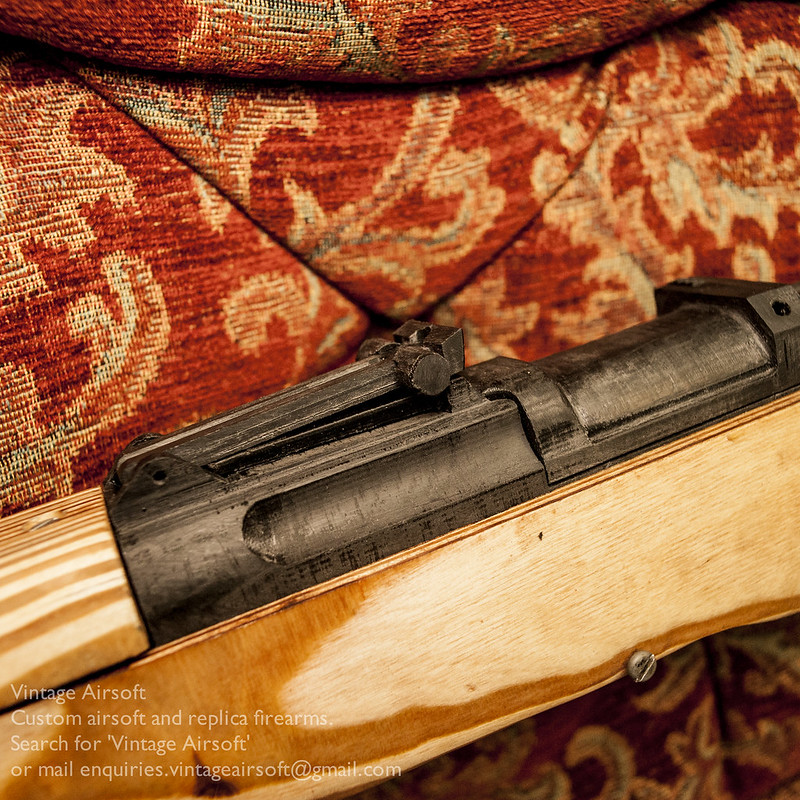
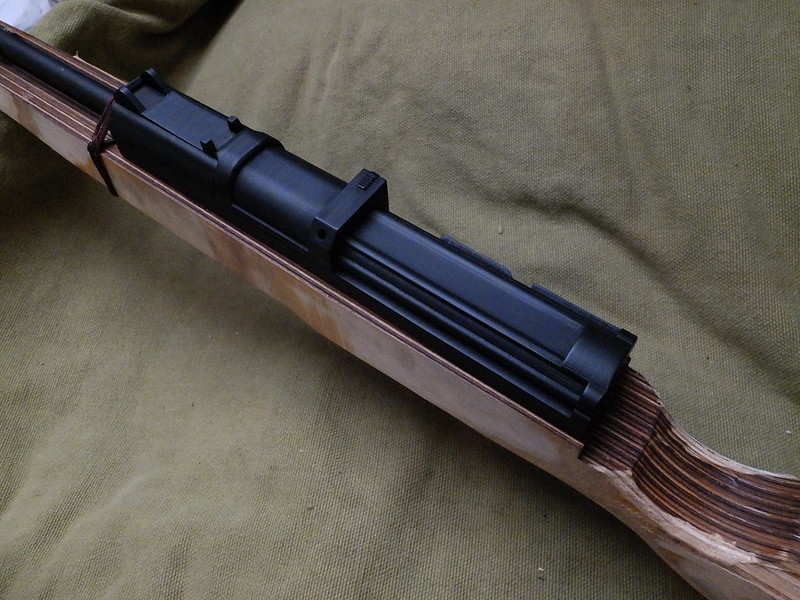
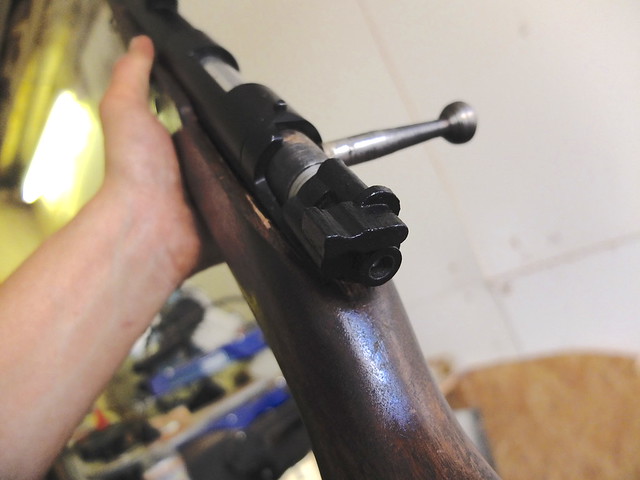
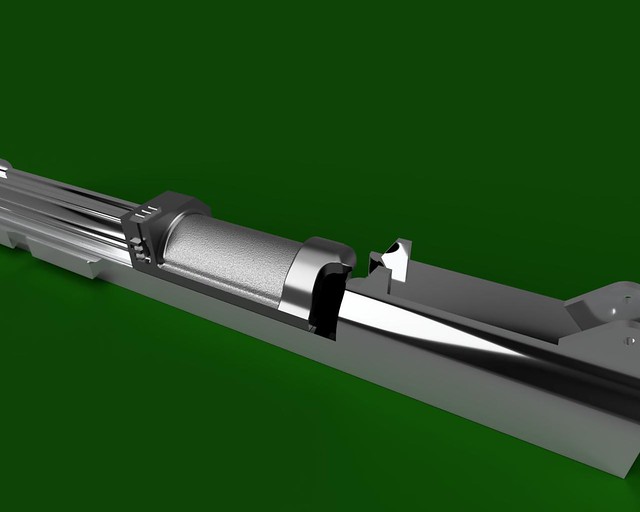
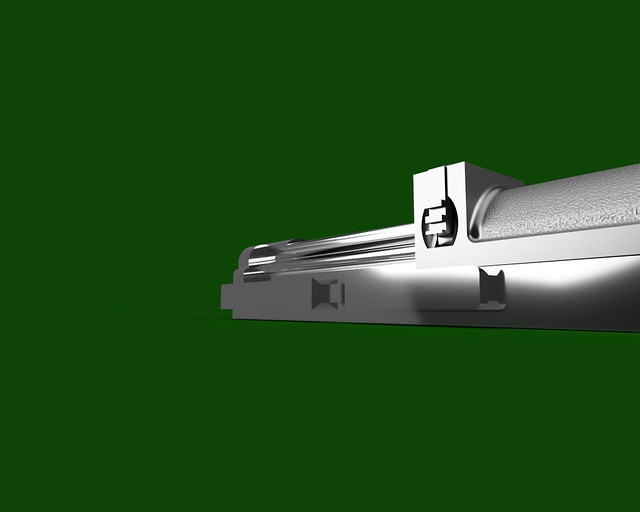
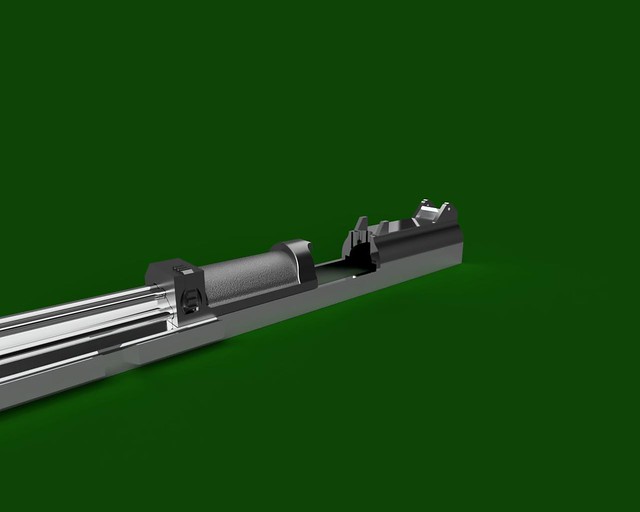
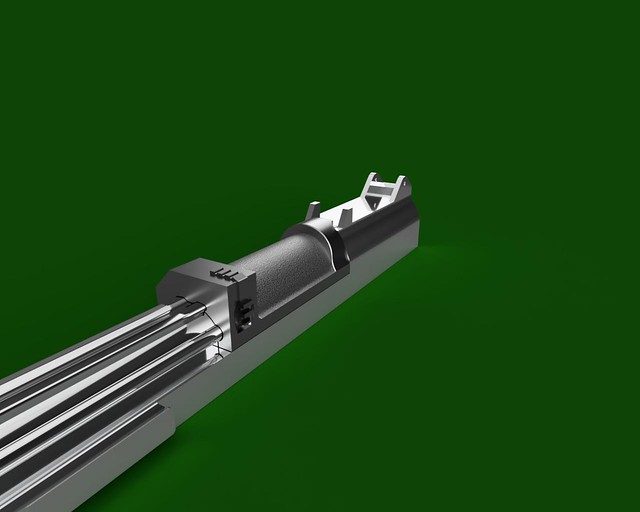
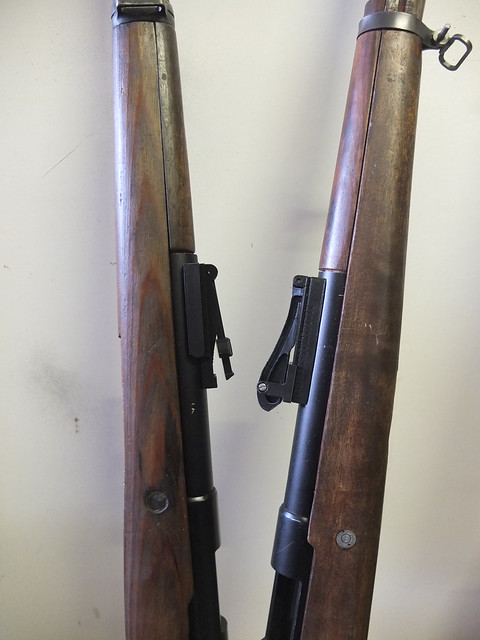
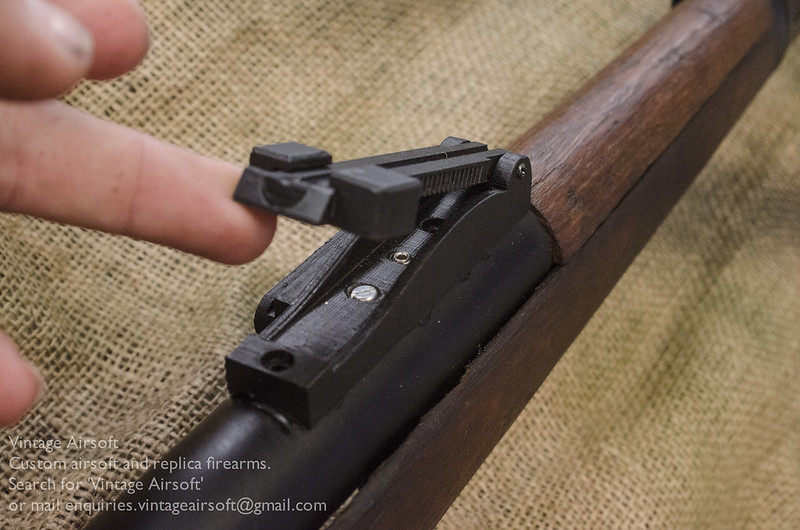
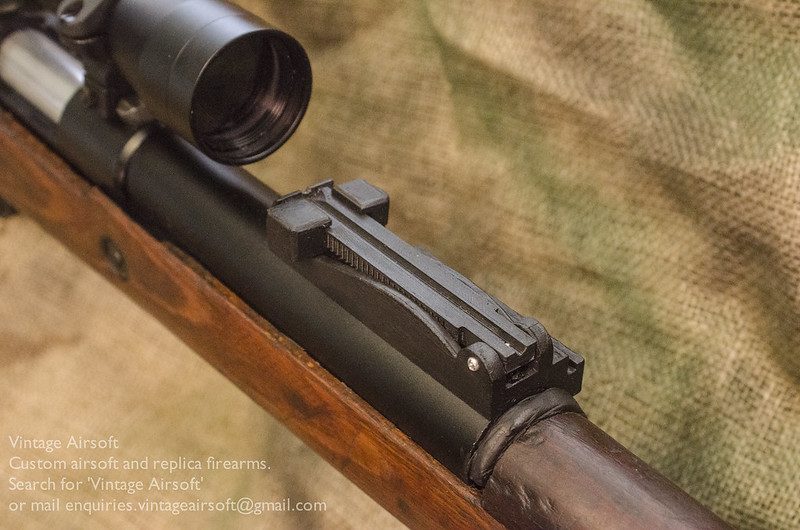
The rear sight unit and, concealed beneath the leaf, the hop adjustment grub screw for the TDC.

_DSC6276

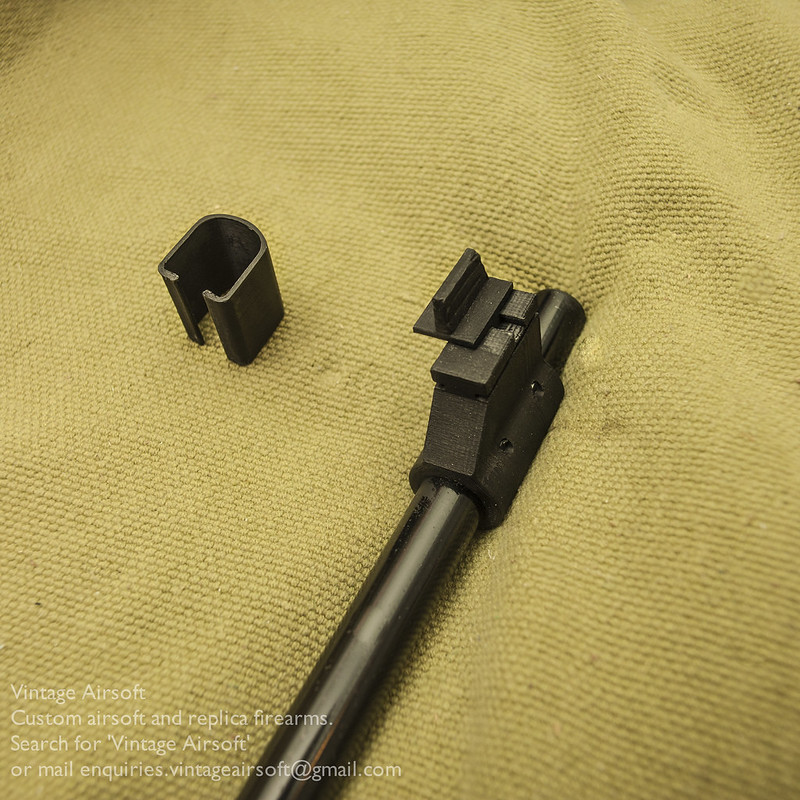
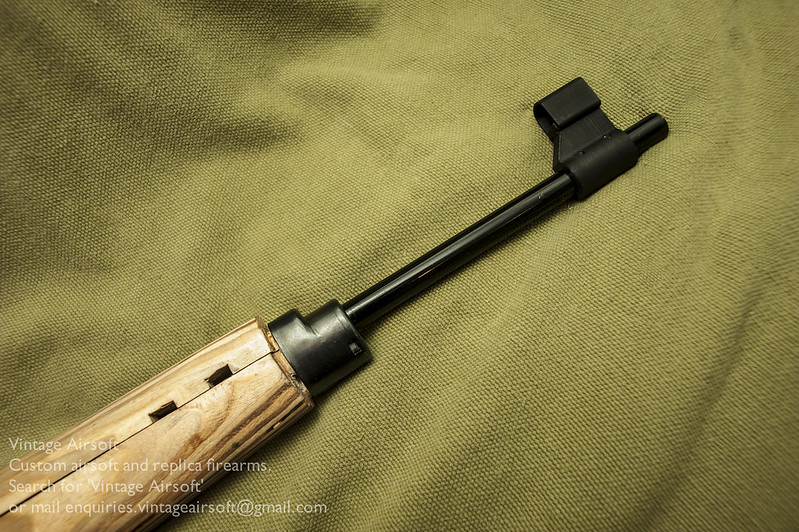
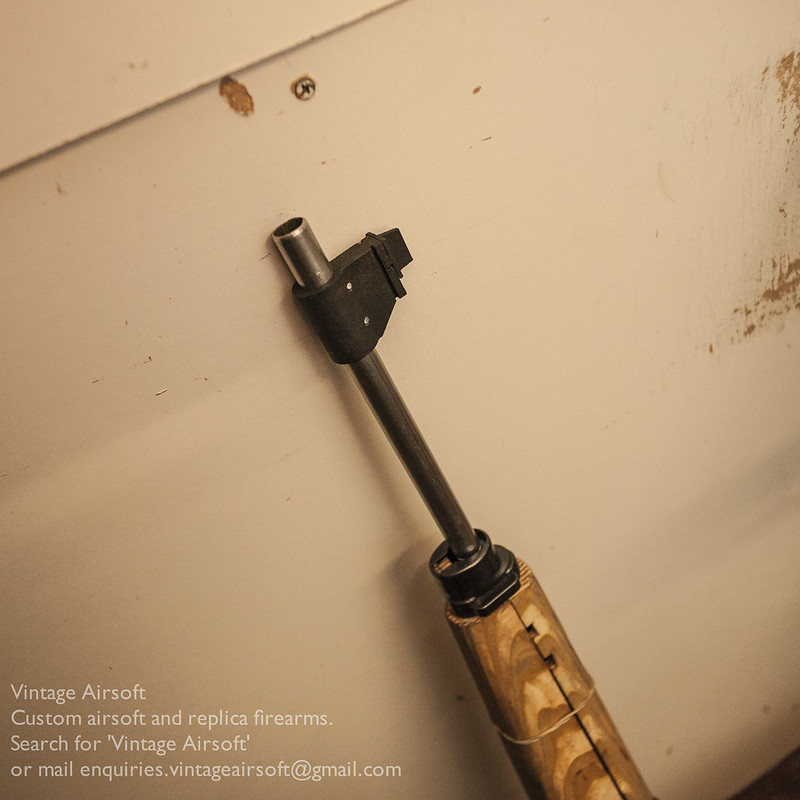
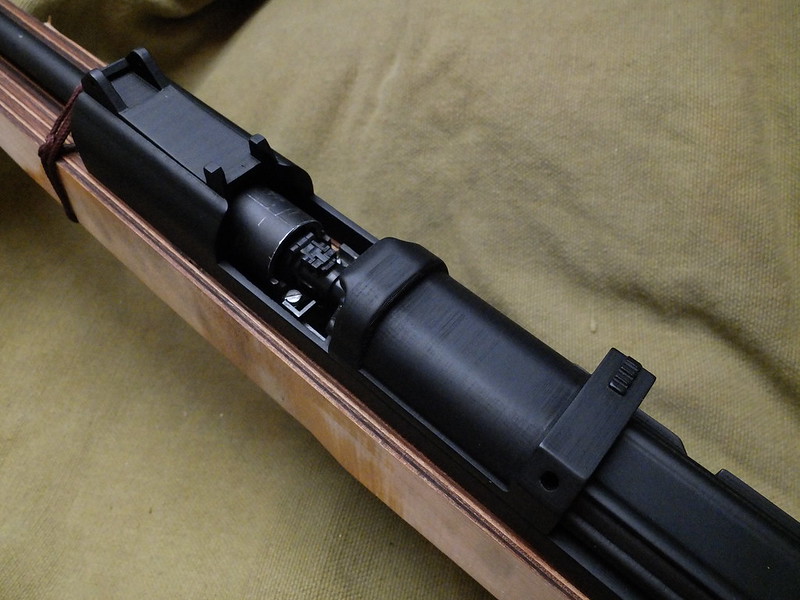
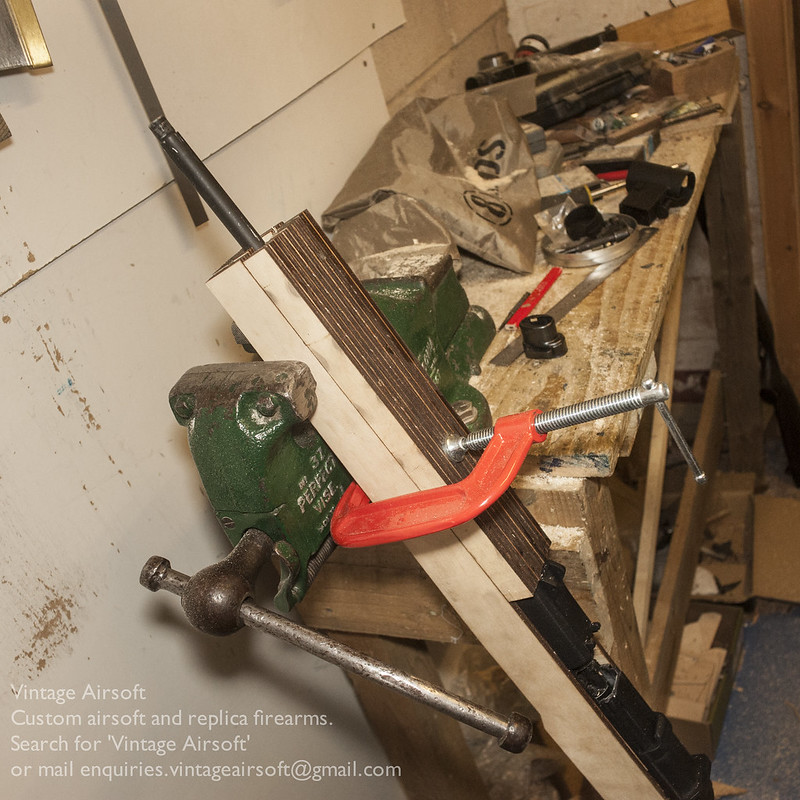
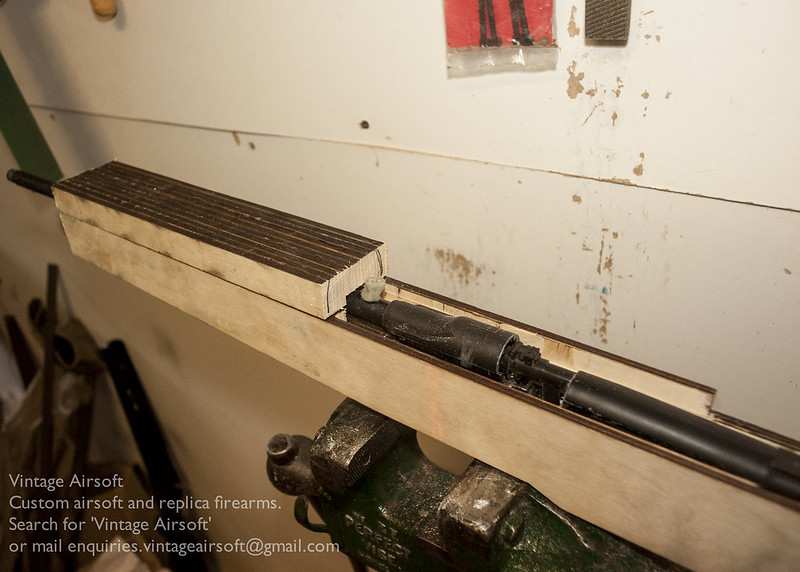
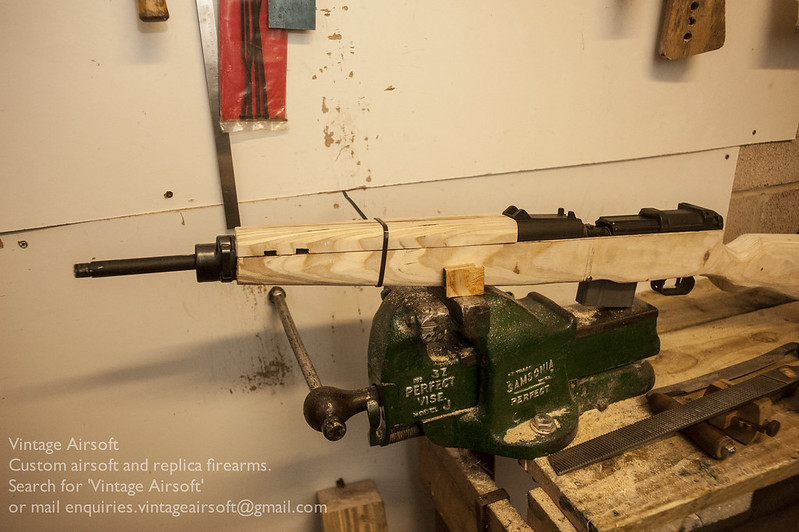
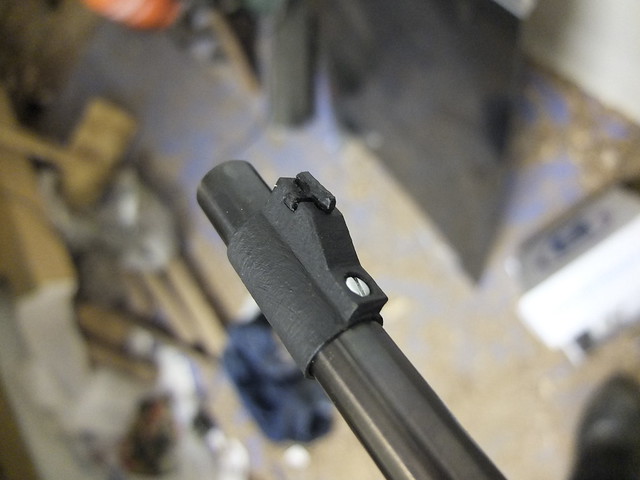
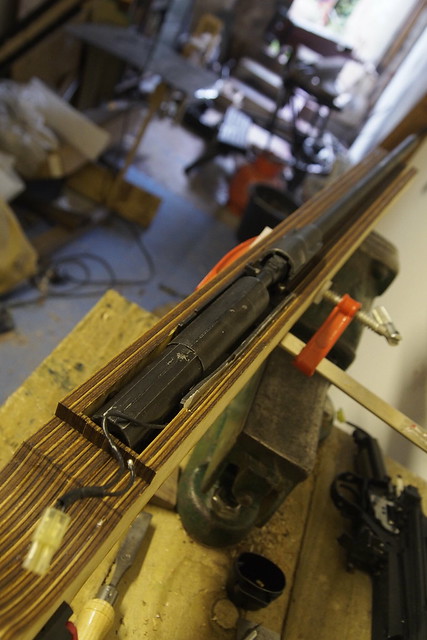
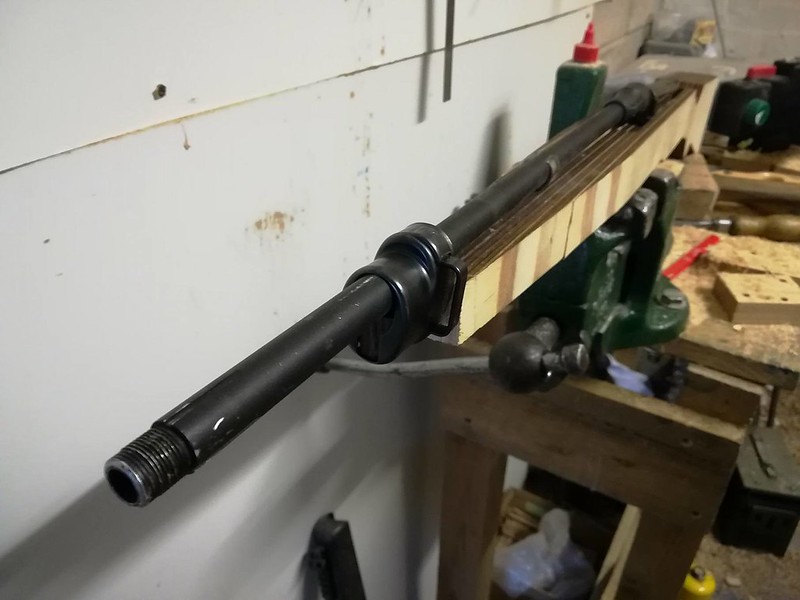
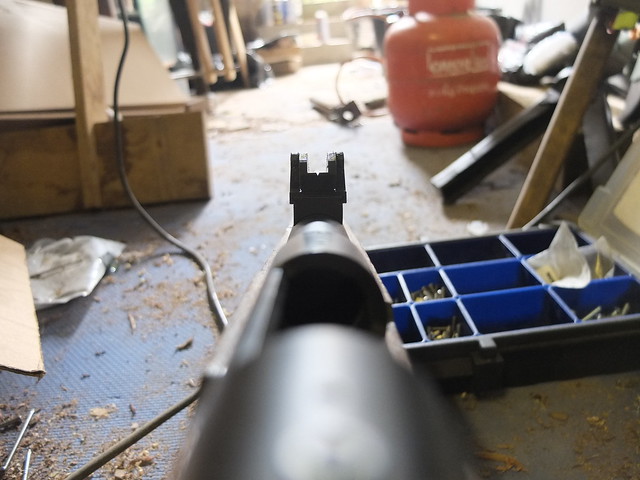
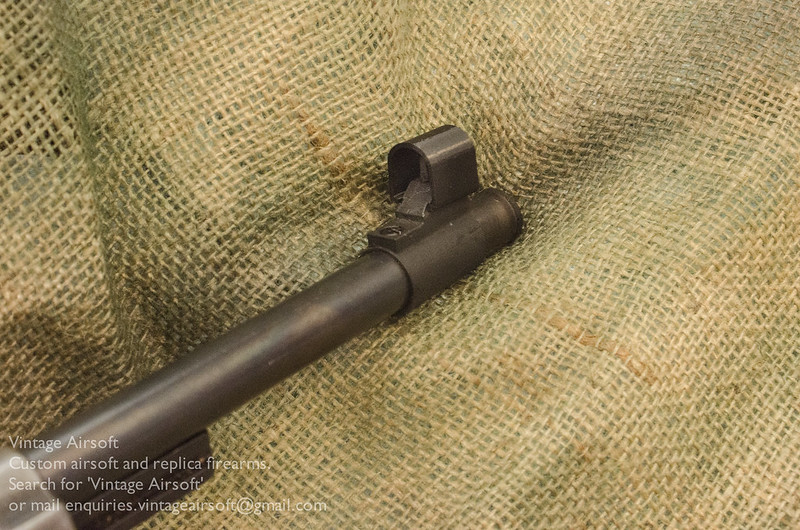
The 3D printed foresight block and oil-finished barrel.

_DSC6277

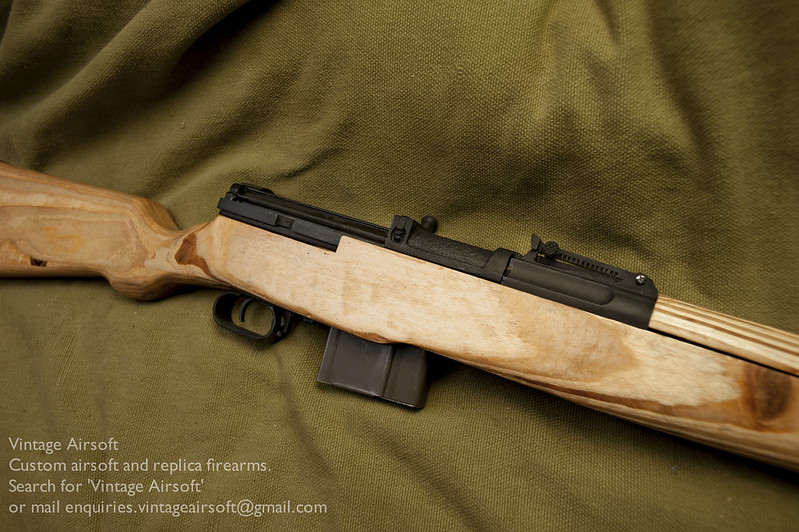
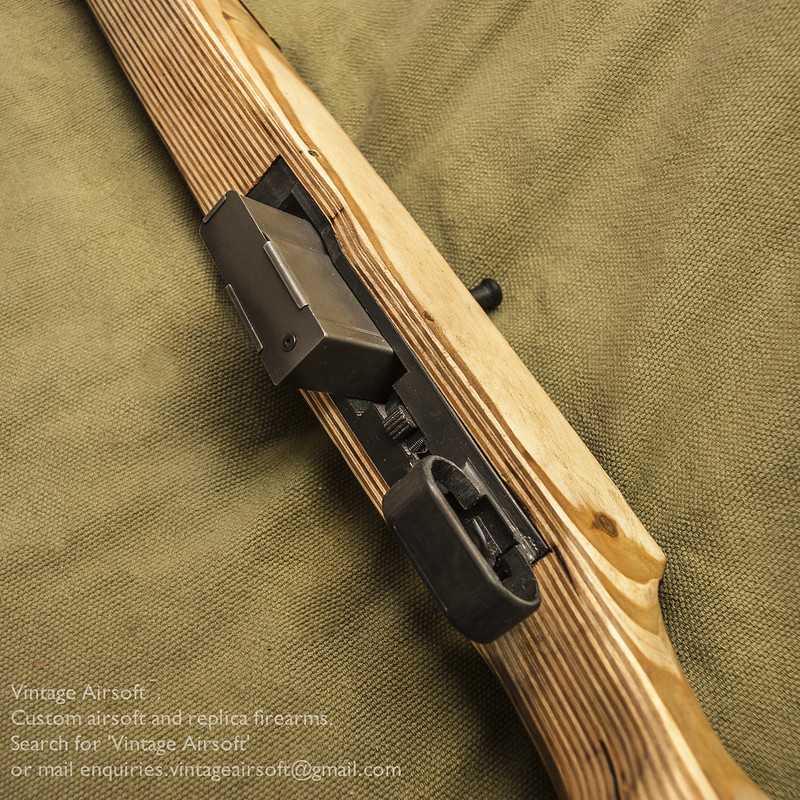
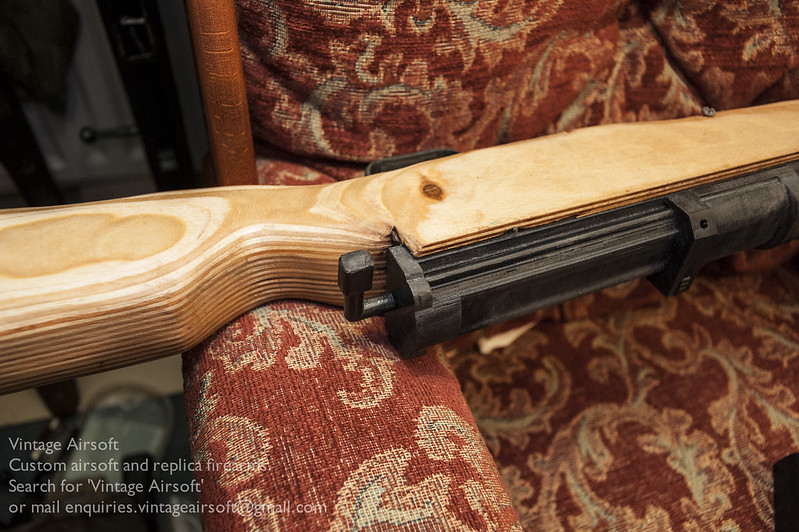
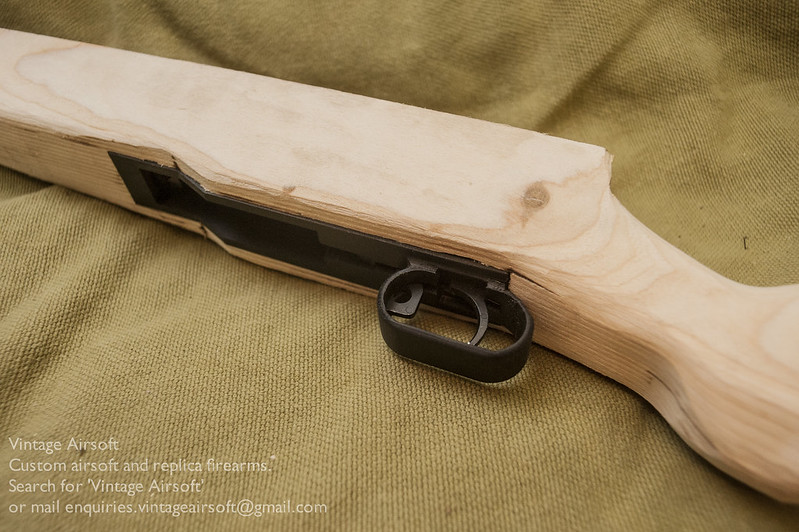
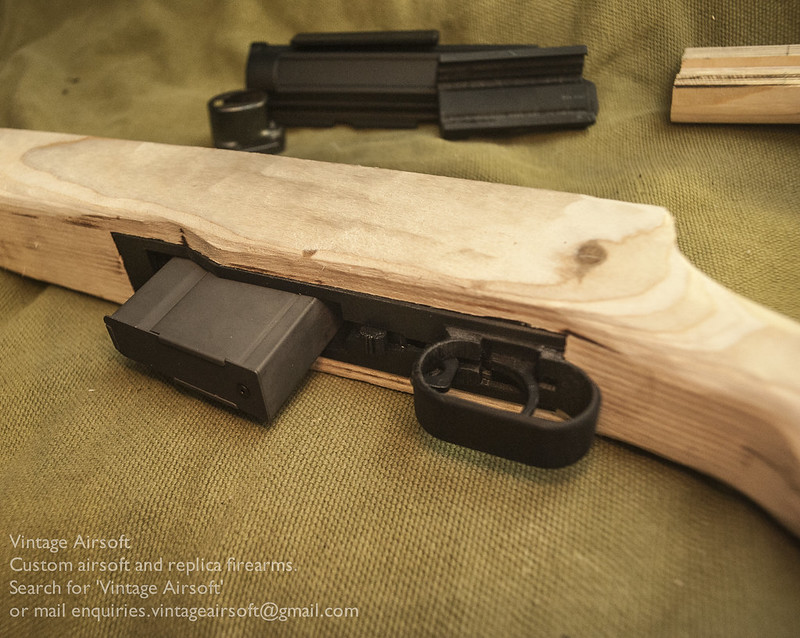
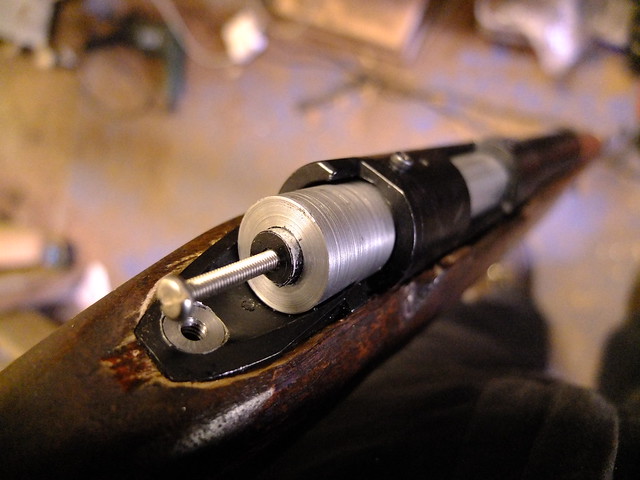
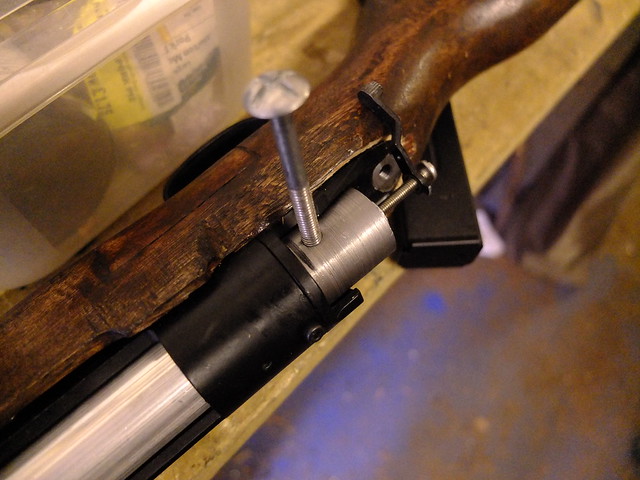
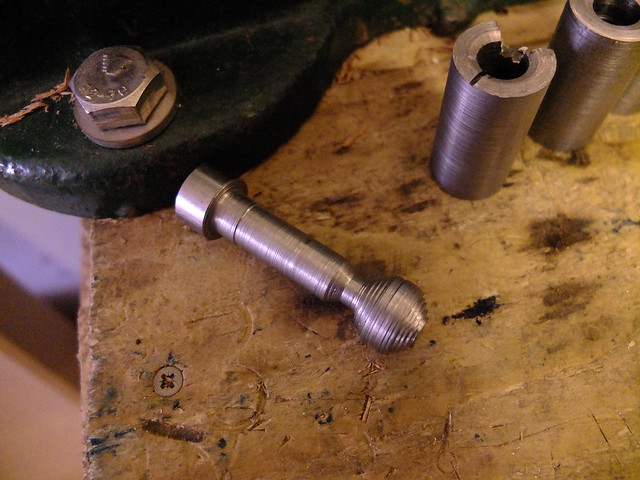
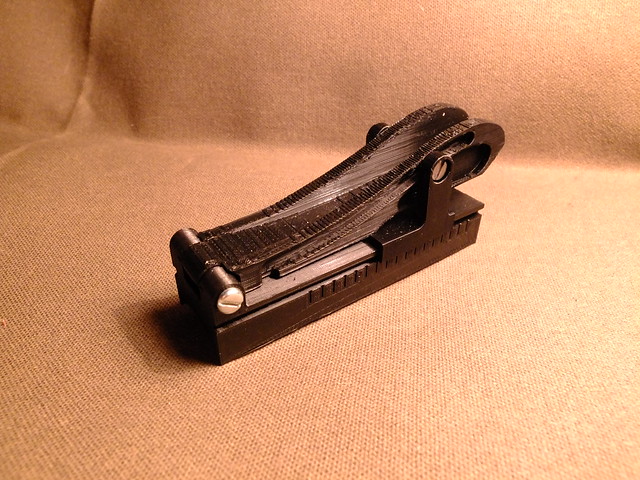
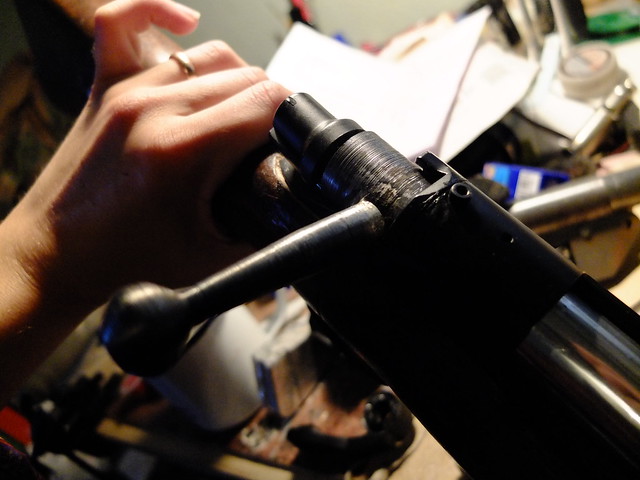
The new VSR magazine well (MkII, printed) is far neater and more intuitive to use than its predecessor.

_DSC6278

Sniper Variant

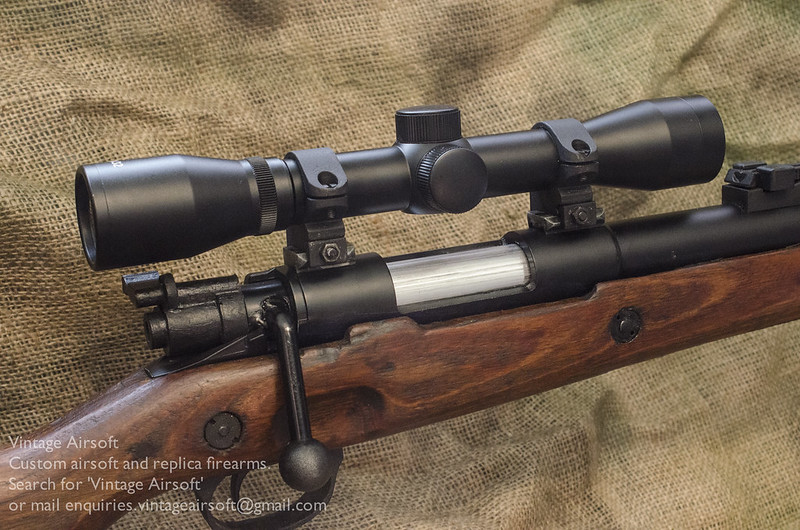
Loosely based on the ZF39 mounted rifles, this was an inexpensive workaround to buying and fitting an original or repro scope and mounting system. While that is something I would like to do, this is good for the player who wants to snipe in style on a bit more of a budget.

_DSC6283

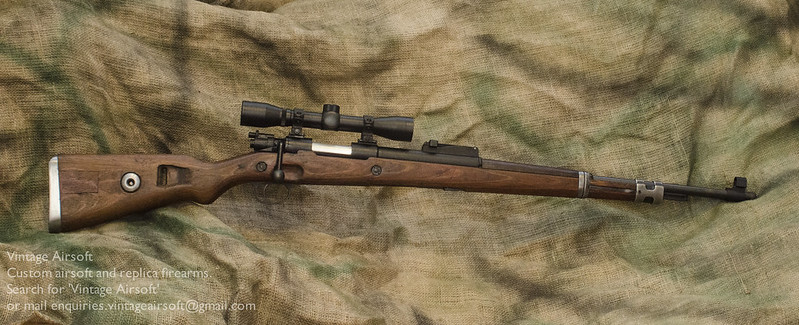
The sight hood is included with the standard K98ks as well, but suits the scoped rifles particularly well.

_DSC6286

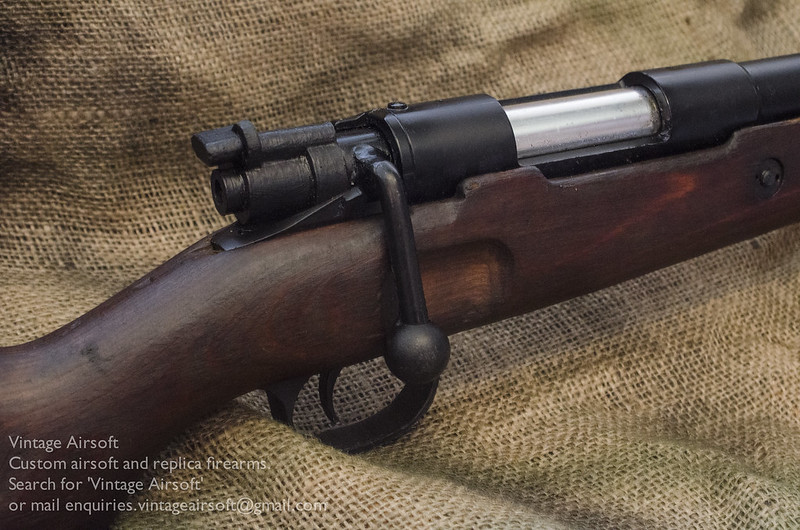
The scope mounts have been modified to look slightly less modern. Square edges have been rounded off, hex screws replaced with oil-finished slotted screws and the chunky thumbscrew replaced with nuts.

_DSC6287

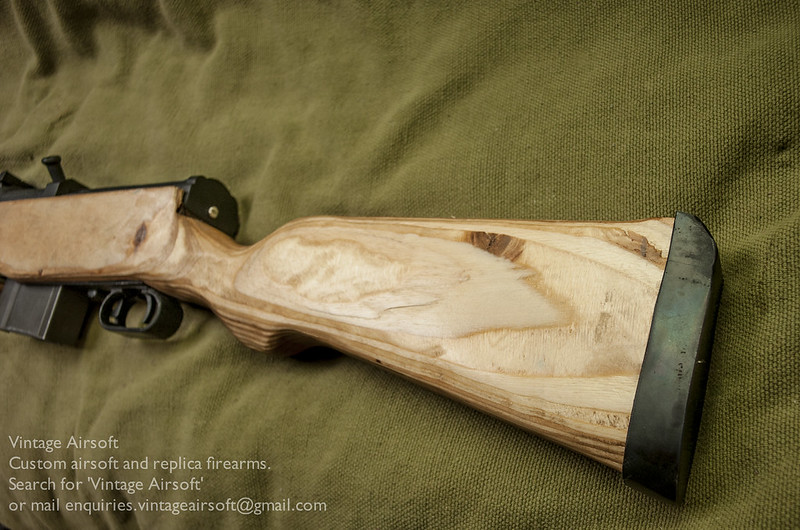
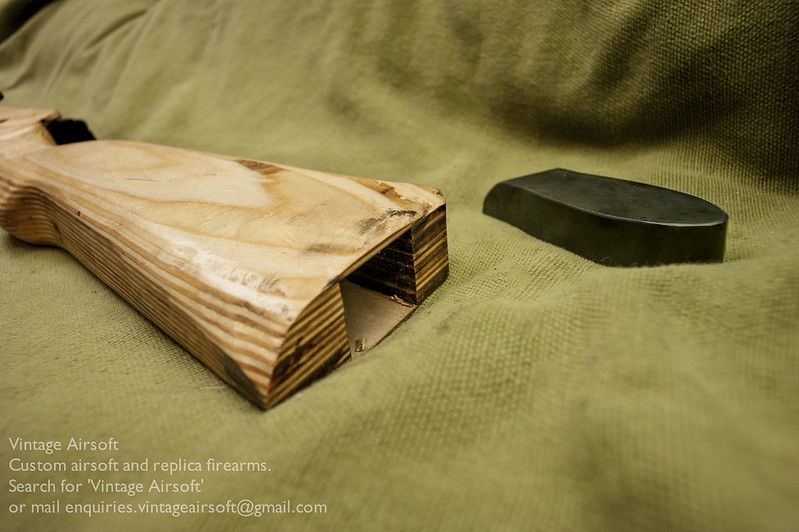
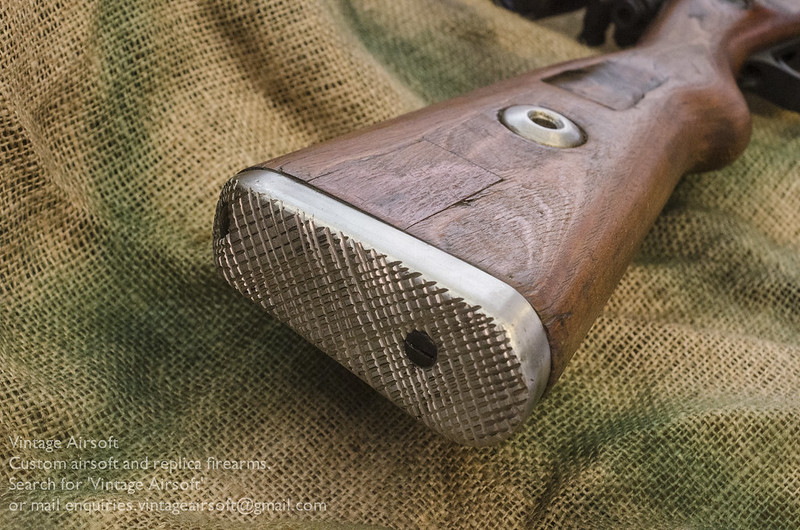
The buttplate has been chequered for extra grip. This could be neater, unfortunately the buttplate curved across its face as well as down the length which I didn’t expect and this threw me off.

_DSC6290

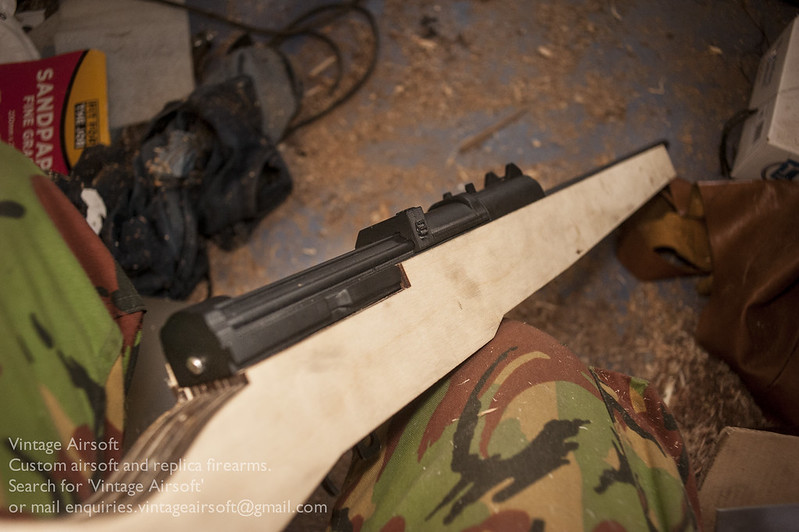
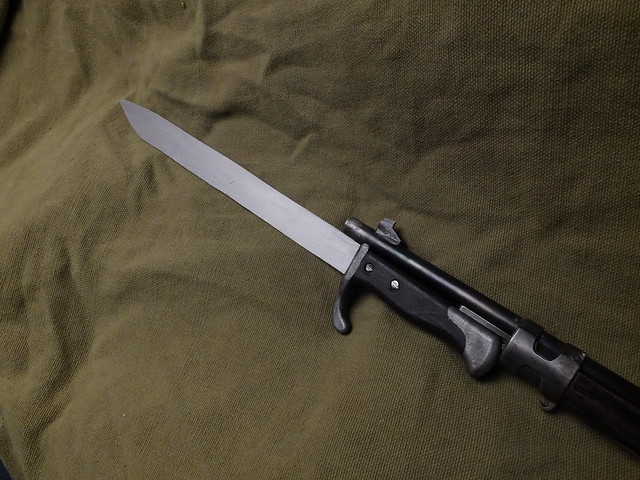
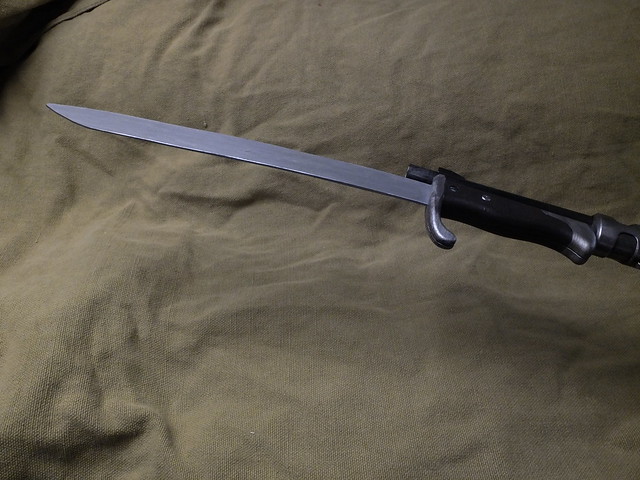
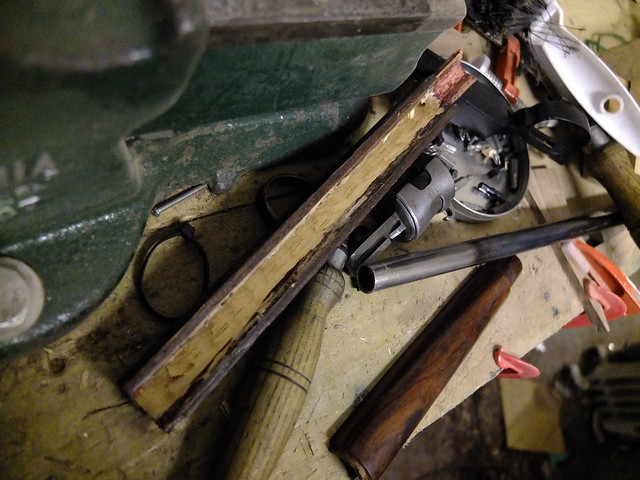
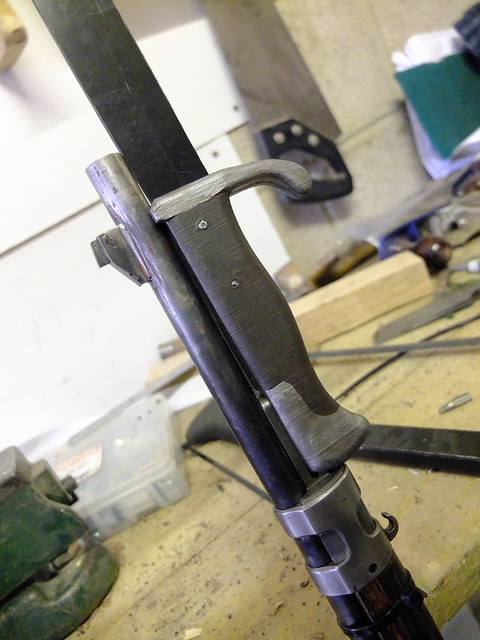
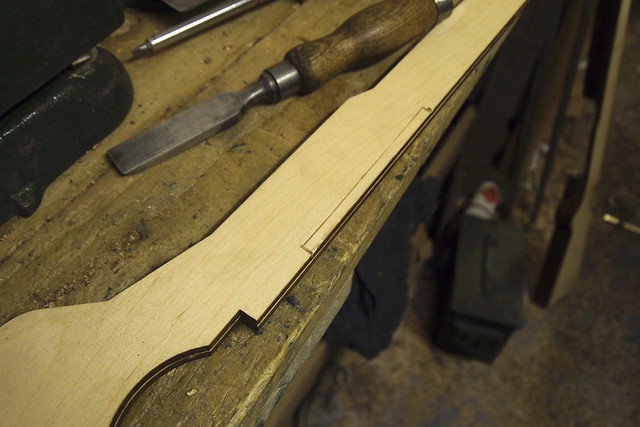
Several of the K98k stocks I have received recently have had shorter-than standard hand guards. In order to ensure a secure fit I have made a polymorph hand guard retaining piece.

_DSC6293

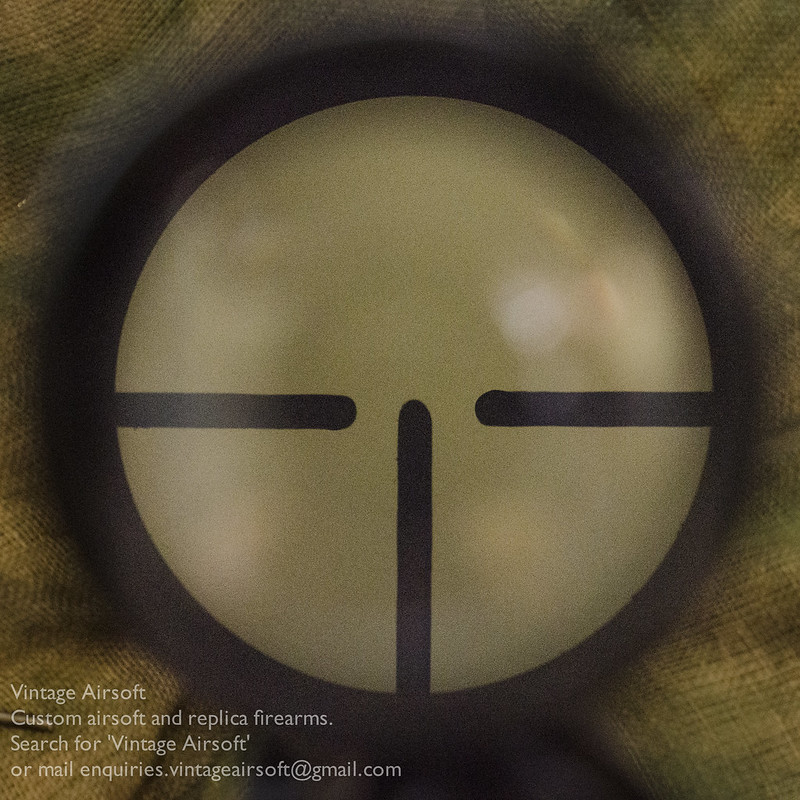
And last but not least, a custom reticle for the scope. You can’t have a German Sniper rifle without a German Post. This is a prototype, I’m looking to get some laser cut for a sharper profile.

_DSC6291

If you are interested in the history of the K98k, you can check out the introduction article here, or see the whole build process here.

If you like this project or have an idea of your own, drop us a line on enquiries.vintageairsoft@gmail.com to discuss. ‘Like’ our Facebook page or follow the blog to get regular updates on projects and interesting videos and articles.

Don’t forget you can buy many of our complete products via The website.

G43 AEG Mk2: Complete

Battle Rifles, Complete builds, Custom builds, G43 MkII, G43/K43, Weapons, WWII

I know some people are quite excited about this project so let’s get straight stuck straight in with some pictures!

Left side:

_DSC7820

Right side:

_DSC7821

The 3D printed receiver.

_DSC7822

The rear sight, adjustable for elevation via the leaf. The rear sight adjustment is controlled by the bar across the leaf which is held in place by teeth and spring tension.

_DSC7823

The receiver open. You can now see the finishing touches to the slide, which has been painted up using a mix of acrylics and coarse sand. This simulates the rough cast surfaces left over that were not milled flat as a manufacturing expediency.

_DSC7827

The foresight unit, 3D printed and pinned in place. The blade is adjustable for windage once the hood is removed.

_DSC7825

The barrel is black painted. Production versions of this may be oil blacked, though the fore-end cap will likely be printed rather than metal.

_DSC7826

The magazine well and trigger guard. I may have to beef up the trigger guard in future versions. The magazine release is the small catch between the  magazine and the guard. Although not greatly ergonomic, the original was designed to be fed with stripper clips to be fair.

_DSC7828

A second view.

_DSC7833

The buttstock needs a bit more work for production, but it’s a satisfying result. For production I am going to try and put a sling mounting through it as per the original.

_DSC7829

The buttplate comes off to access the battery compartment.

_DSC7830

A quick view down the gun from the back.

_DSC7832

I’m very pleased with this build I must admit. It looks the part and has a nice heft to it. Of course there have had to be some dimensional changes to fit the airsoft internals, but they aren’t any worse than AEG M1 Garands and without a direct comparison it ought not stand out too much.

Finally WWII airsofters have an option for a rifle that isn’t a K98k or an STG44.


If you have enjoyed this project or have an idea of your own, drop us a line on enquiries.vintageairsoft@gmail.com to discuss. ‘Like’ our Facebook page or follow the blog to get regular updates on projects and interesting videos and articles.

Don’t forget you can buy our smaller items via Etsy. Our larger items can be found here.


G43 AEG Build 2: Part 3

Battle Rifles, G43 MkII, Weapons, WWII

The last leg of the G43 build are the details that will make it really look the part. First up: the rear sight leaf. This is adjustable for elevation, using a spring and teeth that engage on the right side of the leaf.

Screen Shot 2017-11-04 at 18.21.47

At the front, I’ve had a spring 3D printed. This slots into the nose cap provided by the client.

_DSC7418

At the back of the receiver, the new one has the disassembly lever.

_DSC7416

The rear sight in the flesh. It is kept down by the spring in the front of it.

_DSC7411

Eagle eyed viewers will notice that the receiver has changed a bit, there are now two scoops in the side up by the chamber. There are also stronger rails which had proven a little bit weak to stand up to repeated disassembly.

_DSC7402

The rear sight in place on the new receiver. 

_DSC7446

The foresight is pinned in place with two 3mm pins. The foresight blade is adjustable for windage, so with the rear sight elevation adjustable you have a good range of adjustment.

_DSC7448
 

Although this is now nominally all in place, I need to do some last bits of finishing. Although it is all there there is something missing to give it that ‘X-factor’. I expect it’ll all come together once the painting has been done.


If you are interested in this project or have an idea of your own, drop us a line on enquiries.vintageairsoft@gmail.com to discuss. ‘Like’ our Facebook page or follow the blog to get regular updates on projects and interesting videos and articles. 

Don’t forget you can buy our complete products via Etsy.


G43 AEG Build 2: Part 2

Battle Rifles, G43 MkII, G43/K43, Weapons, WWII

The first job for this part of the build was to modify my receiver design to fit the gearbox with comfortable space around it.

Screen Shot 2017-09-26 at 00.32.57

Effectively I added a slither of extra space down the middle to add width.

Screen Shot 2017-09-26 at 00.33.05

Once printed, it all fits quite nicely. The slide moves freely, needing only a slight tweak to put it in place.

_DSF9817

While there isn’t a function to the action opening, it’s one of those things that is nice to have.

_DSF9816

I decided at this stage to get the stock parts recut to improve the shape slightly.

22712793_10213000894729842_2029052712_o


The action now fits deeper inside  the stock and the receiver needs fitting into the woodwork rather than sitting on top.

22766334_10213000892009774_536645344_o

I routed out the top so that the receiver fitted snugly in. As before it hooks onto the back and screws down at the front.

_DSC7307

I routed out the top guard to fit the barrel and marked out cut lines.

_DSC7311

I marked out some of the shape for the top guard at the same time.

_DSC7314

Fitting the front cap provided by the client, the top guard is partly secured in place here and will be at the back as well.

_DSC7312
With this in place, I can rough shape the stock itself. The top and bottom are rounded off for comfort as far back as possible.

_DSC7317

Even at this stage the stock is developing a pattern quite pleasingly similar to the original!

_DSC7318

I welded up a buttplate, the battery compartment needs still more work to fit an original alas.

_DSC7319

With some careful design, the first version of the trigger guard and magwell just slots straight into the stock. Two screws in the front will hold it in place along with two lugs at the back.

_DSC7327

The build is now starting to look distinctly G43-ish.

_DSC7329

The magazine is a snug fit, but the catch engages nicely.

_DSC7331

A little test piece to see what the varnish/stain will do to the woodwork.

_DSC7338

Much of the rest of the work on this is painting and finishing work with just a few details to add.


If you are interested in this project or have an idea of your own, drop us a line on enquiries.vintageairsoft@gmail.com to discuss. ‘Like’ our Facebook page or follow the blog to get regular updates on projects and interesting videos and articles. 

Don’t forget you can buy our complete products via Etsy.

K98k: Complete

Complete builds, Custom builds, K98k, Weapons, WWII

The VSR K98k is now finished, and she is a pretty one.

_DSC7255

From the outside, the only major giveaway that this is not a real K98k is the VSR magwell in the belly. The eagle-eyed may notice the bolt handle being set back a little (alas unavoidable). 

_DSC7261

The oil blued barrel fits in with the existing metalwork and furniture nicely. As it dulls with age it will fit in better.

_DSC7256

The 3D printed rear sight, which is part of the kit I will be offering people who want to do their own K98k conversion

_DSC7257

The back cap looks the part, even if it doesn’t function. It is certainly an improvement on the original VSR cap!

_DSC7258

Likewise the bolt stop, has no function on this but really adds to the replica. For the uninitiated to the Mauser system, this catch holds and releases the bolt during use and disassembly respectively.

_DSC7260


If you are interested in the history of the K98k, you can check out the introduction article here, or see the whole build process here.

If you like this project or have an idea of your own, drop us a line on enquiries.vintageairsoft@gmail.com to discuss. ‘Like’ our Facebook page or follow the blog to get regular updates on projects and interesting videos and articles.

Don’t forget you can buy many of our complete products via Etsy.

G98 VSR: Complete

Complete builds, Custom builds, G98, G98 VSR, Inter-War (1918-1939), Rifles, Weapons, WWI, WWII

After the last build post, the G98 is finished! Time to take a look at those last details.

_DSF9746

The fore-end is pretty much unchanged externally.

_DSF9747

At the back, the new back cap crowns the rear of the bolt. Although entirely decorative, it does make a difference to the look of the thing.

_DSF9748

There is also a faux bolt release, used on the real thing for disassembly.

_DSF9749

The Vizier rear sight.

_DSF9750

Which is capable of full elevation adjustment.

_DSF9751


_DSF9752

The bayonet will be a useful addition, especially when this is used as a musket for American Civil War airsoft. This is a new design I’ve not tried before and will be trialling it on this and the SMLE.

_DSF9753

Making longer bayonets that are stiff enough to look the part and work safely for airsoft is quite tricky: rubber is too floppy, wire stiffening isn’t strong enough and most fibreglass stiffeners are too hard for guaranteed safe use.

_DSF9757

I feel this plastic blade has the balance of flexibility and stiffness just right. For this and the SMLE bayonets it’s about right, though for longer bayonets it may need a couple of layers of lamination to hold shape. That said, there are only so many bayonets that are longer than 17″ for the eras I cover!

_DSF9758


If you like this project or have an idea of your own, drop us a line on enquiries.vintageairsoft@gmail.com to discuss. ‘Like’ our Facebook page or follow the blog to get regular updates on projects and interesting videos and articles.

If you would like to see the little intro I wrote for the first G98 build you can see it here.

To see the build for this rifle, see here.

Don’t forget you can buy our complete products via Etsy. If you would like a build like this, please drop us a line on the above email.

Kar98k: Build 2

Custom builds, K98k, Weapons, WWII

The next step was sorting out the fore-end. The foresight was 3D printed in ABS, I used filler paint to hide the layers and give it a textured look. It is screwed down to the barrel. The barrel is a piece of steel ERW tube, polished on the lathe and oil finished. This gives it a nice, subtly shiny finish that looks rather like a deep bluing.

_DSF9715 2

A closer look and you can see the adjustable foresight blade.

_DSF9720

A quick view of the bottom, showing the new fake magwell and real magwell. The receiver screws down into the back of this section, the front of it is supported by the metal frame of the VSR magwell.
_DSF9719

The next step is to make the bolt handle unit. This is made in four parts. I turn the ball on the lathe, drill through it to fit a narrow diameter round bar which is brazed in place. I attach it to another part made on the lathe, which surrounds the haft of the bolt and has a cutout for the out of battery safety.

_DSF9777

The back cap is cast from my original 3D printed model used on the G98.

_DSF9778

And that, pretty well, is that. Just a few last bits of touching up paint here and there. I’ll also be making a scope mount for this soon, once I have worked out how to make one that looks ‘right’.

Finished pictures to come!

If you are interested in the history of the K98k, you can check out the introduction article here.

If you like this project or have an idea of your own, drop us a line on enquiries.vintageairsoft@gmail.com to discuss. ‘Like’ our Facebook page or follow the blog to get regular updates on projects and interesting videos and articles.

Don’t forget you can buy many of our complete products via Etsy.


G98 VSR: Part 2

Custom builds, G98, G98 VSR, Imperial Era, Inter-War (1918-1939), Rifles, Weapons, WWI

My first major improvement is the back-cap for the bolt. This one is in two parts, to allow friction to be between these two lubricated steel parts rather than on any soft aluminium bits.

_DSF9642

At the front end, I am replacing the biscuit that joined the front and main parts of the stock with a steel tube. Apart form being very strong, this will also allow me to stow a full-length ramrod in the rifle. Although this is far from necessary for use as a G98, I’ll be using this as a musket for American Civil War airsoft until my dedicated musket is finished.

_DSF9658

With enough material removed, I epoxied the steel tube in place.

_DSF9659

In place on the rifle, I leave it overnight to set.

_DSF9661

At the back end of the bolt, I’ve had a 3D printed cap made to replicate the rear of the Mauser bolt. This will go on the K98 builds as well.

_DSF9680

The bayonet is going to be very useful when the rifle is used as a musket, so it’s important to get it right. The grips are 3D printed (dimensions scaled from a photograph) and screwed together. The blade is replaceable and flexible, but not so much as to be floppy.

_DSF9684

When painted up it improves the look, at least from a slight distance. It would be ideal if I could get it to a mirror finish on it to get that threatening flash as it catches the light.

_DSF9697


And that is pretty much that. Just the pictures of the finished item to go!

If you would like to see the little intro I wrote for the first G98 build you can see it here.

If you like this project or have an idea of your own, drop us a line on enquiries.vintageairsoft@gmail.com to discuss. ‘Like’ our Facebook page or follow the blog to get regular updates on projects and interesting videos and articles.

Don’t forget you can buy our complete products via Etsy.

G43 AEG Build 2: Part 1

Battle Rifles, G43 MkII, G43/K43, Weapons, WWII

The aim of this build is twofold. In the previous G43 build it was a conversion from a wood-stocked M14. There were two problems with this:

  1. The M14 stock isn’t quite the right shape
  2. Wood-stocked M14s have become almost completely impossible to find

So as the G43 is one of my most asked-for builds I have finally come up with a solution. Making a stock from scratch is the simplest way to go, this one has taken a bit of time to get right but I now have a design I’m confident of.

Screen Shot 2017-07-26 at 23.14.34

Laser cut from ply, the parts are stuck together one layer at a time.

_DSF9293

Checking the fit, the ‘lightly’ modified M14 action slots in. At this stage my main concern was the motor space as it is snug by necessity for strength.

_DSF9332

Out of the second side, I have to cut a section to fit part of the M14 receiver. This is chiselled out and is invisible from the outside of the rifle.

_1010019

In situ, the only part out of place here is the rear-wiring, which would normally live inside the stock. However it needs re-soldering on the motor here and doesn’t go in easily as such. This will be solved easily enough though.

_1010020

The second side glued and clamped in place. I’ve put the battery transfer wire through from the battery compartment (in the buttstock) through to the motor housing. 

_1010022

The action fits in snugly, and I fit the repro front cap provided by the client.

22015636_10155935933208623_1262394515_o
Although the donor action looks weirdly bent, that is the shape of an M14 once you strip the receiver bits off. The nozzle goes up into the feed ramp at an angle. It’s weird, but it works.

22050766_10155935933123623_1511603968_o


The next step is to create the faux receiver. I designed it for 3D printing. It may need a little tweaking to fit around the gearbox.

Screen Shot 2017-07-26 at 23.14.20

G43_parts_2017-Jul-26_09-29-28PM-000_CustomizedView29517140883

My initial design will need a little tweaking to fit around the gearbox mounting but the majority of the work is done.

G43_parts_2017-Jul-26_09-18-23PM-000_CustomizedView20191270454

I am hoping to have an opening receiver. Although it’ll have no function, it’s one of those touches that is nice to have.

G43_parts_2017-Jul-26_09-17-25PM-000_CustomizedView1136747149

G43_parts_2017-Jul-26_09-16-48PM-000_CustomizedView14882526777


More of this build coming soon!


If you would like to find out some of the history of this rifle, you can see my long-ago written intro to the G43 here.


If you enjoyed this article, join us over on Facebook and check out our Etsy store. If you have an idea for a custom build of your own get in touch on enquiries.vintageairsoft@gmail.com.

G98 VSR: Part 1

G98, G98 VSR, Imperial Era, Inter-War (1918-1939), Rifles, Weapons, WWI

The start point for this project is the G98 Dboys shell ejecting model. A VSR base for this rifle would make it much more practical and skirmish able.

_DSF8004

The first step is expanding the recess for the magazine This necessitated the removal of the front securing lug for the original magwell and trimming down the metal lining of said magwell to fit the new VSR parts. Rather pleasingly the trigger sits quite naturally in the trigger guard with minimal modification.

_DSF9133

The fore-end is unchanged. I’m using the same outer barrel and fittings.

_DSF9134

The bolt handle will be another custom piece.

_DSF9136

The bolt handle will screw in and be thread locked in place. If at a later date I decide to make a bent handle for use as a sniper rifle I can just swap it out.

_DSF9137

The bolt handle part-made. At this point I had to take it off and make some other parts and the lathe broke down, so I’ll have to come back to this later!

_DSF9138

The rear sight for this is 3D printed, the repro I used won’t fit over the larger receiver. Although it looks a little rough here, once painted up it’ll look the part. In the longer term I hope to cast these in aluminium.

_DSF9365

In place on the rifle, it is secured by two screws. The small hole in the middle is for hop adjustment (I fit a TDC hop mod to all VSR builds).

_DSF9372

Viewing down the rifle, that Vizier rear sight give a really distinctive sight picture!

_DSF9376

Next to its nephew, the K98k VSR build in the workshop.

_DSF9375

A bit of epoxy resin to smooth off the rougher surfaces. When sanded down and painted up it’ll really look the part.

_DSF9418

With the lathe FINALLY fixed I could finish off the bolt handle after looking at it half finished for about two months (truly torturous). Now I just need to finish the back cap and the rifle itself is done.

_DSF9638

Then there are a few optional extras which I’ll be fitting before finishing entirely. So far though, I am delighted with how this conversion is going.


If you would like to see the little intro I wrote for the first G98 build you can see it here.

If you like this project or have an idea of your own, drop us a line on enquiries.vintageairsoft@gmail.com to discuss. ‘Like’ our Facebook page or follow the blog to get regular updates on projects and interesting videos and articles.

Don’t forget you can buy our complete products via Etsy.