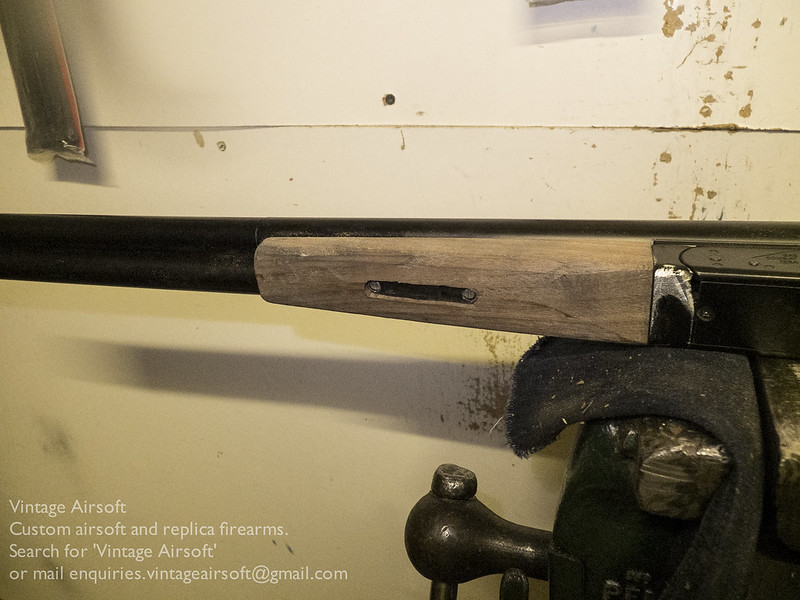
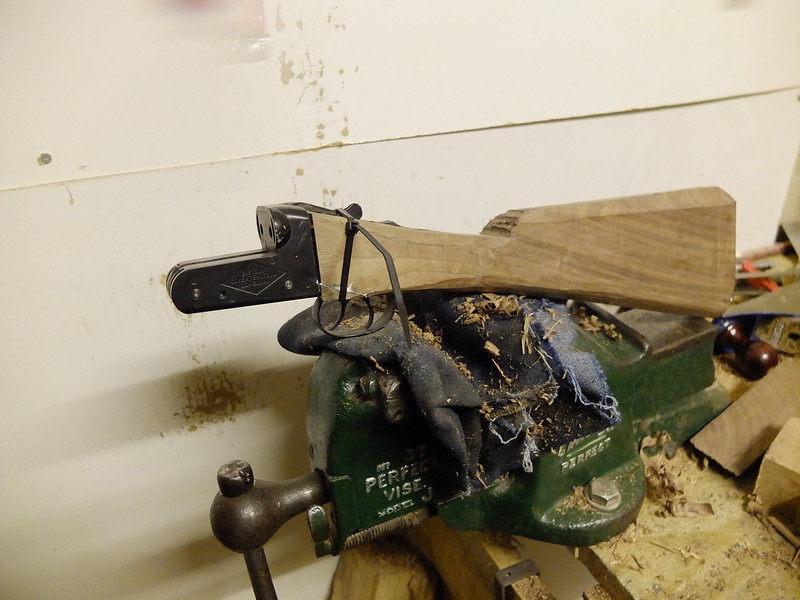
The forestock fitted in place is a little bit longer than the original but is fastened in the same way.
This definitely improves the overall shape of the rifle.
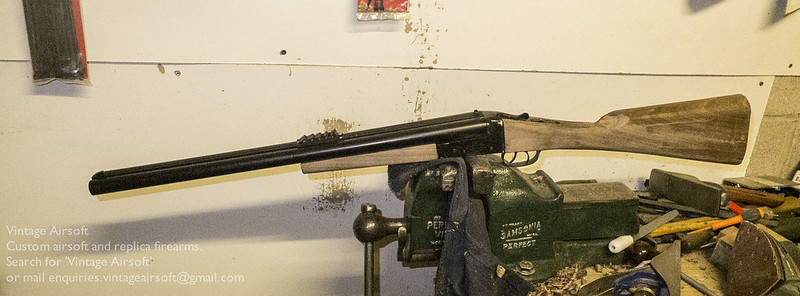
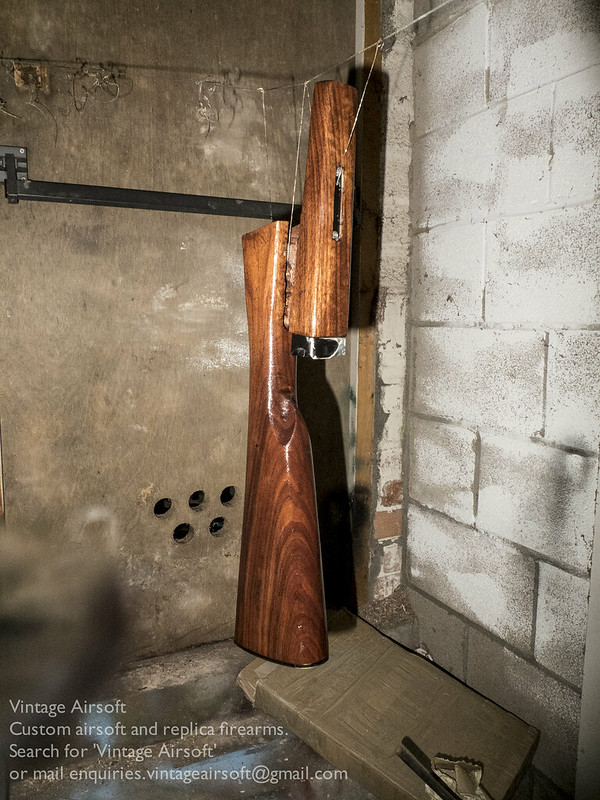
With the woodwork shaped and the buttplate fitted I applied a few layers of finish, leaving it to dry.
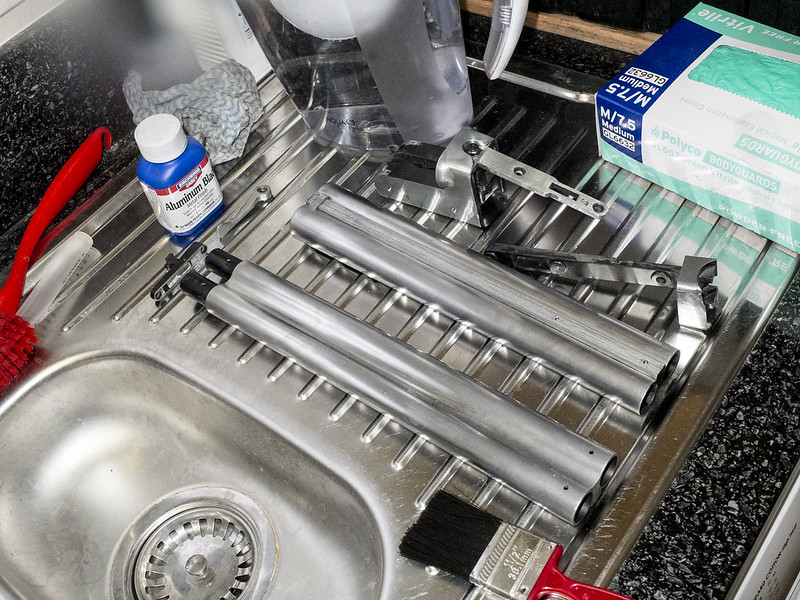
In the metalwork department, I stripped the original paintwork from it. Underneath is aluminium of some kind, though some parts are an odd coppery colour.
I applied Birchwood and Casey’s aluminium black. A couple of coats later and I have a nice dappled finish across the surface.
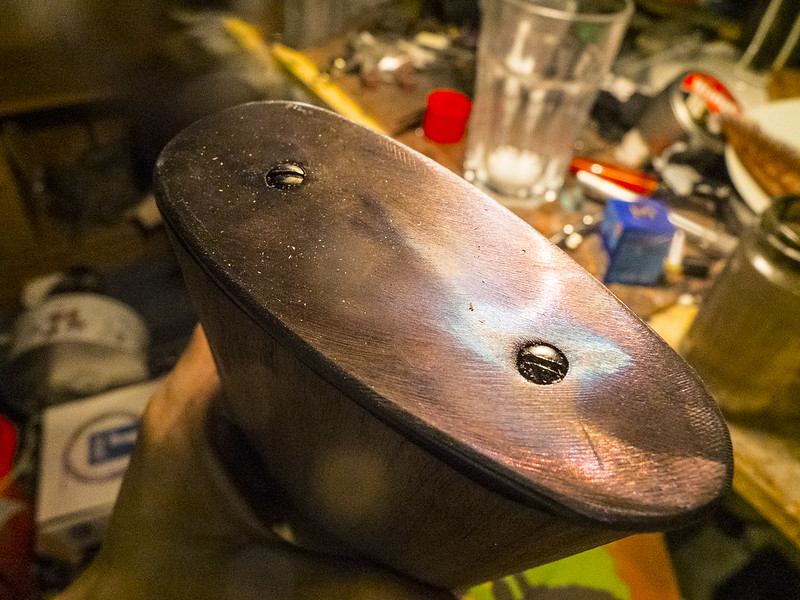
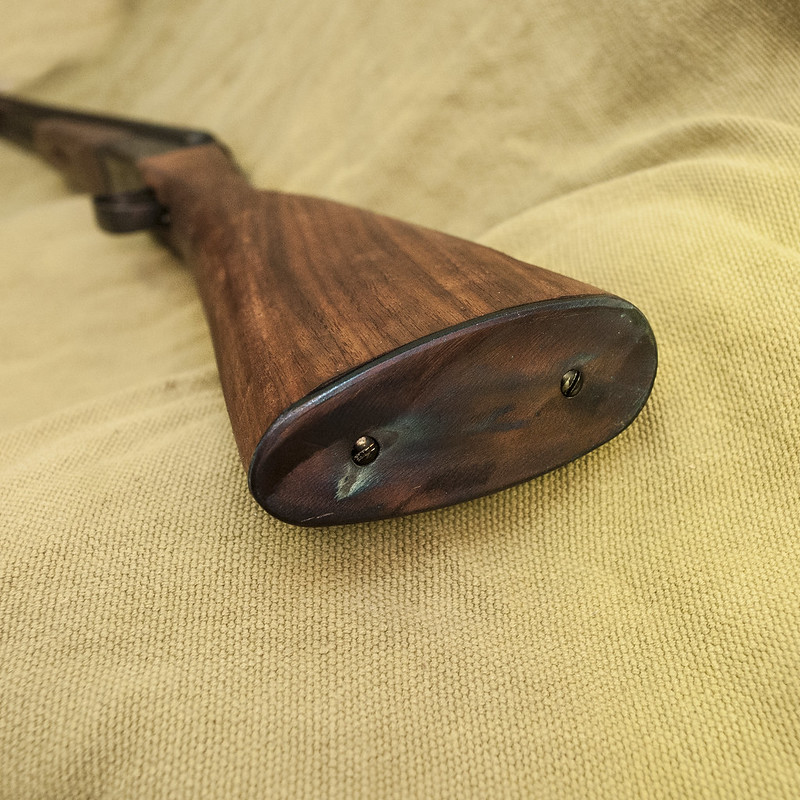
The buttplate, being steel, is brushed smooth (though with a swirling pattern of sorts left on for some semblance of grip) and heated to a dull red before being quenched in oil. This leaves a rather pleasing mixed-colour finish varying from straw to light blue.
The screws are blacked to fit in.
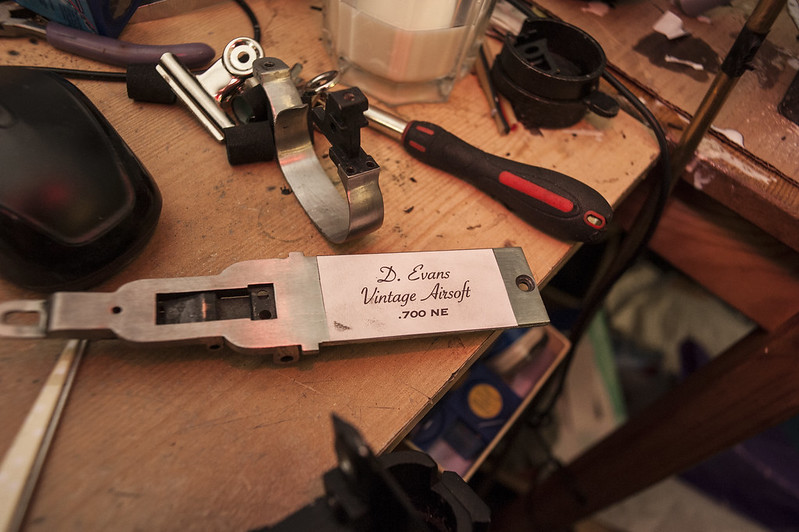
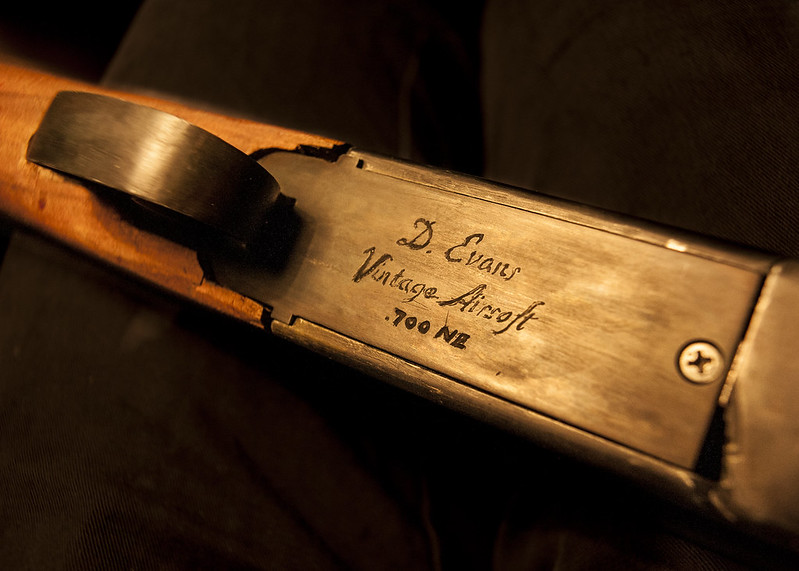
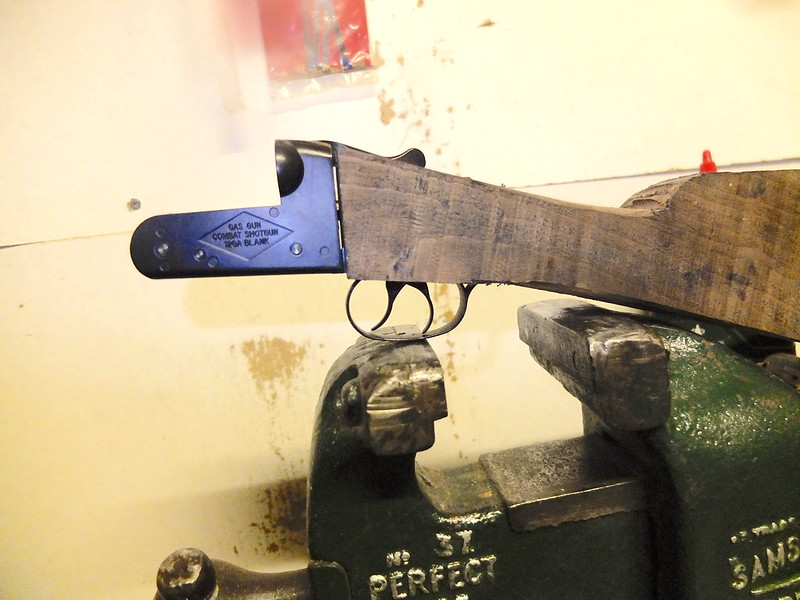
The last bit is to mark up the rifle appropriately. On the bottom plate I’m marking the gun with my details and the ‘calibre’. Though it’s not technically .700 NE, the shells are actually very close.
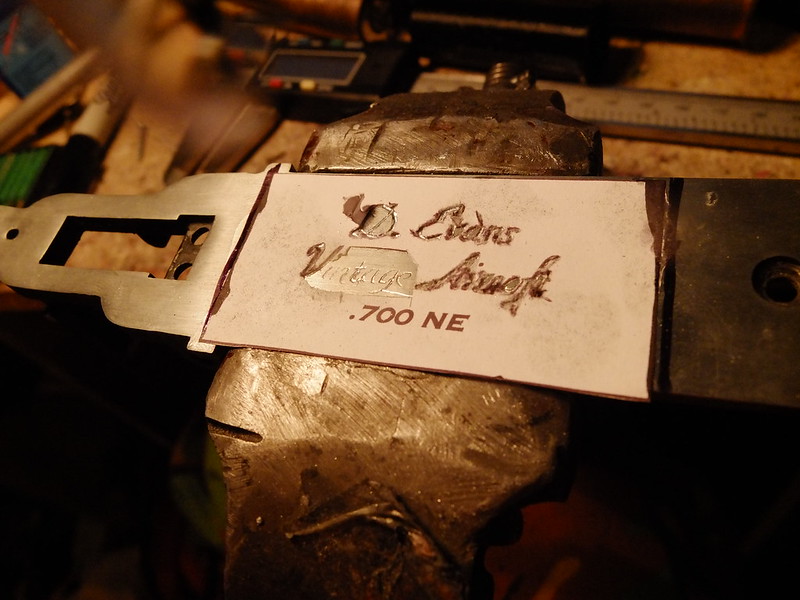
The first step is a quick going over of the script to give a shallow etch to follow. One can then lift the paper to check the etch is deep enough in a few places before removing the whole lot.
With the paper removed, I add depth and boldness to the capitals and detailing in the few places I have the skill to add it.
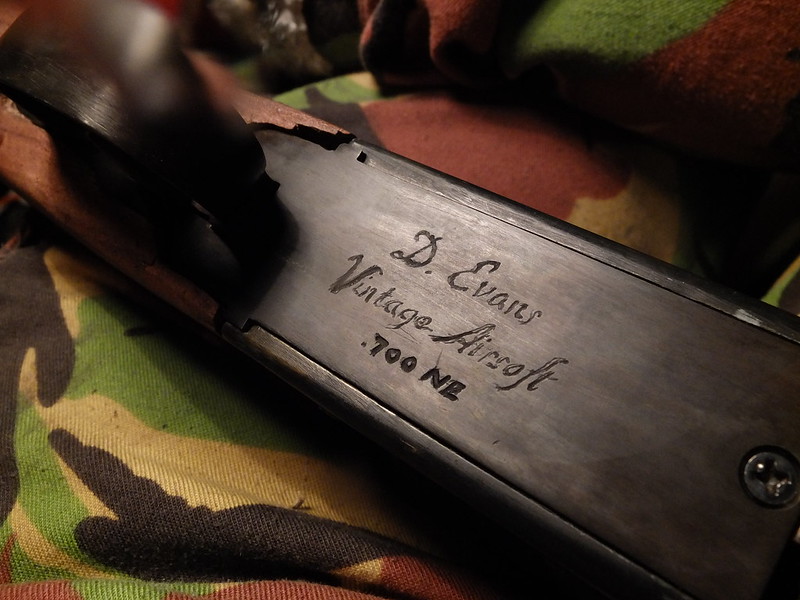
Once all the text is to depth, I used Birchwood Casey’s aluminium black as per the rest of the gun. In the picture below you can see where the back of the foregrip assembly had an argument with my planer, which was a sad event. That being said, I hope to make a replacement in the near future.
I’m pretty pleased with how the script came out. This is only my second attempt at engraving work and I feel it is quite an improvement over the first. I’m not 100% happy with the calibre, but the script typeface isn’t too bad.
This is basically finished now, so photographs of the complete item to follow!
If you are interested in this project you can see the rest of the project here. If you have an idea of your own, drop us a line on enquiries.vintageairsoft@gmail.com to discuss. ‘Like’ our Facebook page or follow the blog to get regular updates on projects and interesting videos and articles.
Don’t forget you can buy our smaller items via Etsy. Our larger items can be found here.
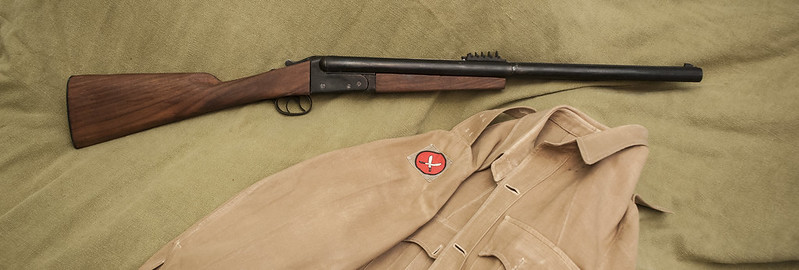
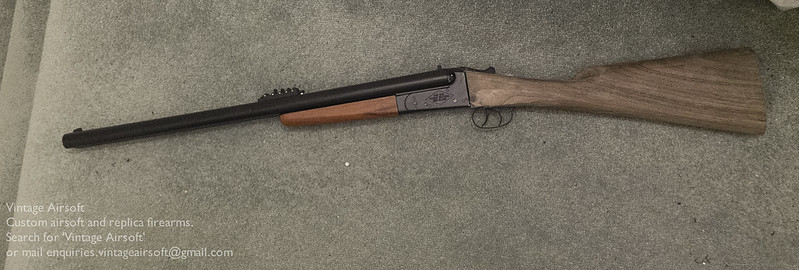
At long last, the Stopping Rifle is done. So anyone planning on bringing an elephant or tiger to a site near me had better watch out!
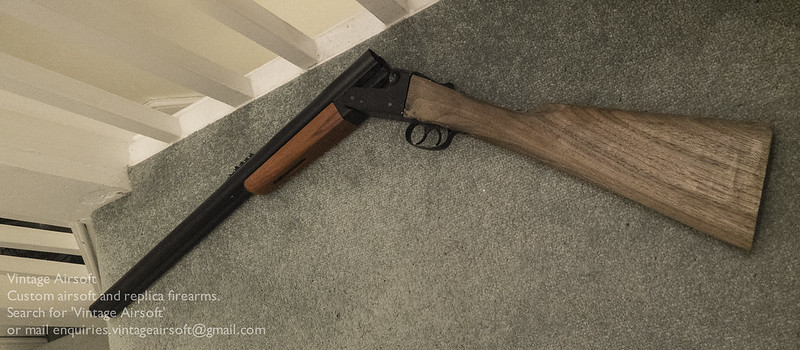
This break action is very satisfying to carry broken over the arm and practice your swift mountings in the bedroom mirror.
The buttplate, lightly oil finished. I’m yet to take a picture that does this justice, but that gorgeous selection of colours fading from one to another is very satisfying.
The straight-wrist stock is a classic English side-by-side design. I’ll probably make other styles of stock in future versions.
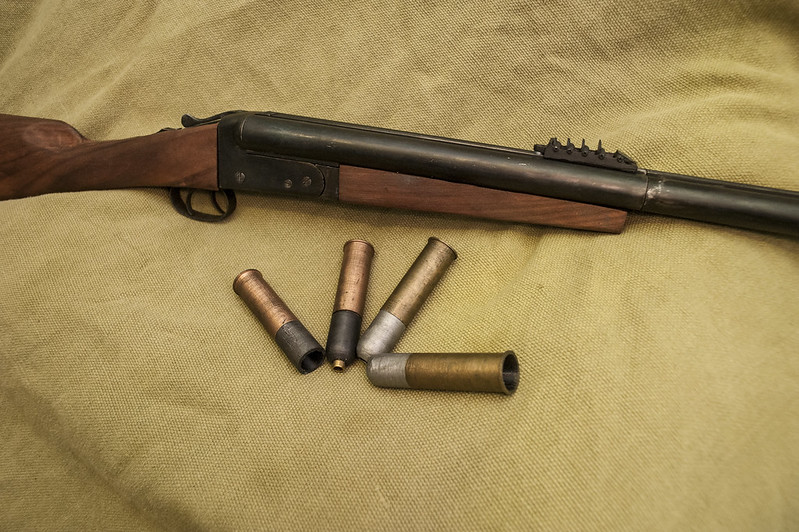
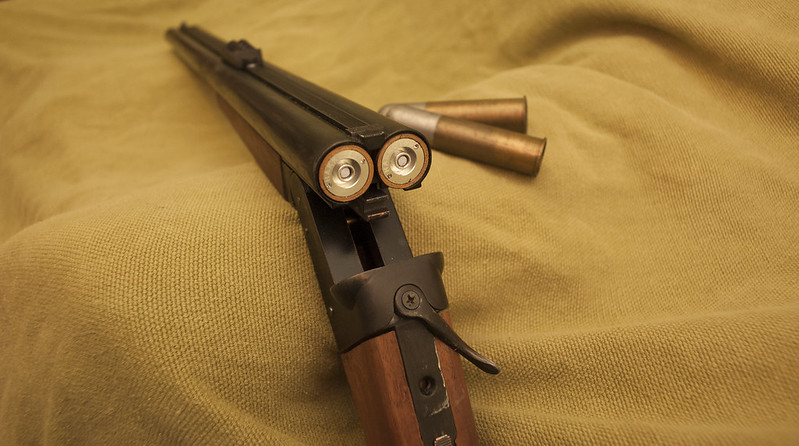
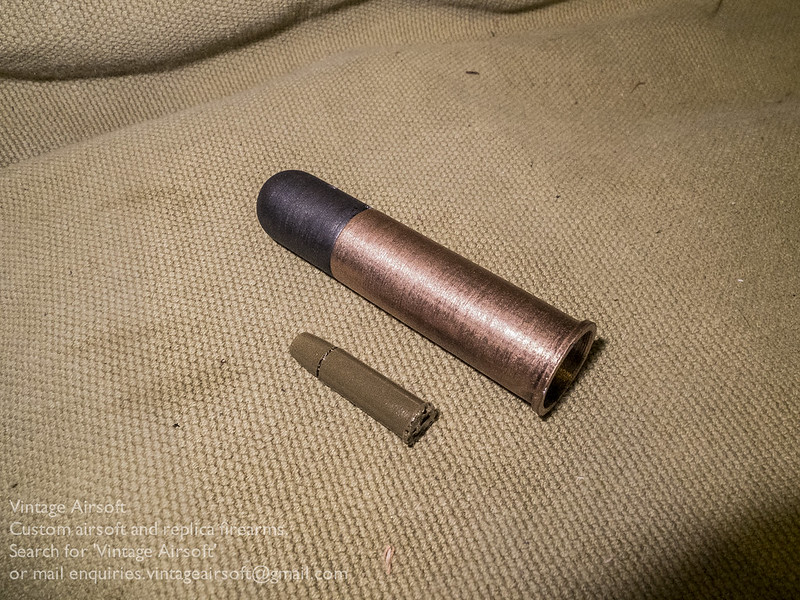
The shells are roughly based on .700 Nitro-Express. These are quite nice for extraction and pocketing, a nice handful in every pair.
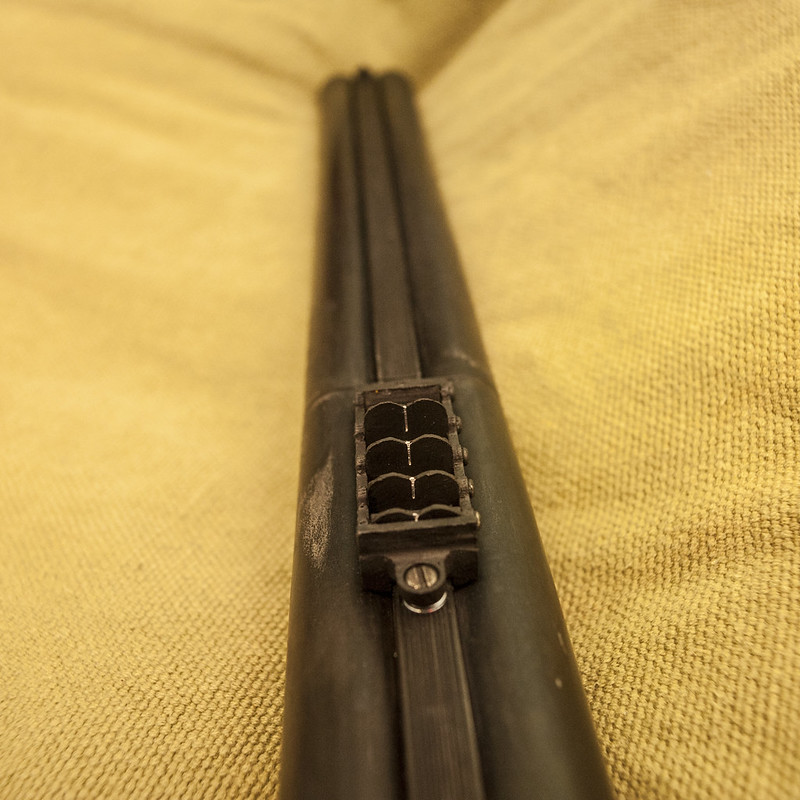
The Express sights deserve comment. Given the nature of express cartridges, heavy and slow, they have a somewhat rainbow trajectory. This style of sight allows the shooter to quickly select their range and fire without having to finely adjust a wheel or tangent.
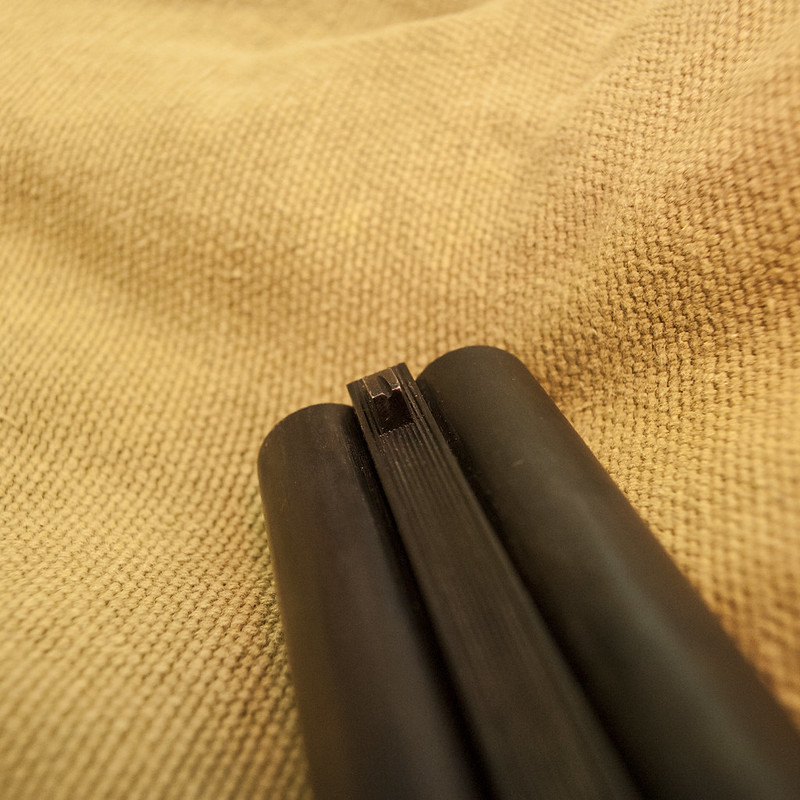
At the front, I’ve taken a leaf out of the French book of rifle design, a chunky front post (already there) for fast shooting and a finer notch in the middle for more precise shots, just in case I ever want to make them!
Broken open, the shells look pretty good! APS cartridges are the heart of this system, though I may make some custom shells in the future.
Finally, the etching. I felt that this was the sort of detail that really needed doing. At some point, I’d like to come back to this and redo it with more extravagant etchings, some scrollwork or an elephant or something. Maybe when I’ve had a bit more practice…
If you are interested in this project you can see the rest of the project here. If you have an idea of your own, drop us a line on enquiries.vintageairsoft@gmail.com to discuss. ‘Like’ our Facebook page or follow the blog to get regular updates on projects and interesting videos and articles.
Don’t forget you can buy our smaller items via Etsy. Our larger items can be found here.
For nearly 150 years, the British Army’s main arm had been the smoothbore musket referred to generically as the Brown Bess. This name covers a number of patterns that were used through this time and includes both the original flint-locks and the percussion cap conversions.
The Rifled Musket was the next major step for field armies. Unfortunately, the necessity of having a snug fitting projectile meant that the rate of fire that could be achieved with a smoothbore couldn’t be managed with a rifle. As a result they were not widely used (although some were adopted prior to this, usually for specialist units).
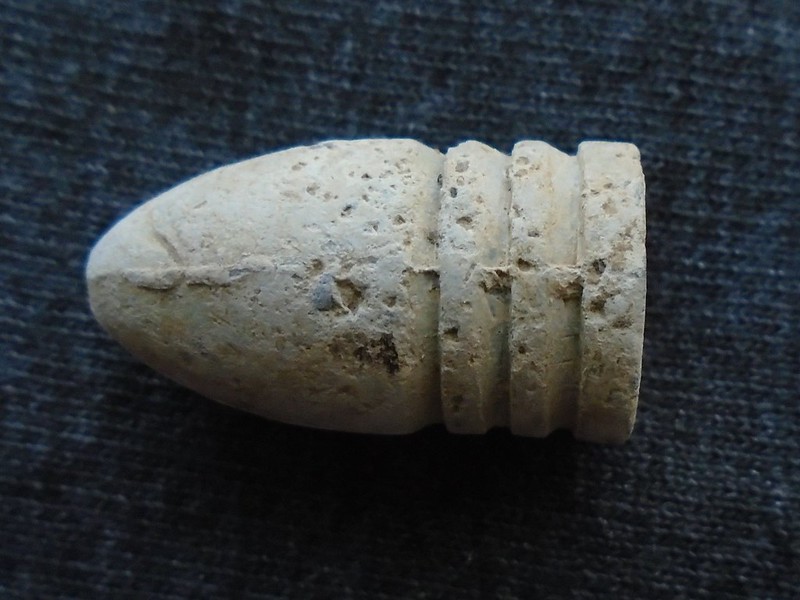
The invention that changed this was the Minié ball (Minnie ball in British slang). In the late 1830s-1840s a series of expanding bullets were designed that were smaller than the barrel (so could be loaded as quickly as a round ball) but when fired spread and engaged with the rifling.
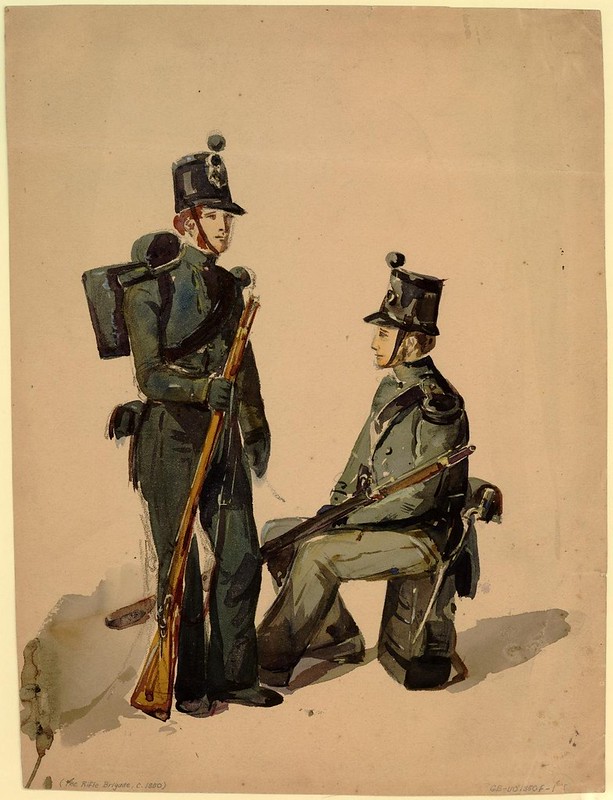
This all happened at much the same time as everything was kicking off in the Crimea between the Ottoman Empire and the Russian Empire. As a result this war was fought with a mixture of rifled and smoothbore muskets, with the Pattern 1853 making its debut there the following year.
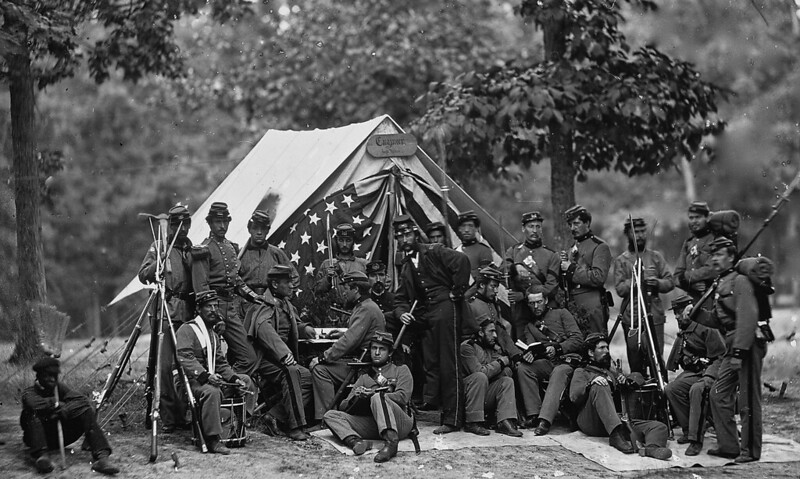
This rifle served in a number of other actions, most famously the Indian Mutiny, the US Civil War (on both sides) and the Second Schleswig War.
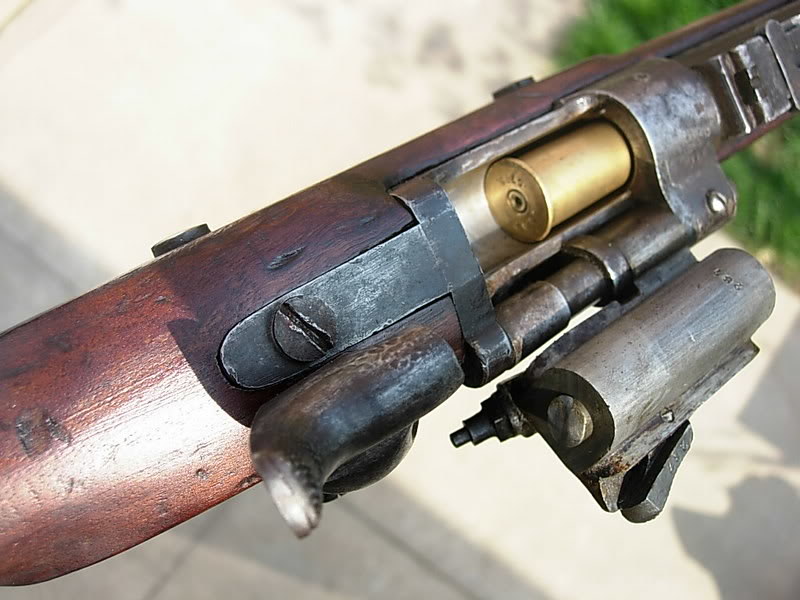
Eventually, the P53 was replaced with… itself. Well, the Snider conversion allowed the P53 to take cartridges through an inexpensive breech conversion, but the story of the Snider-Enfield is for another day.
I’ll be building a P53 Enfield over the next few months for American Civil War airsoft, eventually I hope to upgrade it to the Snider pattern for a slightly more skirmish-able gun.
If this project interests you, you will find the build posts here as they happen.
If you are interested in this project or have an idea of your own, drop us a line on enquiries.vintageairsoft@gmail.com to discuss. ‘Like’ our Facebook page or follow the blog to get regular updates on projects and interesting videos and articles.
Don’t forget you can buy our smaller items via Etsy. Our larger items can be found here.
At the end of the last post, we were taking a look at the woodwork. Since then I’ve had to take some time out from the workshop but work has not halted!
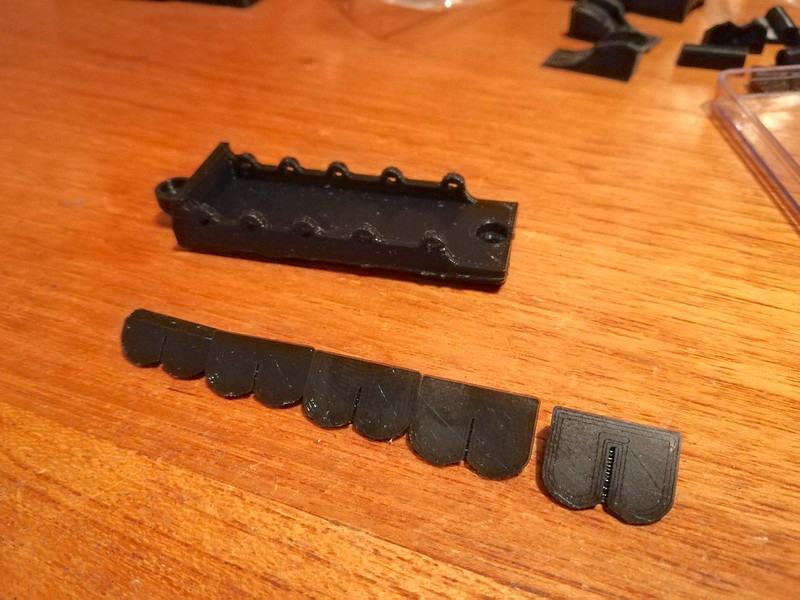
The rear sight parts have arrived and need some rubbing down and smoothing off before painting up.
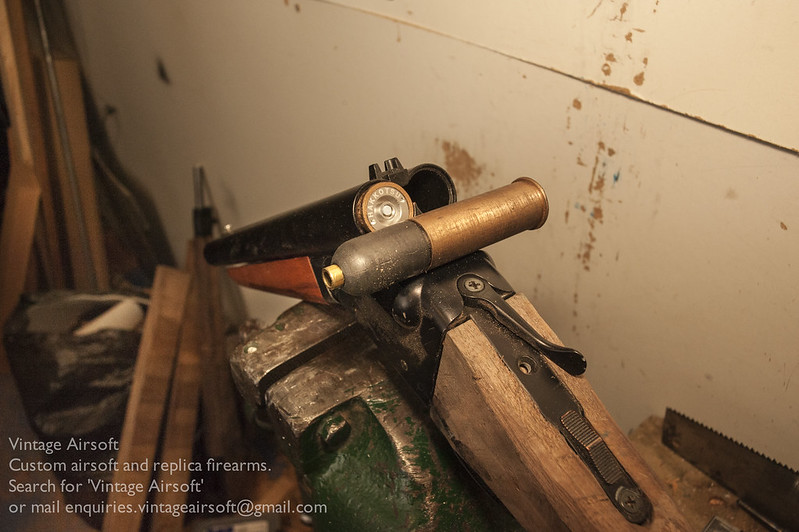
Back in the workshop, the APS shells have finally arrived and been modified to fit the cartridges. This also gives me an opportunity to do a test fire with most satisfying results!
This was also something of a preview of the finished item. In this shorter format it will make for quite a nice coach gun for suitable games.
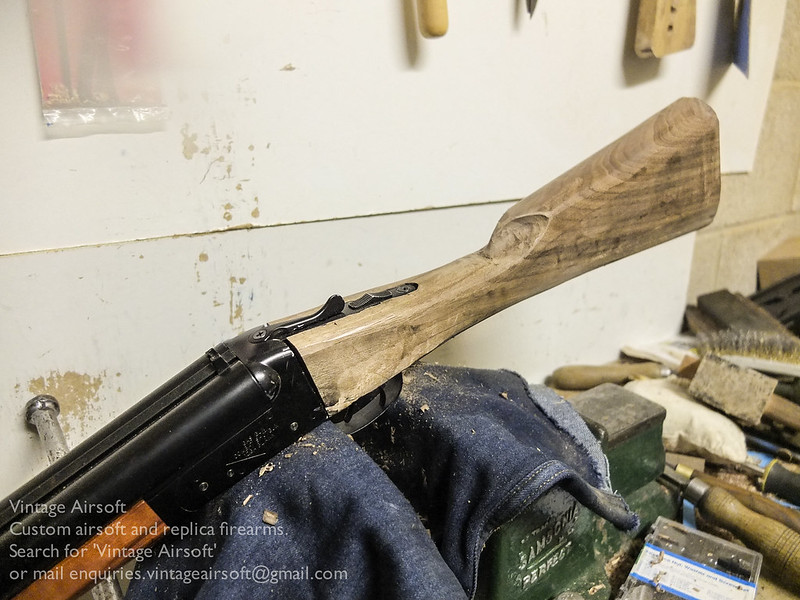
Out came the gouge to finish the front of the comb. I went for a very steep scoop on both sides.
The depth of it means that I have a nice reference point at the front of the comb.
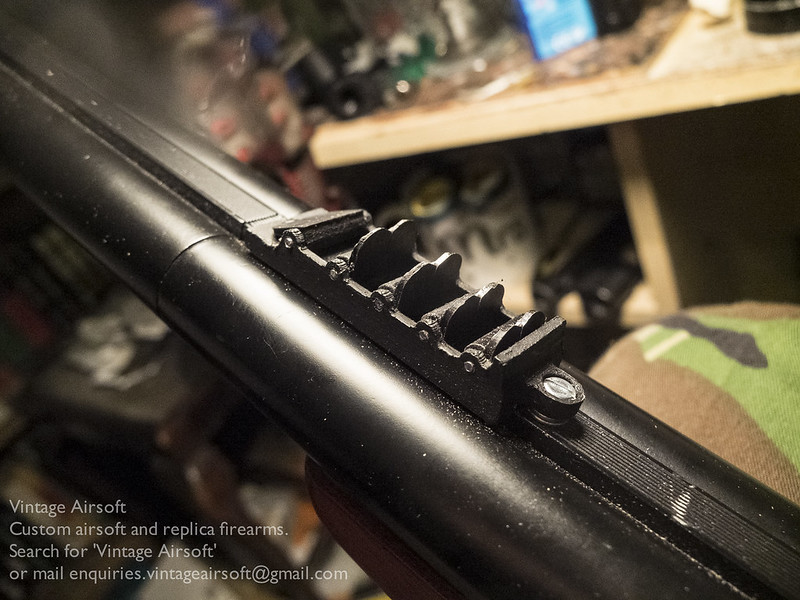
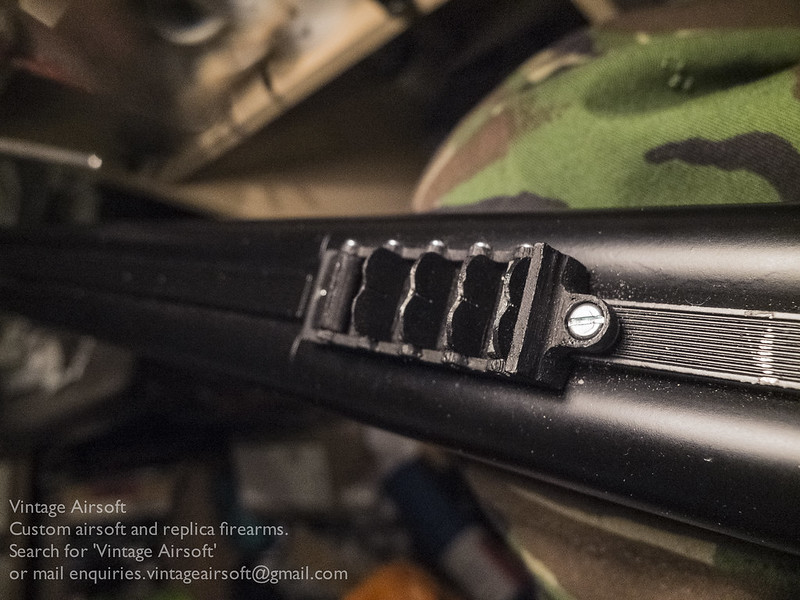
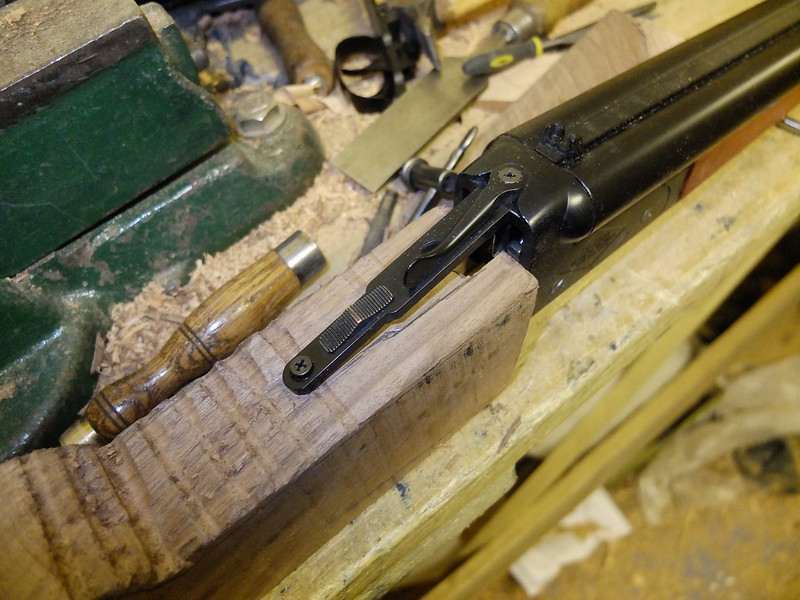
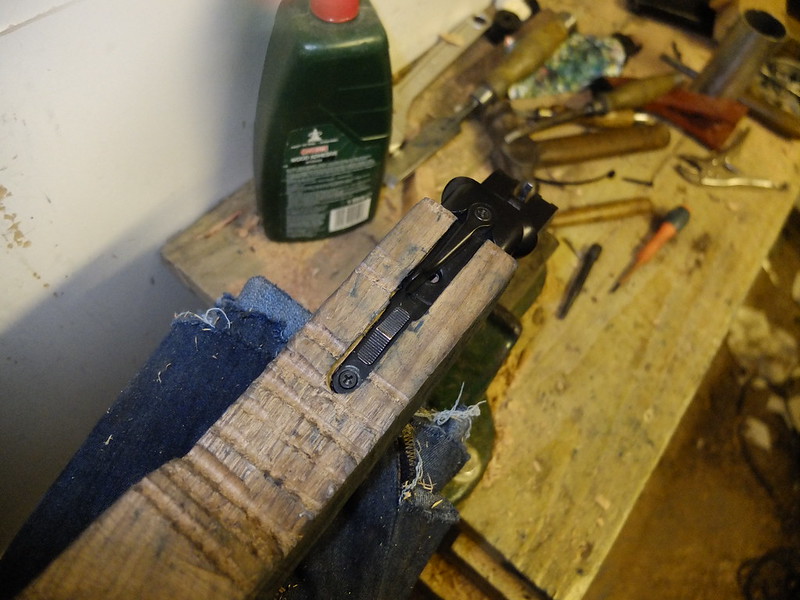
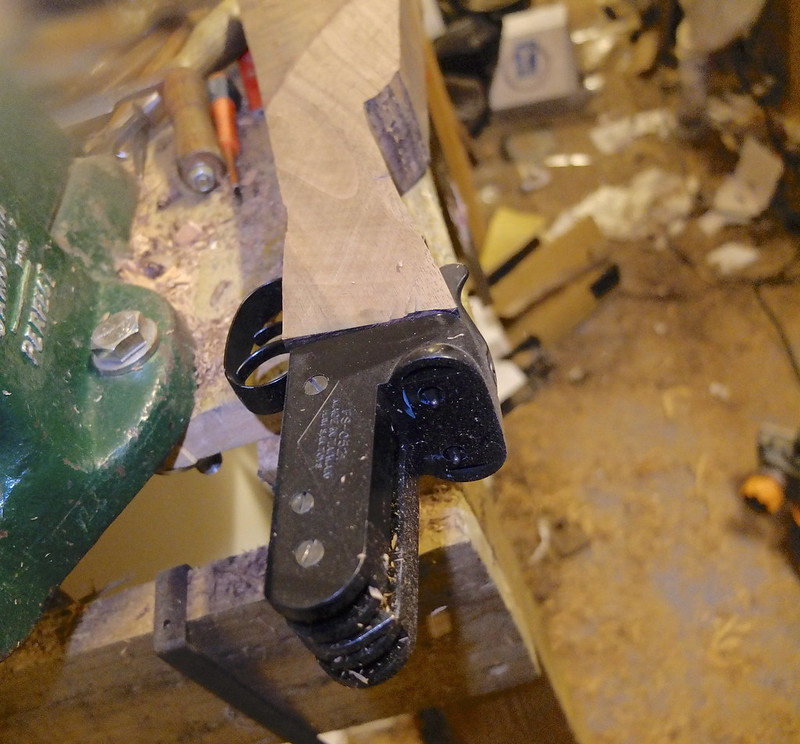
The rear sight fitted in place, using the screw thread already built into the gun for the front securing screw and a second one drilled and tapped for the rear screw.
I may have to fill the screw heads, which being Phillips are a bit unsightly.
Each of the leaves folds down and back up nicely, though the front is a little floppy at present. I’ll add some material to increase friction before finishing.
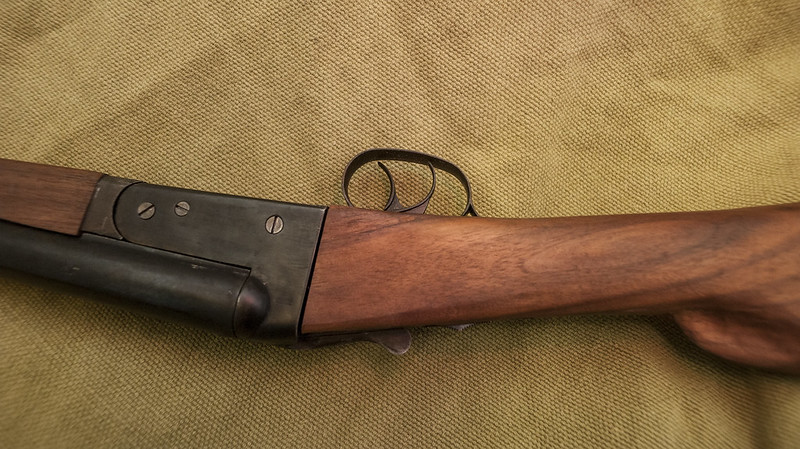
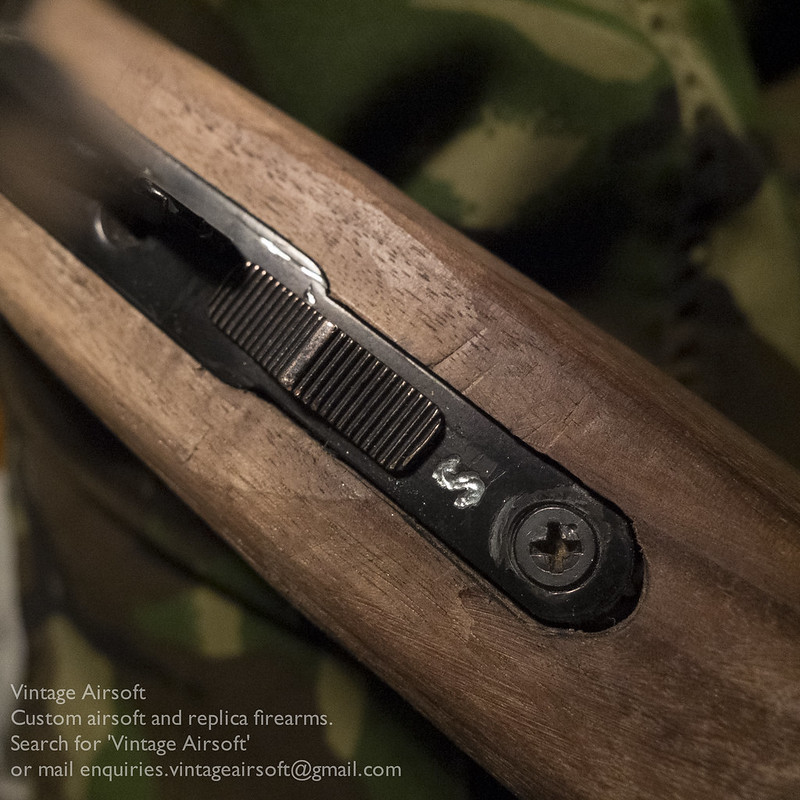
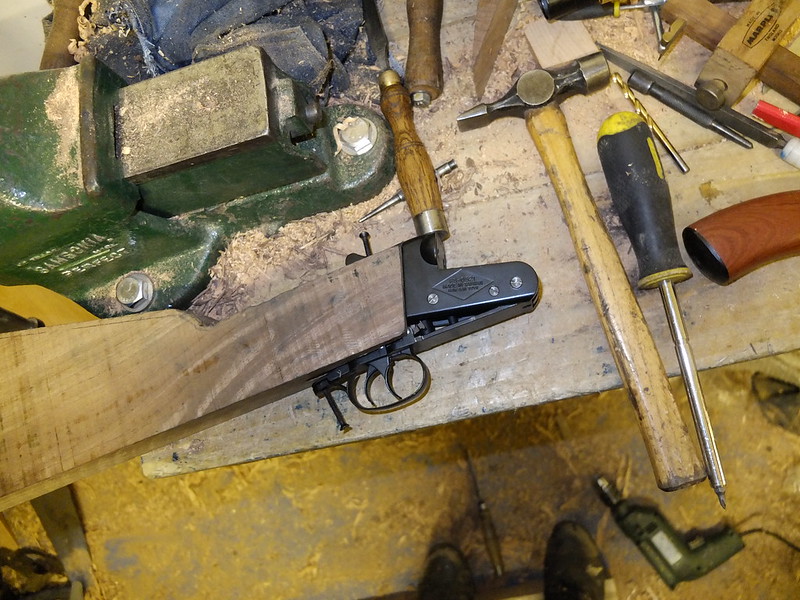
Using the dremmel I etched out an ‘S’ on the tang. When the safety is on, the ‘S’ is visible, when the gun is hot it is covered. Without a positive visual identifier of condition I found this safety design was difficult to check without moving it.
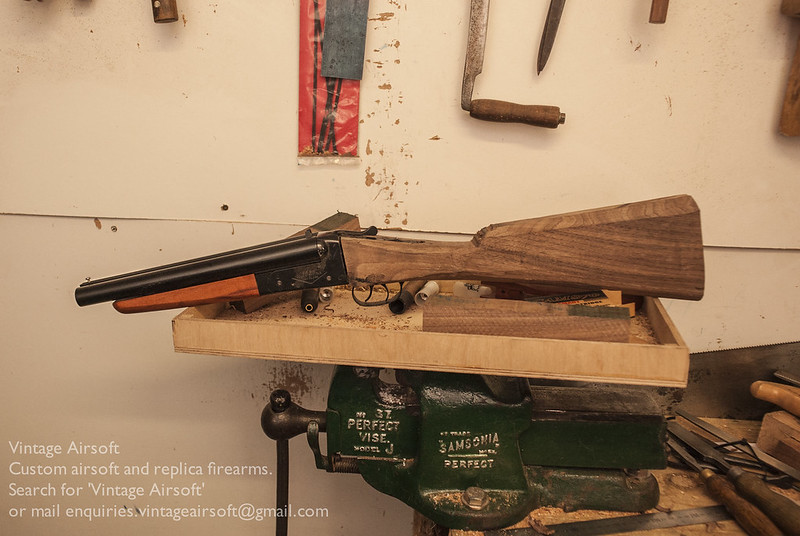
It’s now really starting to take shape.
I need to make a new forestock and buttplate, but these are all finishing touches compared to the rest of the work.
If you are interested in this project you can see the rest of the project here. If you have an idea of your own, drop us a line on enquiries.vintageairsoft@gmail.com to discuss. ‘Like’ our Facebook page or follow the blog to get regular updates on projects and interesting videos and articles.
Don’t forget you can buy our smaller items via Etsy. Our larger items can be found here.
The Stopping Rifle is being built from a Hwasan double barrelled shotgun. The guns themselves are alright, however their standard shells are pretty awful. As a result…
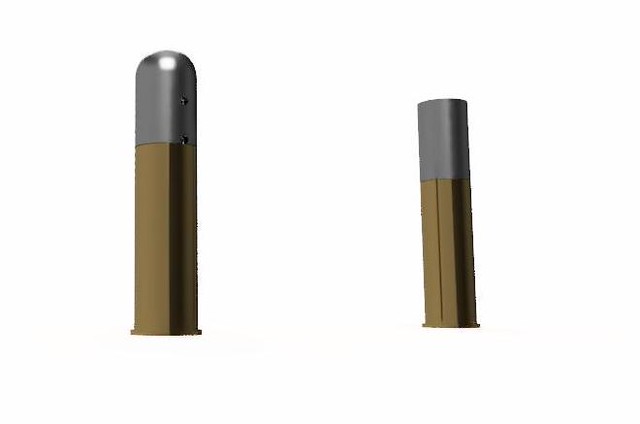
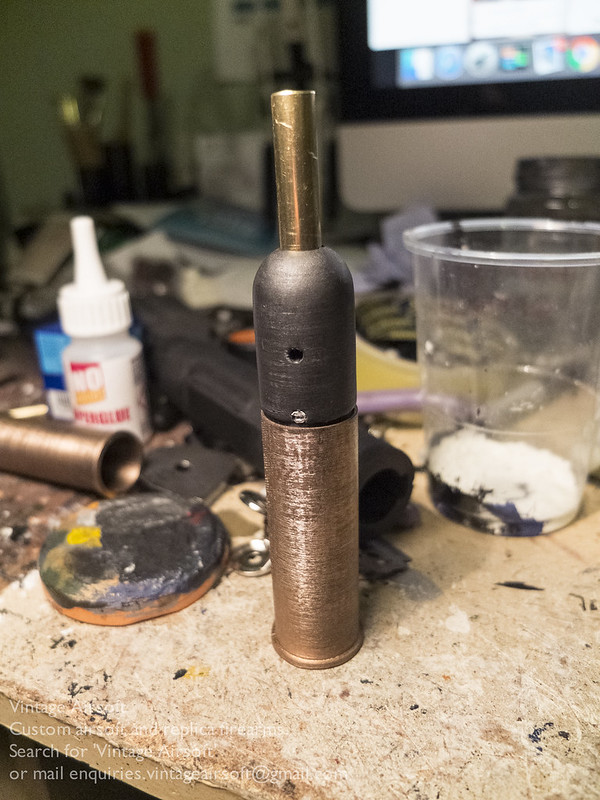
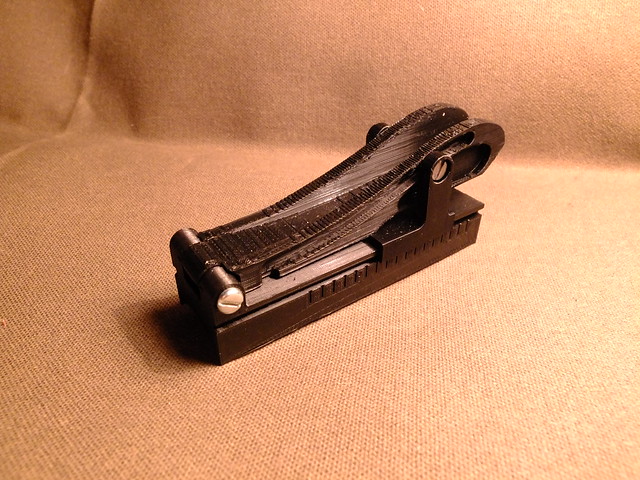
The first step in the stopping rifle build is making usable shells for it. I’m wanting to keep the chunky feel of the standard shells, but with the reliability of something better. Many Hwasan users convert their shotguns to take APS shot shells, I’ll be doing something along those lines by making special shells in the style of .700 Nitro-Express.
These are 3D printed, painted up and, though I say so myself, look great. This is one type next to an airsoft Webley shell for scale.
This will have a barrel in it to increase velocity of the 1-2 BBs it will take for a bit more range over a standard shot shell. I’ll make some shot shells for close up work as well.
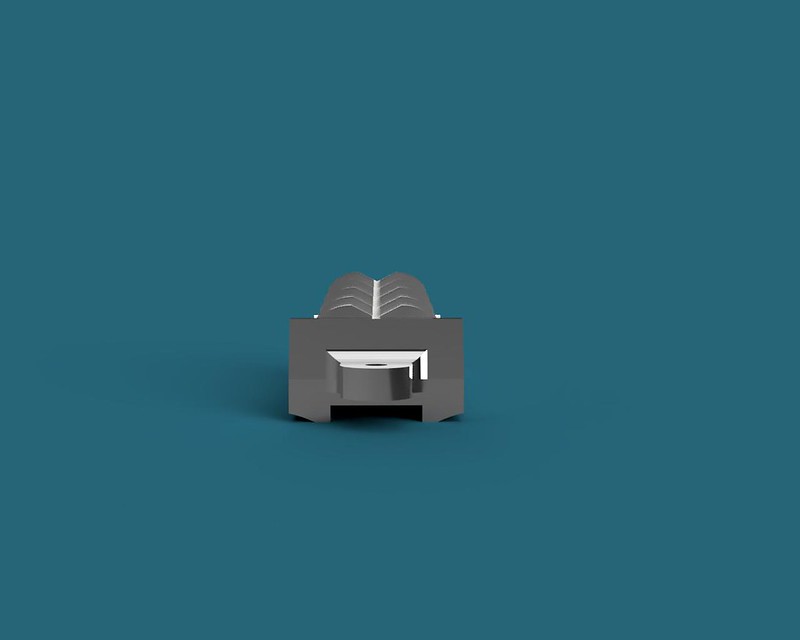
On top, I’ll fit these distinctive Express sights. These were designed to allow the shooter to shoot quickly in an emergency as well as fairly precisely when more time was had.
On the original rifle each leaf was for a fixed range, typically between 50-500 yards depending on the calibre.
These could be folded down quickly to change the range easily.
When lined up, the vertical white line helps with foresight acquisition.
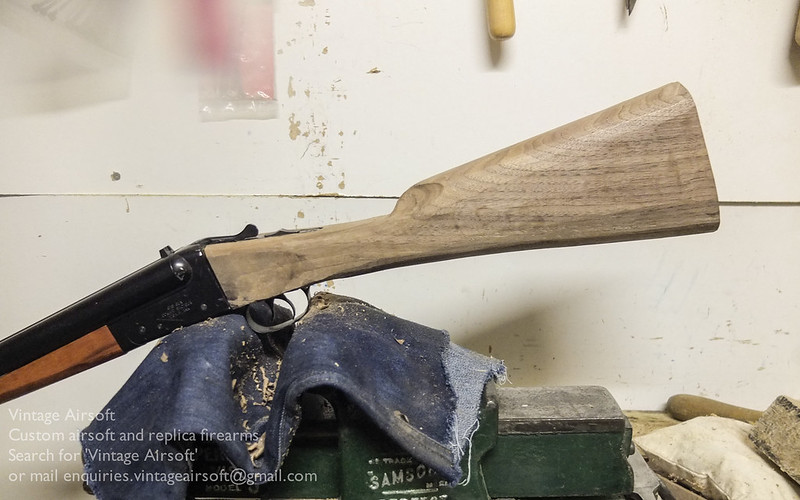
In the real world, I cut out my walnut buttstock.
Cutting and fitting it to the action was a very involved process.
To get to this stage took about two hours of solid work. The receiver cutout for this is incredibly complicated, with lots of nooks and crannies.
Another hour and a half or so later, the action is pretty much fitted.
The metalwork is recessed quite deep into the wood at this stage, which can be cut back to fit closely. This excess makes it harder initially to fit the metalwork, but it does mean that there won’t be a big shelf between the metal and the wood.
As you can see, there’s a tiny gap between the stock and action, which I will fill with an oil finished steel fillet which should make a nice contrasting join.
Next I use the electric planer to take the thickness down to meet the action and add some very rough curves.
Before achieving the rough shape with the hand plane, drawknife and palm plane.
If you are interested in this project you can see the introduction here. If you have an idea of your own, drop us a line on enquiries.vintageairsoft@gmail.com to discuss. ‘Like’ our Facebook page or follow the blog to get regular updates on projects and interesting videos and articles.
Don’t forget you can buy our smaller items via Etsy. Our larger items can be found here.
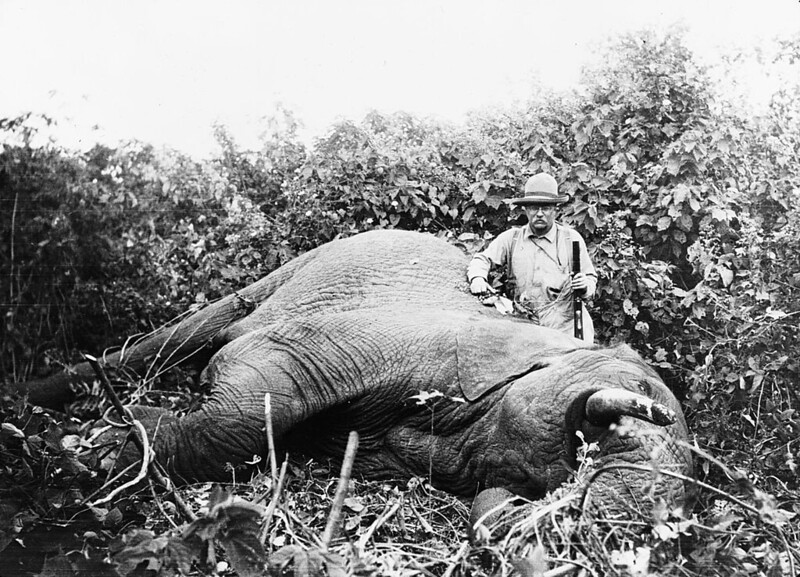
The Stopping Rifle is an oddity today, a hang-over from the Golden Days of trophy hunting in the deepest, darkest parts of Africa and the sub-continent.
Theodore Roosevelt, prolific trophy hunter. Famed for sparing a bear cub and inventing the ‘Teddy’ bear. This elephant was not so fortunate.
The stopping rifle is still part of the (now much rarer) expedition through dangerous game country. When dealing with large and dangerous animals such as the hippopotamus, lions, elephants and tigers, you need a gun that is capable of not only killing the animal quickly, but dropping it on the spot mid-charge.
While many conventional rifles may be capable of killing an animal at range, if an animal is close enough to your party to make a charge such projectiles can go clean through even a critical area, with the animal not realising it is dead until it has mauled you.
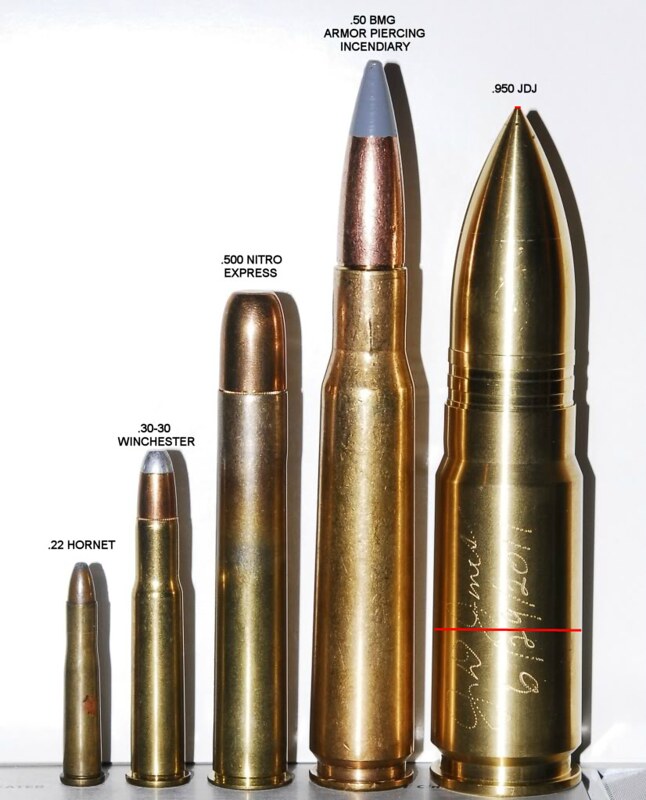
As a result stopping rifles fire heavy, slow bullets. A typical 7.62 NATO bullet is 10-11g, a .450 Nitro Express bullet on the other hand is closer to 32g. .700 Nitro Express at 65g is another level entirely.
.500 NE compared with some more common rounds. Bigger than this you really only have heavy military use rounds and oddball cartridges like the .950 JDJ.
So, why two barrels? Well, given the need for a quick follow-up shot has been around since before the invention of the modern cartridge a second barrel was the only option. However this design classic has survived through not only the bolt-action era but even beyond semi-automatics.
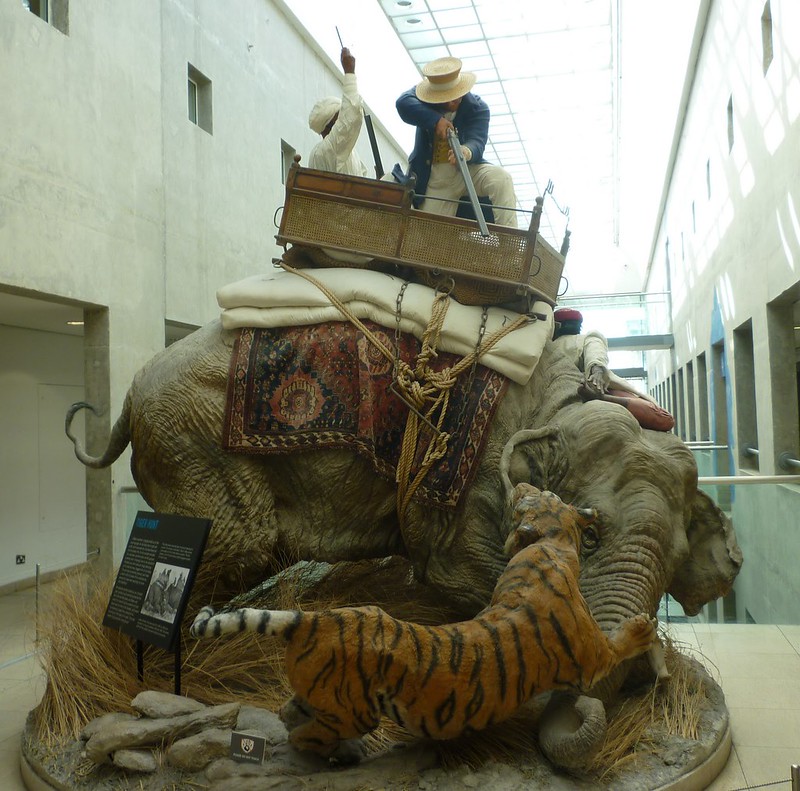
A taxidermy exhibit at the Royal Armouries Museum, Leeds, Yorkshire, Great Britain. The hunter appears to be using a double percussion gun while his guide reloads the first one.
Firstly, you can switch between triggers very quickly, far faster than operating a bolt. Although modern semi-autos could handle the pressure of these large cartridges, they are far more prone to being affected by the dirt and dust which on long expeditions is a fact of life: especially for a gun that has to be carried ready to fire at all times under severe pressure.
Express sights feature a huge V-notch, with several separate leaves for different fixed ranges. This unusual BSA design also has an adjustable leaf. This design allows for some precision use at close range when there is time, but also allows the shooter to use the foresight as a bead in emergencies.
So this hold-over from the Victorians still has its uses and these rifles are still some of the most beautiful examples of private and custom gunsmithing around.
I will be building my own stopping rifle for airsoft use of course, for a safari-type load out, probably paired with the Webley MkVI.
If you are interested in this project or have an idea of your own, drop us a line on enquiries.vintageairsoft@gmail.com to discuss. ‘Like’ our Facebook page or follow the blog to get regular updates on projects and interesting videos and articles.
Don’t forget you can buy our smaller items via Etsy. Our larger items can be found here.
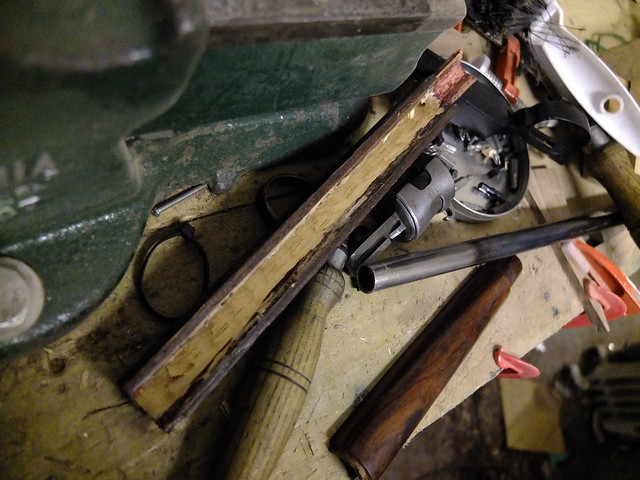
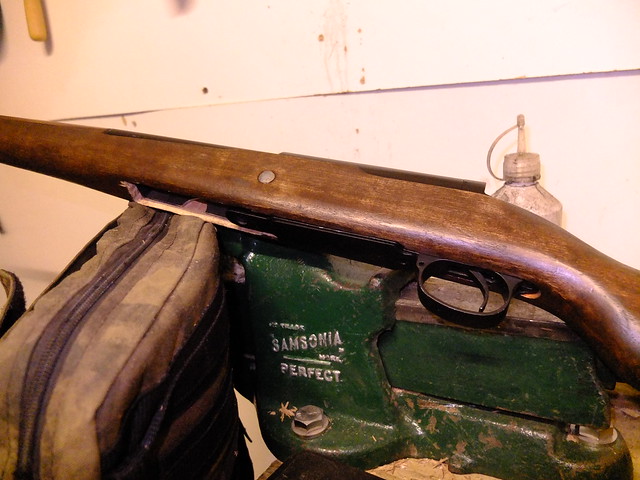
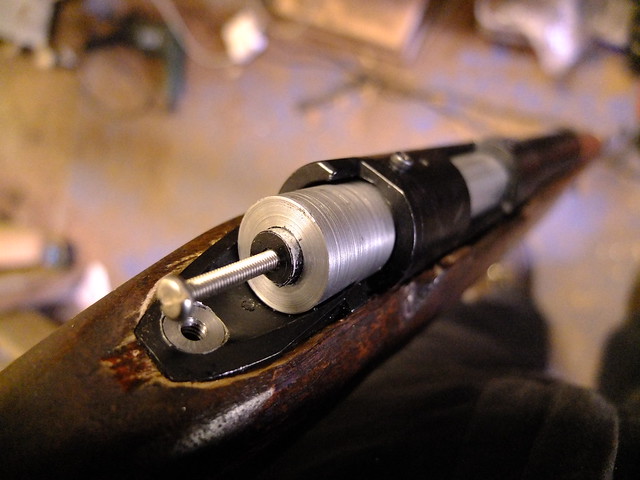
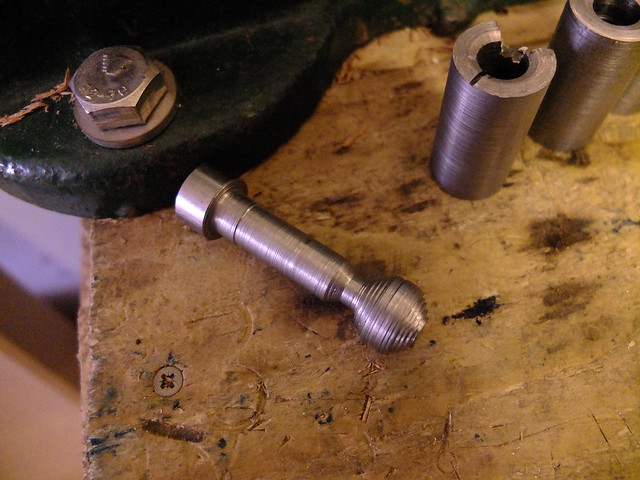
My first major improvement is the back-cap for the bolt. This one is in two parts, to allow friction to be between these two lubricated steel parts rather than on any soft aluminium bits.
At the front end, I am replacing the biscuit that joined the front and main parts of the stock with a steel tube. Apart form being very strong, this will also allow me to stow a full-length ramrod in the rifle. Although this is far from necessary for use as a G98, I’ll be using this as a musket for American Civil War airsoft until my dedicated musket is finished.
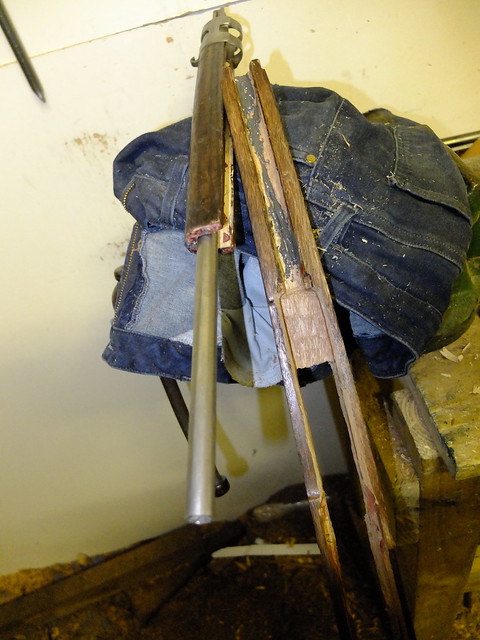
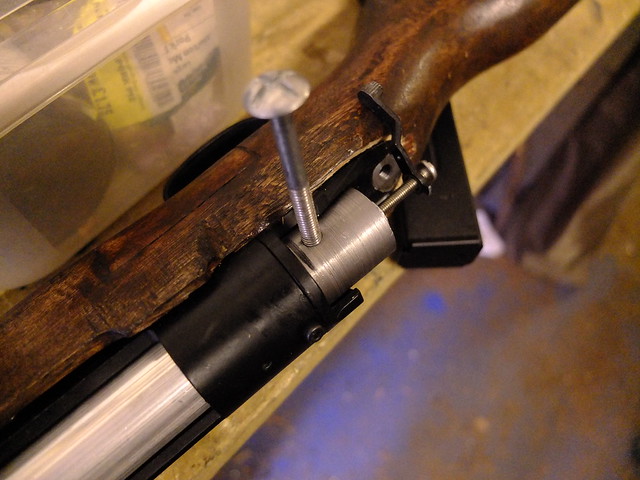
With enough material removed, I epoxied the steel tube in place.
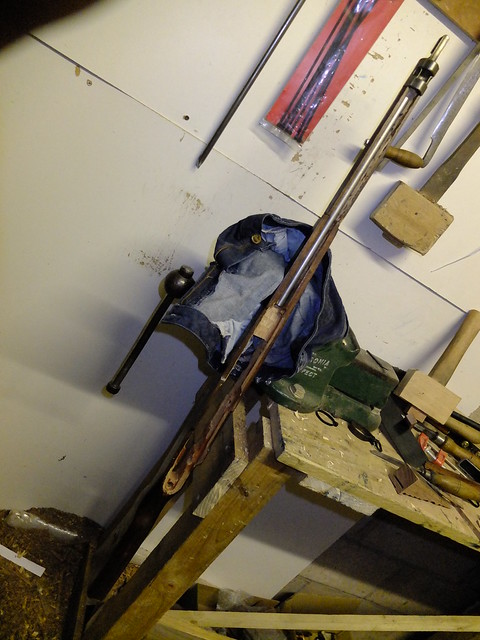
In place on the rifle, I leave it overnight to set.
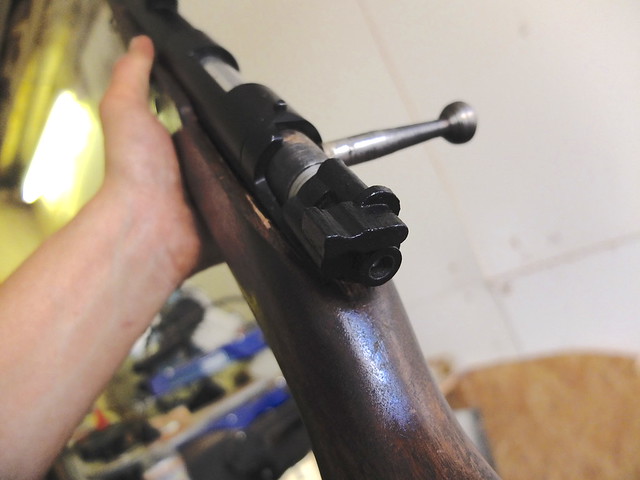
At the back end of the bolt, I’ve had a 3D printed cap made to replicate the rear of the Mauser bolt. This will go on the K98 builds as well.
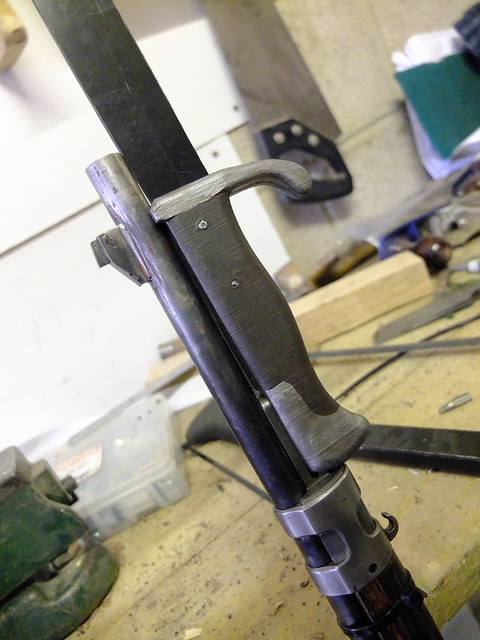
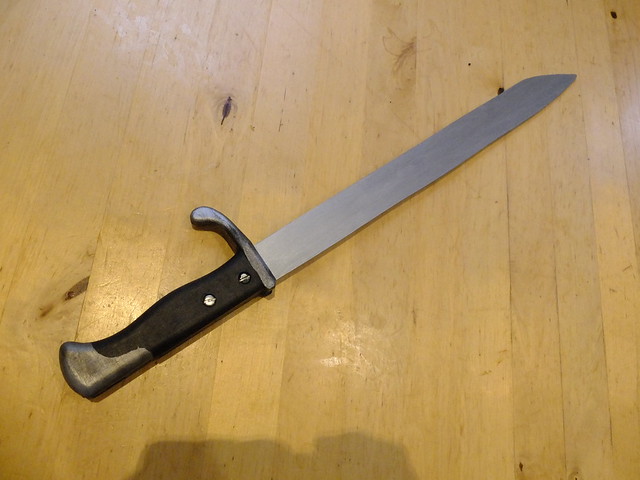
The bayonet is going to be very useful when the rifle is used as a musket, so it’s important to get it right. The grips are 3D printed (dimensions scaled from a photograph) and screwed together. The blade is replaceable and flexible, but not so much as to be floppy.
When painted up it improves the look, at least from a slight distance. It would be ideal if I could get it to a mirror finish on it to get that threatening flash as it catches the light.
And that is pretty much that. Just the pictures of the finished item to go!
If you would like to see the little intro I wrote for the first G98 build you can see it here.
If you like this project or have an idea of your own, drop us a line on enquiries.vintageairsoft@gmail.com to discuss. ‘Like’ our Facebook page or follow the blog to get regular updates on projects and interesting videos and articles.
Don’t forget you can buy our complete products via Etsy.
When I talk to people about the idea of 19th Century Airsoft, the overriding response I get is: “Why would I want to stand in a line, in a field, and be shot at?” This is not an unreasonable question. This would be a very tedious day of airsoft.
It is also completely unlike the day of play we had. This game day was one of the most dynamic and varied I’ve ever had. I won’t give an in-depth blow-by-blow account of the day, but I hope to give some idea of why this style of play is worthwhile and highly enjoyable.
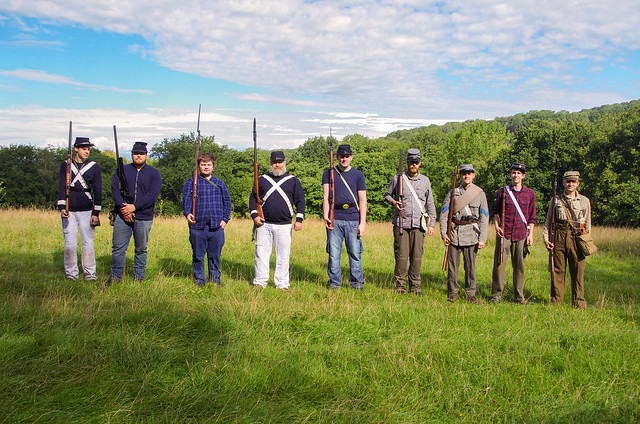
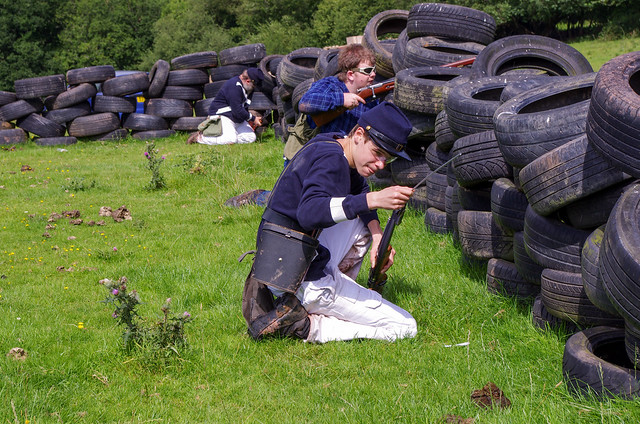
When it comes to historical airsoft, one major concern is that if you turn up to an event you’ll not have the right kit and be looked down on. The group shot we took at the start of the day will give you an idea of the level we’re aiming to start off with. We had no-one with 100%, truly authentic historical repro kit. What we did have was a bunch of guys who did the best they could with the kit they had.
On the Union side, we had a mix of jeans and decorator’s trousers with blue shirts and tops.
On the Confederate side, a couple of the guys wore WWI/II German trousers, one a pair of green civvies and I wore a pair of British 49 pattern BDs. For the top I wore a cotton khaki shirt, the other guys wore either old grey uniform jackets/shirts and even a red cheque. We used a mix of satchels/belts and leather pouches to carry ammunition. The only period-specific equipment we had were the Kepis, which are pretty inexpensive to buy. I made my own Kepi from canvas, I’ll be making another from felt and may even offer a sew-your-own Kepi kit.
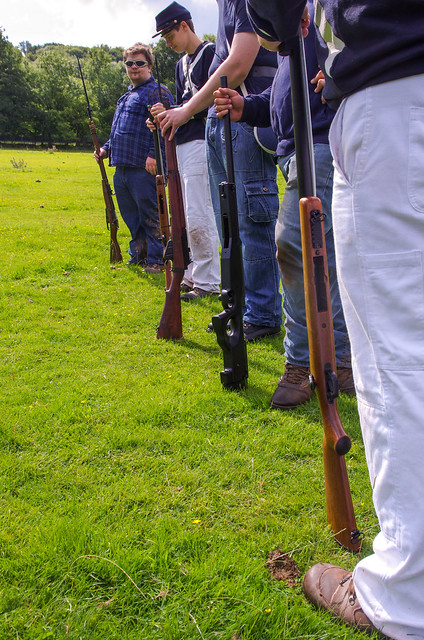
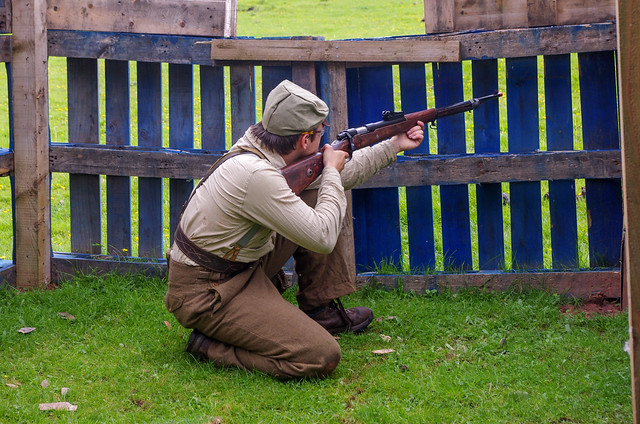
Airsoft gun wise, most of us used bolt-action rifles. Several guys used the stock, basic, unadulterated VSR knockoffs that sell for about £50-60 on the continent. They got kills with them too, using iron sights at the ranges we were playing at (typically 20-80 yards) they are perfectly usable. There are also rules for AEGs and gas guns, but if you are able to buy or borrow a bolt-action I would recommend it as it is a much nicer way to play.
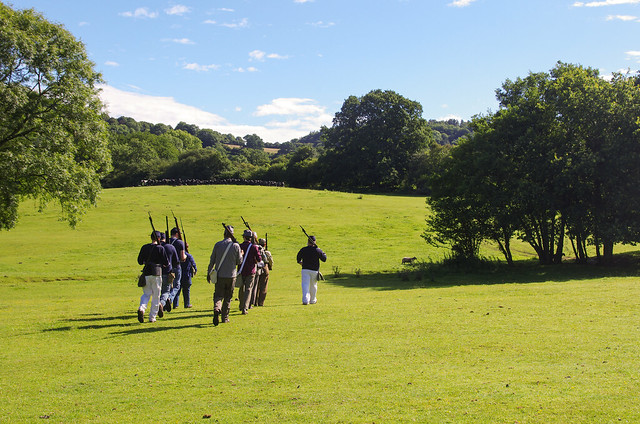
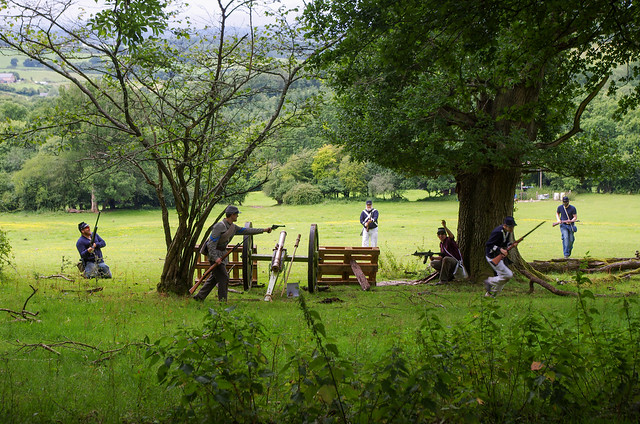
Enough on kit for now. Let’s talk about game play. We headed off to the first game start point. It was a simple attack-defend points game, the Union had two spawns, Confederates had one.
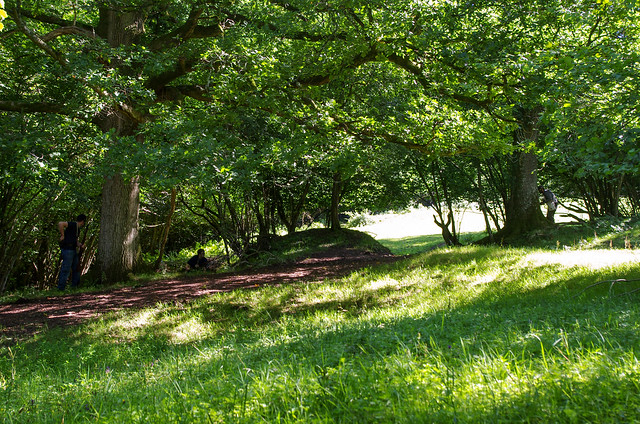
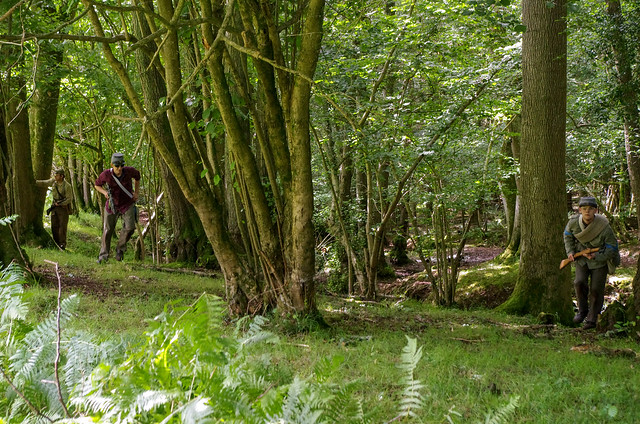
The Confederate spawn was slightly uphill. The Union forces pushed through the trees, while we Confederates went further uphill and took the ridge. We put fire into their flank, taking out a couple of guys. At this point I was killed, but being in the middle of the battle area I could watch the events quite well. The Union took our spawn, pushing round our left. However their spawns had been left entirely unguarded and a couple our guys came round their rear, took the spawns and shot the Union out from behind.
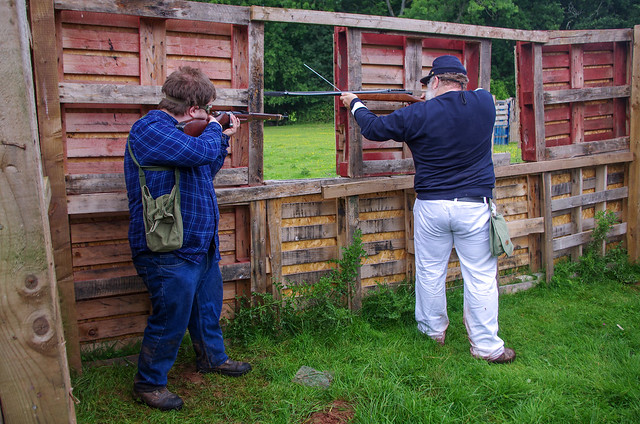
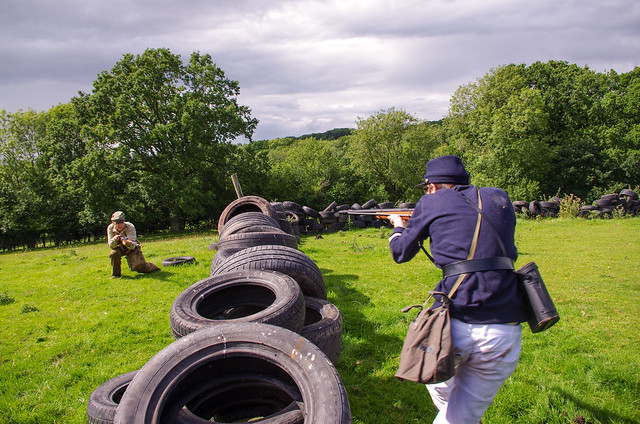
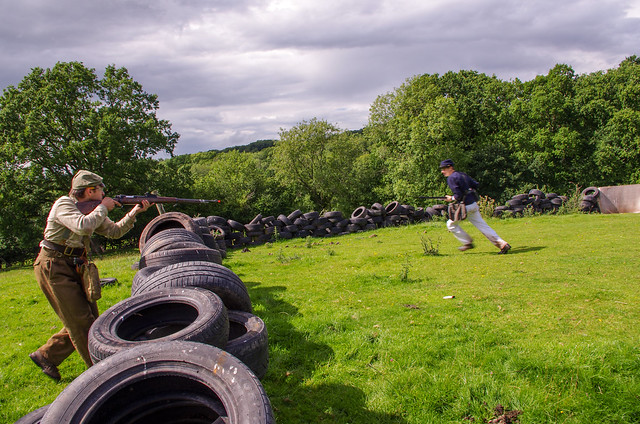
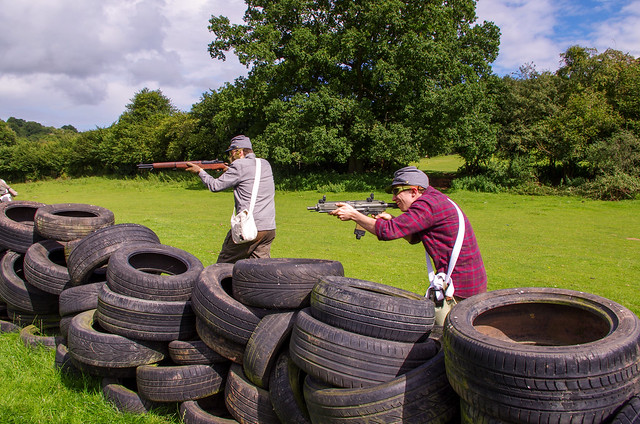
We then played a couple of games running through the village. On the face of it, the defenders should have the advantage when they have cover and the attackers are covering open ground to assault them. In reality, due to the controlled rates of fire, the attackers can fire and move from cover to cover with a minimal chance of being hit. In the meantime the defenders can only hold a certain position. For some time, I was in the building in the picture below duelling the guys in the next picture.
These guys (Ryan, left and Kim, right) kept me pinned for several minutes. Another of my team was going in on their left while two others were taking a spawn behind them. In the end, their undoing was Ryan advancing on my position, taking a couple of shots from close range in cover before being forced back and shot in the back as he retreated. At this point Kim was left on his own, with 3-4 guys coming at him from all sides all firing at his building and he attempted a retreat to the next building, which had more open ground around it so would have been harder to attack. Unfortunately for him, 2/3rds of the way across I let a BB fly and it curved beautifully into his hand.
That’s the beauty of this style of gameplay. If you want to hold a position, you need to stick together and work together. There’s no chance a single person can keep a whole team pinned with a flurry of automatic fire in about the right direction every now and then. Fire and manoeuvre is needed and actually has a chance of working without the unlimited ammunition and rates of fire in a normal skirmish.
The next game was a sort of collapsing defence game. The Confederate objective was to push through and clear a corridor of Union Spawn points. Once a spawn was taken, it could not be retaken, but the Union were able to advance as far forward as they liked.
The result of this was that although the Confederacy took each spawn, we were brutally flanked and taken from behind a couple of spawn points in.
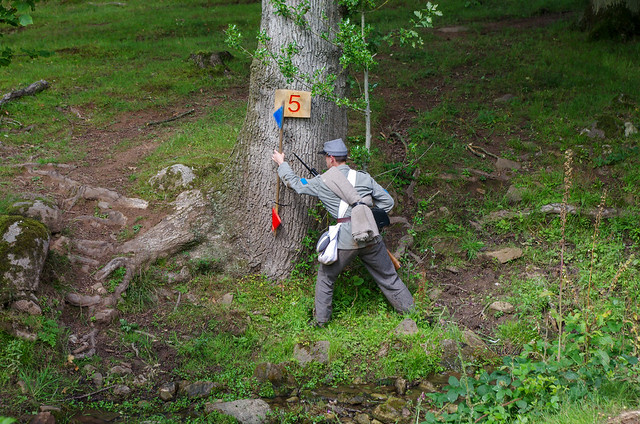
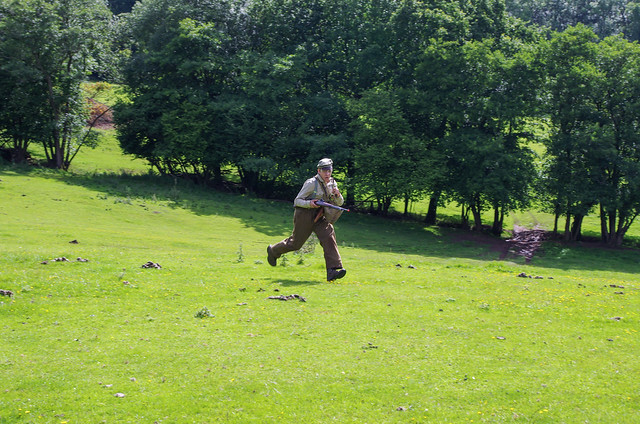
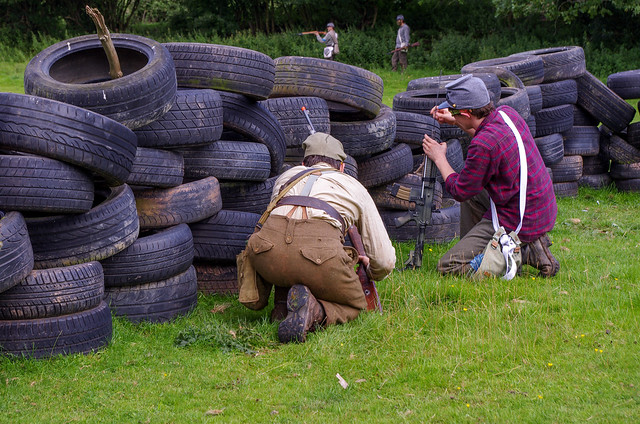
This series of pictures really drives home what’s special about this gameplay. It is not staged. I had charged, noisily round the left of the fort to draw fire and attention away from my Confederate buddies.
I reached the fort and found it still quite occupied. Two of the nearest Union boys shot at me and missed.
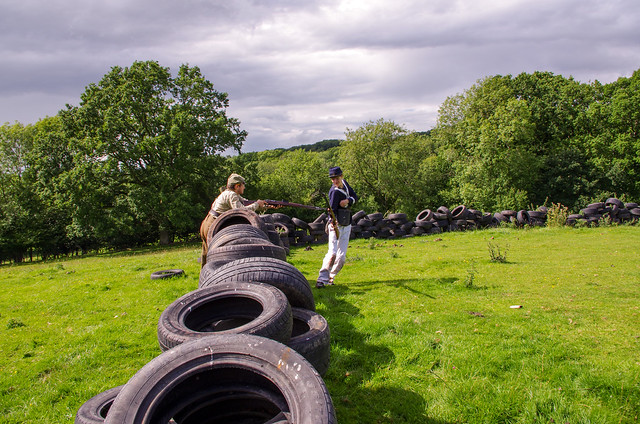
I shot at them and missed. In normal airsoft play at this point one player or the other would sprint straight at the wall and hose over it on full auto.
Instead, there was a brief consideration of whether or not to reload, before deciding that at this range, let’s just go in with the steel. I only just managed to land a stab on Aidan, at which point I ducked back down to reload.
At this stage, my distraction had served its purpose and my team had pushed up and shot one of the others. We didn’t realise there was a third hidden away in the corner, who had to be dealt with as we climbed in.
Once in the fort, it was a case of attempting to repeat the flanking action on the next group of buildings. This proved much harder as they had several angles to fire from and each flank covered. We had to take them in a certain order, so couldn’t just come in round the back.
Now, with regards to marching in line and standing in a field; have I persuaded anyone yet that there’s much more to this type of play than just being a target? Because that isn’t exciting for anyone.
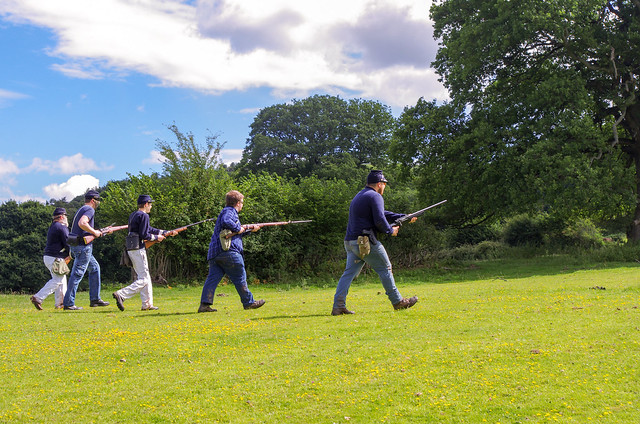
Now let’s talk about line fighting. ‘Cause this is exciting, even if it doesn’t sound like it would be.
For normal airsoft, advancing across open ground and firing in lines would be useless and painful to boot. With two opposing lines of even numbers, the chances of one side wiping the other out in shooting at range is unlikely. You have to get close to increase the chance of hits, even then there’s no guarantee and when BBs are coming in at near 400fps at close range the pressure is on to reload. Reloading under that sort of pressure is surprisingly hard!
If the attacking force do so with determination and vigour, using a little work on the flanks, they can get to grips ‘properly’. Melee is not just a nice addition to this type of fighting, it is a necessity.
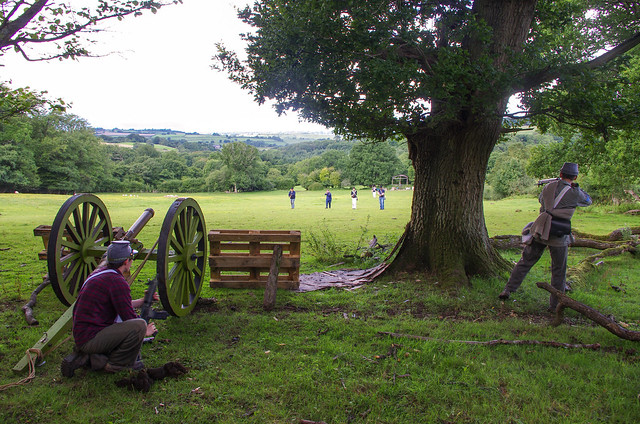
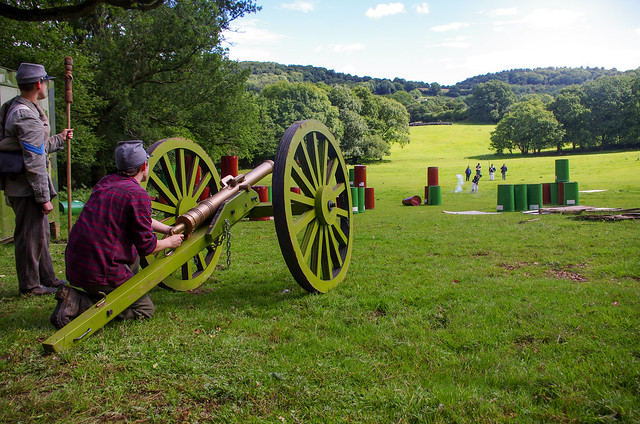
The artillery is a nice touch too, advancing into it is unnerving. The only time the Confederates had to take it on was over relatively covered ground, but with the shells coming in around you and not being able to tell where they were coming from or landing was distracting. TAGs make a very, very loud bang by airsoft paper pyro standards. I’m told that advancing toward it over open ground is also unpleasant.
There’s a great deal of satisfaction in this type of game. Because of the higher-powered rifles there is more of an adrenaline rush when playing close up, the pressure to reload or charge is intense. The lack of automatic fire means you have to pick your shots, pick your targets. It means you can move from cover to cover without being pasted.
If you think this type of game could be your bag, I would wholeheartedly encourage you to give it a go.
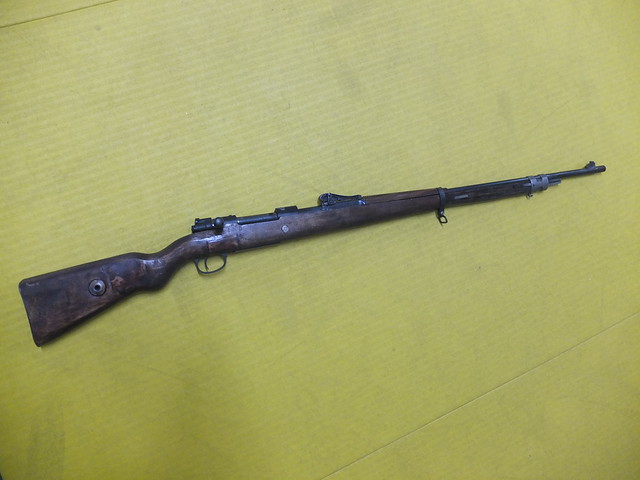
The start point for this project is the G98 Dboys shell ejecting model. A VSR base for this rifle would make it much more practical and skirmish able.
The first step is expanding the recess for the magazine This necessitated the removal of the front securing lug for the original magwell and trimming down the metal lining of said magwell to fit the new VSR parts. Rather pleasingly the trigger sits quite naturally in the trigger guard with minimal modification.
The fore-end is unchanged. I’m using the same outer barrel and fittings.
The bolt handle will be another custom piece.
The bolt handle will screw in and be thread locked in place. If at a later date I decide to make a bent handle for use as a sniper rifle I can just swap it out.
The bolt handle part-made. At this point I had to take it off and make some other parts and the lathe broke down, so I’ll have to come back to this later!
The rear sight for this is 3D printed, the repro I used won’t fit over the larger receiver. Although it looks a little rough here, once painted up it’ll look the part. In the longer term I hope to cast these in aluminium.
In place on the rifle, it is secured by two screws. The small hole in the middle is for hop adjustment (I fit a TDC hop mod to all VSR builds).
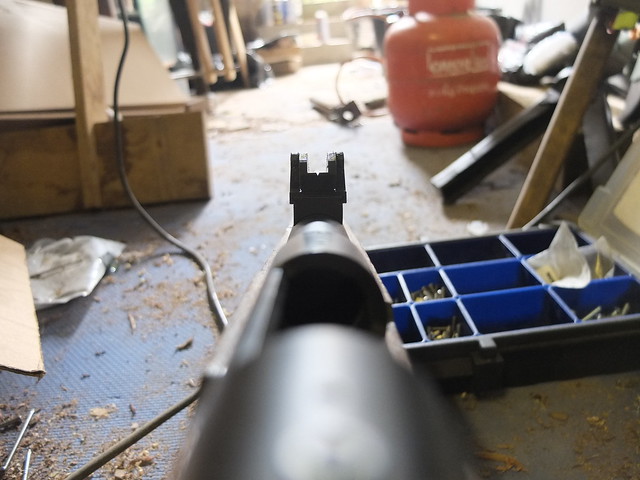
Viewing down the rifle, that Vizier rear sight give a really distinctive sight picture!
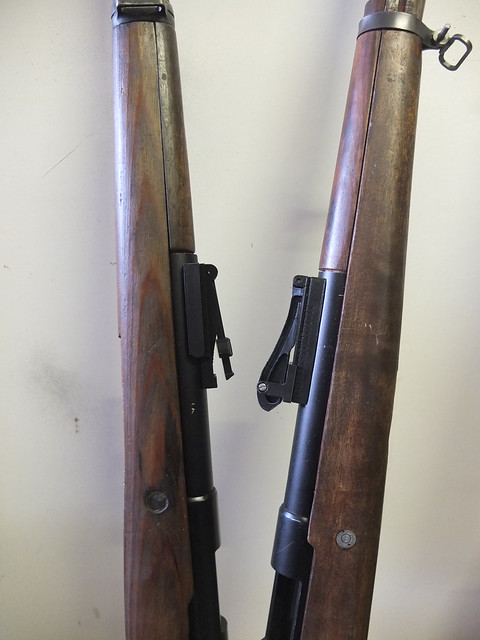
Next to its nephew, the K98k VSR build in the workshop.
A bit of epoxy resin to smooth off the rougher surfaces. When sanded down and painted up it’ll really look the part.
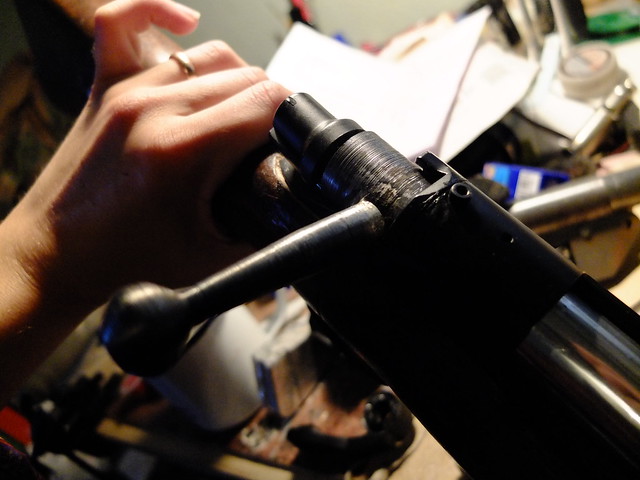
With the lathe FINALLY fixed I could finish off the bolt handle after looking at it half finished for about two months (truly torturous). Now I just need to finish the back cap and the rifle itself is done.
Then there are a few optional extras which I’ll be fitting before finishing entirely. So far though, I am delighted with how this conversion is going.
If you would like to see the little intro I wrote for the first G98 build you can see it here.
If you like this project or have an idea of your own, drop us a line on enquiries.vintageairsoft@gmail.com to discuss. ‘Like’ our Facebook page or follow the blog to get regular updates on projects and interesting videos and articles.
Don’t forget you can buy our complete products via Etsy.
Thos of you who have followed Vintage Airsoft for some time will recognise this and be like: “Is he STILL working on that?”. Well, yes. I swear if something could go wrong on this build, it did. At least once.
So, here’s hoping this is the last build post at long last!
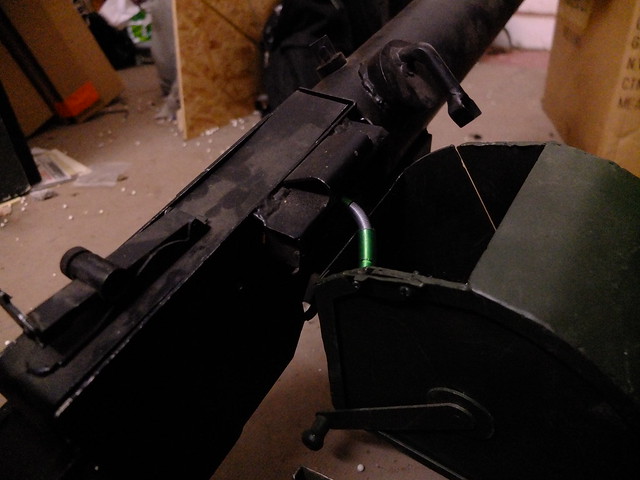
One of the problems was the air seal between the gearbox and the hop unit. This it turned out was caused by flex between these parts, resulting in variation from shot to shot.
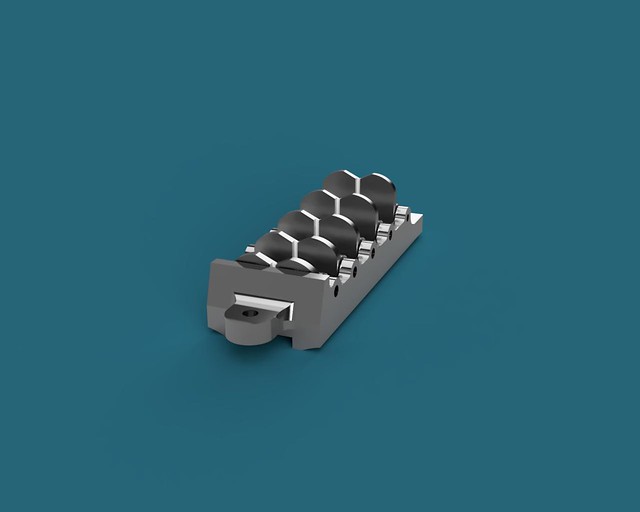
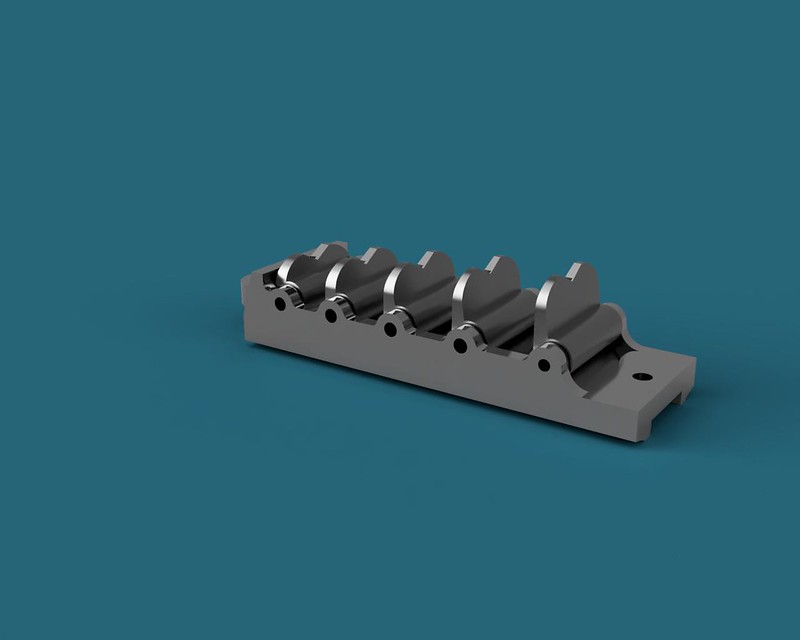
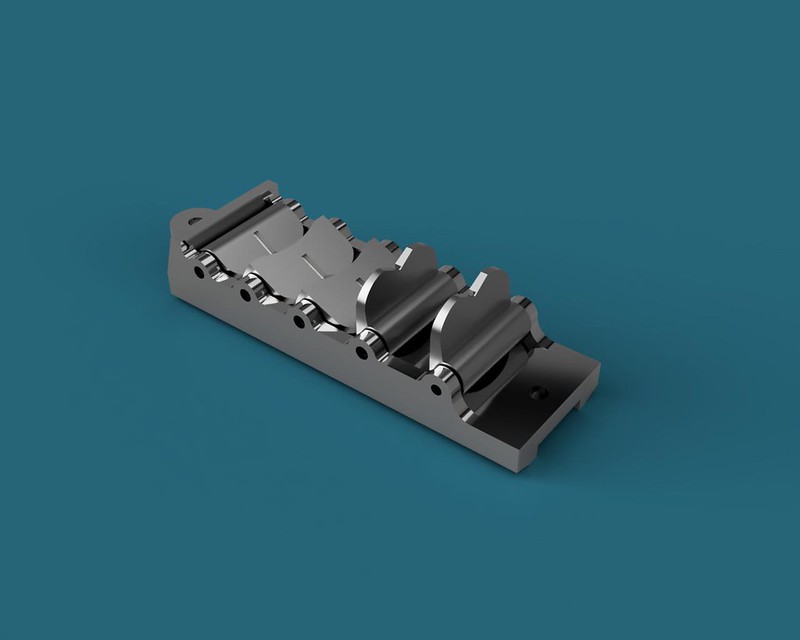
In the end, I re-designed the mounting plate to feature a hop-up ‘vise’ to hold the unit in place really solidly. There isn’t any wobble in this sod.
I had to make a few mods to the trigger unit design and the bottom of the baseplate to work together, but now the trigger raises a sear which sets off the microswitch in the gearbox itself.
In place, clamped down! I’m still using the same feed system as before.
The feed tube comes out to meet the magazines.
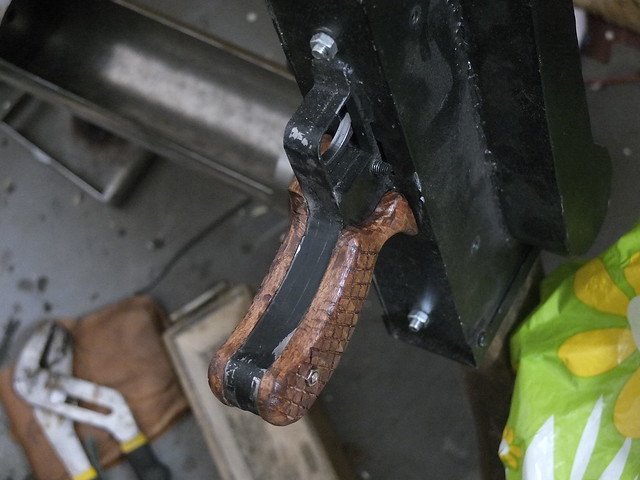
Oh yes, new grips. I wasn’t happy with the old ones, one wasn’t quite spot on, but as with all things the second attempt was much better. I’ve used hardwood this time (as opposed to laminate) and cut in cross-hatching for grip.
Topping up the paintwork.
I’m really looking forward to having the finished photos on this at last.
If you are interested in this project or have an idea of your own, drop us a line on enquiries.vintageairsoft@gmail.com to discuss. ‘Like’ our Facebook page or follow the blog to get regular updates on projects and interesting videos and articles.
Don’t forget you can buy our complete products via Etsy.