M2 60mm Mortar: Complete

Area effect, Area-effect, Cold War, Complete builds, Custom builds, M2 60mm Mortar, Products, Weapons, WWII

The mortar is finished, and what a beauty she is too, though I say so myself.

P1010094 copy

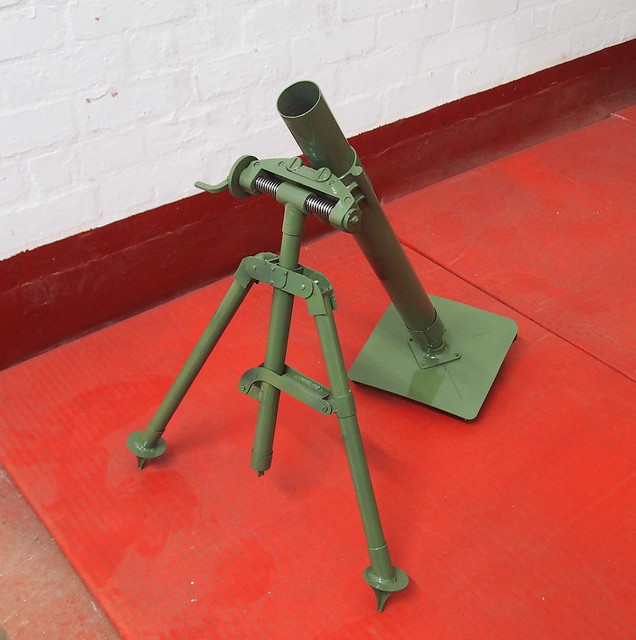
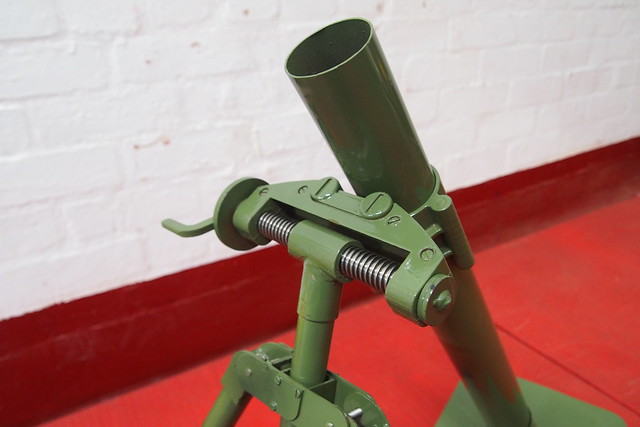
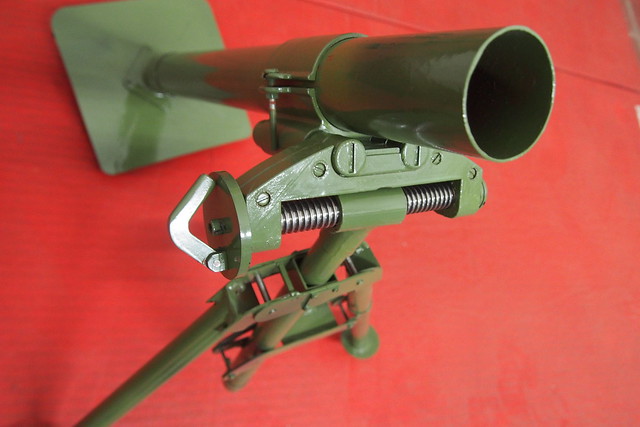
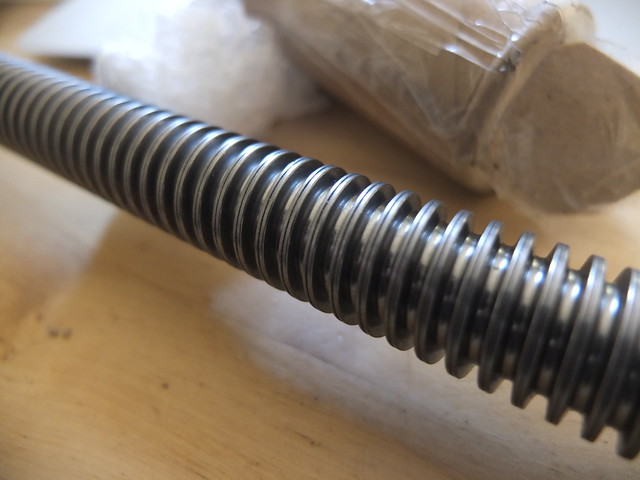
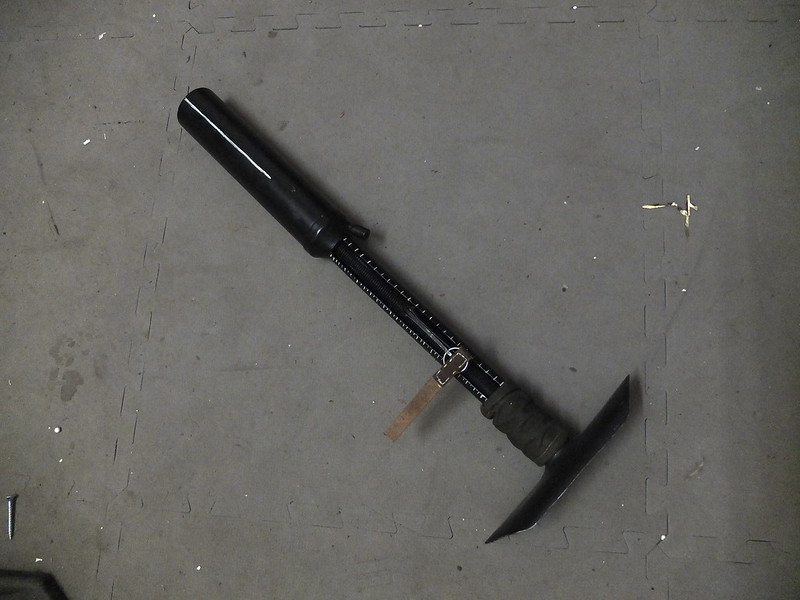
The adjustable windage is quite smooth, the folding handle giving adequate purchase and leverage.

P1010095 copy

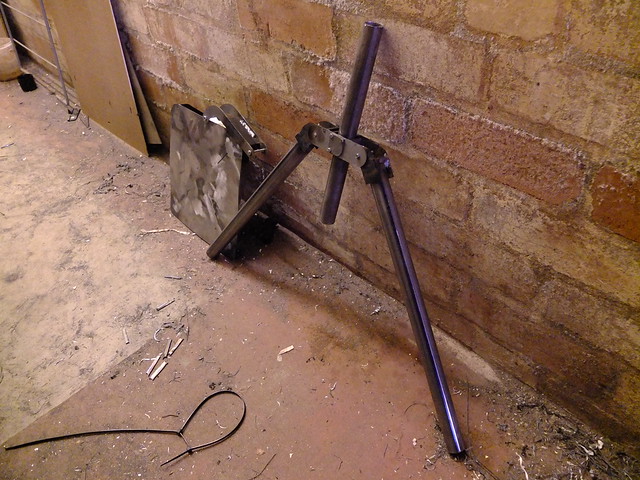
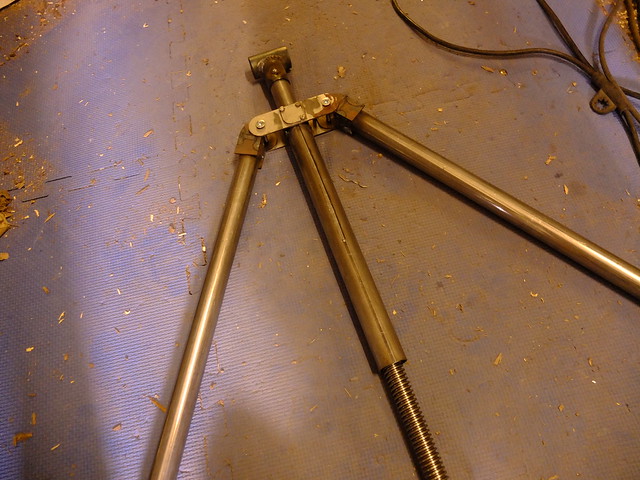
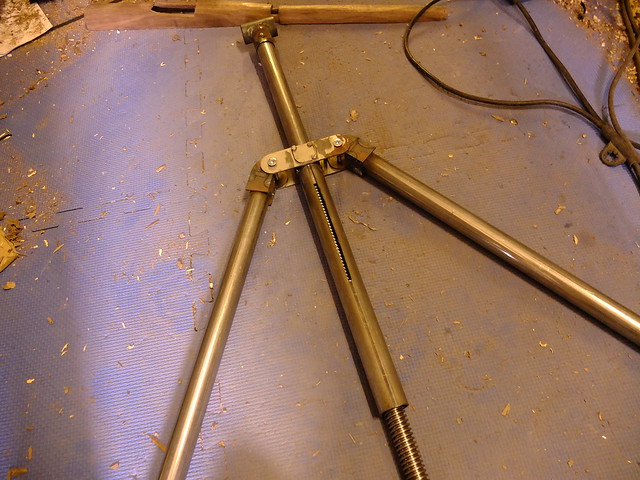
While the leg spreading system has its advantages, I can’t help but feel there are simpler designs that would have had the same result. Perhaps the reasoning is plainer with a live firing version.

P1010096 copy

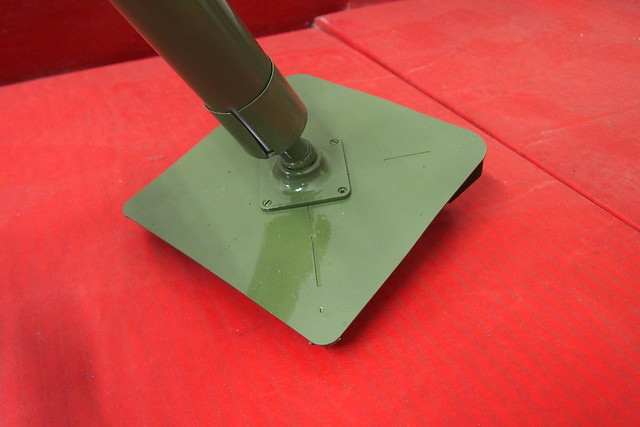
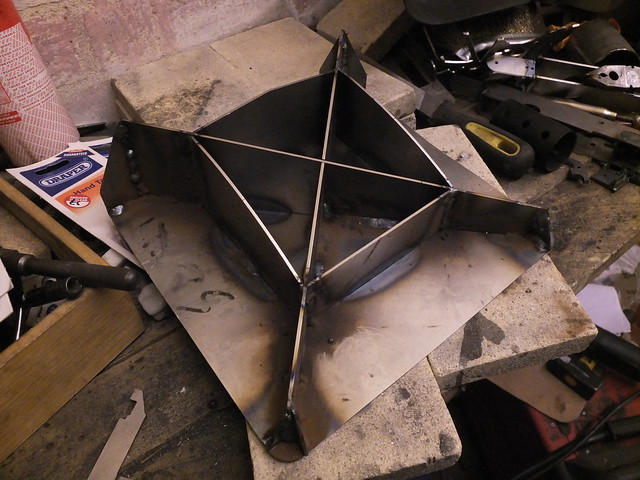
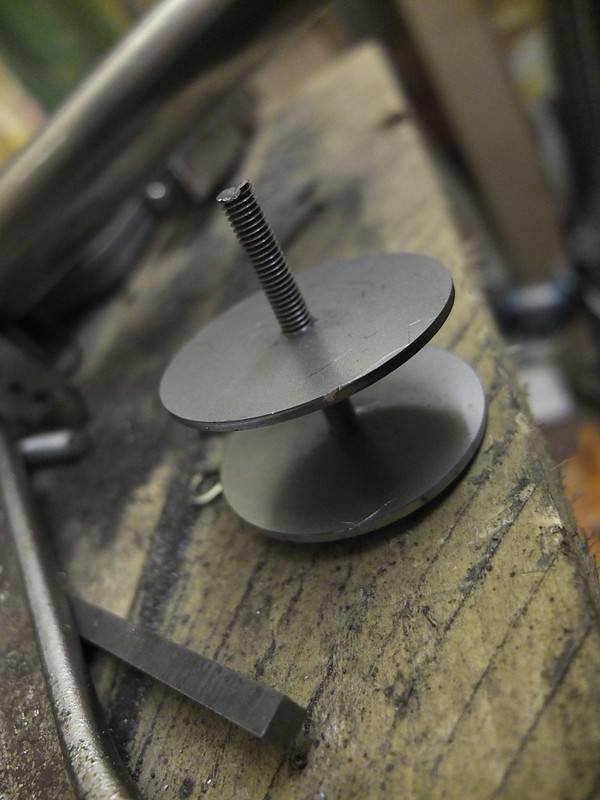
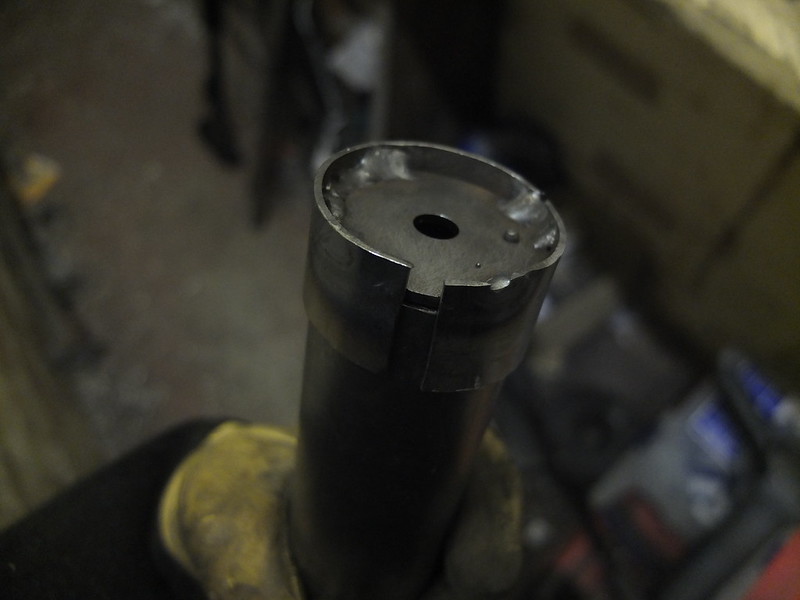
The baseplate has a 3D printed socket for the ball to slot into. On the original this is stamped into the plate design and features a lock, but here the ball is left free so that the barrel can be quickly upended and spent shells ejected.

P1010097 copy

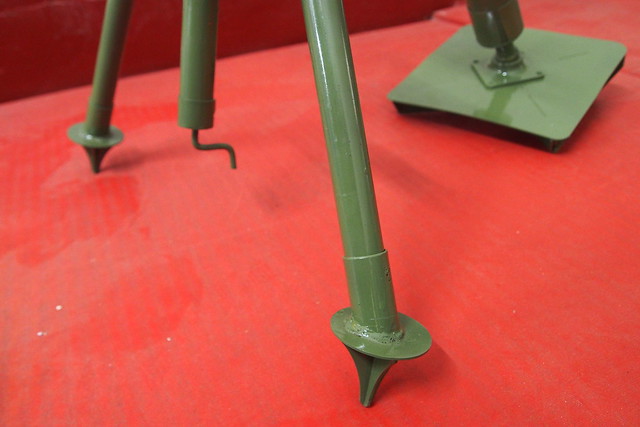
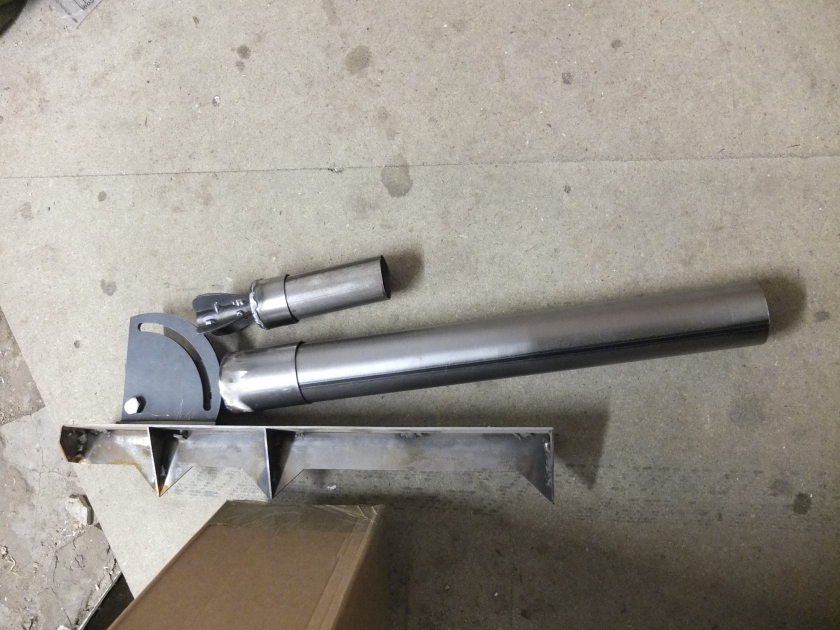
The spikes on the bipod should keep it raised just high enough to give access to the elevation control in the centre.

P1010099 copy

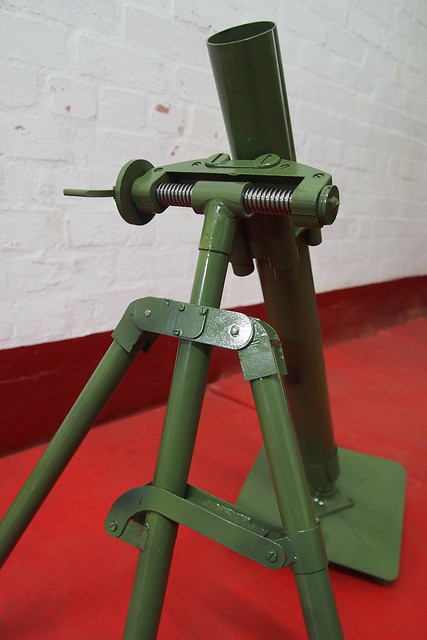
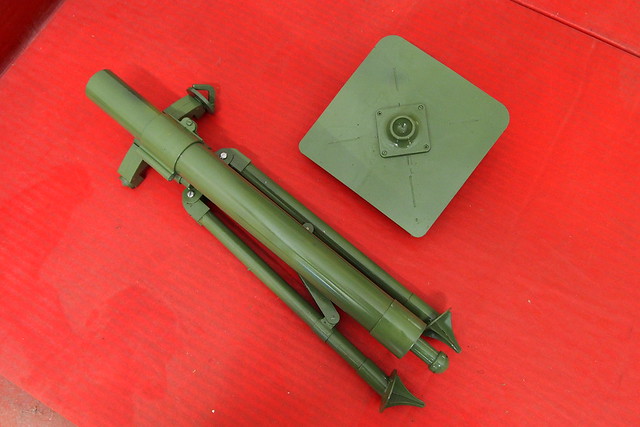
A top-down view, showing the windage lever in the stowed position.

P1010101 copy

Once packed away, this mortar isn’t actually too bad for portability. Considering the complexity and the precision you could achieve out to a respectable range on the original, you can see why modern light mortars are more closely related to this package than the T89 or SMBL 2″ families. While they may have portability and speed on their side, the ability to fine-tune fire for only a little extra weight and bulk certainly has its appeal.

P1010103


If you liked this project or have an idea of your own, drop us a line on enquiries.vintageairsoft@gmail.com to discuss. ‘Like’ our Facebook page or follow the blog to get regular updates on projects and interesting videos and articles.

You can find the build posts for this mortar here.

Don’t forget you can buy some of our complete products via Etsy. If you would like to commission a build like this, please drop us a line on the above email.


M2 60mm Mortar: Build 1

Area-effect, Cold War, M2 60mm Mortar, Weapons, WWII

The project started with a good deal of research, finding pictures of all the component parts. From this I calculated dimensions and drew up plans.

The M2 is quite a bit more complicated than the SMBL 2″ used by the British. For my flat laser cut parts, I’m looking at around 3x as many pieces: plus a number of cast or printed parts.

Screen Shot 2017-06-19 at 15.08.39

The baseplate is the first component to be assembled. This heavy plate is designed to stick into the ground to control and direct the recoil.

_DSF9085

Then the feet for the bipod legs and the hinge parts, Although the M2 is complicated, it does fold down quite tidily, which means a lot of moving parts.

_DSF9124

With the legs in place, the mortar starts to take shape. The tube through the middle will have the elevation control going through it, at the top of it will be the T-piece where the windage adjustment will sit.

_DSF9159

The thread arrived, it is a 20mm trapezoidal threaded rod which should be coarse enough to allow quick adjustments to be made, but fine enough to allow for accurate fire adjustment.

_DSF9259

The elevation adjustment screw in place and the T-piece at the top of the column (where the windage screw will go). There is a slit in the back of the column in which a screw sits that locks the inner column into the outer and engages the screw thread.

_DSF9302

When the elevation is raised to maximum, you can just see the thread through the slot at the back, but this will effectively be hidden by the barrel.

_DSF9303


The next components will be the windage adjustment and endcaps. These are going to be 3D printed in ABS for strength and will also have the barrel clamp.


If you are interested in the history of the M2, you can check out the introduction article here.

If you like this project or have an idea of your own, drop us a line on enquiries.vintageairsoft@gmail.com to discuss. ‘Like’ our Facebook page or follow the blog to get regular updates on projects and interesting videos and articles.

Don’t forget you can buy our complete products via Etsy.

Japanese T89 ‘knee’ mortar

Area effect, Area-effect, Complete builds, Custom builds, Inter-War (1918-1939), T89 'Knee' Mortar, Weapons, WWII

I was recently given this replica T89 mortar replica to convert to fire TAGS. I hope someday to make my own from scratch with a bit more detailing and moving parts.

_DSF8460 copy

The first step is to fit a firing pin. This is quite simple, I tapped two disks and threaded them onto a bolt to create a stable unit. This can be pushed down to the bottom of the barrel.

_DSF8462

The shells are steel tubes with custom-made caps. This is the prototype, there is a second hole in the production versions to allow quick refiling of the TAGs. The bottom plate is held on by spring pressure.

_DSF8463

There are two rows of spacers. The bottom one keeps the shell centred in the barrel, the top, thicker row allows the user to line up the shell before dropping it into the barrel for firing.

_DSF8464

The completed shells.

_DSF8681

I’ll be taking lessons learned from this design to apply to my other mortars and heavy weapons. I’ll also be offering these quickfill shells as an alternative to the standard 2″ mortar shells I’m providing with the SMBL mortar.


If you want a mortar of your own, please do get in touch at: enquiries.vintageairsoft@gmail.com or join us on our Facebook page. Don’t forget you can buy our complete products via Etsy.

Heavy weapons prototype special

Anti-Tank, Area effect, Area-effect, Cold War, LAW, PIAT, SMBL 2" mortar, War on Terror, Weapons, WWII

Nothing too in-depth today, just a short video showing off some of the prototypes we’ve been working on for over a year…

All of these are now available to order by email, we will be putting up pictures of the finished articles in the next few weeks.

If these products are of interest to you, please do get in touch at: enquiries.vintageairsoft@gmail.com or join us on our Facebook page. Don’t forget you can buy many of our complete products via Etsy.


British SMBL 2″ Mortar prototype

Area effect, Area-effect, Cold War, SMBL 2" mortar, Weapons, WWII

I’m afraid I have been somewhat remiss on photographing this build, but it’s quite a simple one in terms of components… The baseplate is an early war design which suits itself to precision rather than speed. The spiked arrangement on the bottom digs into soft ground to provide stability. The curved plate is your elevation control.
_DSF6051

The bottom of the barrel/chamber, shown just after welding. The main body of the barrel is easily removable to remove the shell if you need to.

_DSF6151

And the finished prototype! There will be a few modifications for production that allow the barrel to sit flatter for transport and the shell will have cutouts in the fins for lightness.

_DSF7247
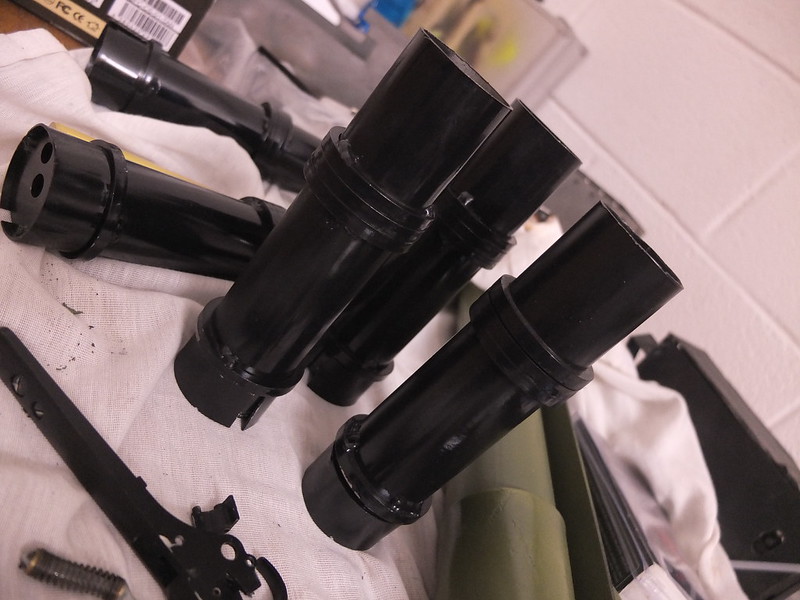
Something worth pointing out is that this is designed mainly for use with TAG shells to take out targets at long range or lay smoke screens, though you can put in any 40mm shells you like. During testing we did experiment with scatter shells and they were  effective at clearing a wide area ahead of the mortar.

Also, dropping the shell is unlikely to set it off. The firing mechanism is sat well inside the shell and will only be fired if activated by something goes that far into it. This makes it safer than just carrying moscarts which can go off when dropped on their base.


If this product is of interest to you, please do get in touch at: enquiries.vintageairsoft@gmail.com or join us on our Facebook page. Don’t forget you can buy our complete products via Etsy.

Light Mortars: SMBL 2″ mortar

Area effect, Area-effect, Cold War, History, SMBL 2" mortar, Weapons, WWII

History

Mortars are artillery that fires at a steep trajectory, used originally in sieges to target buildings inside walled towns that would be unreachable by conventional artillery.

They have been used by armies ever since, though the modern mortar is a very different beast to its medieval counterpart. This pattern of man-portable mortar was developed in the Great War: when remaining in cover while targeting an enemy in cover was necessary to survive. This close-use artillery needed to be small enough to live in conventional trenches but provide greater firepower and range than rifle grenades.

Loading2inchMortarBalkanFront

The Stokes mortar was introduced by the British in 1915 and the design was widely modified and used by other countries. It is the grandfather of all modern mortars.

The Ordnance SMBL 2″

The 2″ mortar as used by the British Army in WW2 was developed from a Spanish 50mm mortar, though with modifications to make it suitable for British service. By the end of the war there had been eight marks with countless ‘*’ designations (used by the British at the time to denote small changes that did not add up to a full Mk).

595px-Men_of_1st_Royal_Ulster_Rifles,_1st_Airborne_Division,_demonstrate_the_2-inch_mortar,_29_August_1942._H23359

Originally the mortar was supplied with a collimating sight with spirit-levels and adjustment to allow for carefully aimed fire, however this was dropped on many of the marks, being replaced by a simple white line up the length of the barrel which was pointed at the enemy and fire adjusted until the bombs landed on target.


Vintage Airsoft have built a prototype mortar and will be demonstrating it very soon.

If this product would be of interest to you, please do get in touch at: enquiries.vintageairsoft@gmail.com or join us on our Facebook page. Don’t forget you can buy our complete products via Etsy.

PIAT: Part Two

Anti-Tank, Area-effect, PIAT, Weapons, WWII

PIAT Part One was quite a while ago now and the project had to take a bit of a back seat for a while. Since then it has undergone a few changes to improve it and get it working!

Firstly, the shell holder is now welded onto the receiver for strength and simplicity. The whole unit now strips from the back.
_DSF6891

The back now uses a bayonet locking lug system to hold the internals in place.

_DSF6892 
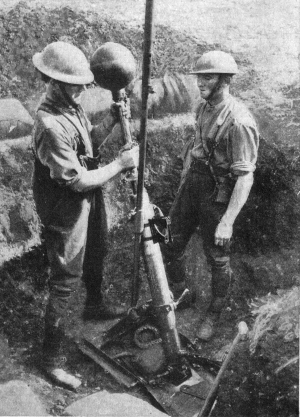
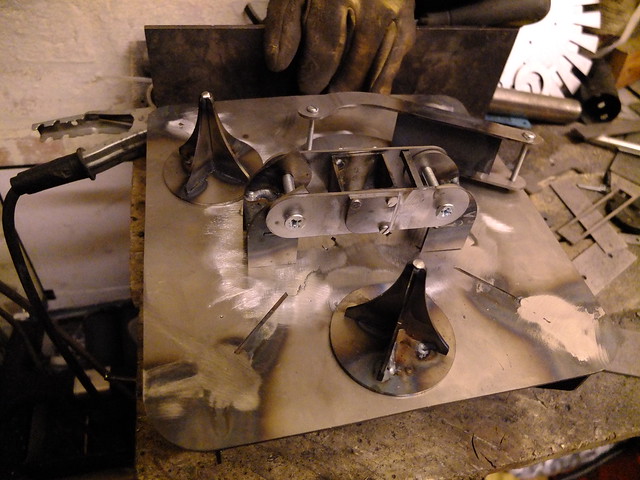
The trigger mechanism is now also smaller and smoother to operate, so it now looks like this:
_DSF7051

With the prototype shell in place! The production shells will be much more authentic in shape, this is just a proof of concept at this stage.

_DSF7090

Time for a first coat of paint. Panzer green will do to prevent rust for now, though surviving examples are painted everything from a forest green to a chocolate brown.

_DSF7092

Time for a bit of bang:

If you like the look of this piece and would like a build of your own or want to support this project please do get in touch! Email us on enquiries.vintageairsoft@gmail.com or get in touch via our Facebook page.

Don’t forget to visit our Etsy page HERE.