Lanchester MkI*: Complete

Complete builds, Custom builds, Lanchester, Products, Sub Machine-guns, Weapons, WWII

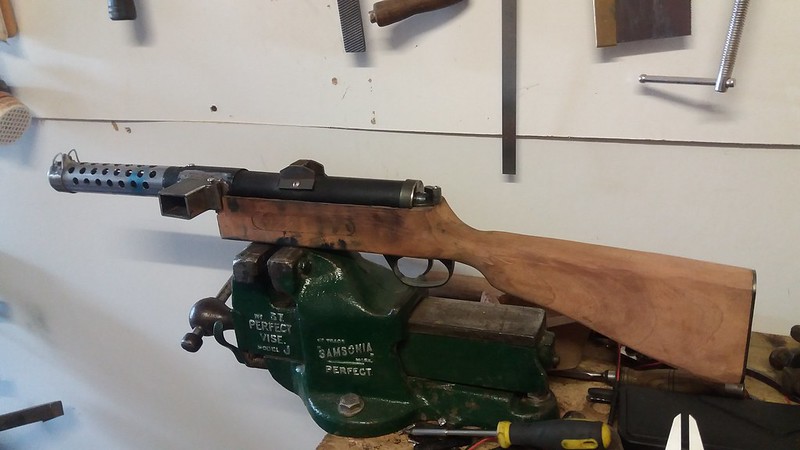
So, the Lanchester is finished! And I am in love, though I say so myself.

_DSF9334

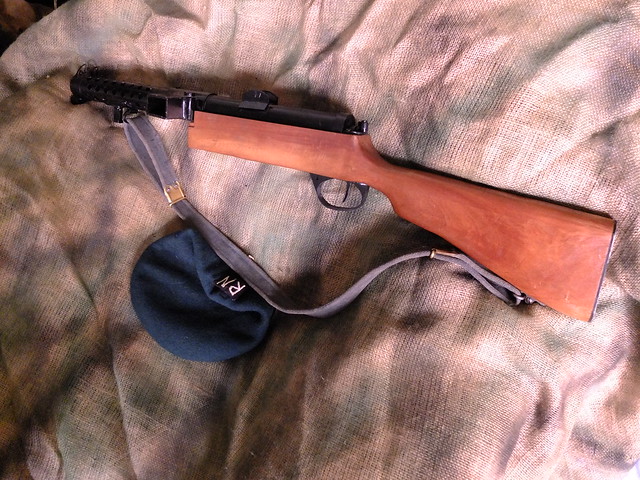
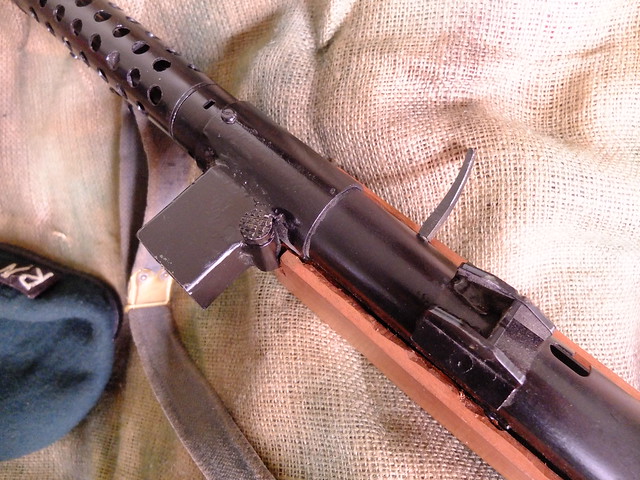
Details, the new magazine well closely resembles the original and is an improvement on the Sten original. I have brazed the mag catch head so that when it wears it looks brassy.

_DSF9335

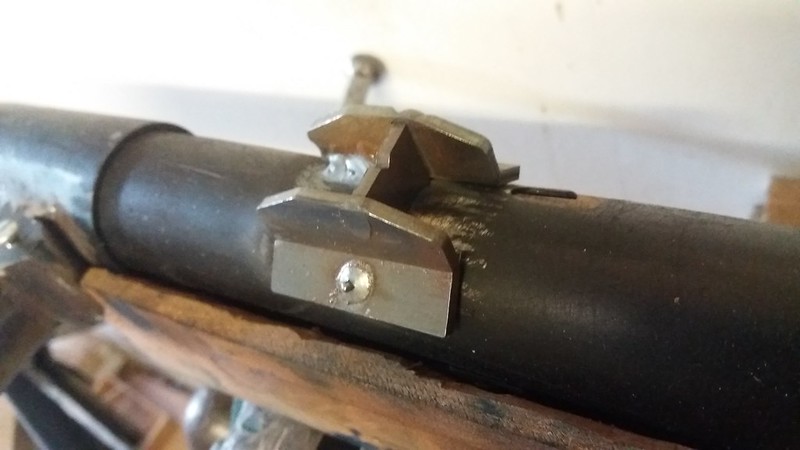
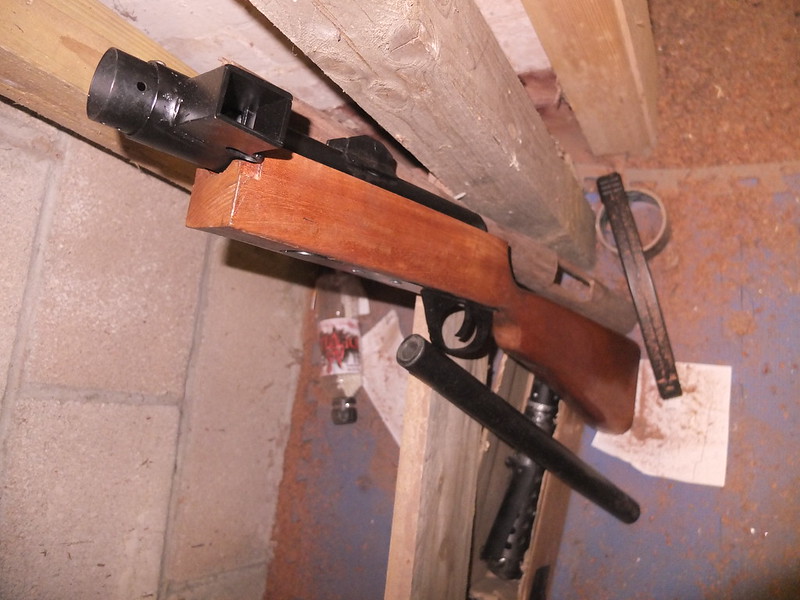
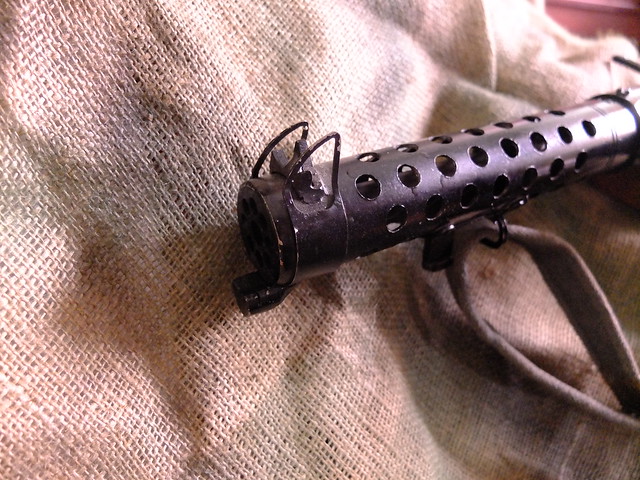
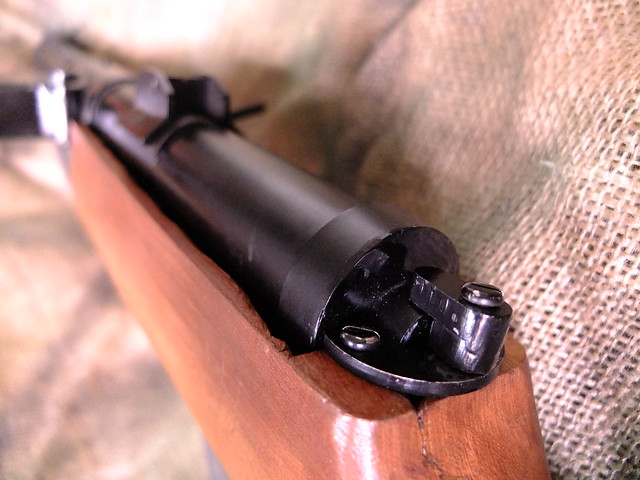
The foresight and bayonet lug. This should take a rubber SMLE bayonet if the owner decides to do so!

_DSF9336

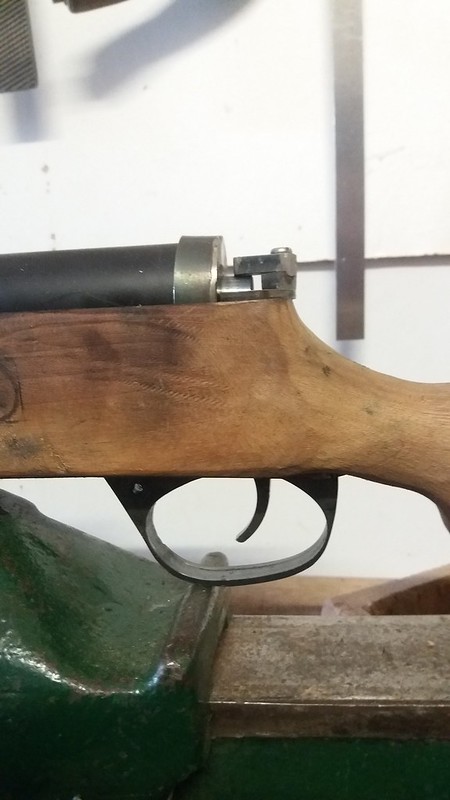
The trigger is set back, the pull is a little unusual but not bad.

_DSF9337

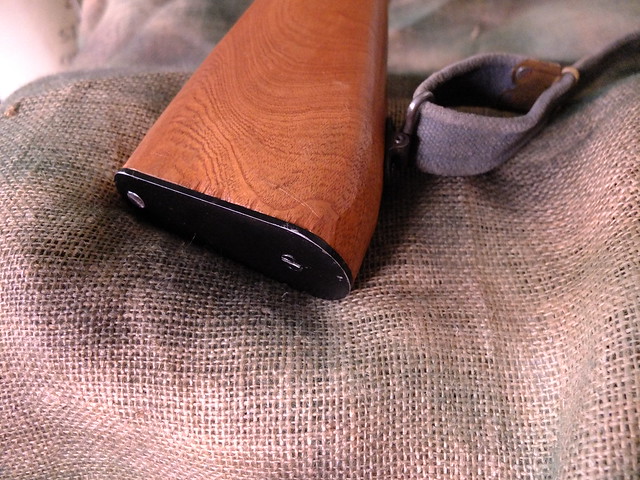
The buttplate, steel, though a brass SMLE buttplate could be substituted in here.

_DSF9338

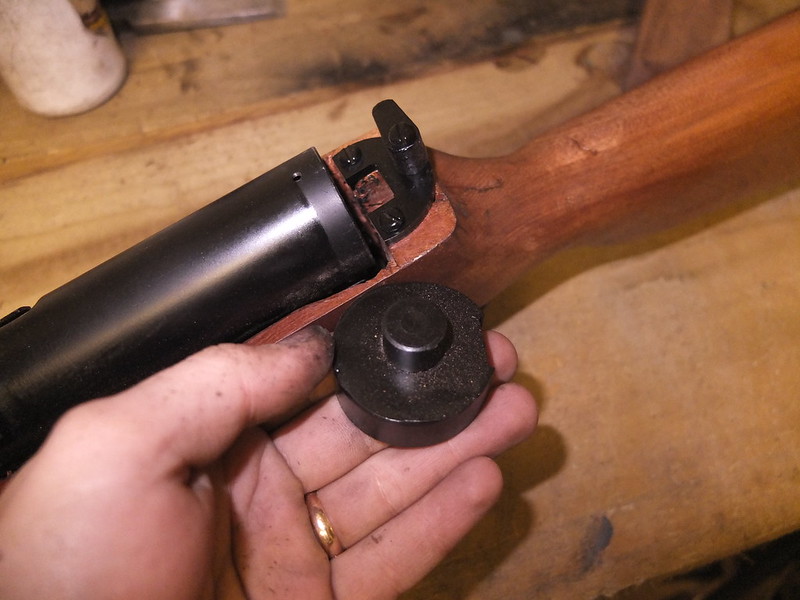
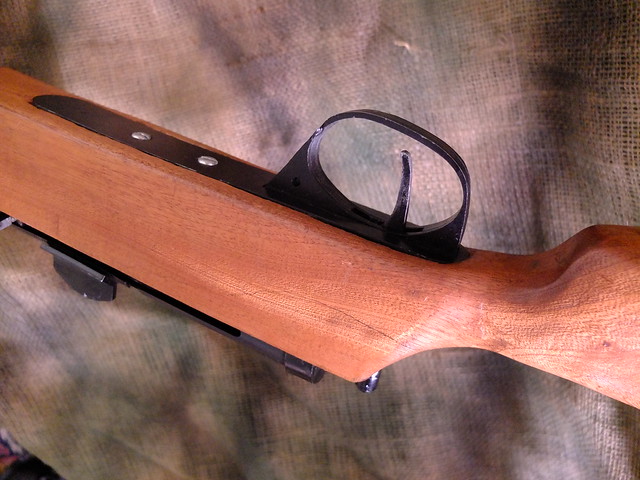
The rear locking lug is just for looks on this. A hinge is quite hard to do but may be doable in the future. For now you can remove the lock and back cap to replace the battery. Unfortunately the wrist of this stock is too slim to drill through to a larger battery compartment in the buttstock.

_DSF9339


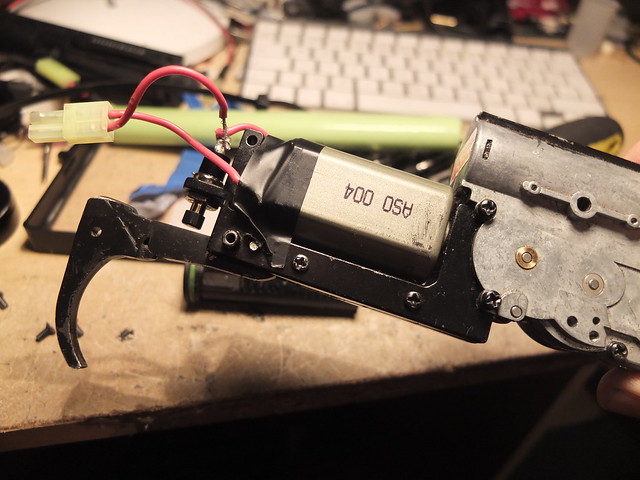
You can check out the build process for this gun here.


If you like this build, you may like to take a look at where it came from, the MP18 and its extended family.


Don’t forget to subscribe to the blog or join us on Facebook for more! You can buy some of our ready-made products on Etsy. You can also email to enquire about custom or special builds on enquiries.vintageairsoft@gmail.com.


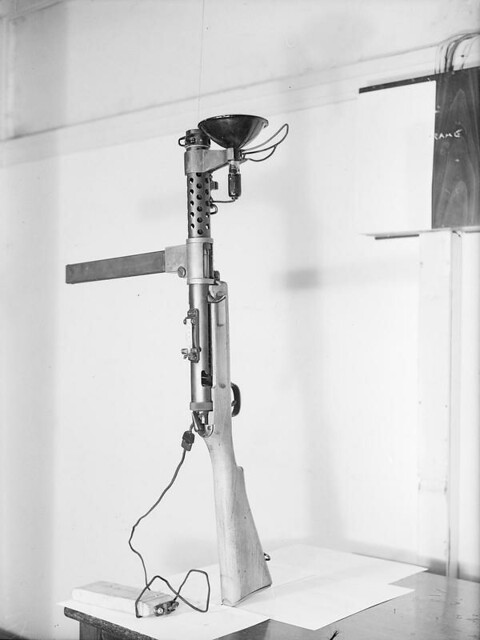
P.S.: If anyone wants a Lanchester with this awesome period tac-light please DO get in touch. 

Fighting_in_the_Dark._2_January_1943,_Liverpool,_the_Navy's_Lanchester_Gun_Fitted_With_Illumination_Attachment_For_Night_Operation._A13831

Lanchester Build: Part 2

Custom builds, Lanchester, Sub Machine-guns, Weapons, WWII

Since the last post, I have welded the rear sight unit and fitted the buttplate into place.

20170401_134615

With the buttplate screwed down, I can do the last bits of shaping on the stock. I always leave a bit of excess to make this fit as close as possible.

20170401_134623

I also took the opportunity to fit the action lock. In the original this stops the receiver from tipping forward on the hinge under the magazine well. As the receiver is screwed into the stock on this it is merely there for the aesthetic.

20170401_134636

The rear sight is permanently affixed. For an SMG adjustable sights are generally overkill.

20170401_134643

This side picture shows how much further back the trigger is compared to the Sten original.

20170401_134702

I then applied finish to the majority of the parts. I am using hardwax oil for the wood as it picks up a patina nicely and looks the part for these period weapons.

_DSF8961

The metalwork is sprayed black enamel on the whole.

_DSF8969

The smaller parts have been oil blacked where possible as this is more wear resistant.

_DSF8972

The trigger contacts gave up the ghost as they do tend to, so I have replaced this with a switch and advised a mosfet. 

_DSF9143

With the mosfet in place, I re-assembled everything and ran my tests. Pictures of the finished item to follow!


If you like this build, you may like to take a look at where it came from, the MP18 and its extended family.


Don’t forget to subscribe to the blog or join us on Facebook for more! You can buy some of our ready-made products on Etsy. You can also email to enquire about custom or special builds on enquiries.vintageairsoft@gmail.com.

Lanchester Build: Part 1

Custom builds, Lanchester, Sub Machine-guns, Weapons, WWII

First things first, I draw out the stock template on the wood.

I took the drill to the stock and took out the detailed bits, then sawed through the rest. I’m very much looking forward to the day when I have a bandsaw to do this job…

Over in the metalshop, I bent, tacked and welded the steel parts together. On this build I am making a new magwell, but will be using the original magwell sleeve.

The fore-end of the Lanchester, showing the foresight and sight guards. These will need to be hardened to be much use I think.

Fitting the action to the stock. This is always a long job, but having recently got a hold of some lovely blue oil paint I’m improving my fitting technique and speed quite a lot!

Showing the bottom plate, which I am going to draw around to cut a nice, deep recess for.

I have cut the recess for the bottom plate deep so that the trigger reaches through to the correct depth in the trigger guard. I may need to tweak the trigger design though as at present it is a bit sticky. Far from ideal in an automatic airsoft gun!

I can finally get to my favourite bit: Shaping the stock. The Lanchester has a very slim, feminine wrist on the stock reminiscent of a P14/17 rifle. As a result it will have to rely on Lipos in the back of the receiver which is unfortunate but better than sacrificing the stock strength at the weakest point further. Even when I have carefully selected the grain to flow down through this for maximum strength there’s only so much you can do to keep it strong.

The Lanchester, pretty much roughed out. Now onto the rear sight, locking lugs and detailing!


If you are interested in this project or have an idea of your own, drop us a line on enquiries.vintageairsoft@gmail.com to discuss. ‘Like’ our Facebook page or follow the blog to get regular updates on projects and interesting videos and articles. 

Don’t forget you can buy our complete products via Etsy.