LS26: Build 1

Custom builds, Inter-War (1918-1939), LS26 LMG, Machine-Guns, Weapons, WWII

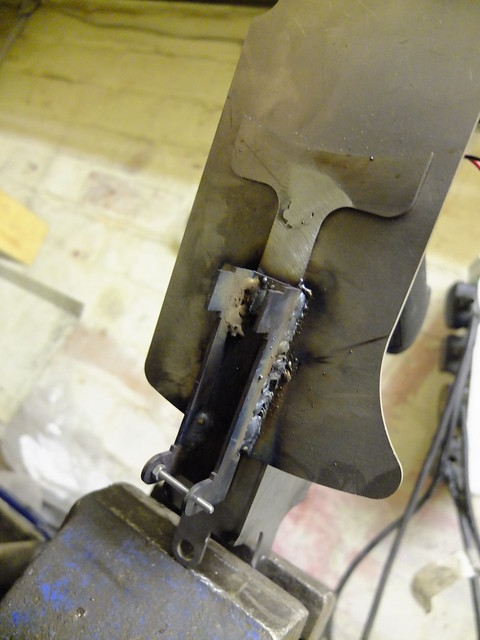
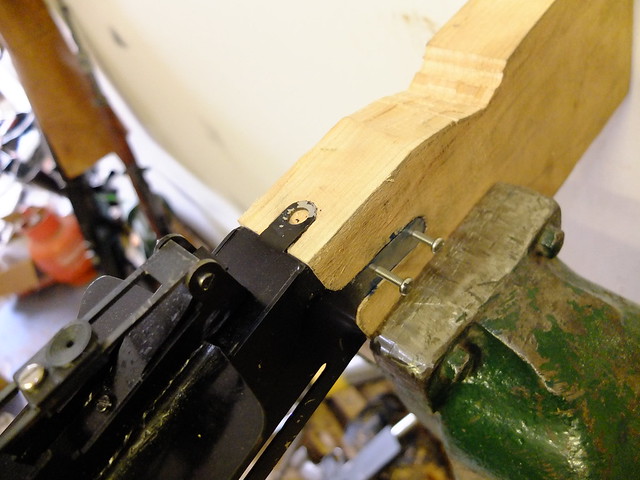
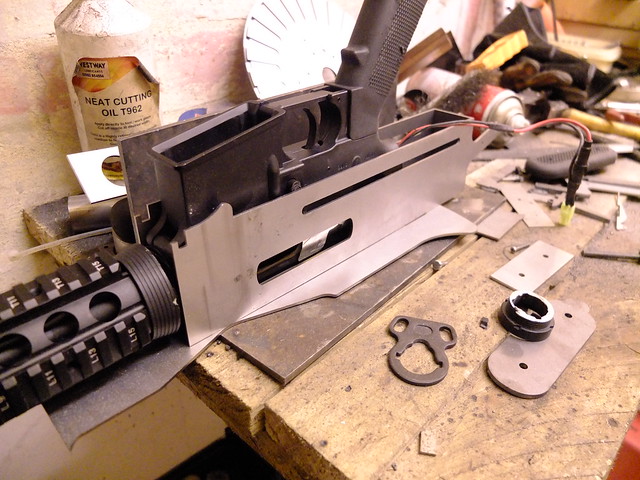
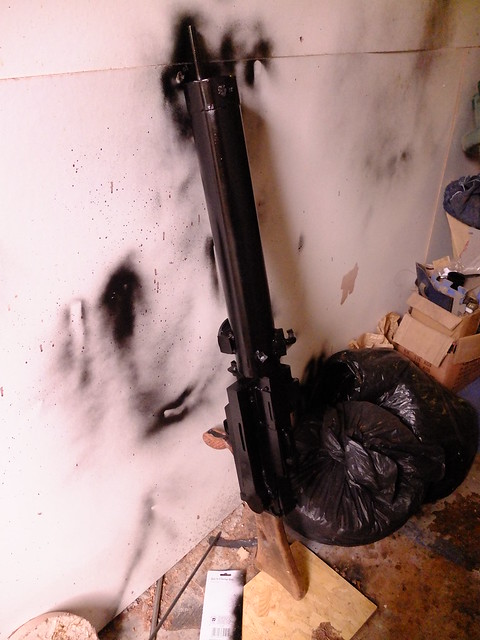
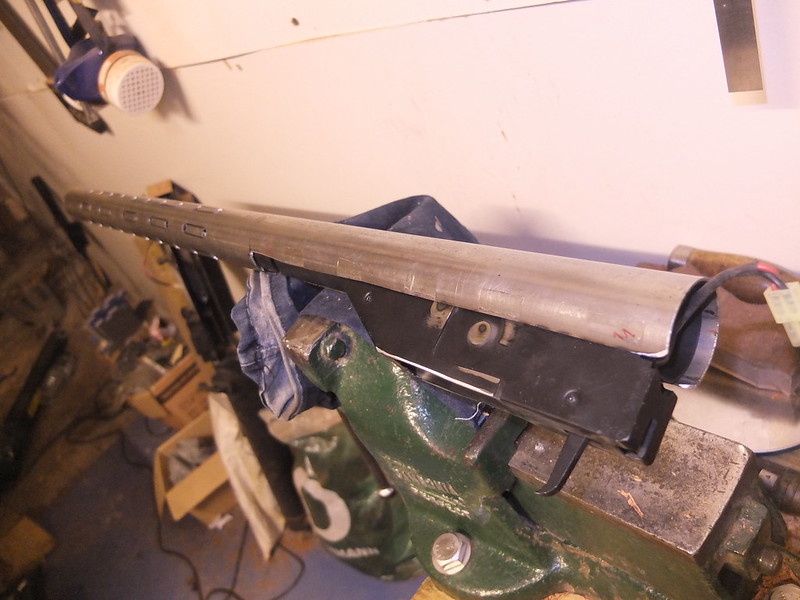
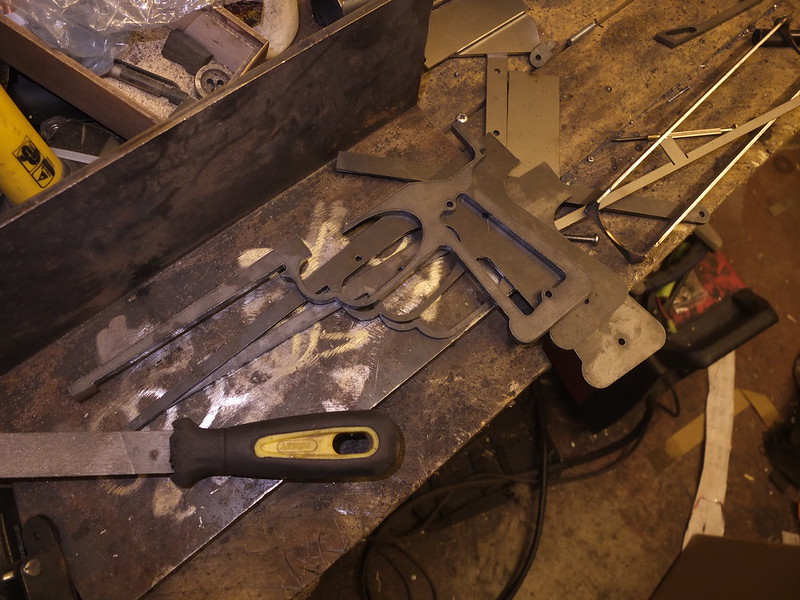
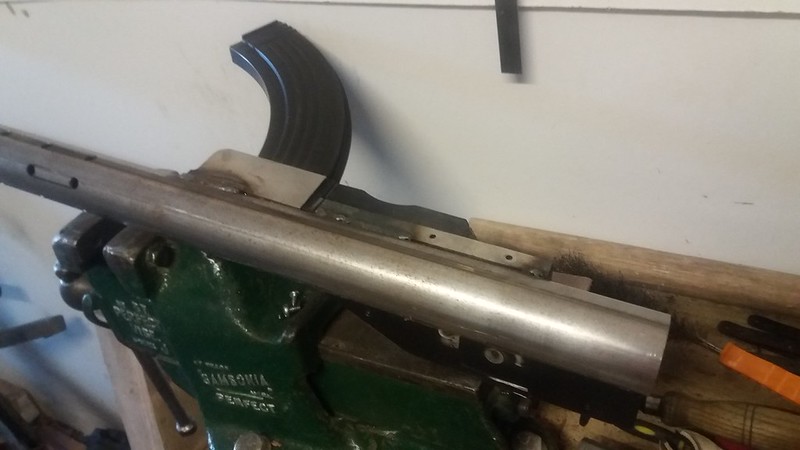
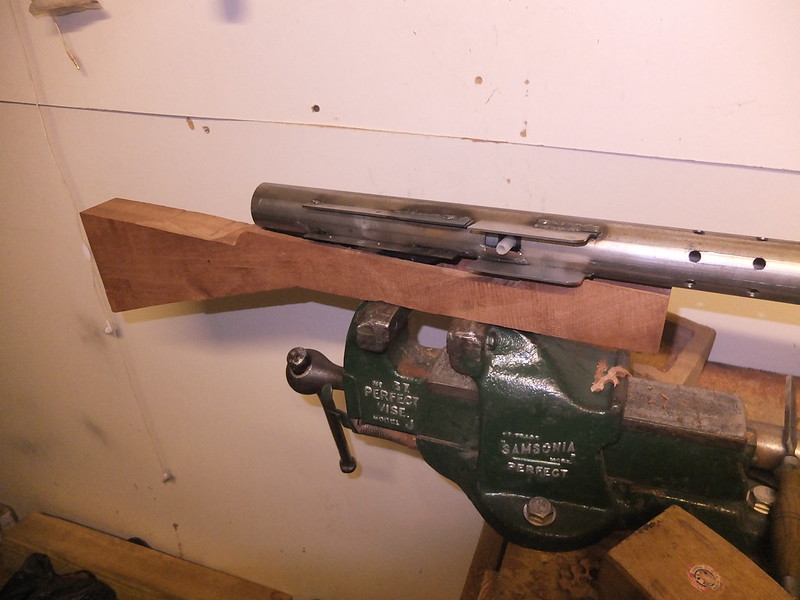
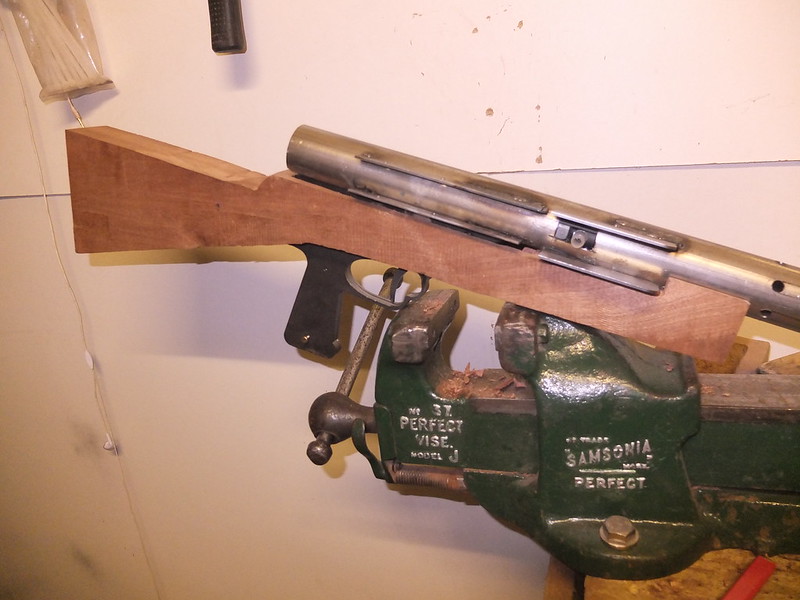
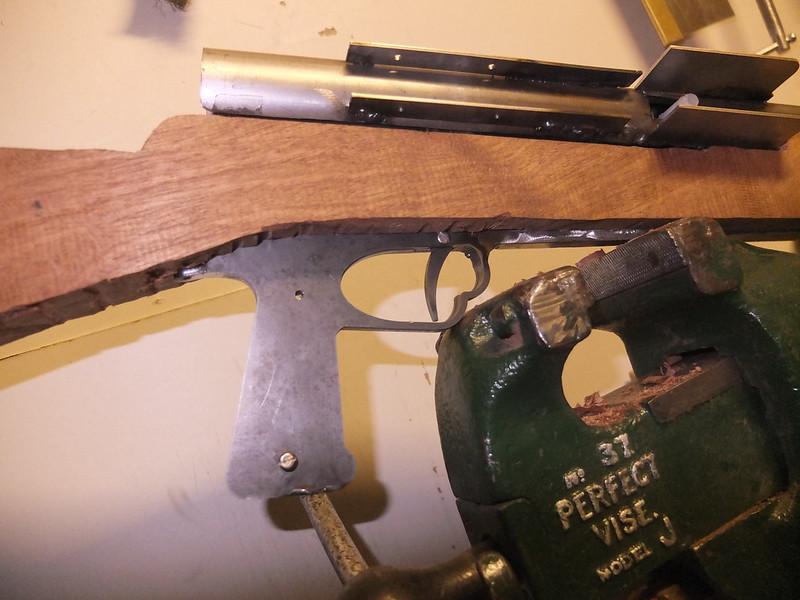
This build will be another based on the ever trusty AGM Sten! The first step is to strip off the unneeded bits, grind down the unwanted protrusions etc…

_DSC7339

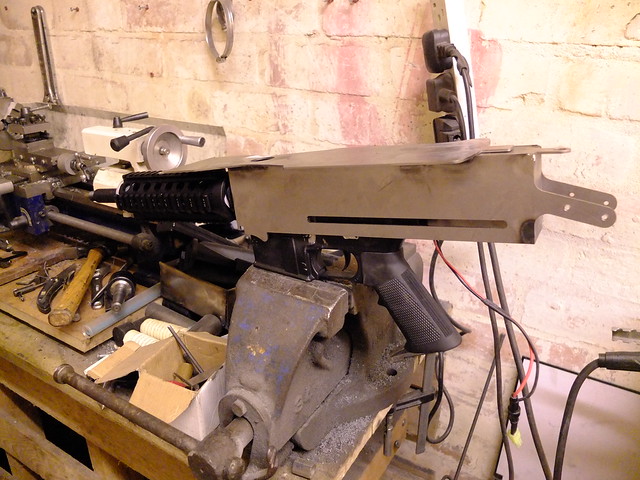
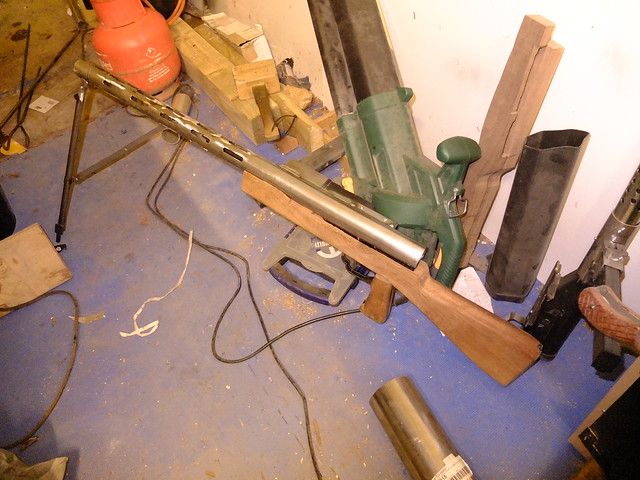
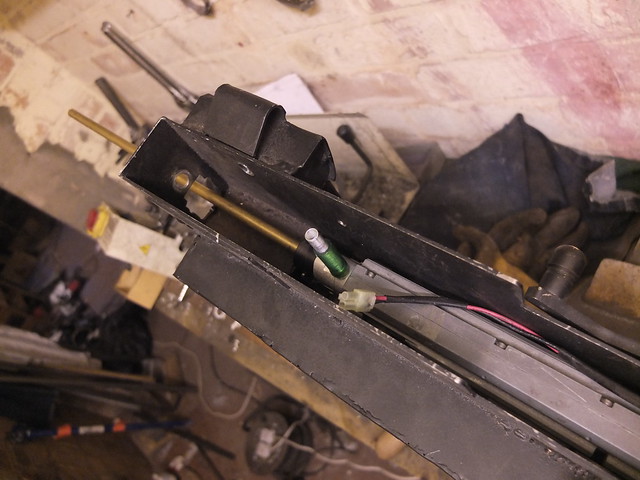
Then I could start tack welding the cradle together to form the receiver. Once all the parts are in place and squared up I’ll weld them in place permanently.
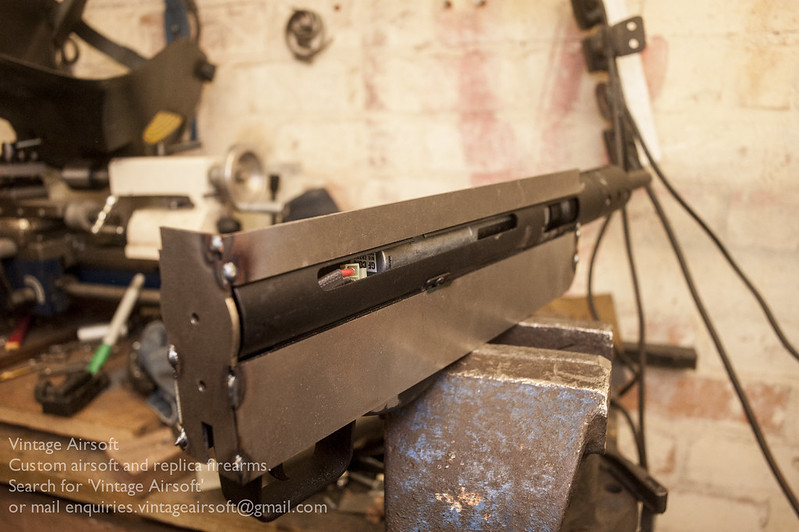
_DSC7341

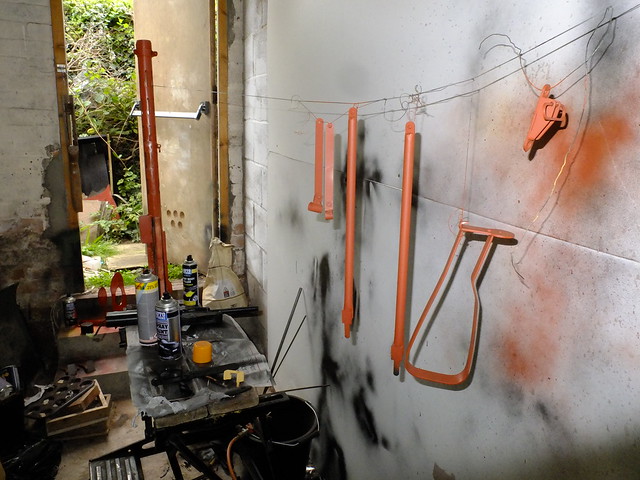
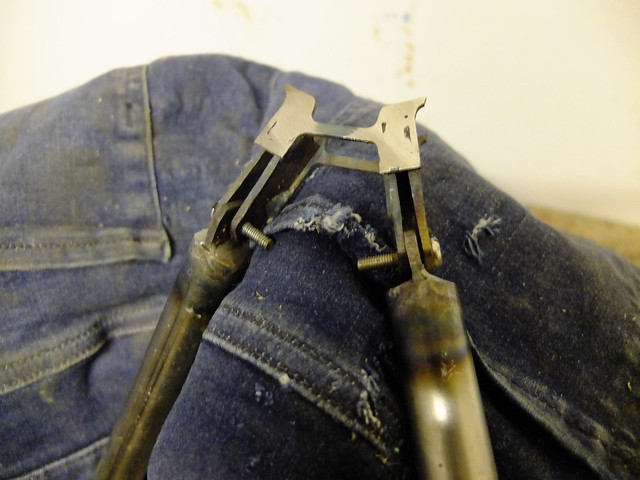
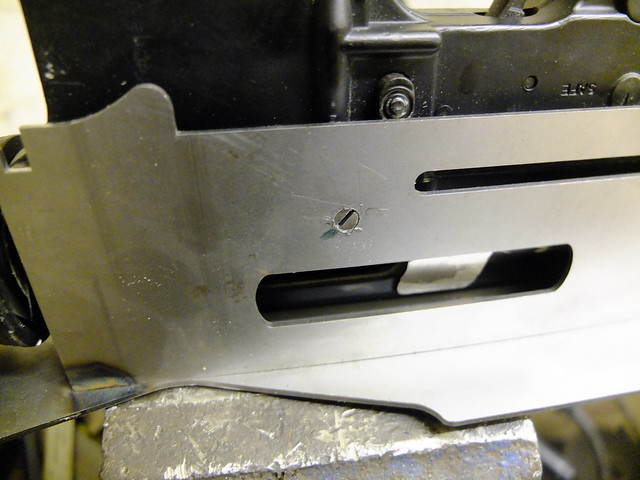
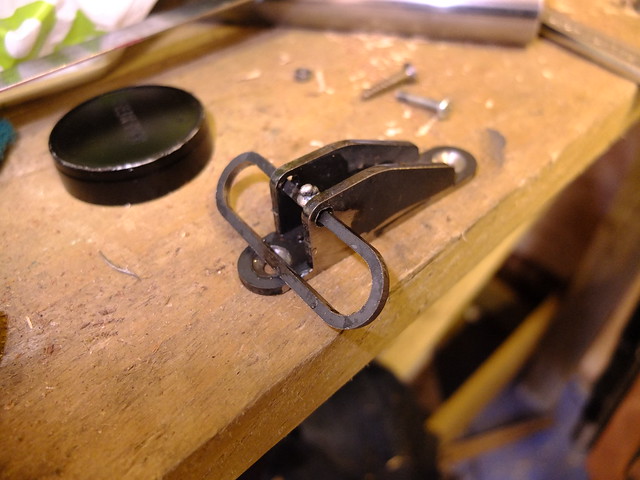
Next up, I’m assembling the bipod. With builds like this it’s good to reduce the number of floating parts as quickly as possible, otherwise things have a habit of vanishing into the ether.
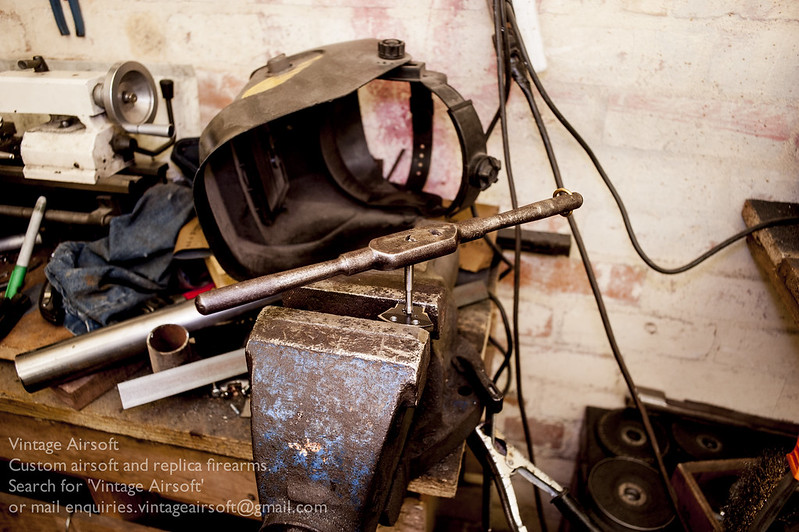
_DSC7348

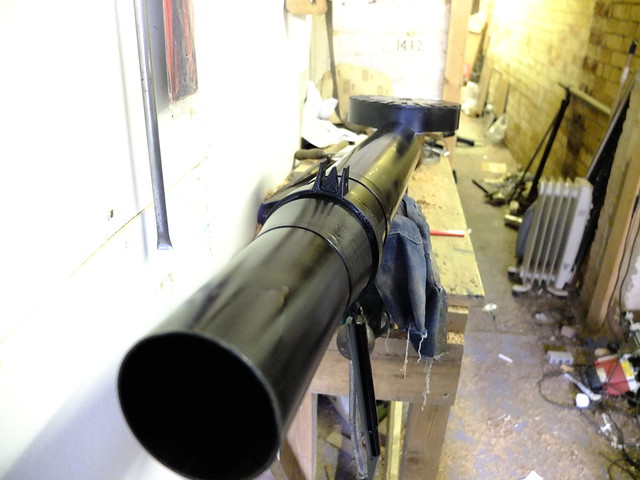
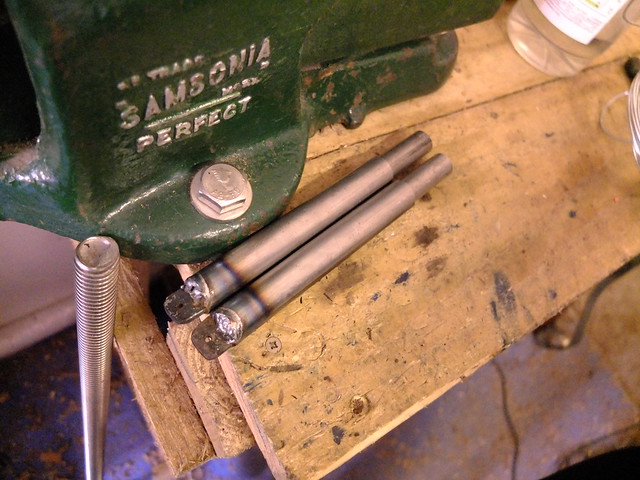
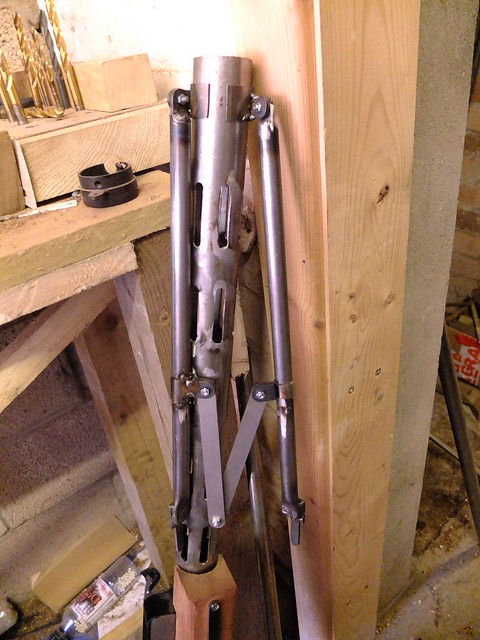
The top part of the bipod pivots forward and folds back under the barrel shroud. The legs spread only as far as the limiter allows. At the bottom of each leg is the distinctive  ski-pole depth limiter. A spiked bipod is great for a solid mounting on soft ground, but once it gets too soft they tend to dig in so these will stop it from going in so far that you’d have to be King Arthur to remove it.
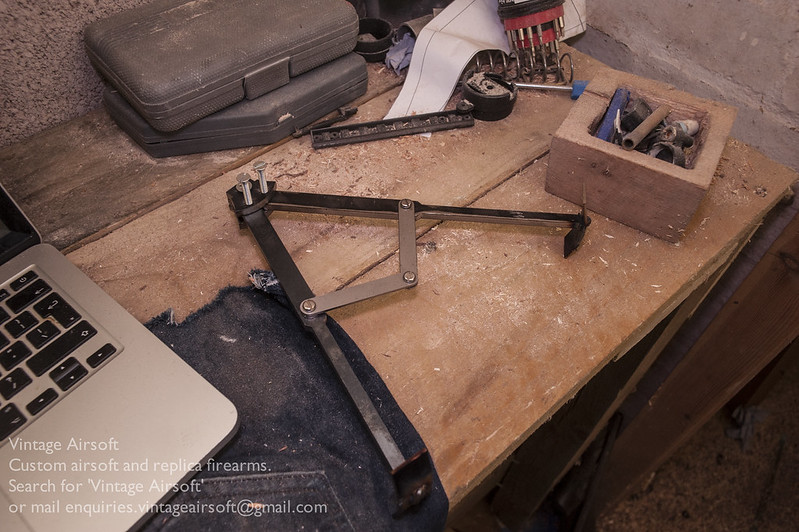
_DSC7350

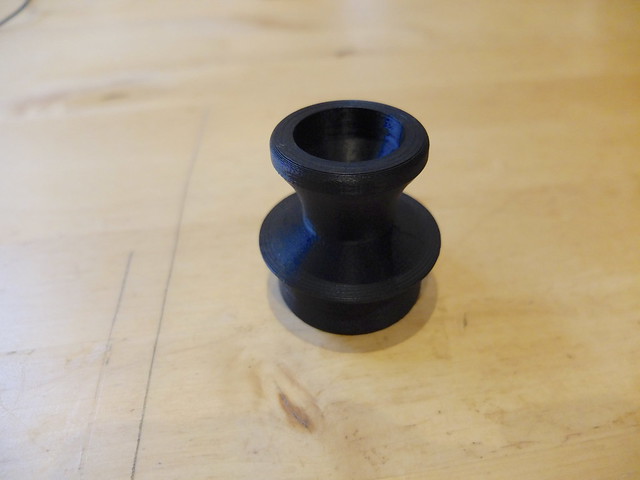
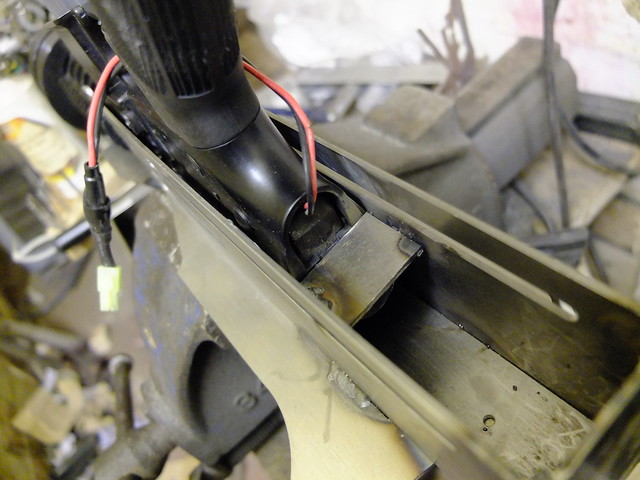
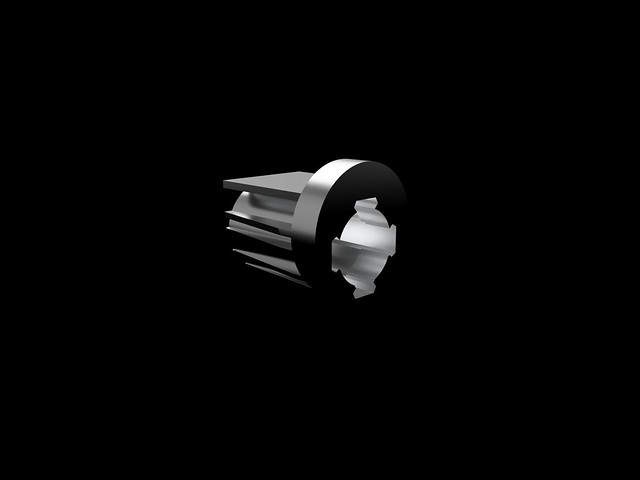
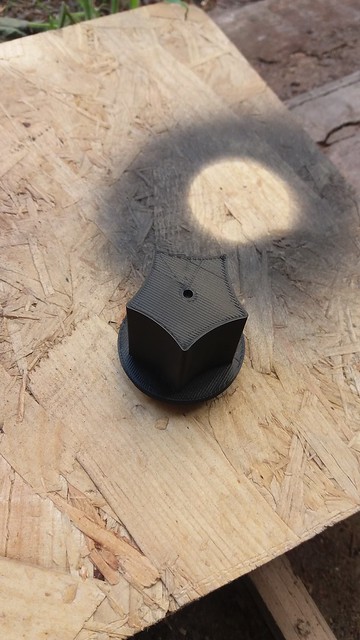
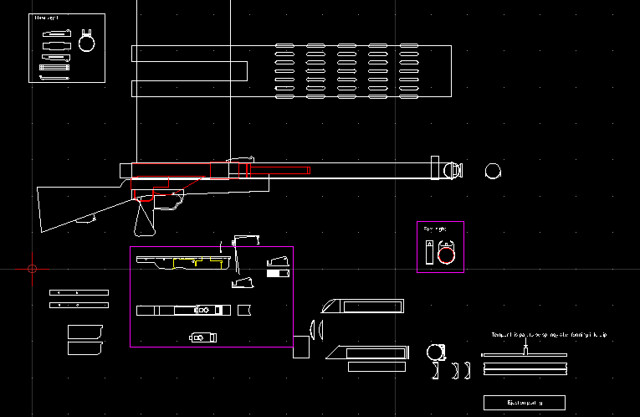
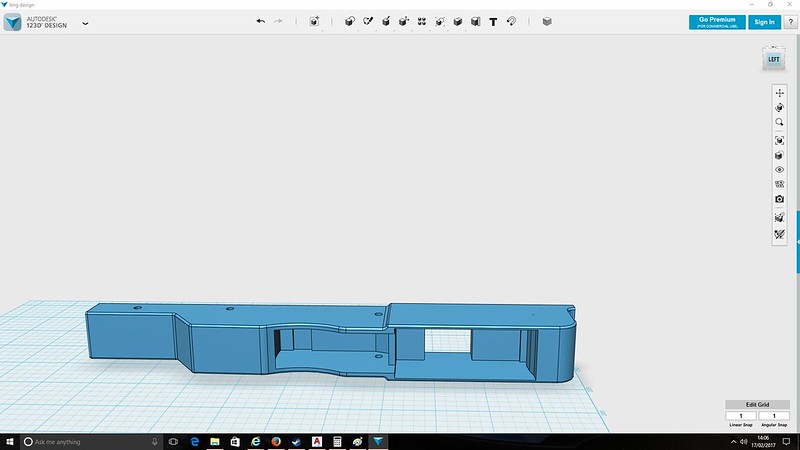
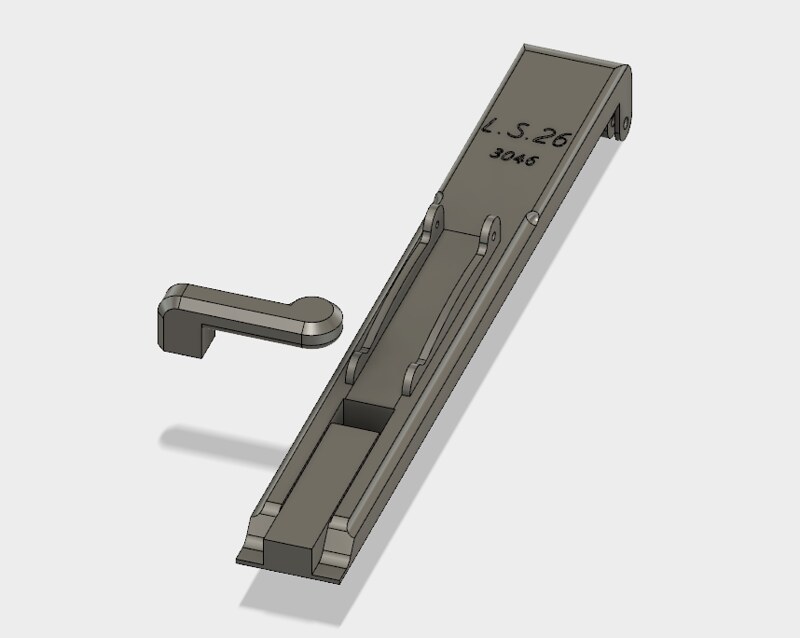
The top cover is to be 3D printed. This allows me to get some of the awkward shapes and dimensions.
Screen Shot 2017-11-15 at 21.44.40

Once printed, some small tinkering to make it fit nicely but not much.

_DSC7430

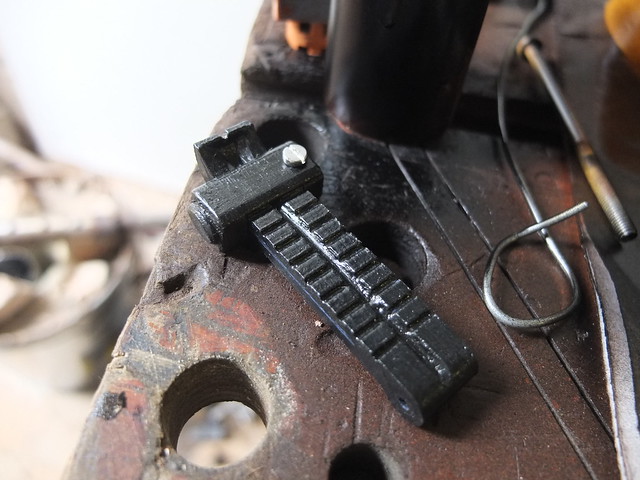
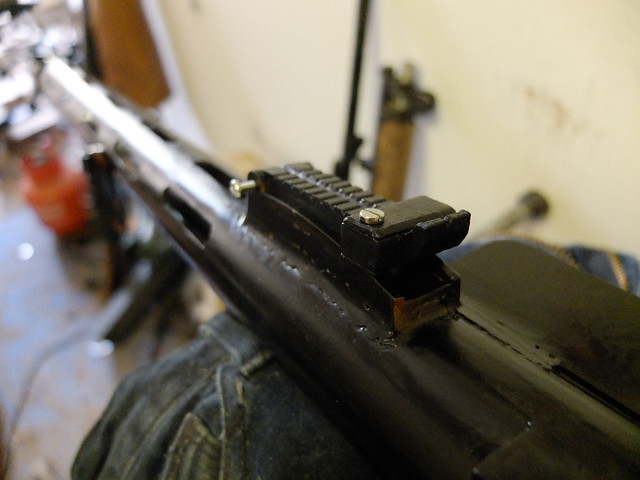
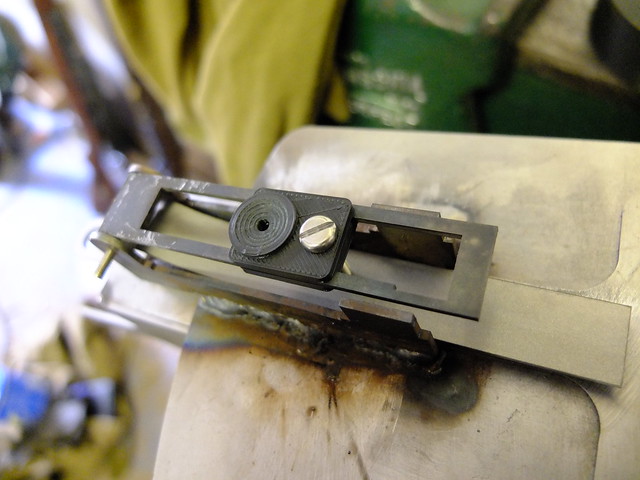
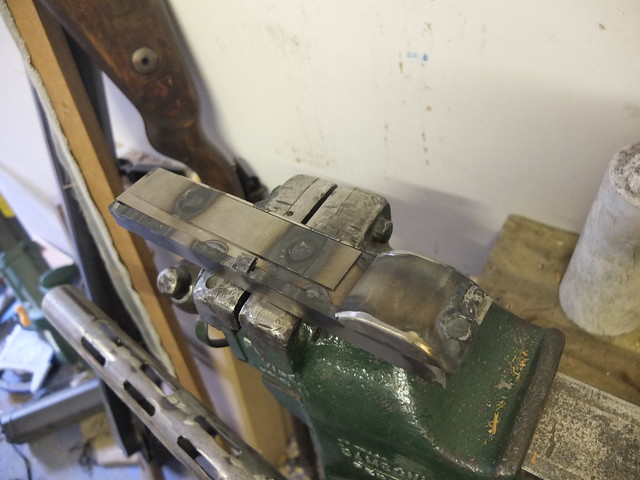
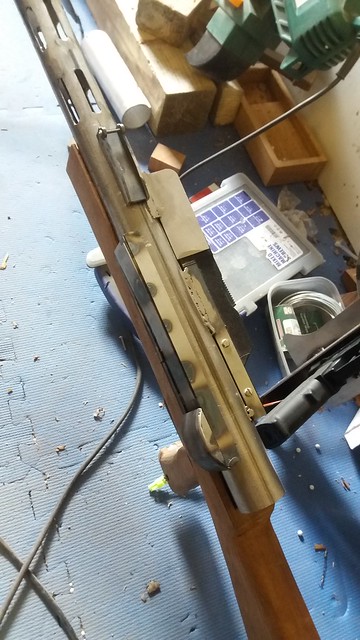
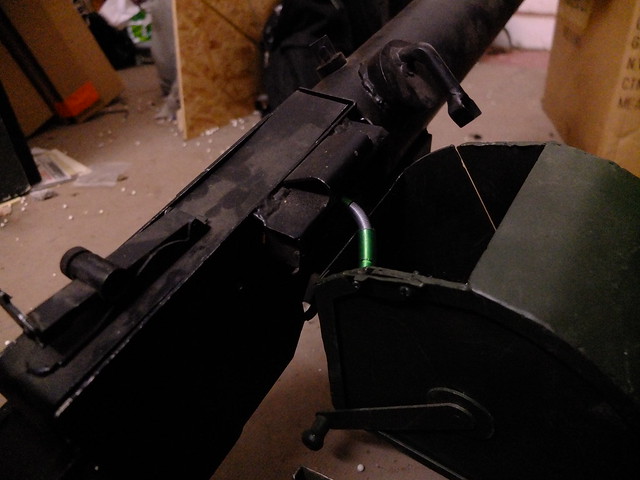
The rear sight is adjustable for windage and elevation, with the windage leaf dovetailed in. The elevation adjustment uses a variant of my usual system with teeth locking it in place securely using spring pressure.

_DSC7431

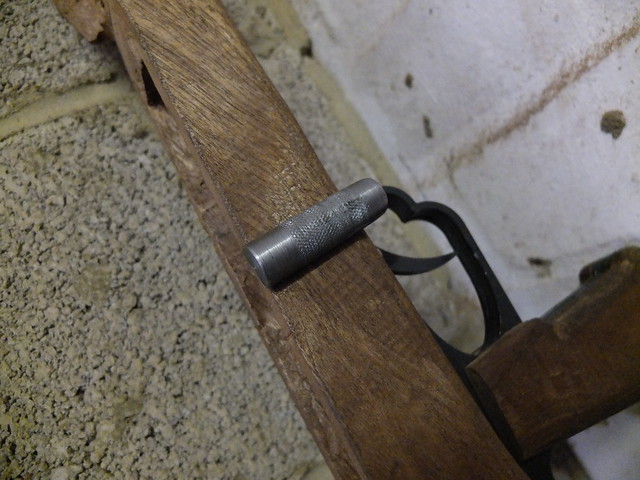
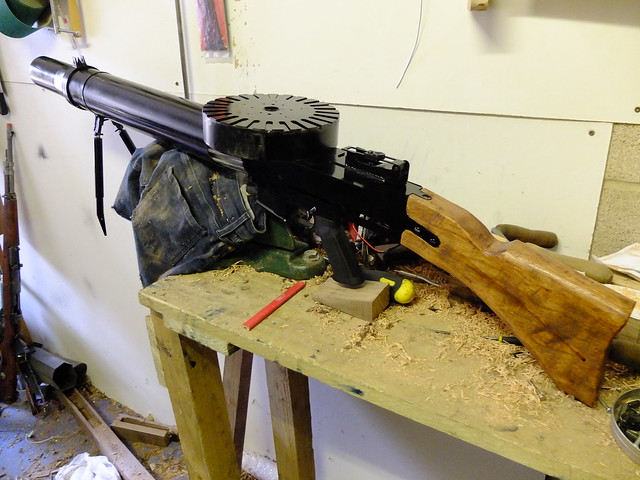
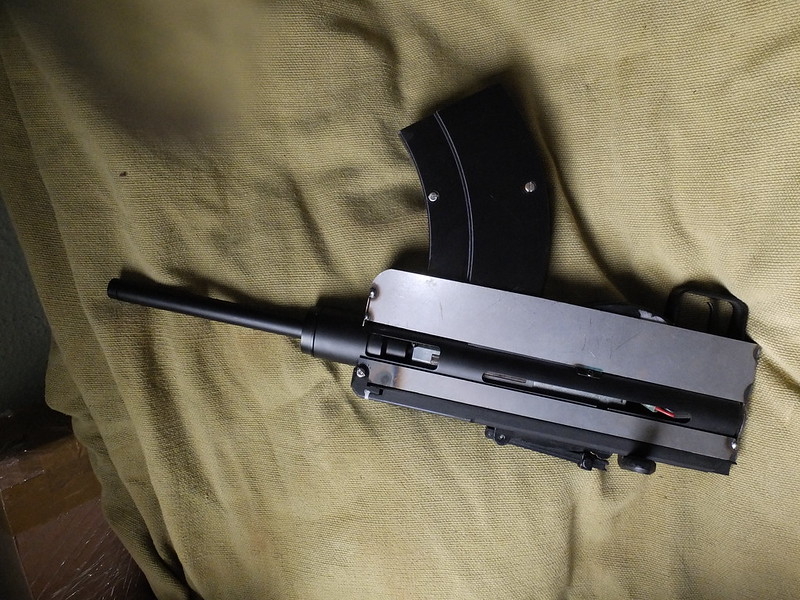
The magazine in the magwell. This part is all 3D printed, I’ll be joining it up to the Sten using a spring much like an LMG magazine for an M249 or similar.
_DSF9966

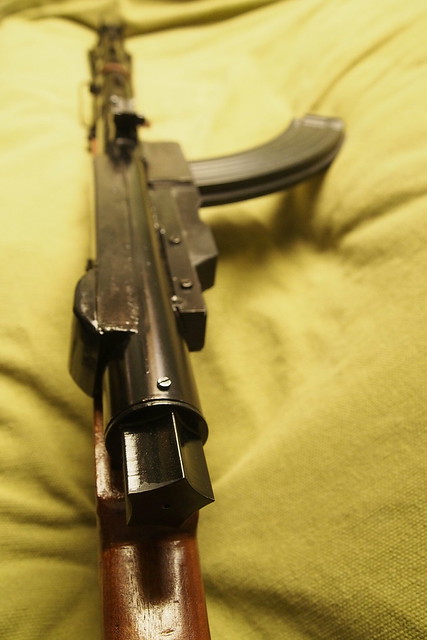
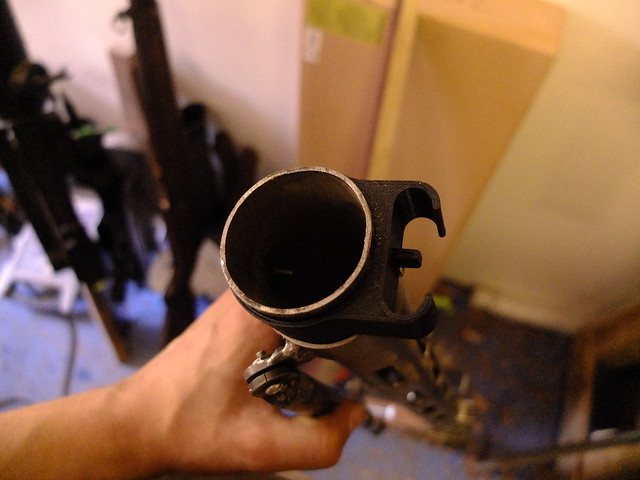
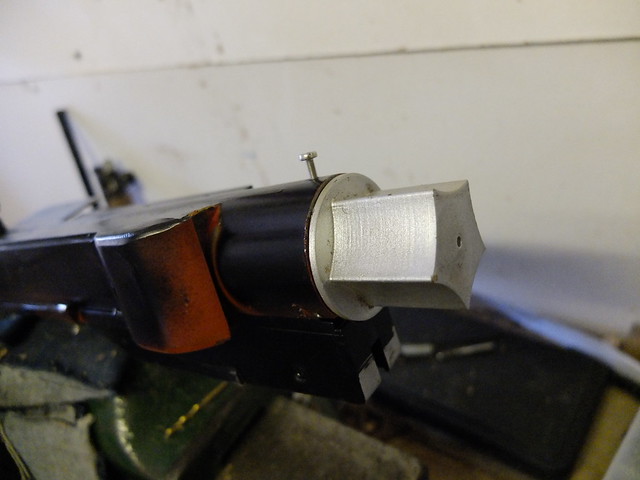
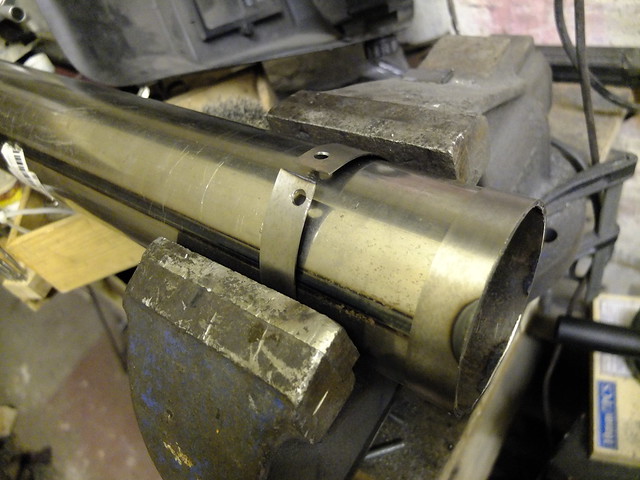
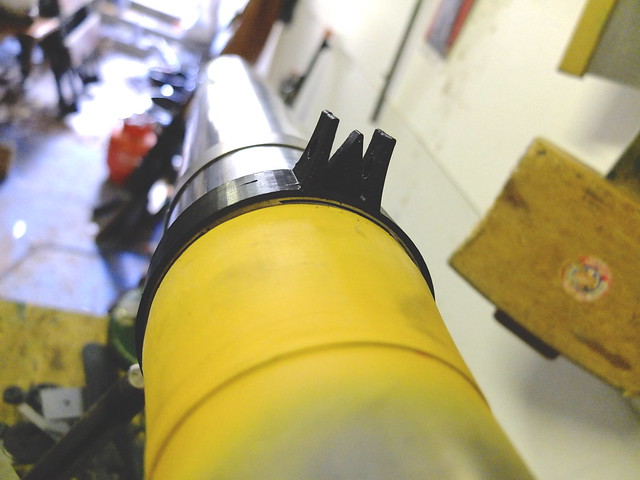
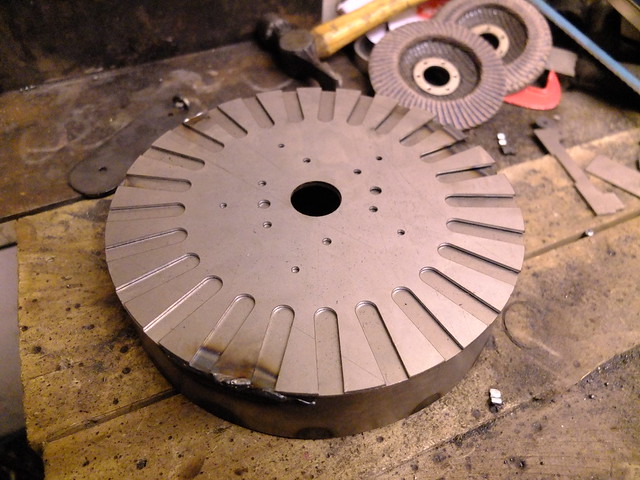
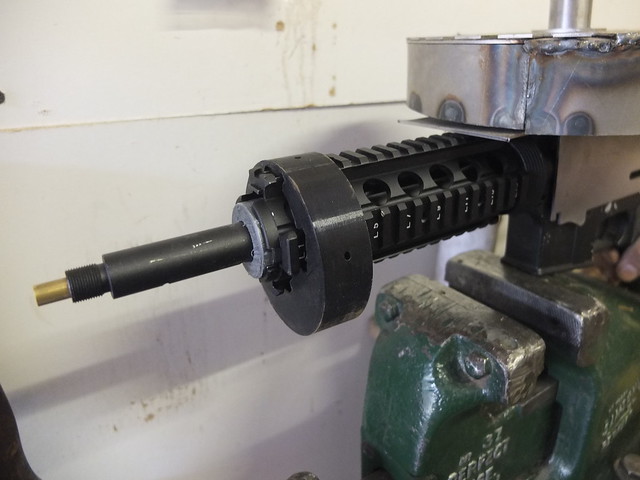
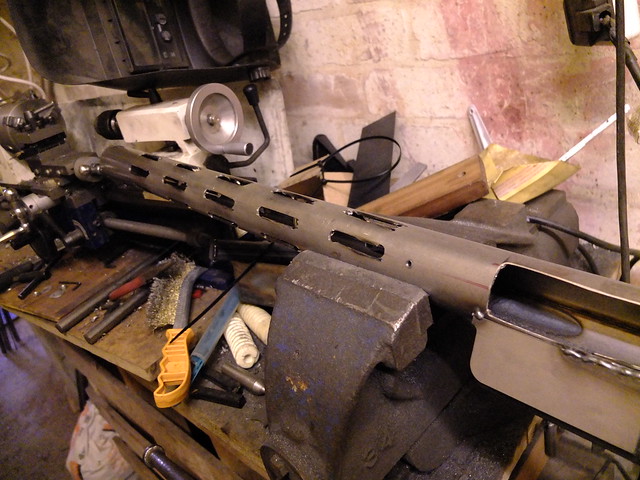
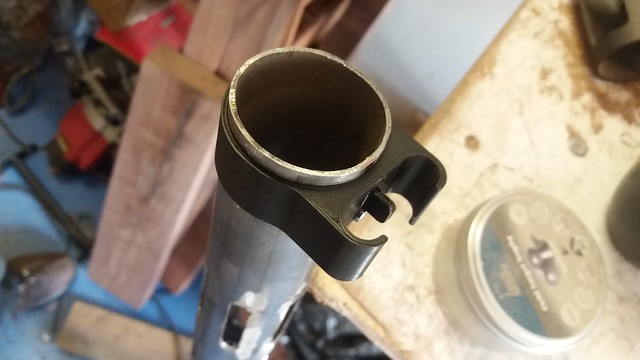
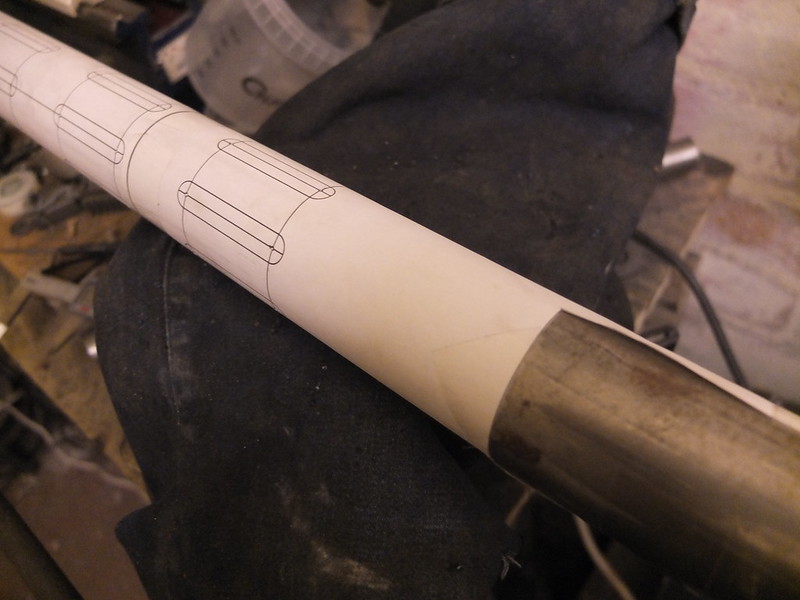
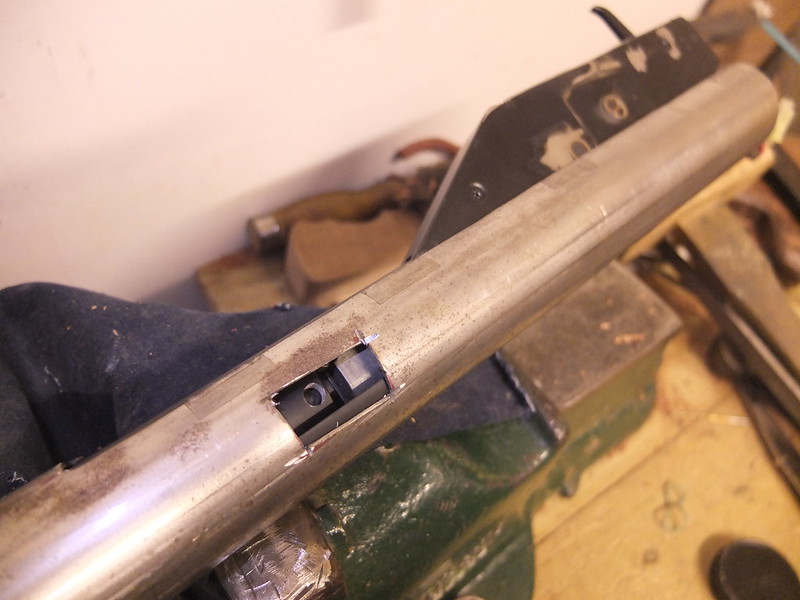
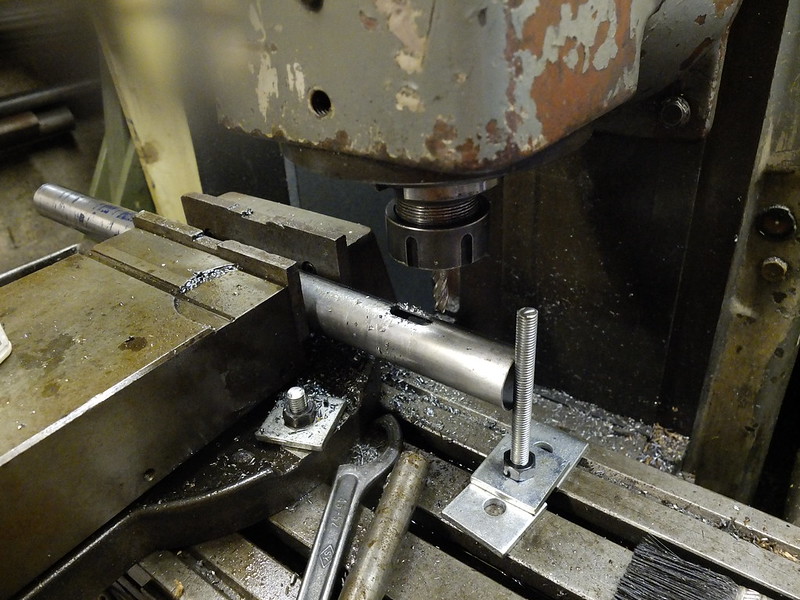
I’ve been putting off making the barrel heat guard as I knew I’d soon have access to my Mill, which would be a much tidier and faster way of making this part. I started by drilling four holes at 90º to one another around the circumference of the tube, then went in with my end mill and cut the first four slots.
 
_DSF0052

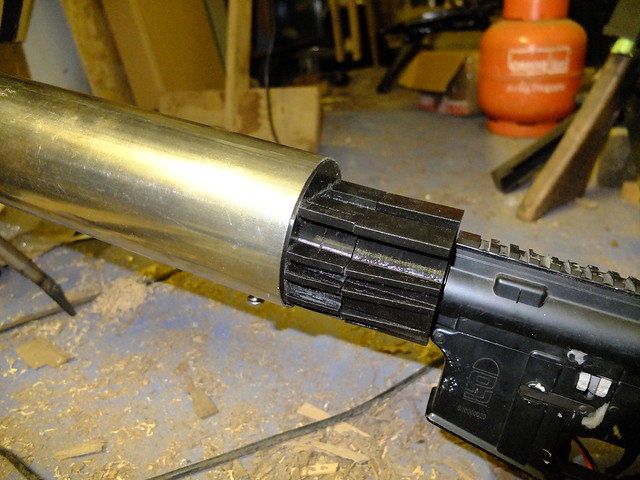
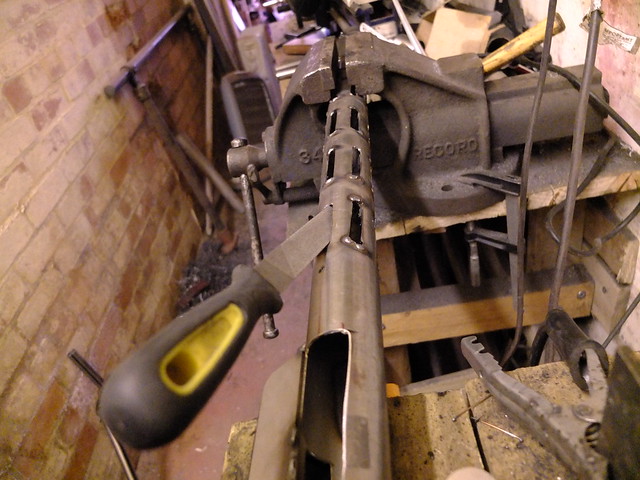
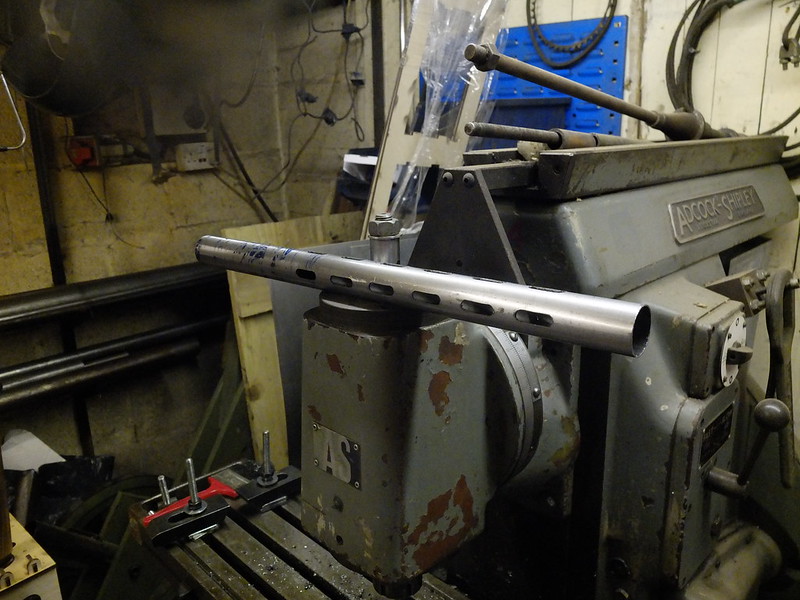
I could then skip the left material, plunge into the next slot, then rinse and repeat until the line was done. Then rotate the workpiece 90º and do the same.

The end result is both accurate and tidy, much better than if I had done it the way I used to have to (with a drill and a grinder)_DSF0059
 

There’s still a good bit of work to do on this, but that’s for another post.


If you would like to see the other posts for this build, you can do so here.

If you want to check out a similarly obscure Light Machine-Gun, you can see the LMG25 articles here.

If you enjoyed this content join us over on Facebook and check out our Etsy store. If you have an idea for a custom build of your own get in touch on enquiries.vintageairsoft@gmail.com.

LS26: Introduction

Custom builds, History, LS26 LMG, Machine-Guns, Weapons, WWII

There isn’t a great deal written in English that I can find on the LS26 light machine gun, but let me share a general outline here and any Finnish fans can come in and correct  all the stuff I get wrong…
Winter_shooting
In 1925/26 the Finns ran trials for a light machine-gun and the LS26 won. Production began the next year and they were produced for both the Finns and the Chinese, though very few made it to China due to the Japanese putting pressure on Finland not to deliver them.
3218994
In the West, it served in the Finnish actions against the Soviets during WWII, and against the Nazis in 1944/45. It had a mixed reputation, with some gunners liking its accuracy and others despising it for its unreliability during its early days of service.

ls266
When posed against the Soviet DP-28, you can see why some Finns swapped for the Soviet gun. With a 20 round box vs a 47 round pan magazine, the DP has a significant advantage for suppressive fire. It is also simpler to strip and with wider tolerances it was more reliable in field conditions. Weight is mentioned as an issue with the LS, but given the DP is around the same weight I suspect this is more a case of weight vs capability making soldiers prefer their Russian captures.
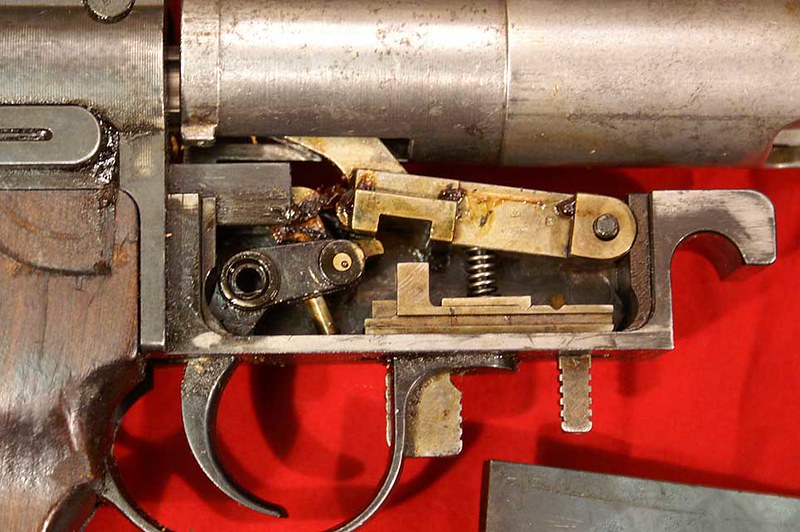
Ls26 R trigger ass

If you want to see some footage of an LS26 and DP-28 being fired as a comparison to one another you can do so in this short video from Forgotten Weapons.

Vintage Airsoft is currently working on an LS26 for a customer, being an AEG this one should be quite nice to fire in comparison!


If you want to see something completely different, check out my side by side stopping rifle build here. If you have an idea of your own, drop us a line on enquiries.vintageairsoft@gmail.com to discuss. ‘Like’ our Facebook page or follow the blog to get regular updates on projects and interesting videos and articles.


Don’t forget you can buy our smaller items via Etsy. Our larger items can be found here.


LMG25: Complete

Complete builds, Custom builds, Inter-War (1918-1939), LMG25, Machine-Guns, Weapons, WWII

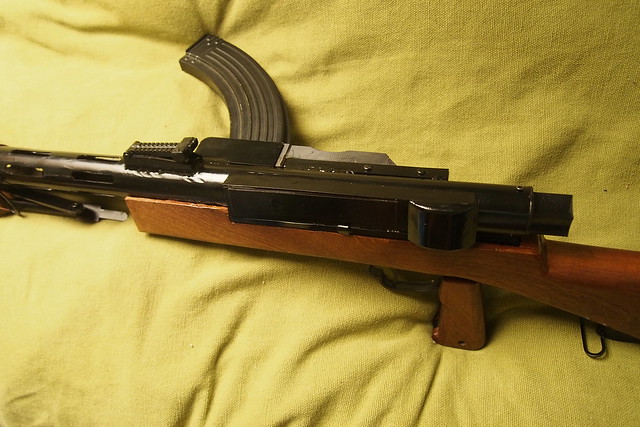
The finished LMG25 is a funny-looking beast!

_1010002

The magazine isn’t quite right, the one shown is a standard stamped metal AK magazine. The plan is to modify some more modern AK magazines to resemble the smooth sided LMG mags.

_1010003


_1010004

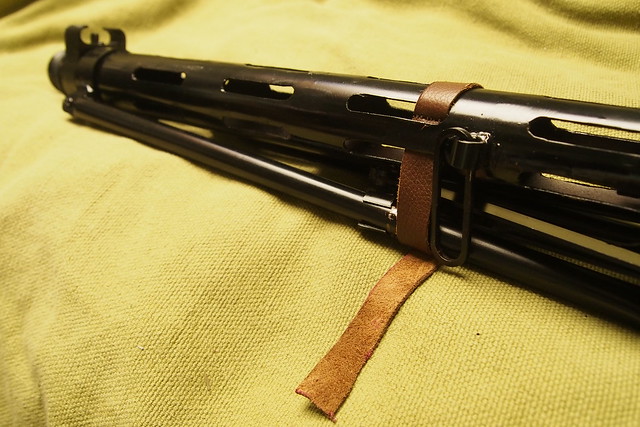
The leather strap to hold the bipod is correct. Most guns use a mechanical latch to lock bipods in place, but this system overcomes the risk of undetected corrosion or dirt ingress.

_1010005

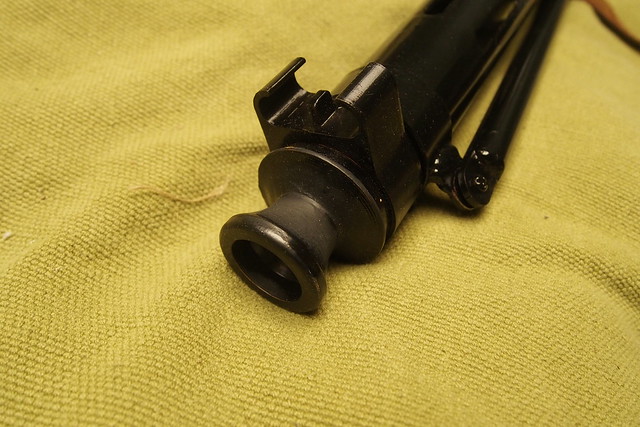
The foresight and muzzle.

_1010006

Now they’re painted up, they blend in quite nicely with the rest of the gun.

_1010007

The bottom strap on this securely holds the receiver in place.

_1010009

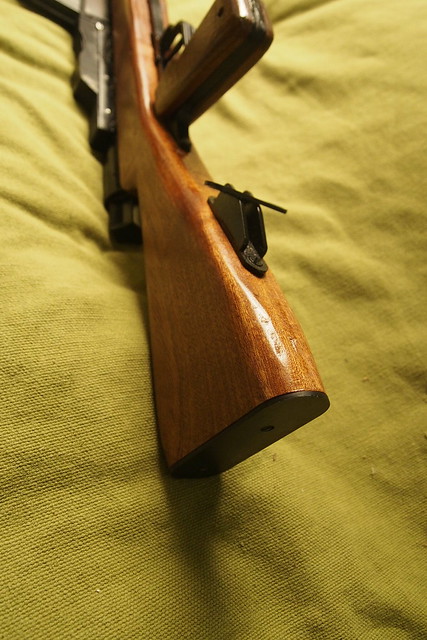
The extremely wide rear sling swivel is for a two-piece sling, which allows the gun to be work like a pack.

_1010011

The only part I’m not 100% happy with is the magazine well. If I were to do this again, I would attach it straight through into the receiver tube with bolts, rather than with protruding lugs welded on as I did here.

_1010012

The trigger placement is strange, but authentically so. This gives it an odd trigger pull, but it is comfortable enough once you get used to it.

_1010013


If you would like to see the build posts for this, you can do so here.

If you want to know the history of this obscure Swiss Light Machine-Gun then you can check out the pre-build piece here.

If you enjoyed this content join us over on Facebook and check out our Etsy store. If you have an idea for a custom build of your own get in touch on enquiries.vintageairsoft@gmail.com.

LMG25: Build 3

Custom builds, Inter-War (1918-1939), LMG25, Machine-Guns, Weapons, WWII

I wasn’t quite happy with some of the pictures from the build post, so I’ve taken some more and added to them.

The bipod, now largely finished, I have welded the ring that goes round the cooling shroud shut and screwed the bipod in place. In some pictures of the LMG25 in use the bipod has been removed and it seems to be used like a heavy assault rifle of sorts, so I’m hoping to keep this removable.

_DSF9294

A better picture of the foresight, the print quality on this piece is really clean and the part is surprisingly solid.

_DSF9295

This was my initial idea for attaching the back-cap/battery compartment cover. Two neodymium magnets (which are very, very strong for their size) meeting the steel receiver. Unfortunately, it isn’t quite strong enough and would fall off easily when running about. I’m adding a bayonet lock for this to keep it solidly attached.

_DSF9340

The bayonet lock is attached to the back cap with araldite. I’ll put two screws into the receiver for them to lock into.

_DSF9647

With the majority of the parts done, I started to prime them to keep the rust at bay.

_DSF9657

The rear sight has been 3D printed in ABS, along with the sight adjustment. I’ll be flipping it upside down so the screw head isn’t visible.

_DSF9704

In situ on the receiver, this gives a surprisingly nice sight picture! The V-notch itself is a little on the small side, but the high position means you get a very nice view of the periphery.

_DSF9710

The back cap locks in really solidly using the new bayonet mount. I’ll have to trim down the securing screw so it sits flat of course.

_DSF9711

The cocking handle has been turned on the lathe, in steel. This was then drilled and tapped blind on the back side so it could be screwed onto the wood.

_DSF9712

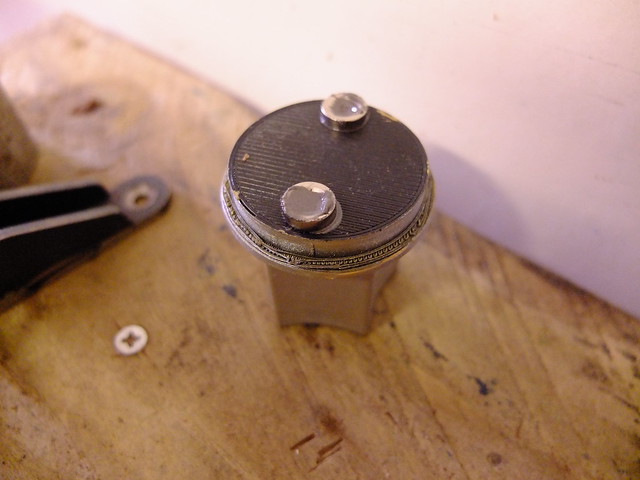
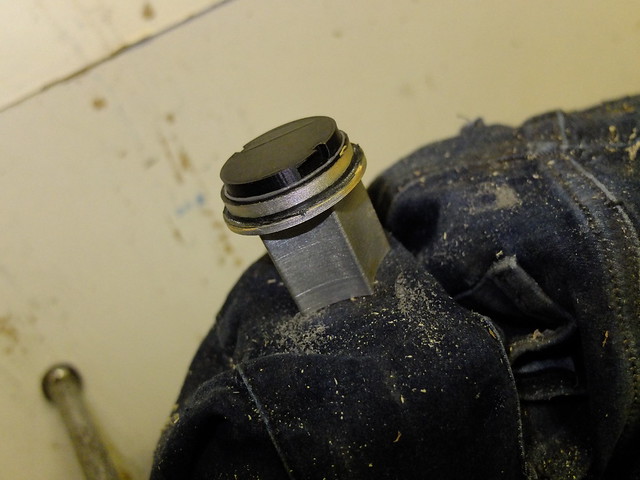
The muzzle has been 3D printed in ABS, it will be painted up and secured in place with a screw. The last few bits are just finishing touches, so this is the last build post for this project!

_DSF9793

If you have a thing for obscure Swiss Light Machine-Guns then you can check out the pre-build piece here.

If you enjoyed this content join us over on Facebook and check out our Etsy store. If you have an idea for a custom build of your own get in touch on enquiries.vintageairsoft@gmail.com.

Lewis Gun: Build 2

Custom builds, Inter-War (1918-1939), Lewis Gun, Machine-Guns, Weapons, WWI, WWII

At the end of the last build post, I had made the bipod legs but not the bipod itself. I designed the bipod leg mounts and assembled them. I missed out the hinge on the cut list (something has to be missed out, it’s Sod’s law) so had to hand-make them.

_DSF9392

The distinctive bands at the front of the Lewis cooling jacket are welded into place. The rear one will also house the bipod unit made previously.

_DSF9393

The rear sight block is another piece of laser cut steel, welded into place at the back of the receiver. I’m going to braze together the sight leaf itself together and use a 3D printed aperture to give elevation adjustment. (P.S.: Yes to other welders this weld is obviously pretty dire, I literally ran out of gas on this seam, I’ll clean it up).

_DSF9394

The donor is held in by two screws pinching it from either side…

_DSF9396

And a plate that will be welded into place at the back that holds under the buffer tube mount on the AEG.

_DSF9395

I brazed together the parts for the rear sight leaf. The aperture is adjustable and is based on an ‘upgrade’ Lewis sight that gave a clearer field of view in low light conditions. The flat spring underneath locks it into upright or stowed positions.

_DSF9604

The foresight is also 3D printed, this was by far the simplest way to get the weird shapes around that front post. This is secured by a screw and will be painted up to match the rest.

_DSF9603

The buttstock is quite a simple one, secured by machine screws running through from one securing tang to the other. Once shaped it will be stained and finished with hardwax oil.

_DSF9613

At the front end, the 3D printed cooling fins have arrived. They fit well, once painted up they will serve very nicely for the detailing purpose they are designed for.

_DSF9615

Painting up and assembly under way, I have to touch up a couple of areas previously missed.

_DSF9621

Once painted up, you can appreciate the sinister, gaping mouth of the cooling jacket.

_DSF9625

Finished photos to follow!

If you are interested in the history of the Lewis, you can check out the introduction article here.

If you like this project or have an idea of your own, drop us a line on enquiries.vintageairsoft@gmail.com to discuss. ‘Like’ our Facebook page or follow the blog to get regular updates on projects and interesting videos and articles.

Don’t forget you can buy our complete products via Etsy.

Lewis Gun: Build 1

Custom builds, Inter-War (1918-1939), Lewis Gun, Machine-Guns, Weapons, WWI, WWII

The base gun for this build is an M4. Nothing too fancy, but with lots of options for upgrade parts if needed. The first step to making the transformation into a Lewis is to build the receiver. I have modified plans I was given some time ago to build a replica to take the donor and be made from steel.

_DSF9122

Inside this I will fit a ‘harness’ to hold the donor.

_DSF9123

The drum magazine, on this I’m not sure if it will be functional, but it will be removable so I may do a very high capacity magazine in the future.

_DSF9126

The external detailing is welded on.

_DSF9127

I designed this spacer to mount on the rails, there are two of them to steady the barrel shroud.


_DSF9256

Dry fitting the parts, you can see the space where the rear end of the cooling fins are to go.

20170615_153236

I’m also making use of 3D printed parts for the taper on the fore-end. This part was simply much too big to make on the lathe and this system keeps the cost and the weight down.

20170615_155354

The bipod is the next major component. It will need some feet, and hinges made up for the top, which will have to come in a later instalment.

_DSF9296

Also for the next instalment, the design for the back of the cooling fins is complete (a long day’s work making this!) and it will be 3D printed much like the spacers before being painted to look like aluminium. It may even be a project for the new furnace.

Lewis_cooling_fins_2017-Jun-27_06-18-25PM-000_CustomizedView8964933988


If you are interested in the history of the Lewis, you can check out the introduction article here

If you like this project or have an idea of your own, drop us a line on enquiries.vintageairsoft@gmail.com to discuss. ‘Like’ our Facebook page or follow the blog to get regular updates on projects and interesting videos and articles. 

Don’t forget you can buy our complete products via Etsy.

LMG25: Build 2

Cold War, Custom builds, Inter-War (1918-1939), LMG25, Machine-Guns, Weapons, WWII

At the end of the last post, I had most of the large components roughed out for the LMG25. However the cooling ports in the barrel jacket are a little rough at the ends.

_DSF9154

So I welded the outsides edges, so I could grind them down and round out the ends.

_DSF9158

Next I welded up the ejection port.

_DSF9257

And the rear sling swivel, attached to the mount.

_DSF9263

The bipod was an interesting challenge. In order to go from the stowage to the deployed position the lugs all have to rotate, so a little tweaking was needed to make everything move freely.

_DSF9264

The end result is a pretty stable bipod with good movement, allowing the operator to sweep over an arc of fire.

_DSF9265

The dry assembly of the rear sight and ejection port. From this I learned that the ejection port needed a little trimming off the bottom to sit tidily. I also decided to chamfer the edges of the rear sight base to get a deep penetration for the weld.

20170615_161208

The foresight has been 3D printed, it screws into place on the barrel jacket.

20170615_170539

It sits just ahead of the bipod.

20170615_174938

The back-cap is also printed, I may replace this with a cast aluminium version now I have a working kiln.

20170615_175019

Most of the remainder of the work is now detail parts such as the rear sight unit, operating handle and the attachment for the back-cap. 

If you have a thing for obscure Swiss Light Machine-Guns then you can check out the pre-build piece here.

If you enjoyed this content join us over on Facebook and check out our Etsy store. If you have an idea for a custom build of your own get in touch on enquiries.vintageairsoft@gmail.com.
Lewis Gun: Introduction

Custom builds, Inter-War (1918-1939), Lewis Gun, Weapons, WWI, WWII

Before I go any further, if you are seriously interested in the history and workings of the Lewis gun, check out C&Rsenal’s video. If you just want a quick overview, you can skip that and carry on reading…
Issac Newton Lewis, Colonel, US Army designed his machine gun in 1911 and spent around two years banging his head against a brick wall trying to persuade the US Ordinance Department to adopt his gun. In 1913 he left the United States and set up shop in Belgium where he received a respectable first order from the Belgians. In 1914 BSA bought a license to produce it and as war loomed Lewis moved his factory to Britain to keep it out of German hands. Lewis’ BSA license proved very profitable: between BSA and Savage Arms around 50,000 Lewis Guns were produced by 1918 and the license granted him commission on every one made.

The design itself was based on work done by Samuel Maclean, but between Lewis and designers at BSA it was transformed into a reliable and easy to produce machine. It is gas operated, open bolt with three locking lugs at the rear of the bolt. The most distinctive feature is of course the massive aluminium heat sink/fins/barrel jacket arrangement.

Shot of the Lewis receiver. On the right you can see the barrel jacket and the rear end of the cooling fins. On the bottom of the gun, forward to the trigger is the clock-type main spring.

The idea of this was to wick heat away from the barrel as quickly as possible (quick-change barrels weren’t really a thing yet). The large mass of aluminium took the heat into the fins and the muzzle blast would suck air through from the back towards the front. In theory. In reality the necessity of this sophisticated arrangement is dubious, aircraft Lewis Guns were pressed into service on the ground during WWII, even in North Africa and the guns were found to function perfectly well without.

The magazine is also worth mentioning, coming in 47 and 97 round versions. This Pan magazine is NOT a drum magazine (which relies on a spring to feed, keeping ammunition aligned with the bore) and is manually rotated and indexed as the gun operates.

lewis8

The indexing system for the Lewis. If you want to know how it works, see the C&R video above for the animation.

Last but not least, the mainspring is a spiral clockwork type, mounted in that distinct protrusion from the belly of the receiver. This is very efficient and saves space over a much larger conventional mainspring, also allowing for easy adjustment to account for field conditions to make for reliable firing in all weather.


The Lewis gun’s service was long and varied. Before even leaving for Europe, Lewis had put the gun on a Wright Flyer and as a result it has the distinction of being the first machine-gun fired from an aircraft (1912).

During the Great War, Britain used them extensively, eventually outnumbering the Vickers by about 3:1 in spite of being more expensive. That the government was willing to spend so much more on these than an established home-grown piece is a comment on the quality of the design.

Due to its light weight, the Lewis was readily adopted by Air Arms where it was widely used for observer’s defensive guns. It was also mounted as foreward firing guns but had to be mounted outside of the propeller’s arc due to firing from an open bolt (therefore being nigh-on impossible to synchronise to a propeller).

By the Second World War, the Lewis was outdated for the role in which it was originally used. After Dunkirk and the fall of France, Britain pulled its Lewis guns out of reserve where it was used by the Home Guard and for low-level anti-aircraft fire. In the Far East it served with Empire forces on the front lines. Throughout the war it remained in use with the Navy and RAF for air defence from boats.


As well as versions chambered in .303 British, there were Lewis guns made in 7.92 and 7.7 Japanese rimmed, the Japanese having copied the design from versions captured in the Far East.


The Lewis had some limited influence on other designs, the FG42 taking inspiration for its bolt/piston arrangement and from that the M60. There was also a Lewis pistol, which fired from an open bolt.


Links:

Lewis gun firing in slow motion

Lewis Gun video, manuals and pictures

The Lewis Pistol

MG08/15: The last furlong?

Custom builds, Imperial Era, Inter-War (1918-1939), Machine-Guns, MG08/15, Weapons

Thos of you who have followed Vintage Airsoft for some time will recognise this and be like: “Is he STILL working on that?”. Well, yes. I swear if something could go wrong on this build, it did. At least once. 

So, here’s hoping this is the last build post at long last!

One of the problems was the air seal between the gearbox and the hop unit. This it turned out was caused by flex between these parts, resulting in variation from shot to shot.


In the end, I re-designed the mounting plate to feature a hop-up ‘vise’ to hold the unit in place really solidly. There isn’t any wobble in this sod. 

_dsf8416

I had to make a few mods to the trigger unit design and the bottom of the baseplate to work together, but now the trigger raises a sear which sets off the microswitch in the gearbox itself.

_dsf8466

In place, clamped down! I’m still using the same feed system as before. 

_DSF8684

The feed tube comes out to meet the magazines.

_DSF9120

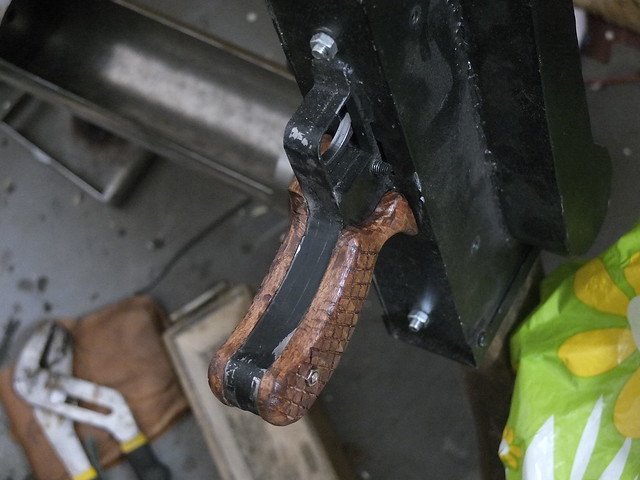
Oh yes, new grips. I wasn’t happy with the old ones, one wasn’t quite spot on, but as with all things the second attempt was much better. I’ve used hardwood this time (as opposed to laminate) and cut in cross-hatching for grip.

_DSF9140

Topping up the paintwork. 

_DSF9161

I’m really looking forward to having the finished photos on this at last.


If you are interested in this project or have an idea of your own, drop us a line on enquiries.vintageairsoft@gmail.com to discuss. ‘Like’ our Facebook page or follow the blog to get regular updates on projects and interesting videos and articles. 

Don’t forget you can buy our complete products via Etsy.

LMG25: Build 1

Cold War, Custom builds, Inter-War (1918-1939), LMG25, Machine-Guns, Weapons, WWII

The LMG25 is a really weirdly formatted gun, but with a Sten and some modifications I’m hoping to make something really interesting and unique.

Screen Shot 2017-04-07 at 00.19.41

As ever, this started with a load of research and design work. There aren’t too many parts to this compared to some of my builds and they nearly all attach directly to the receiver. The first step of construction was to make this receiver, which I made a template for and centre punched for the drill, before cutting the space needed for the donor.

_DSF8702

_DSF8934

The welding begins with the mock-upped ejection port and the trigger grouping/pistol grip.

_DSF8863

I also cut a hole for the magazine feed.

_DSF8935

The magazine well has an awkward and distinctive shape, so it is being 3D printed and will be mounted with metal plates and screws to the receiver.

16810116_587428191446607_1100663209_o

In place it fits quite nicely! This replica takes AK magazines which look the part well enough from a distance.

20170406_150322

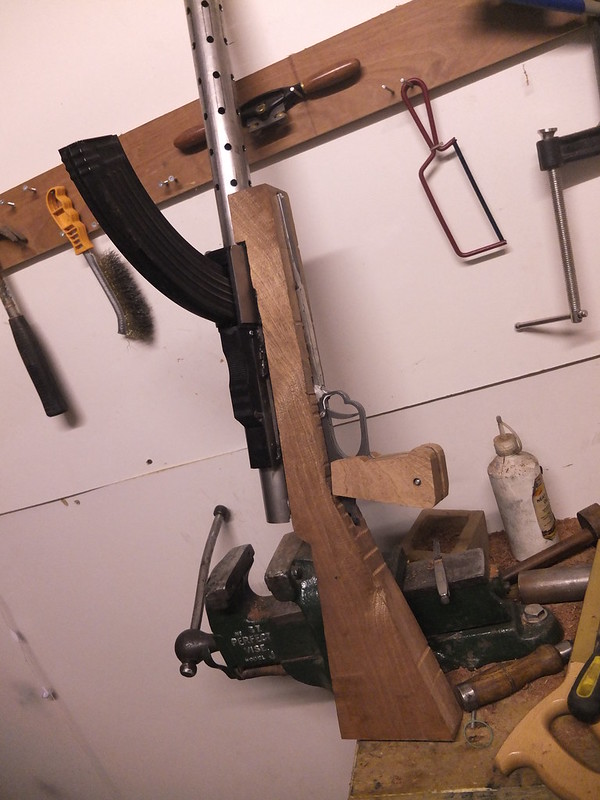
Onto the stock. I cut it out in the usual way from the blank, but I can’t cut out the action recess in the usual manner due to the awkward lump at the front of the stock. It would have been possible to have this as a separate piece but it’s not a major issue to work around.
_DSF8964

The pistol grip unit is, fortunately, an entirely separate unit. This means making it is a lot easier than a one-piece pistol grip/stock. It somewhat resembles some of the early semi-auto conversions of bolt-action rifles in this respect of its design.

_DSF8965

There is quite a pleasing curve to the back of this pistol grip which is easily missed.

_DSF8966

This means that all the major working parts are in place. The next important step is to get the working parts actually working! Then we can enjoy the detailing, sights and bipod.

_DSF8967

If you have a thing for obscure Swiss Light Machine-Guns then you can check out the pre-build piece here.

If you enjoyed this content join us over on Facebook and check out our Etsy store, and if you have an idea for a custom build of your own just get in touch with us on enquiries.vintageairsoft@gmail.com.