LS26: Build 1

Custom builds, Inter-War (1918-1939), LS26 LMG, Machine-Guns, Weapons, WWII

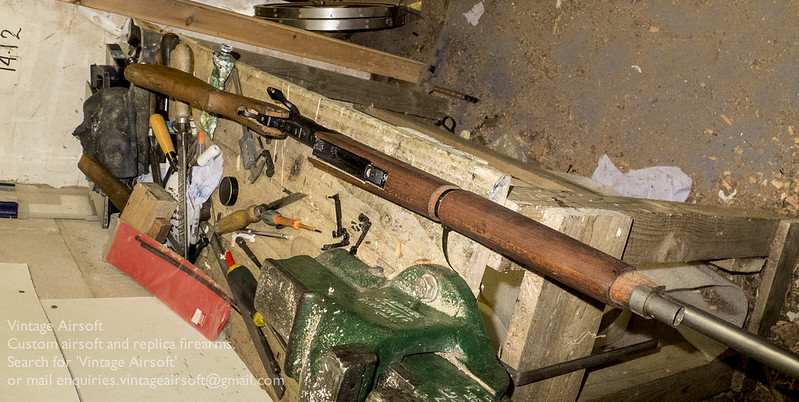
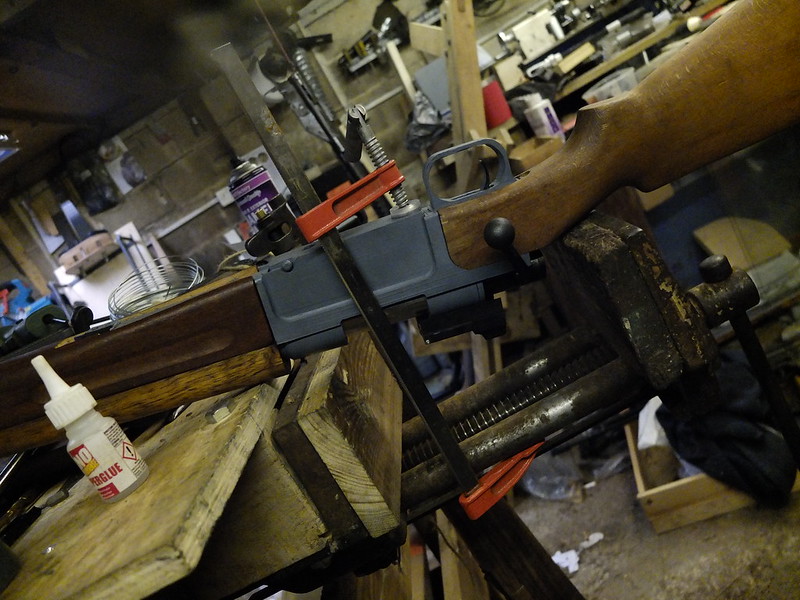
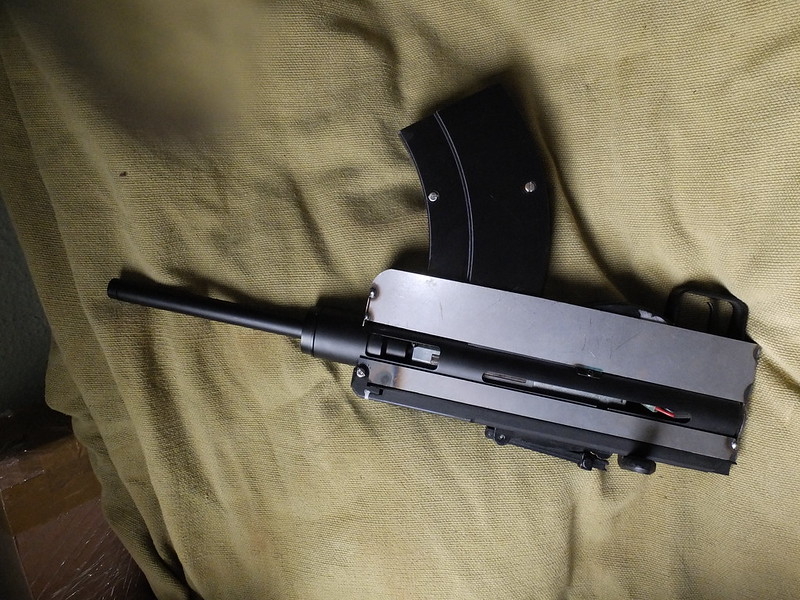
This build will be another based on the ever trusty AGM Sten! The first step is to strip off the unneeded bits, grind down the unwanted protrusions etc…

_DSC7339

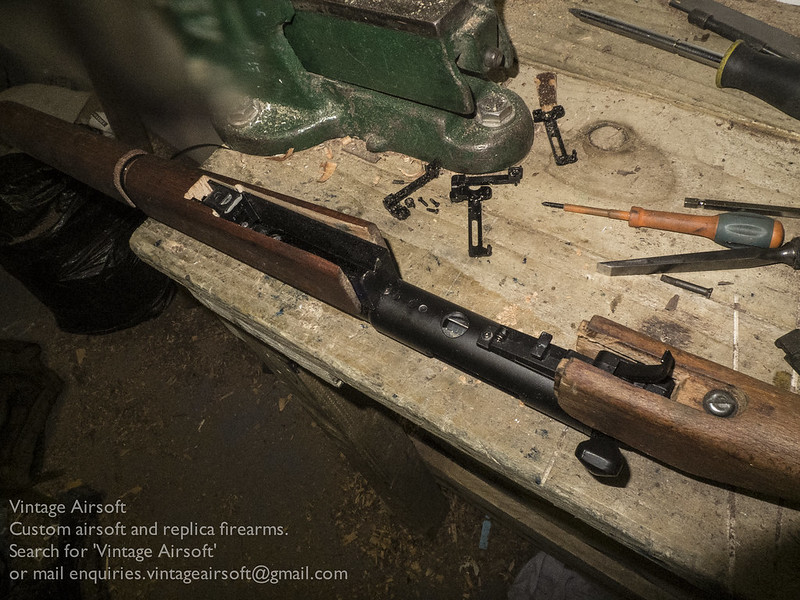
Then I could start tack welding the cradle together to form the receiver. Once all the parts are in place and squared up I’ll weld them in place permanently.

_DSC7341

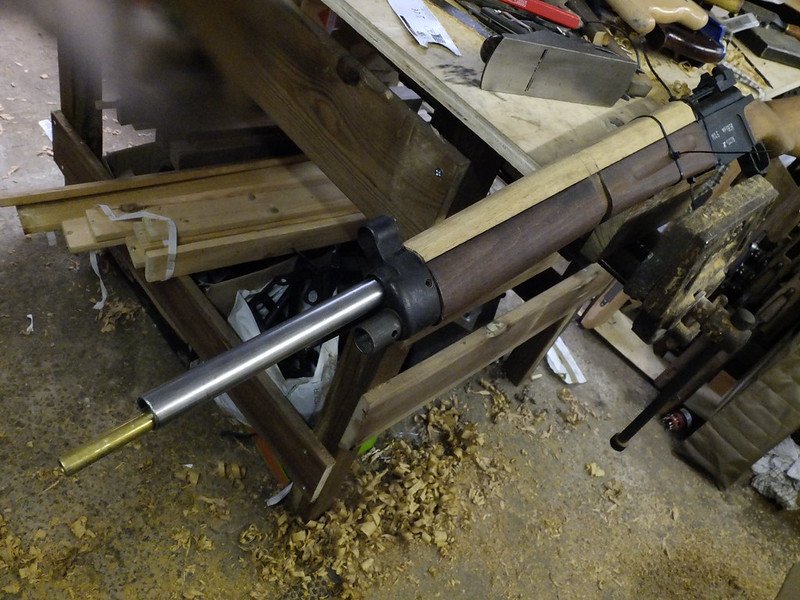
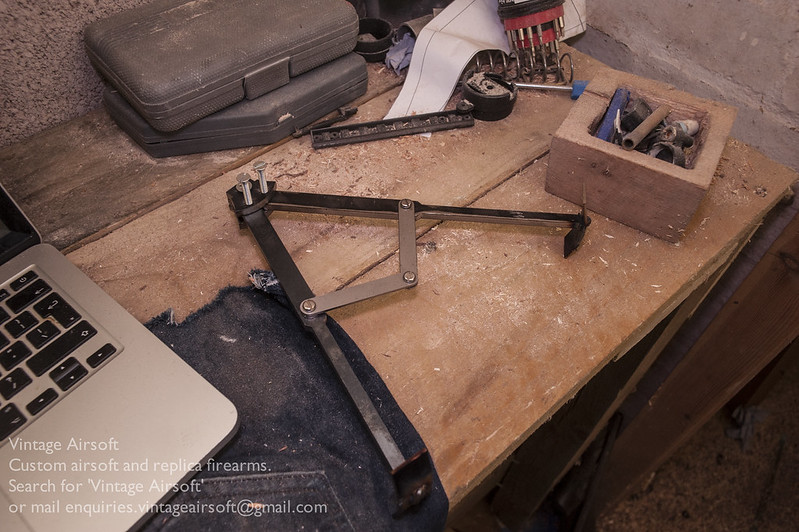
Next up, I’m assembling the bipod. With builds like this it’s good to reduce the number of floating parts as quickly as possible, otherwise things have a habit of vanishing into the ether.

_DSC7348

The top part of the bipod pivots forward and folds back under the barrel shroud. The legs spread only as far as the limiter allows. At the bottom of each leg is the distinctive  ski-pole depth limiter. A spiked bipod is great for a solid mounting on soft ground, but once it gets too soft they tend to dig in so these will stop it from going in so far that you’d have to be King Arthur to remove it.

_DSC7350

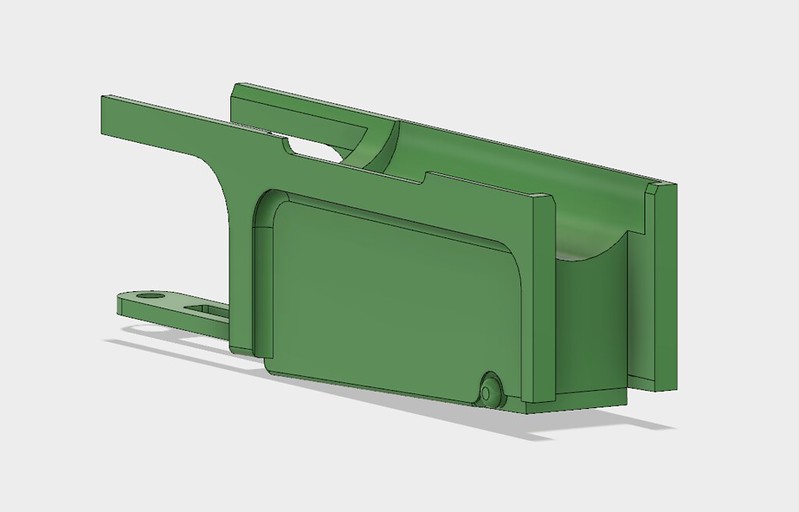
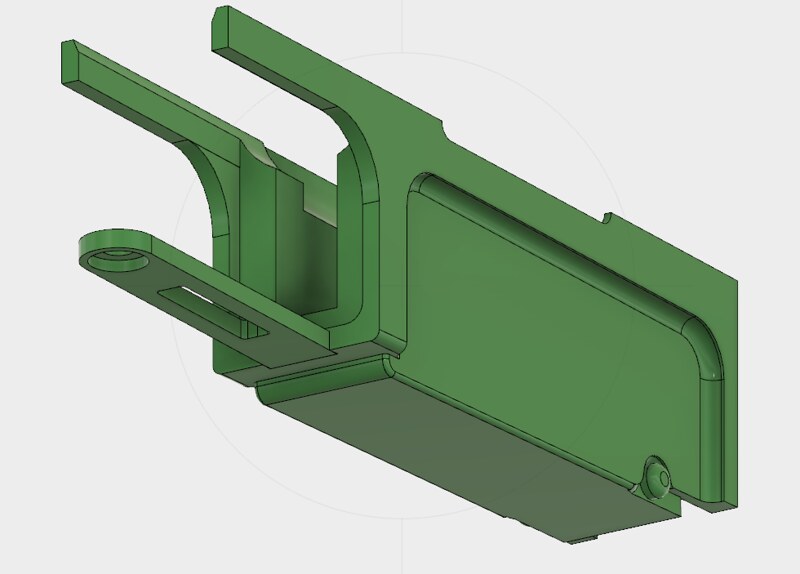
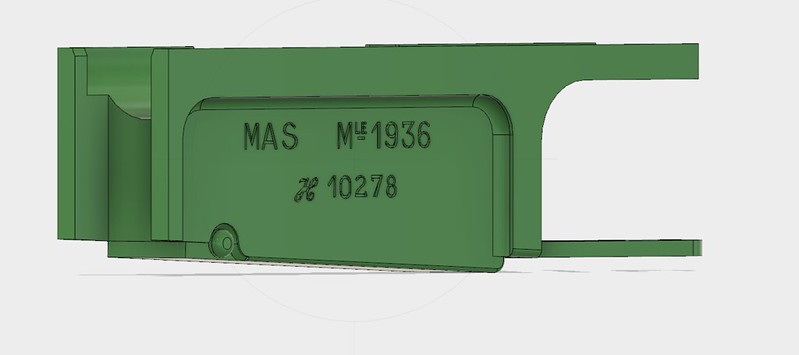
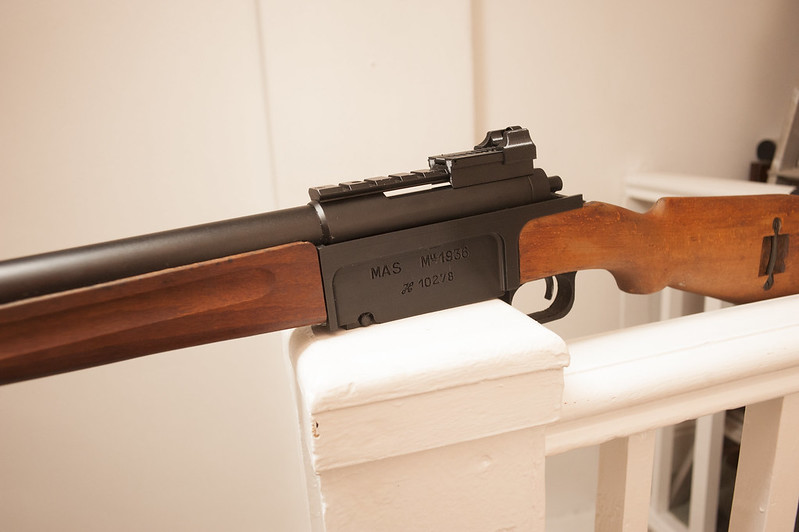
The top cover is to be 3D printed. This allows me to get some of the awkward shapes and dimensions.

Screen Shot 2017-11-15 at 21.44.40

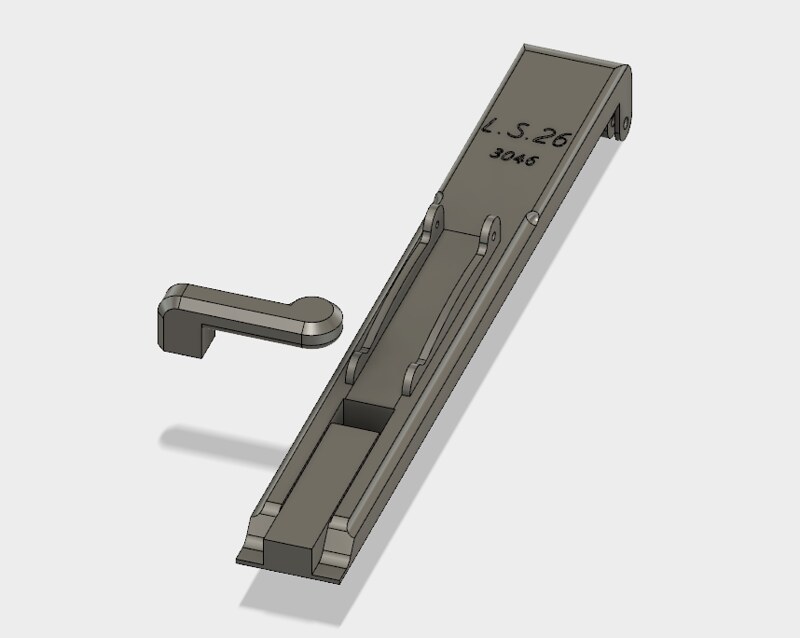
Once printed, some small tinkering to make it fit nicely but not much.

_DSC7430

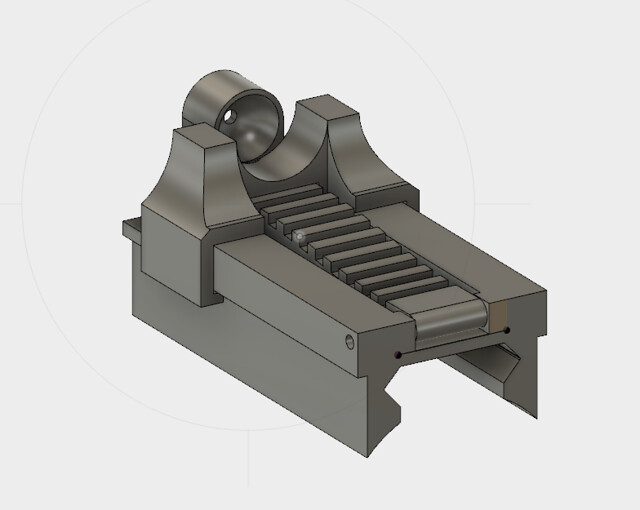
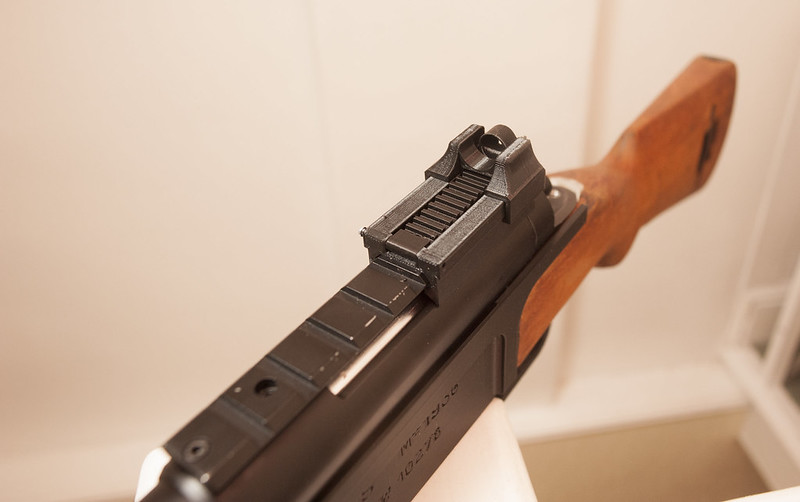
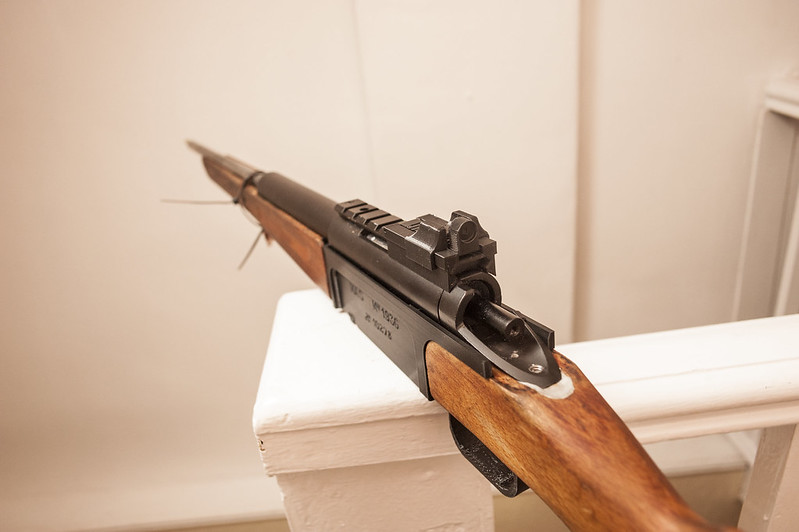
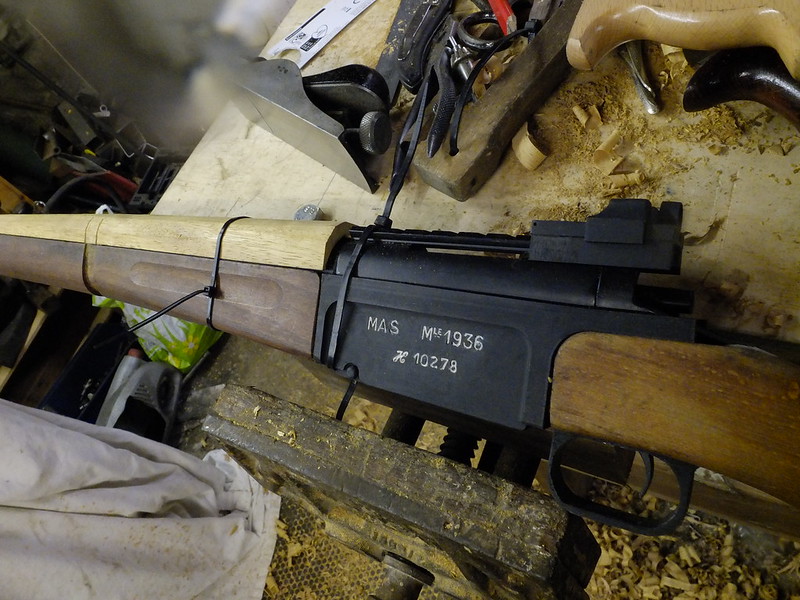
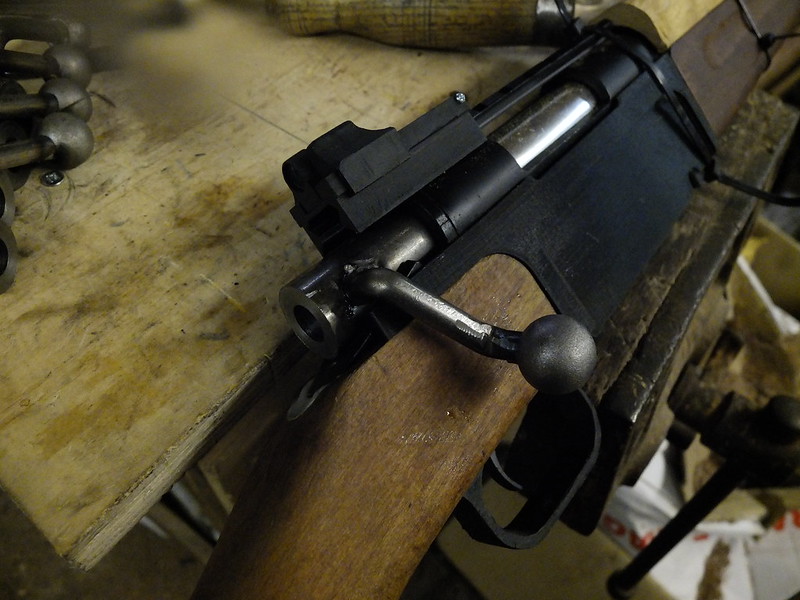
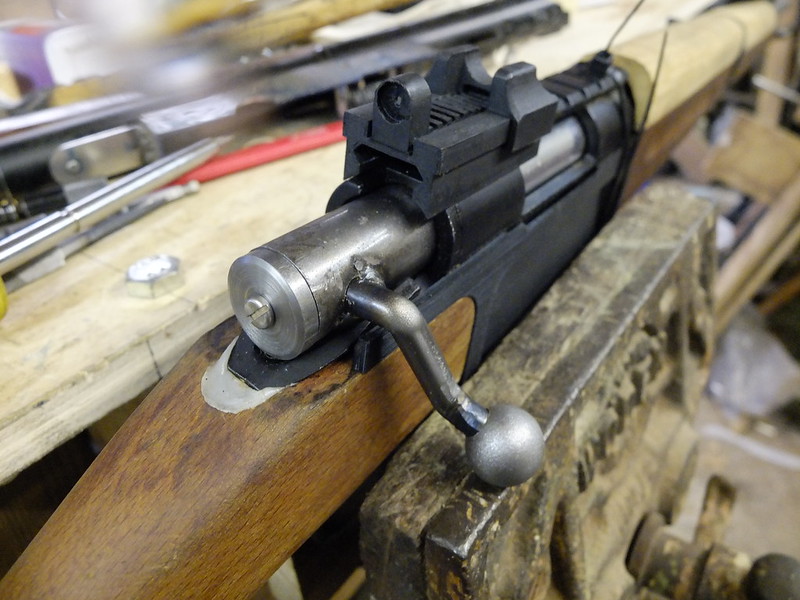
The rear sight is adjustable for windage and elevation, with the windage leaf dovetailed in. The elevation adjustment uses a variant of my usual system with teeth locking it in place securely using spring pressure.

_DSC7431

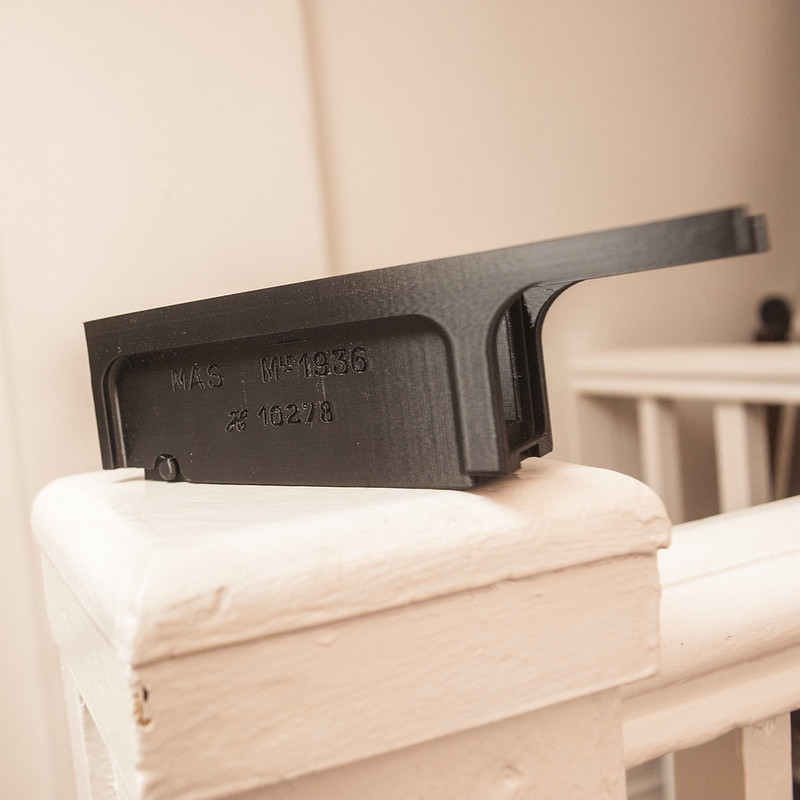
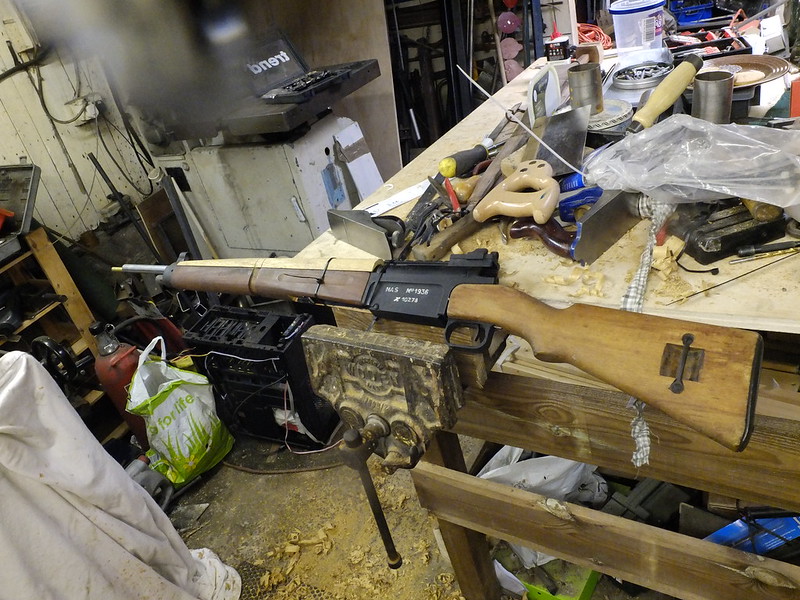
The magazine in the magwell. This part is all 3D printed, I’ll be joining it up to the Sten using a spring much like an LMG magazine for an M249 or similar.

_DSF9966

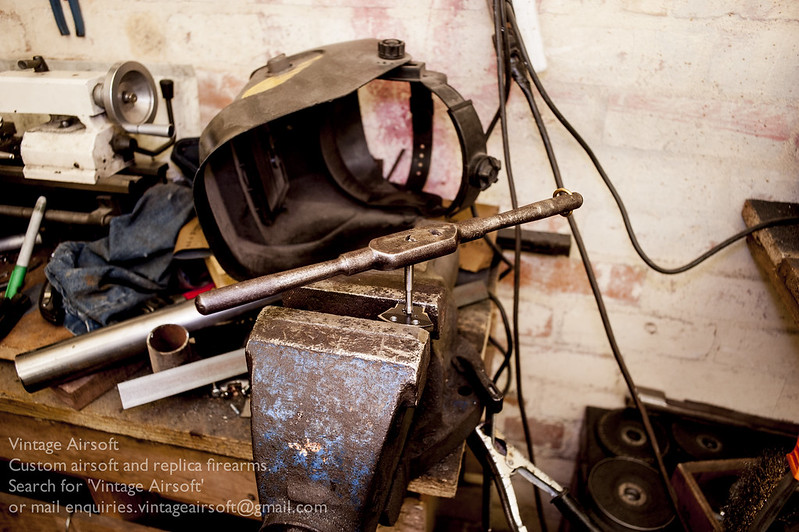
I’ve been putting off making the barrel heat guard as I knew I’d soon have access to my Mill, which would be a much tidier and faster way of making this part. I started by drilling four holes at 90º to one another around the circumference of the tube, then went in with my end mill and cut the first four slots.
 
_DSF0052

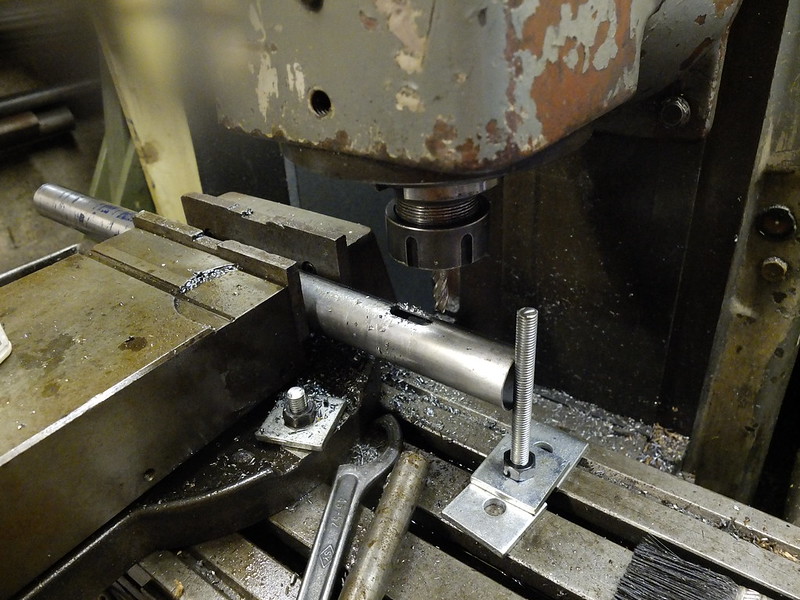
I could then skip the left material, plunge into the next slot, then rinse and repeat until the line was done. Then rotate the workpiece 90º and do the same.

The end result is both accurate and tidy, much better than if I had done it the way I used to have to (with a drill and a grinder)_DSF0059


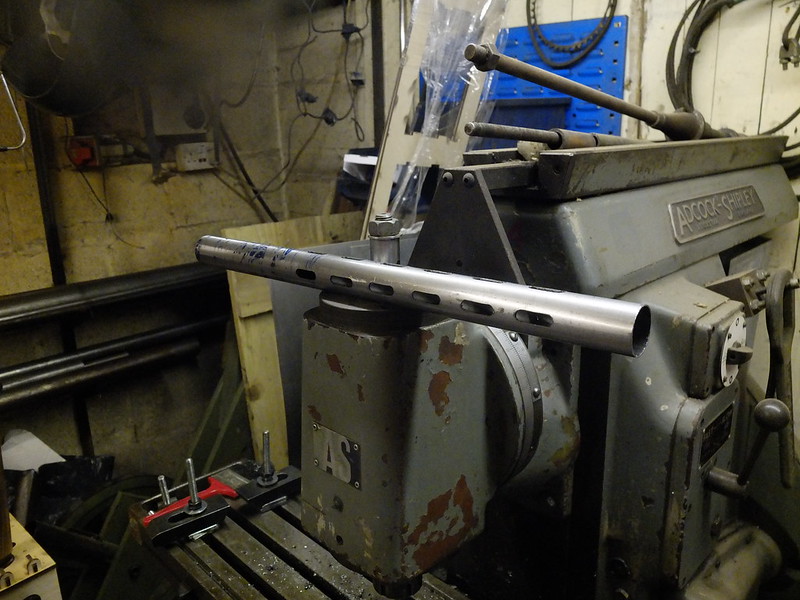
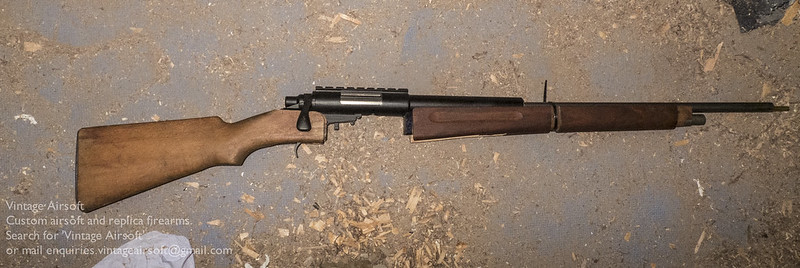
There’s still a good bit of work to do on this, but that’s for another post.


If you would like to see the other posts for this build, you can do so here.

If you want to check out a similarly obscure Light Machine-Gun, you can see the LMG25 articles here.

If you enjoyed this content join us over on Facebook and check out our Etsy store. If you have an idea for a custom build of your own get in touch on enquiries.vintageairsoft@gmail.com.

LS26: Introduction

Custom builds, History, LS26 LMG, Machine-Guns, Weapons, WWII

There isn’t a great deal written in English that I can find on the LS26 light machine gun, but let me share a general outline here and any Finnish fans can come in and correct  all the stuff I get wrong…
Winter_shooting
In 1925/26 the Finns ran trials for a light machine-gun and the LS26 won. Production began the next year and they were produced for both the Finns and the Chinese, though very few made it to China due to the Japanese putting pressure on Finland not to deliver them.
3218994
In the West, it served in the Finnish actions against the Soviets during WWII, and against the Nazis in 1944/45. It had a mixed reputation, with some gunners liking its accuracy and others despising it for its unreliability during its early days of service.

ls266
When posed against the Soviet DP-28, you can see why some Finns swapped for the Soviet gun. With a 20 round box vs a 47 round pan magazine, the DP has a significant advantage for suppressive fire. It is also simpler to strip and with wider tolerances it was more reliable in field conditions. Weight is mentioned as an issue with the LS, but given the DP is around the same weight I suspect this is more a case of weight vs capability making soldiers prefer their Russian captures.
Ls26 R trigger ass

If you want to see some footage of an LS26 and DP-28 being fired as a comparison to one another you can do so in this short video from Forgotten Weapons.

Vintage Airsoft is currently working on an LS26 for a customer, being an AEG this one should be quite nice to fire in comparison!


If you want to see something completely different, check out my side by side stopping rifle build here. If you have an idea of your own, drop us a line on enquiries.vintageairsoft@gmail.com to discuss. ‘Like’ our Facebook page or follow the blog to get regular updates on projects and interesting videos and articles.


Don’t forget you can buy our smaller items via Etsy. Our larger items can be found here.


MAS 36: Build

Cold War, MAS 36, Rifles, Weapons, WWII

The first step was to fit the woodwork as far as possible. Due to the split woodwork I have to estimate it to some extent as I’ll have to fill the gap with a receiver.

_DSF9975

I’m using the MkII magwell, a much easier design to fit than the previous version.

_DSF9977

Rough fitted, I can design the receiver.

_DSF9978

Three days and many cups of tea later…

Screen Shot 2018-04-01 at 23.30.03

This has been done in two parts, the trigger guard tang is being done separately, which gives me a bit more flexibility if a dimension is out slightly.

Screen Shot 2018-04-01 at 23.30.21

And on the other side, markings. I’ve really got into doing these lately, they are satisfying to reproduce and add an air of authenticity to the replica.

Screen Shot 2018-04-02 at 00.35.15

The rear sight is the early pattern one to go with the rest of the gun. Finding photographs of this variant to work from was very tricky, but the end result works just like the originals.
Screen Shot 2018-03-23 at 01.50.15

The receiver, now printed, arrives!

_DSC8324

And amazingly, this fits first time. As does the rear sight unit.

_DSC8326

The underside looks a bit rough now, but a bit of filing down will smooth it off nicely.

_DSC8329

The rear sight is adjusted by pushing the leaf down and adjusting the slider forwards and back, a pretty unusual system.

_DSC8328

Once I’d cleaned out the peep hole it’s quite a nice light sight.

_DSC8330

The top hand guard was a bit of a puzzle. The wood of the original stock was a mystery, certainly not like anything I’ve worked on before, it has the appearance of beech but is much easier to work. I’ve decided it must be something tropical, given the French had Colonies in Africa and the Far East it’s not beyond the pail to think they may have shipped in some durable, rot-resistant timber that would be perfect for gunstocks.

_DSF0004

The timber I have used is also a mystery wood. Given to me by a friend its previous life was as some window frames, but this use is much better. Nothing else matched the original wood quite as well in grain structure and once stained or oiled to match it should blend in nicely.

_DSF0005

Unfortunately due to having to house the VSR I couldn’t be completely true to the original shape of the rifle. Once the middle band is in position it should break up that slight slope quite nicely though.

_DSF0007

And the nose cap or, as the French call it: Mouthpiece. This is the late type as the early type (when they are available) are about £50 at the time of writing. Understandable as they were only used on the first two/three batches of guns or so compared to the six or seven runs that came later. I’ll be modifying it to look correct for this early model.

_DSF0006

The next step was the bolt handle, as I was making a batch of Enfield bolts already I added this to the parts list. The main shank was turned on the lathe, left just a smidgen longer than an Enfield bolt. The haft is 8mm steel bar bent to the correct shape.

_DSF0030

This was a really tricky one to do, most bent bolt handles  have one bend in them and are then straight down or slanted back. This one is not only slanted forward, but has a kink outwards from the rifle as well, this with bolt operating speed in mind as the rifle was designed at a time where the replacement of bolt actions with self-loading rifles was imminent.

_DSF0031

From this angle you can see the outwards kink. I feel I’ve got this pretty darn close to the original though I say so myself.

_DSF0032

The back cap made, I’m going to have to add some detailing to this to make it look right.

_DSF0036

The new middle band/sling swivel arrangement. This had to be 3D printed as there were absolutely none to be found.

_DSF0035

The mouthpiece and front sight guard has finally been modified. I cut the top of the hood off, straightened the steel and added the lips to the wings with the MIG welder.

_DSF0034

The back cap details added, I put the straight lines in with the hacksaw, the letters with stamps. If I did this again I’d probably soften the metal before doing these as it turned out to be a little harder than expected resulting in stampings that weren’t as deep as I’d like.

_DSF0046

Fitting the trigger guard permanently in place. You may also notice I’ve done the first paint coat on the receiver, oil finished the bolt and added a finish to the top guard.

_DSF0060


This is pretty much the job done. There are a few bits of detailing and last touches to complete the rifle but I’ll let you enjoy the overall effect of the finished item.


If you want to see the finished item, you can see it here when it’s posted.

Don’t forget you can buy many of our smaller items via Etsy. Our larger items can be found here

If you have an idea of your own, drop us a line on enquiries.vintageairsoft@gmail.com to discuss. ‘Like’ our Facebook page or follow the blog to get regular updates on projects and interesting videos and articles.