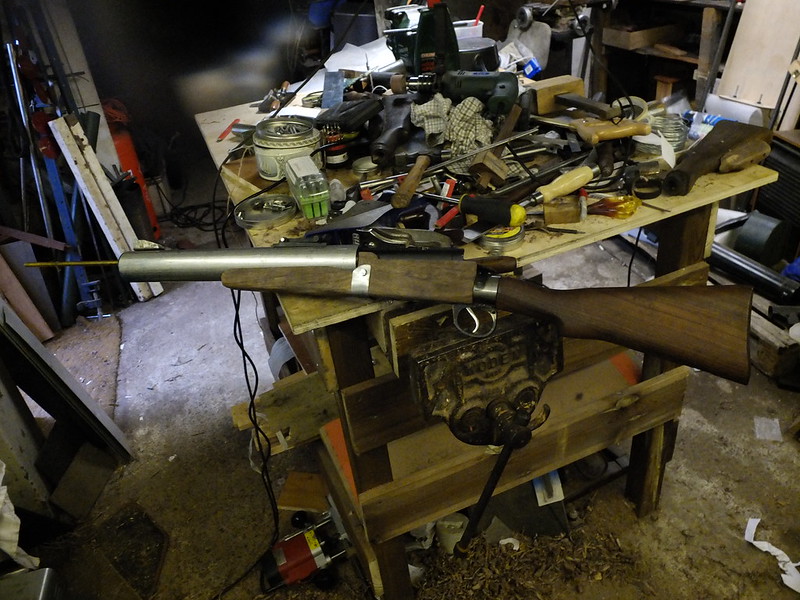
Sten Mk5: Folding stock experimental model

carbine, Cold War, Complete builds, Custom builds, Sten, Sub Machine-guns, Weapons, WWII

On a Facebook group a few months ago, someone shared a picture of something I had never seen before. As time has gone by, it has become rare for this to happen to me in the world of firearms.

49343124_2019959264791945_2984784421388812288_n

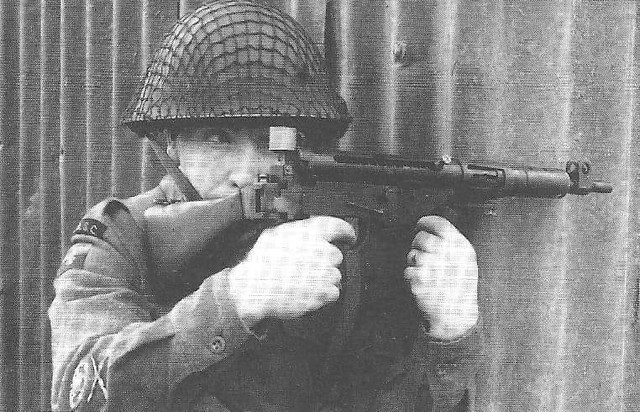
Yes, that is a Sten Mk5. Yes he is shooting it around a corner using a folding stock.

CNN2S_zVAAQM_Mg

Although it’s not really practical for airsoft, where shooting without looking (blind fire) is a banned practice, it was such a distinctive and interesting idea it had to happen. This is what a Cornershot carbine looks like in the late 1940s.

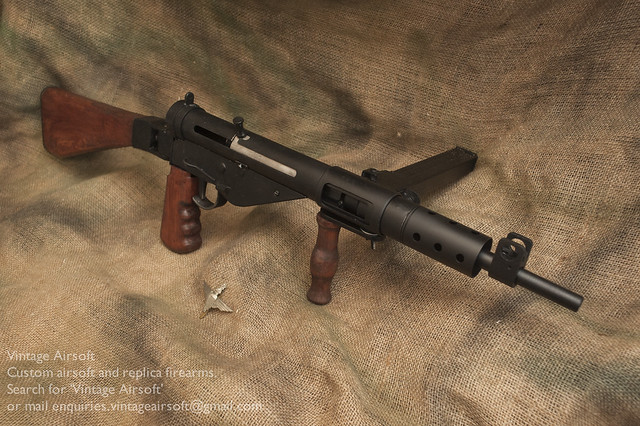
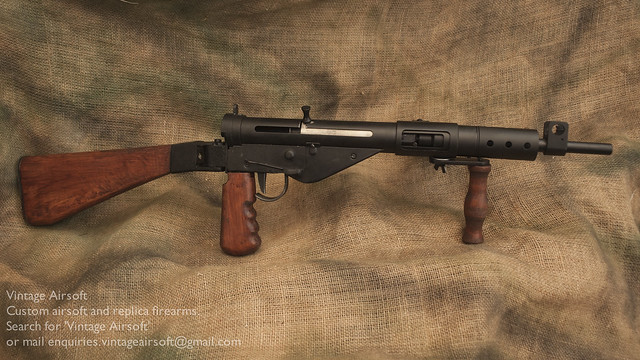
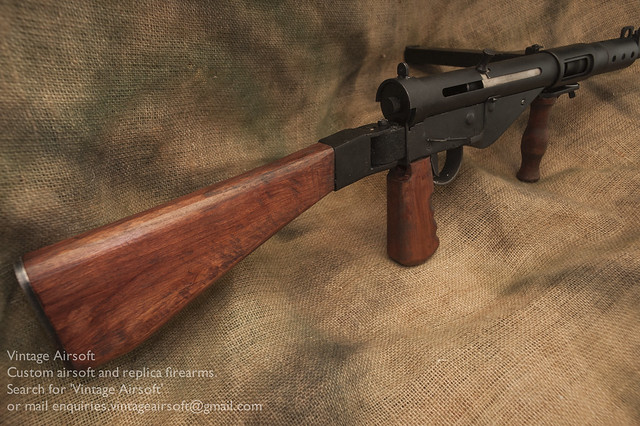
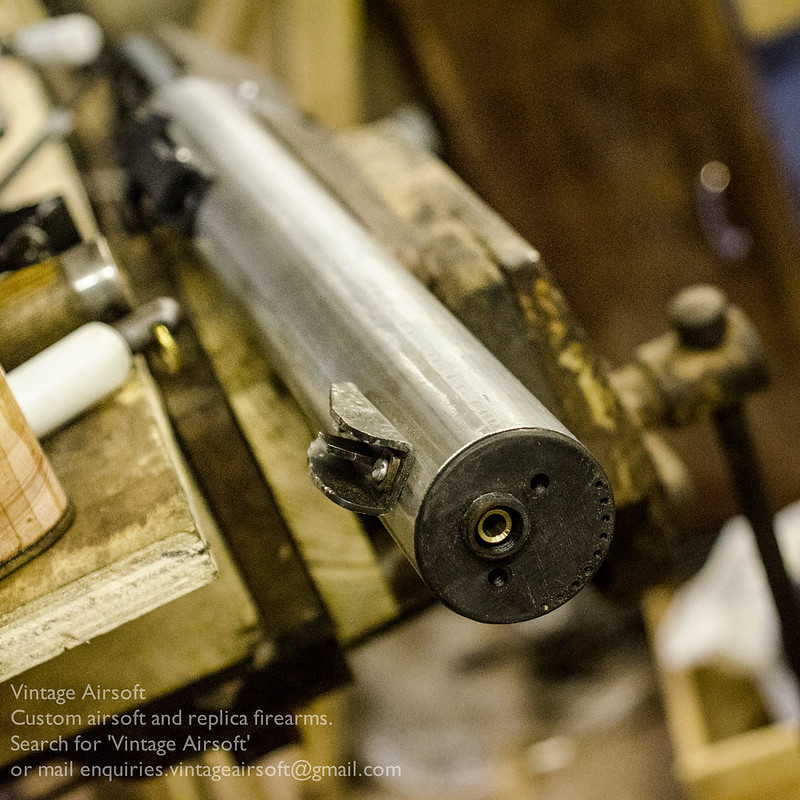
At first glance, it looks like a standard Sten Mk5. I turned down the barrel to make it slimmer and more shaped like the original.

_DSC9664

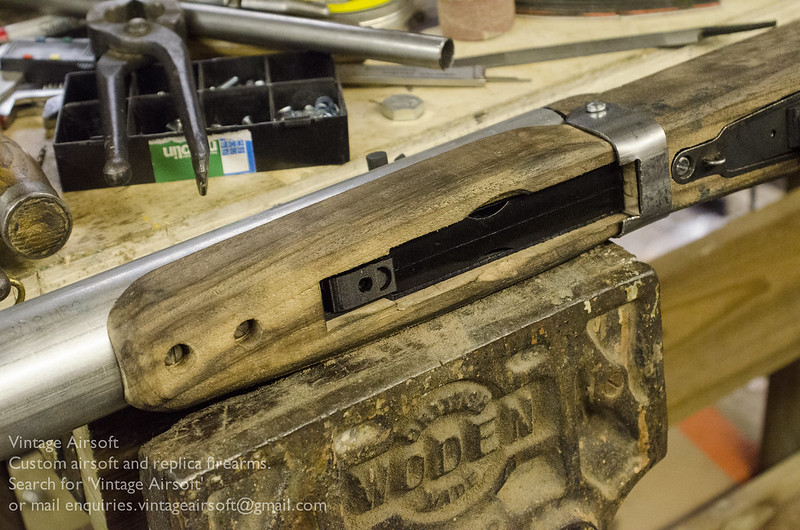
From the side, you can see the slightly longer joint for the buttstock.

_DSC9667

The wood pattern is pretty much identical.

_DSC9665

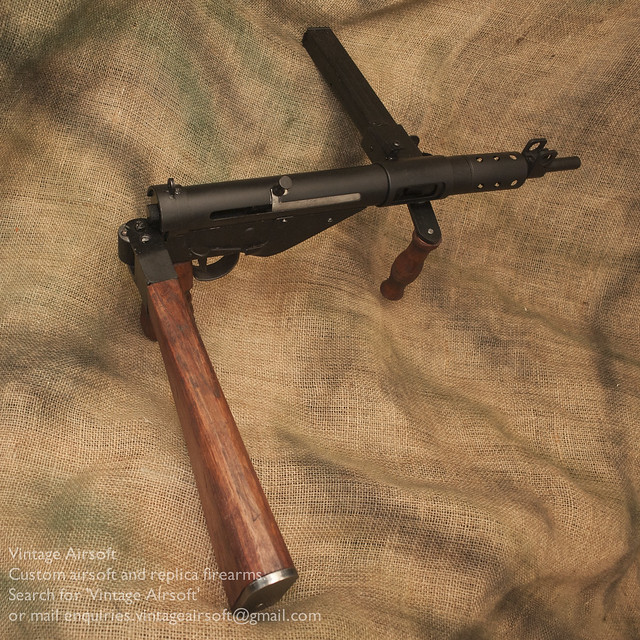
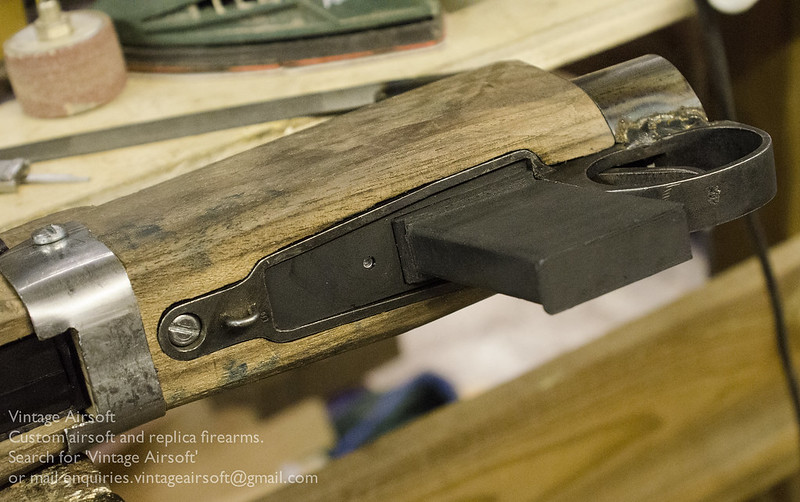
The swivel function is controlled with the silver button. This is depressed, the stock is swivelled 90º one way or another and the spring-loaded button locks into place. At the same time, the foregrip is loosened with the thumbscrew, moved into place and tightened down. This is one area where I have deviated from the original which used a hex nut: carrying a spanner around in the field wouldn’t be practical.

_DSC9668

You will notice that there is no prism sight on this. I looked into getting a pentaprism as used by the original, but the cost would have nigh-on tripled the price of the build.

_DSC9670

To round off: a couple of views of it folded different ways.

_DSC9673

_DSC9672


So far as I can tell these were never properly trialled beyond the one prototype. I imagine that managing recoil and maintaining a sight picture would have been tricky, the prism would have been expensive and limited the soldier’s field of view.

If any reader has any information on these carbines, better quality original photos or recognises the magazine the snippets above have been taken from I would be very much obliged if you would get in touch on the email below.

If you are interested in this build you can see the rest of the project here. If you have an idea of your own, drop us a line on enquiries.vintageairsoft@gmail.com to discuss. ‘Like’ our Facebook page or follow the blog to get regular updates on projects and interesting videos and articles.


Don’t forget you can buy VA products on the website where this will be available. 

The DeLisle Commando Carbine: Complete

Cold War, Complete builds, Custom builds, Delisle, Rifles, Suppressed, Weapons, WWII

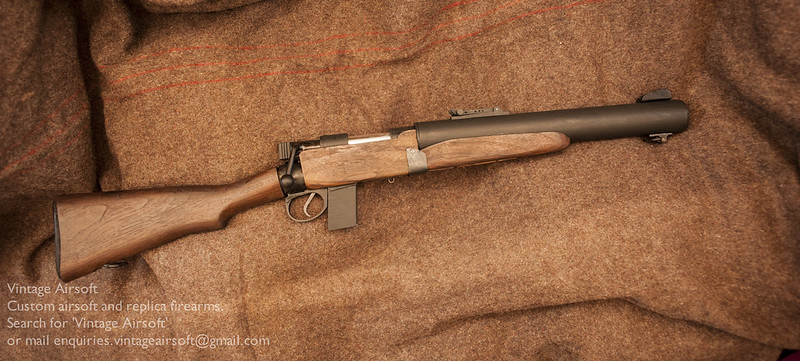
This project is one I’ve been wanting to do since forever and the outcome is very satisfying.

_DSC8929

This VSR based carbine should be a very nice balance of practical and handsome. The receiver has been left quite plain, at some point I would like to do another with the receiver all milled out like the original. This will have to wait for now as it will require extensive modifications to make it secure.

_DSC8930

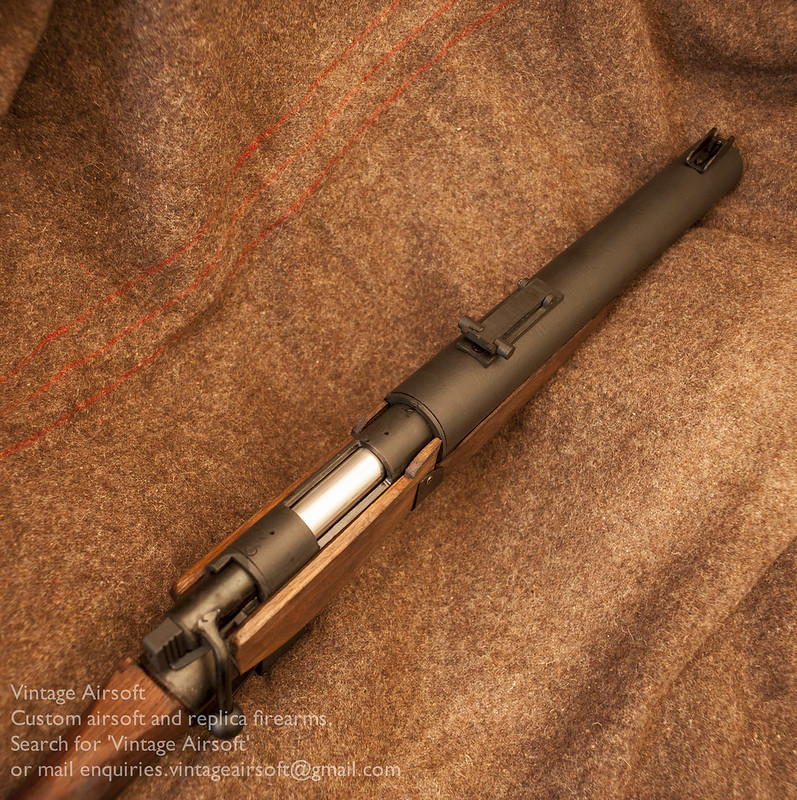
As you can see, the bolt handle has been dropped down around the right location. The bolt back cap on this one has been 3D printed, but I am likely going to replace this with a milled one for strength and durability.

_DSC8931

The foresight, which is adjustable for windage to a limited extent.

_DSC8932

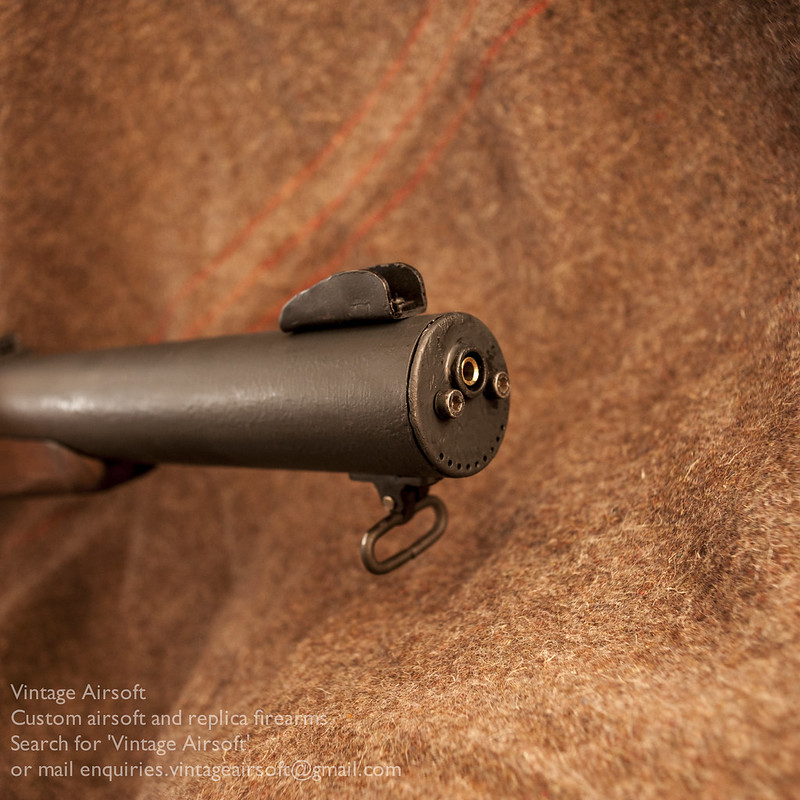
The 3D printed front cap. You can also see the barrel poking out. Although I could have made it shorter than this, it would have ended up being incredibly short and every millimetre helps with a barrel of this length.

_DSC8933

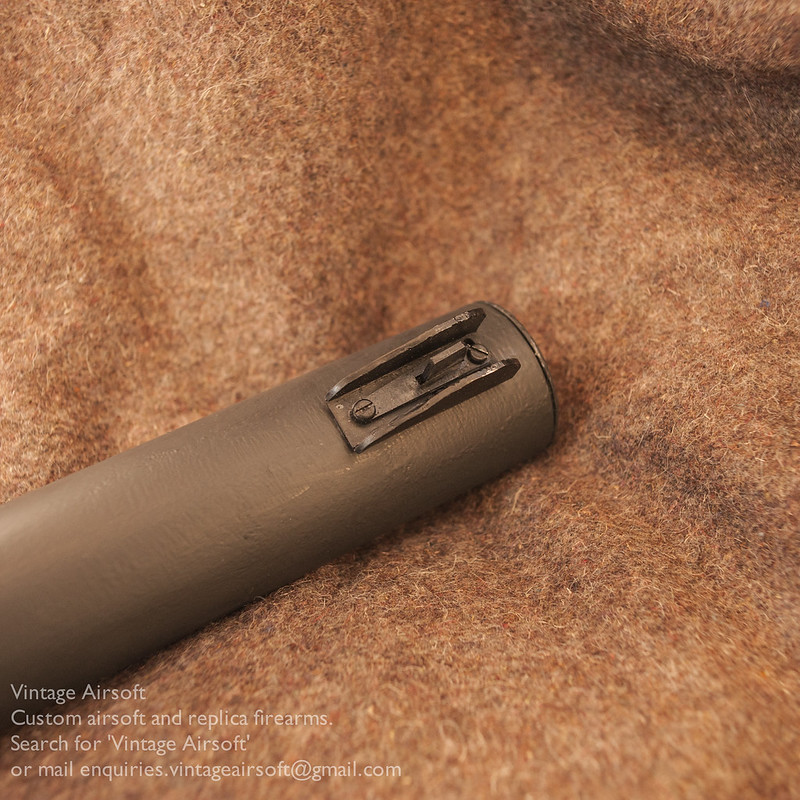
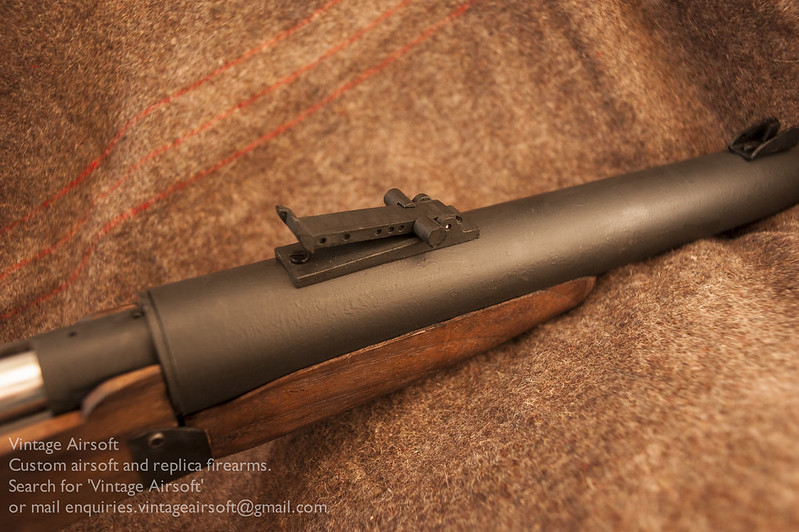
The rear sight, adjustable for elevation. The hop adjustment is under this, a TDC screw modification.

_DSC8934

The faux magazine is 3D printed and quite solid. If this model proves popular I may make it in black hard rubber instead. _DSC8939

The buttplate is a rubber cast, as originals are getting prohibitively rare and expensive.

_DSC8936

Finally a quick bottom view, the VSR magazine well in the foregrip and cut out re-enforcing band. The grain on these bits of wood are particularly lovely and you can see them in this picture.

_DSC8943


If you are interested in this build you can see the rest of the project here. If you have an idea of your own, drop us a line on enquiries.vintageairsoft@gmail.com to discuss. ‘Like’ our Facebook page or follow the blog to get regular updates on projects and interesting videos and articles.


Don’t forget you can buy our smaller items via Etsy. Our larger items can be found here.


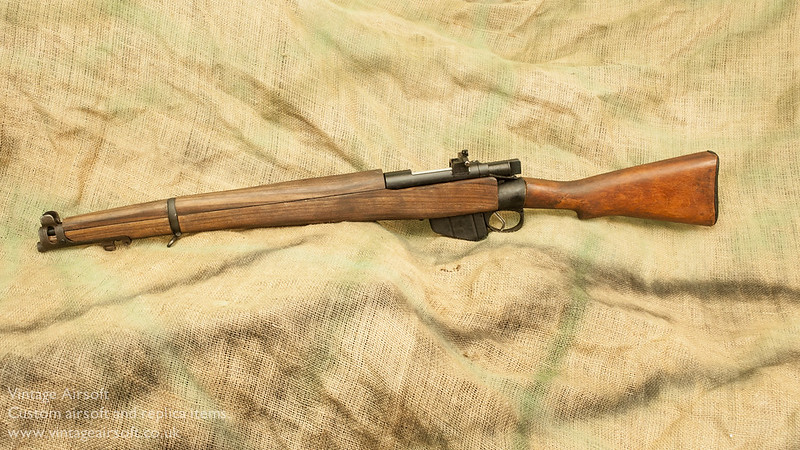
Australian SMLE Carbine VSR

Complete builds, Custom builds, SMLE, VSR SMLE, Weapons, WWII

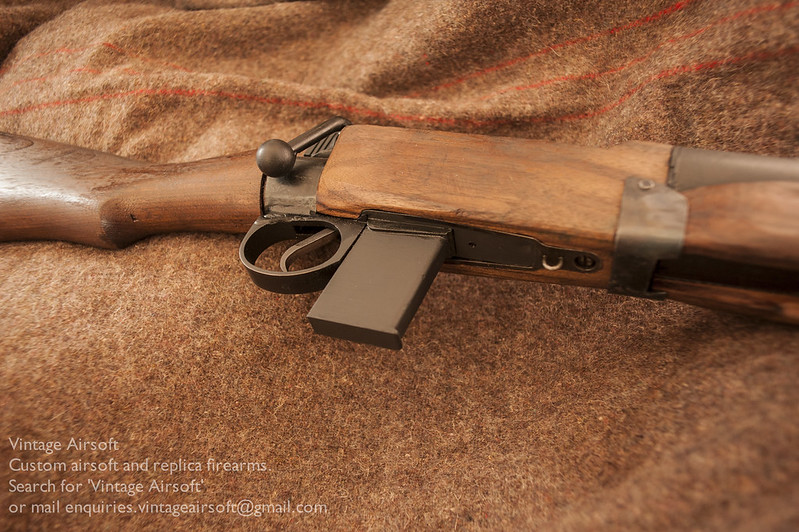
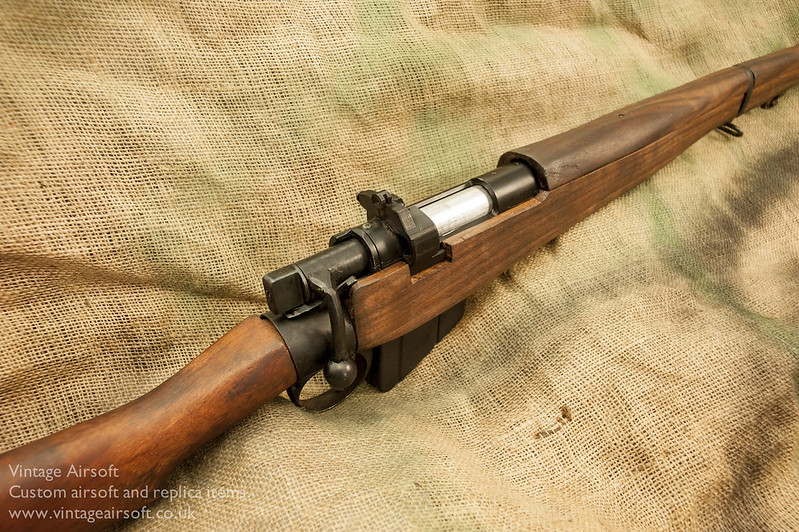
When I saw this pattern of experimental SMLE on Forgotten Weapons (see the video here) I knew I just had to make one. I used this as an opportunity to try out some of my new techniques for SMLE builds.

This carbine was conceived as a way to make the SMLE shorter and lighter, the project being run in parallel with similar programmes in Ishapore (India) and Enfield (GB), the latter of which used the No.4 as the starting point and resulted in the No.5 MkI.

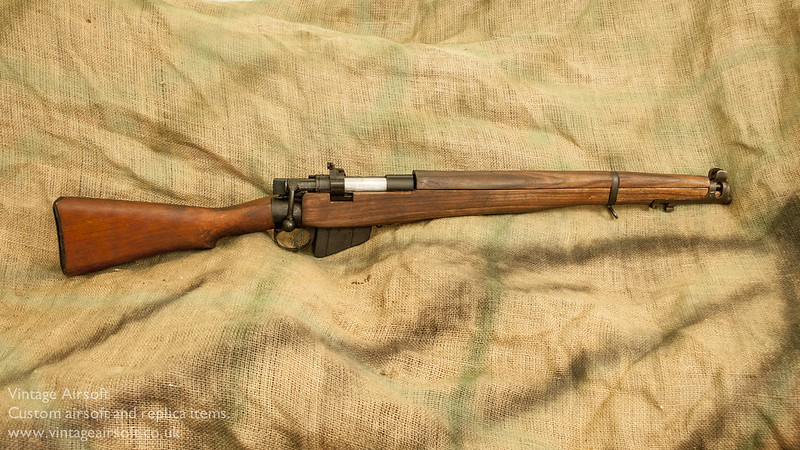
This is an impression of the first shortened Australian pattern. In time I hope to replicate quite a few of the others.

_DSC9151

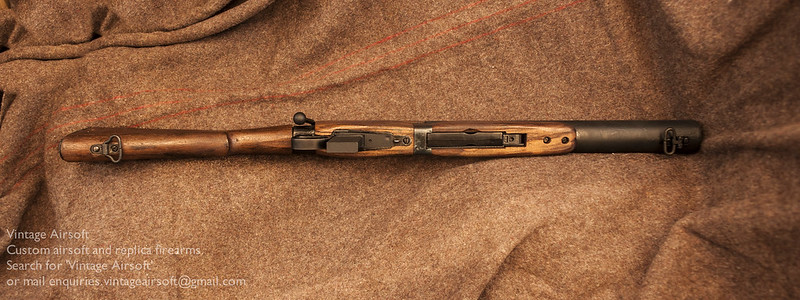
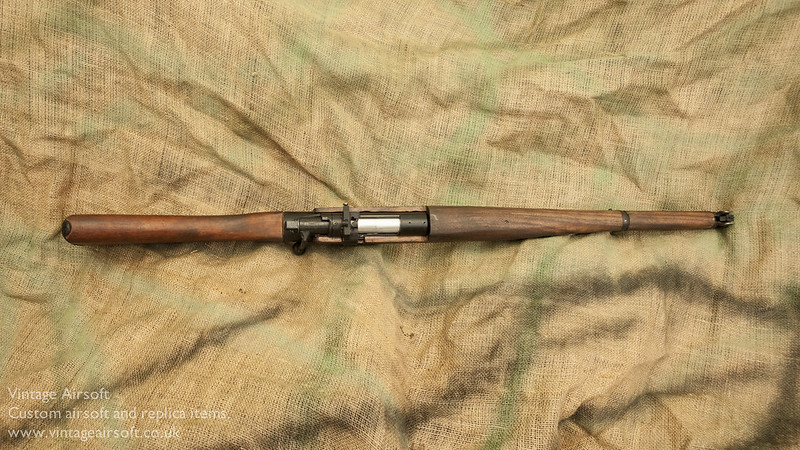
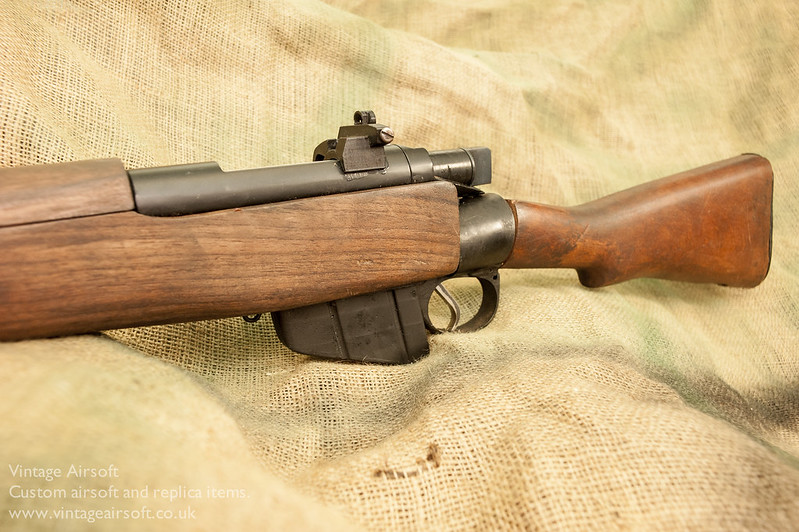
It is, in essence, just a short SMLE. The only real effort to make the rifle lighter at this stage was in shortening the barrel and woodwork.

_DSC9156

This does however make for a very handy rifle!

_DSC9142

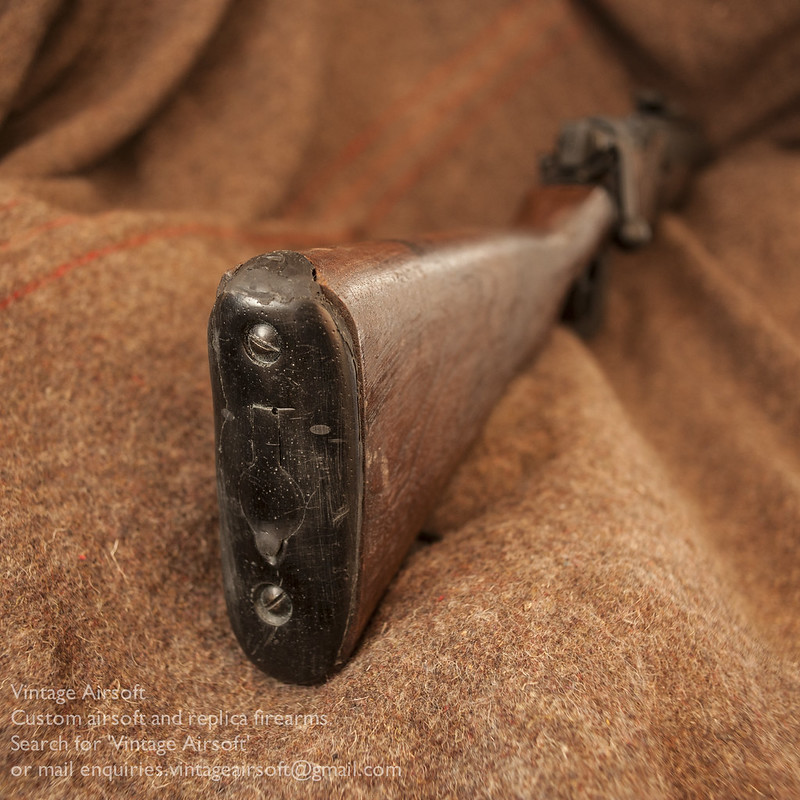
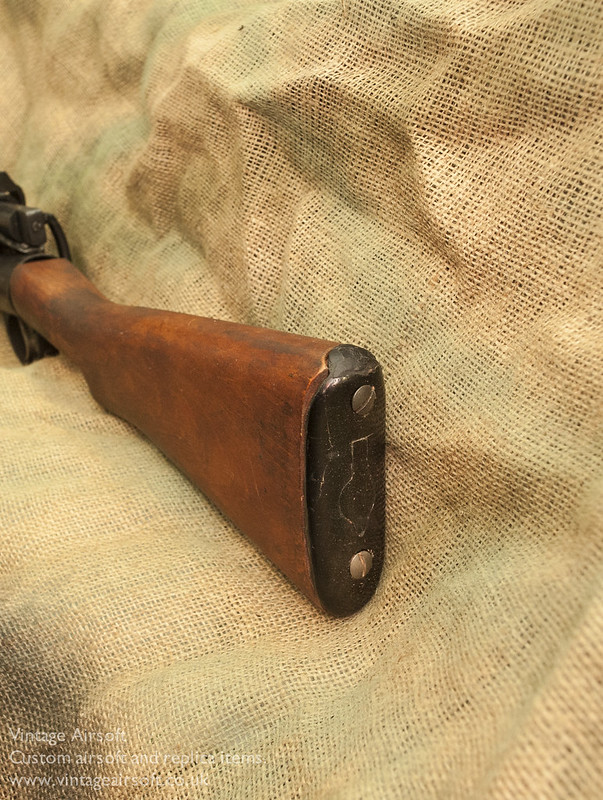
This was one of my first rifles to use my rubber cast buttplates. The originals used metal plates, I use rubber simply because metal plates are very hard to get presently.

_DSC9149

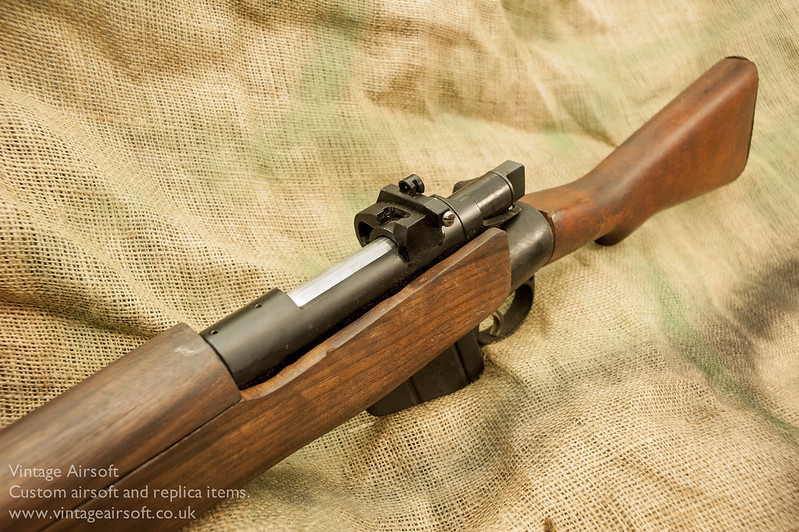
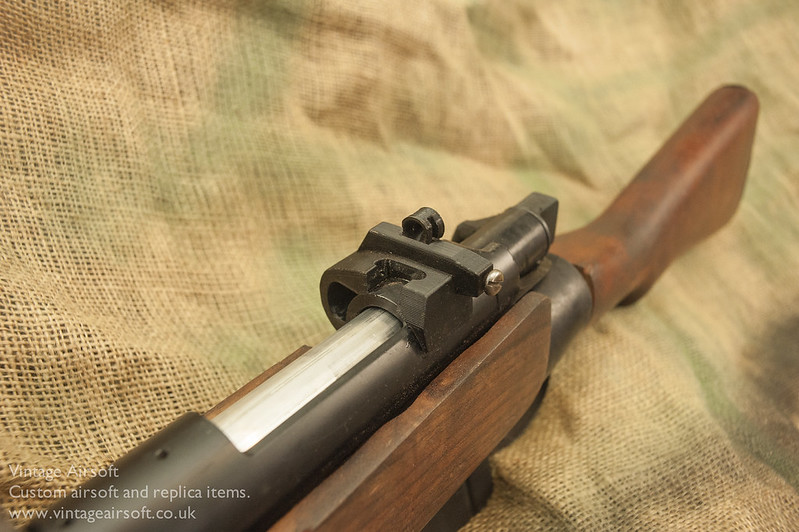
Possibly the best feature of this conversion is the use of this rear-mounted aperture sight. On the original rifle, this had two settings for range, on mine I have gone for a simple zeroing elevation adjustment. 

_DSC9155

Having used this rifle in-game I can say confidently that this is an excellent sight, far superior to a regular SMLE notch. The narrower aperture is in my opinion better than the No.4 sight, at least in daylight.

_DSC9154

As with the original, I have put a large draft on the front of the aperture to gather the maximum light possible.

_DSC9158

As with my other Enfield builds, I have used my custom Enfield trigger.

_DSC9157


I got to use this in-game in October. The shorter, lighter version of the SMLE make this extremely handy on its own, add in the rear aperture and it’s extremely quick to bring to bear as well. As an airsoft version, I can’t comment on how comfortable it would be to shoot the original, but I suspect it would be rather brutal on recoil and have a rather blinding flash.

Although this was never adopted, I’m glad to have made my own version and can confirm it is going to a very good home.

If you like this project or have an idea of your own, drop us a line on enquiries.vintageairsoft@gmail.com to discuss. ‘Like’ our Facebook page or follow the blog to get regular updates on projects and interesting videos and articles.

Don’t forget you can buy many of our complete products via The website.


MAS 36: Complete

Cold War, Complete builds, Custom builds, MAS 36, Products, Rifles, Weapons, WWII

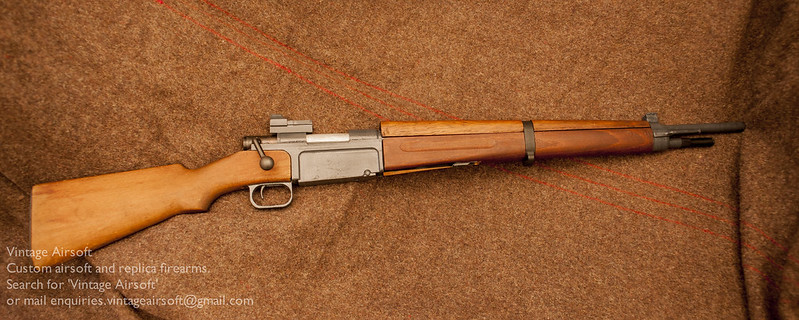
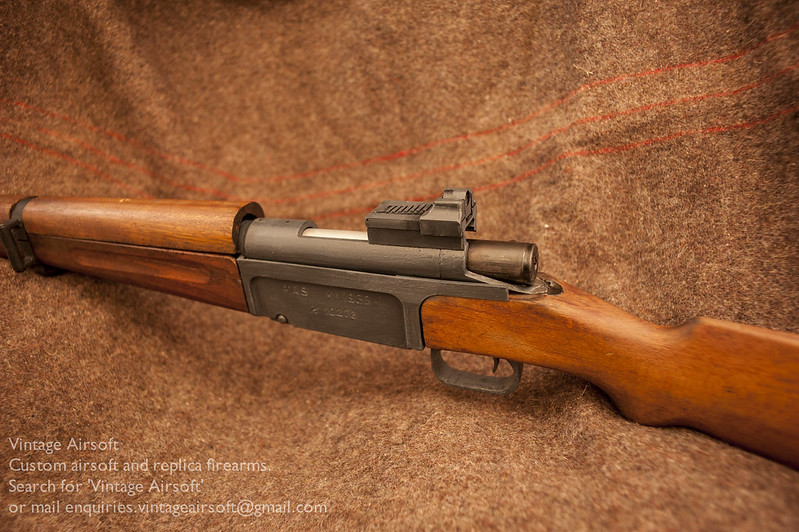
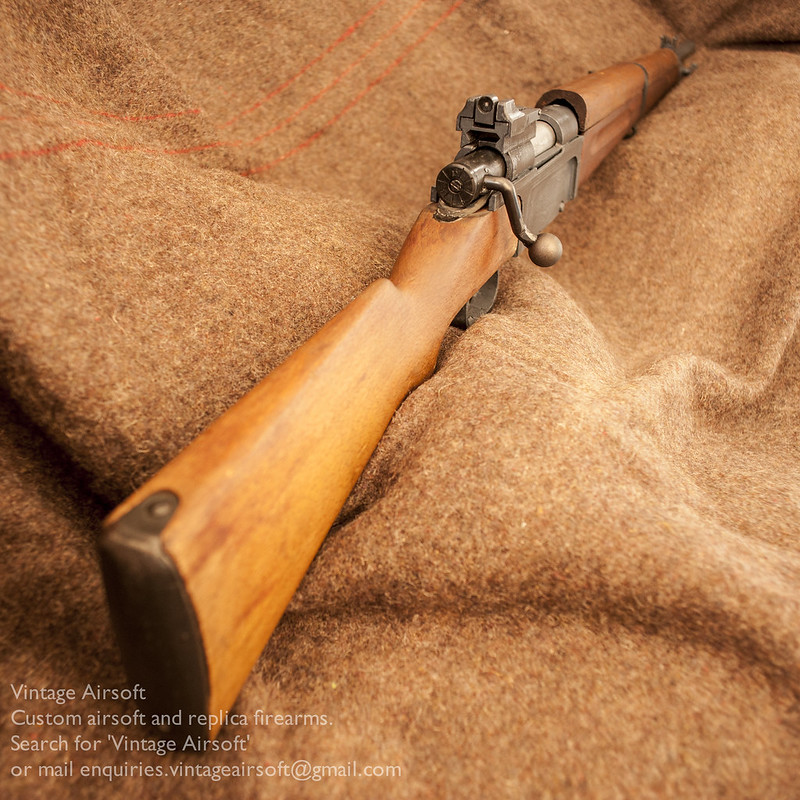
Though I say so myself, she’s rather nice. When I first took on the MAS 36 build, it was just an interesting commission. Now, I rather want one. A fascinating rifle and it’s satisfying to have an airsoft version of it.

_DSC8957

The far side, showing the sling arrangement.

_DSC8959

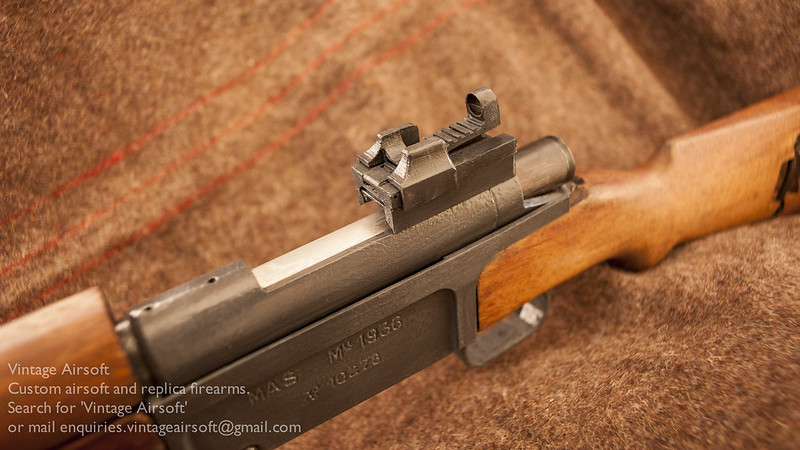
The rear sight is designed along the same lines as the original.

_DSC8912

To adjust the elevation, you press down the leaf and move the slider. The markings are visible in this picture as well, recessed deep into the receiver like the originals

_DSC8913

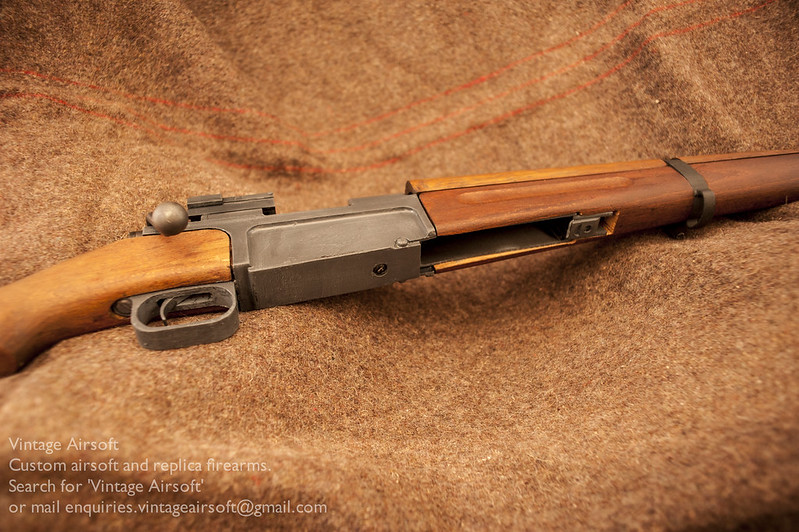
The VSR magwell, shared between the foreguard and receiver. As you can see, this is the MkII magwell, which allows you to fit an extension if you struggle with the catch, useful for cold weather if you have to wear gloves.

_DSC8915

The 3D printed middle band. It should be strong enough for use as I thickened it quite significantly, not to mention the steel screw running through it

_DSC8917

The original woodwork really adds to this build. As and when I can do another I may make the top guard a good bit skinnier.

_DSC8918

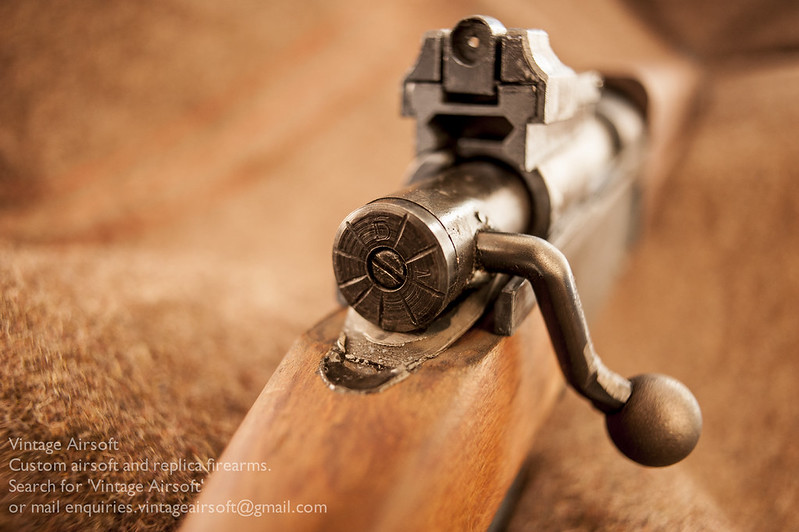
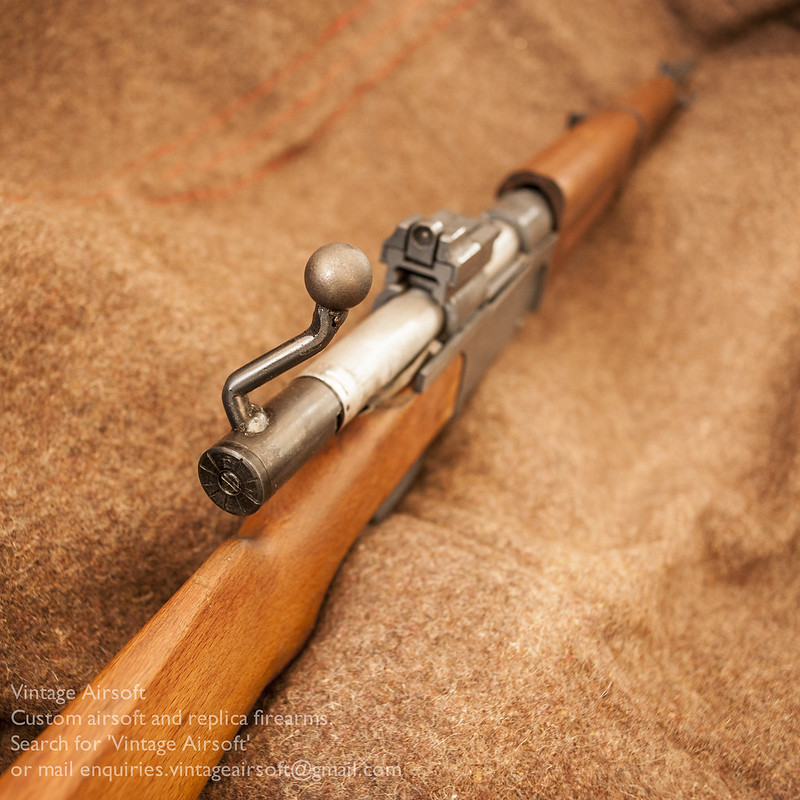
The bolt, all oil finished. Though I say so myself it looks the part.

_DSC8921

The bolt handle operates at 90º, like the original.

_DSC8924

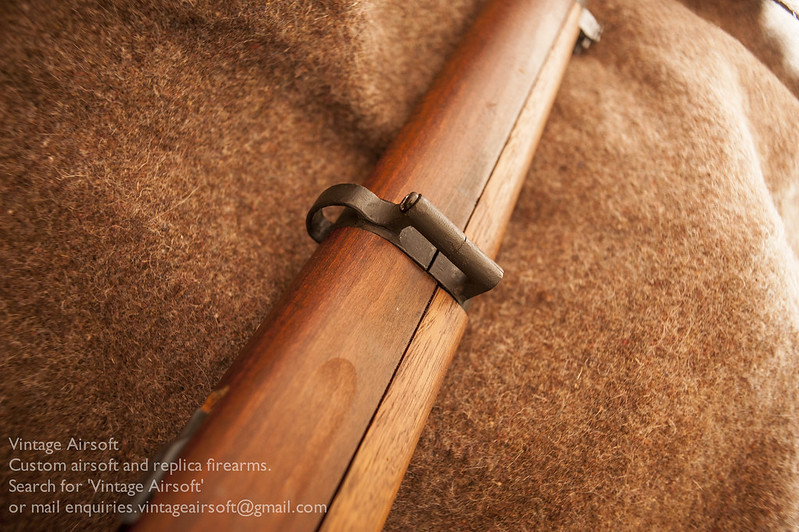
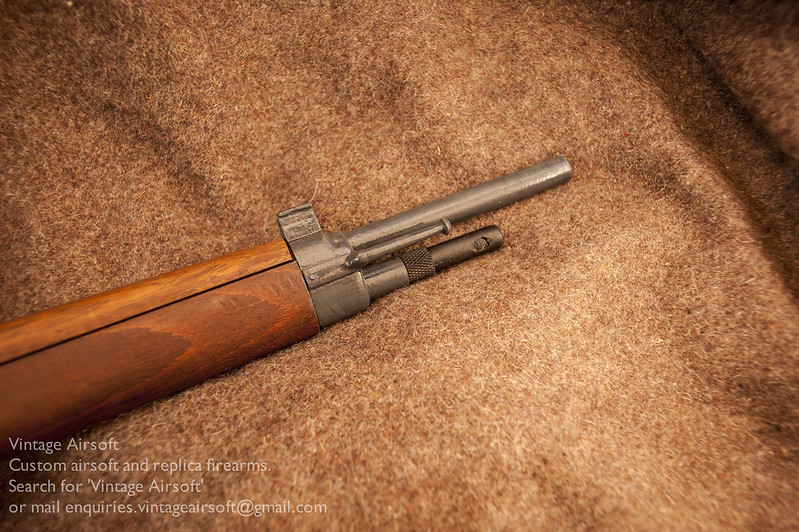
At the front, something important was missing. I realised it was the bayonet. I had a MAS bayonet mould made up already for the FG42, so I made another and adjusted it to fit.

_DSC8925

Every rifle wants a bayonet really, but especially when it is built in. This one has a plastic stiffener running through it to prevent excessive wobble.

_DSC8927


If you like this build you can see the rest of the project here. If you have an idea of your own, drop us a line on enquiries.vintageairsoft@gmail.com to discuss. ‘Like’ our Facebook page or follow the blog to get regular updates on projects and interesting videos and articles.


Don’t forget you can buy our smaller items via Etsy. Our larger items can be found here.

The DeLisle Commando Carbine: Build

Cold War, Delisle, Lee-Enfield, Suppressed, Weapons, WWII

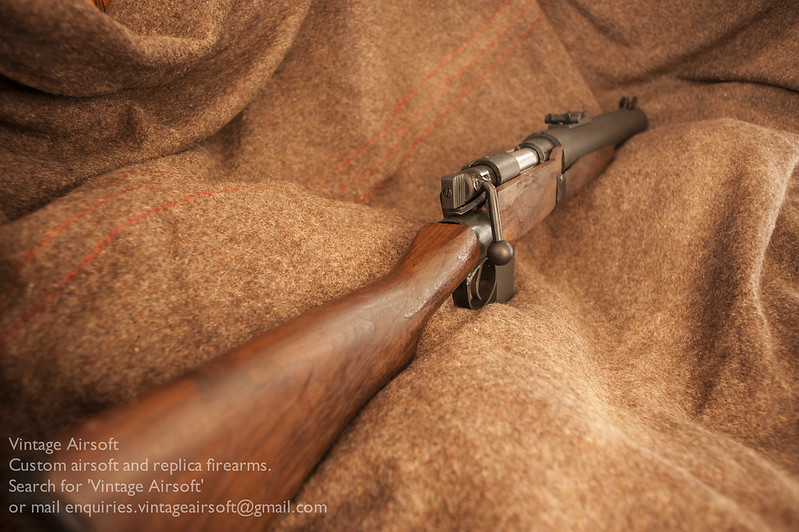
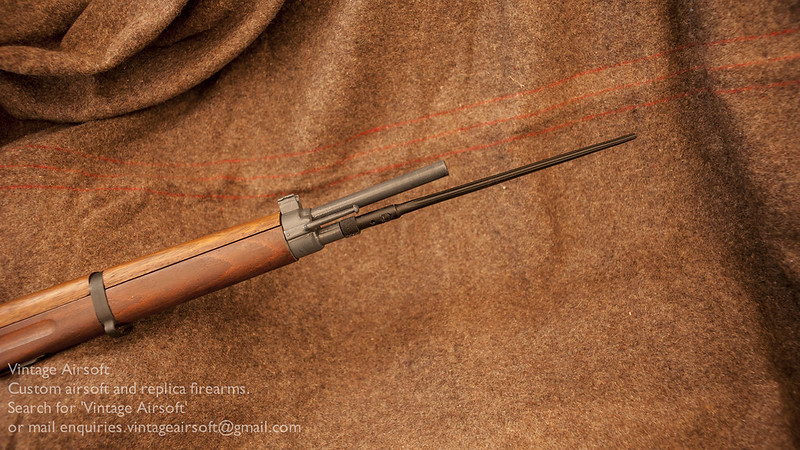
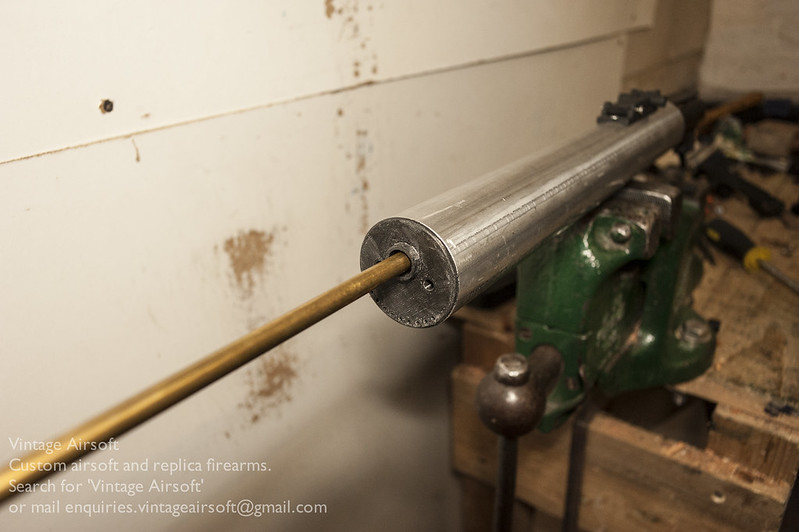
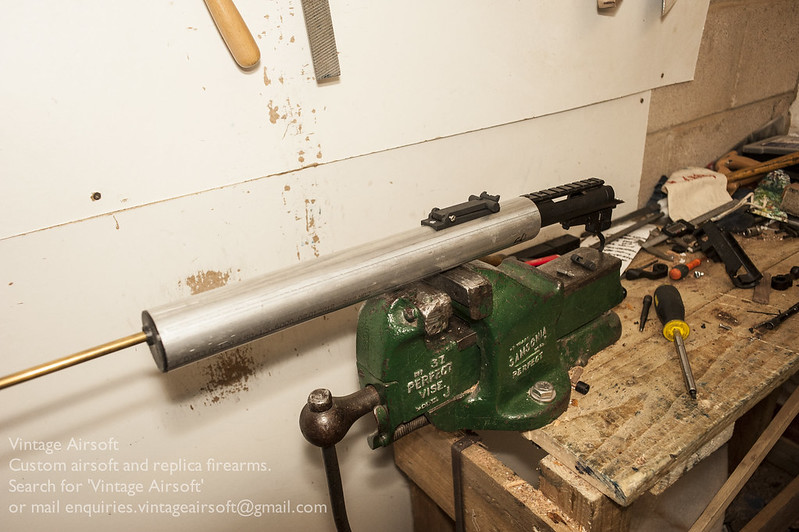
The DeLisle is VSR based, so this acts as the joining unit between the different parts. Due to the sheer size of the suppressor however this will pretty much be joined as part of the chassis.

At the fore-end, the front cap is 3D printed, as is an internal spacer.

_DSC8294

At the back of the suppressor is the rear sight, a simple V-notch on an elevation leaf.

_DSC8298

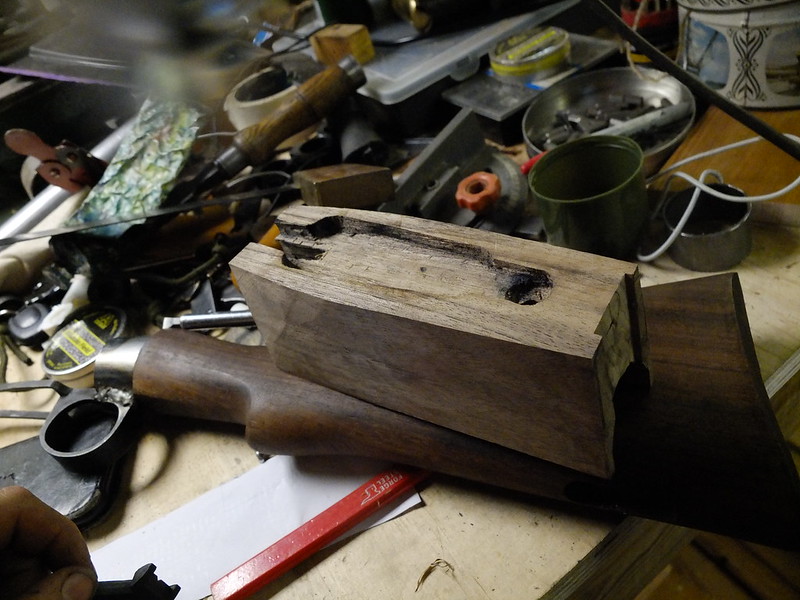
The woodwork on this is in three parts, the buttstock, receiver housing and forestock. Once I had carved out the internal shapes for the receiver and magazine well, I could shape the outside.

_DSF0054

Once all the parts were roughly shaped and strapped down to the VSRI added the re-enforcing band. I’m not sure this was strictly necessary, but it was on the original so on it goes!

_DSF0055

The band had to be cut back for the magazine well, but it will make quite a nice tactile reverence point if the gun is used in the dark.

_DSC5716

Fitting the faux magazine well in permanently, this 3D printed part is fitted with a machine screw through the stock so it’s pretty solidly mounted.

_DSC5717

At the front, I turned the inner barrel down to the correct length.

_DSC5721

At this stage, it’s mostly finishing and painting work to do, which isn’t very interesting to see so the next time you see this, it will be the finished item!

If you are interested in this build you can see the rest of the project here. If you have an idea of your own, drop us a line on enquiries.vintageairsoft@gmail.com to discuss. ‘Like’ our Facebook page or follow the blog to get regular updates on projects and interesting videos and articles.


Don’t forget you can buy our smaller items via Etsy. Our larger items can be found here.

Sten Suppressor MkII

Cold War, Complete builds, Sten, Sten Suppressor, Sub Machine-guns, Suppressed, Weapons, WWII

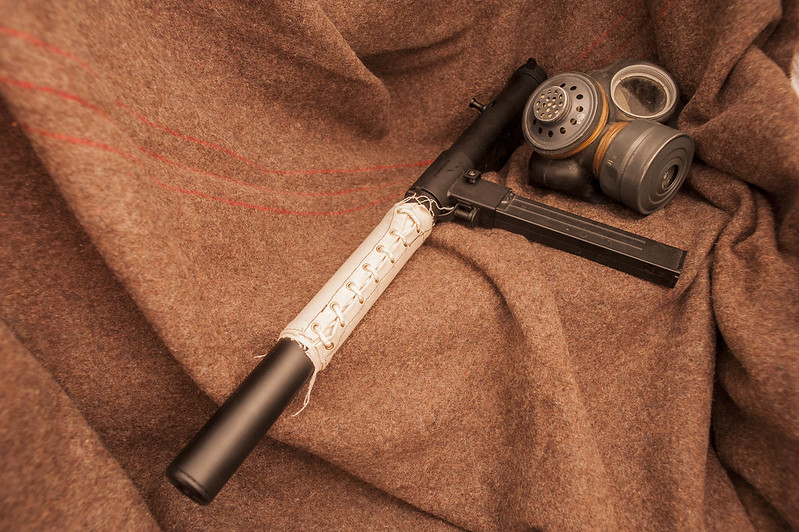
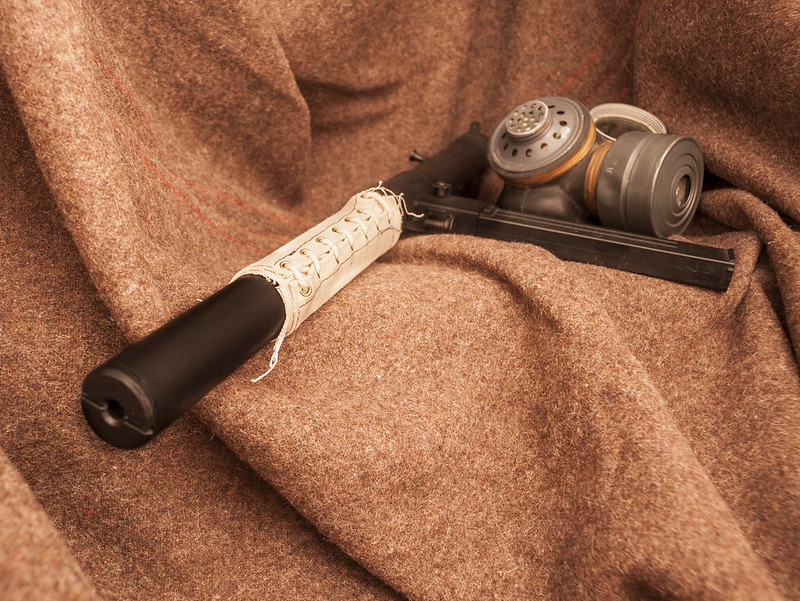
I realised the other day that I hadn’t updated my Sten Suppressor pictures in about two years, in spite of making this much nicer model for some time.

_DSC8351

This replica can be used correctly on the MkII and Mk5 Stens, the latter format would make it a Mk6 if you were so inclined.

_DSC8353

_DSC8244

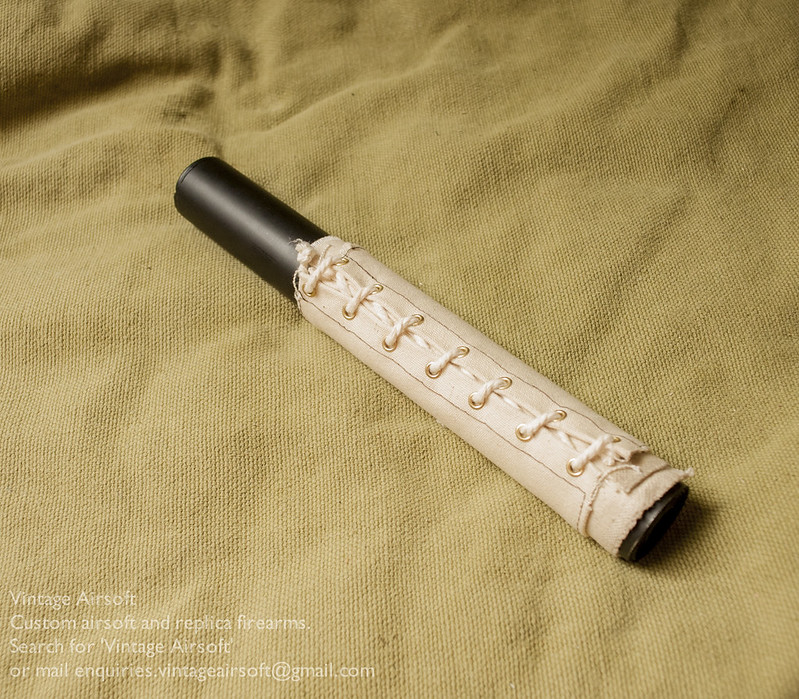
I’m using a thicker canvas for the cover than before and a thick cotton cord, ready laced up in the correct format (straight laced, like British Army boots).

_DSC8245

A securing screw locks it into place on the barrel.

_DSC8246

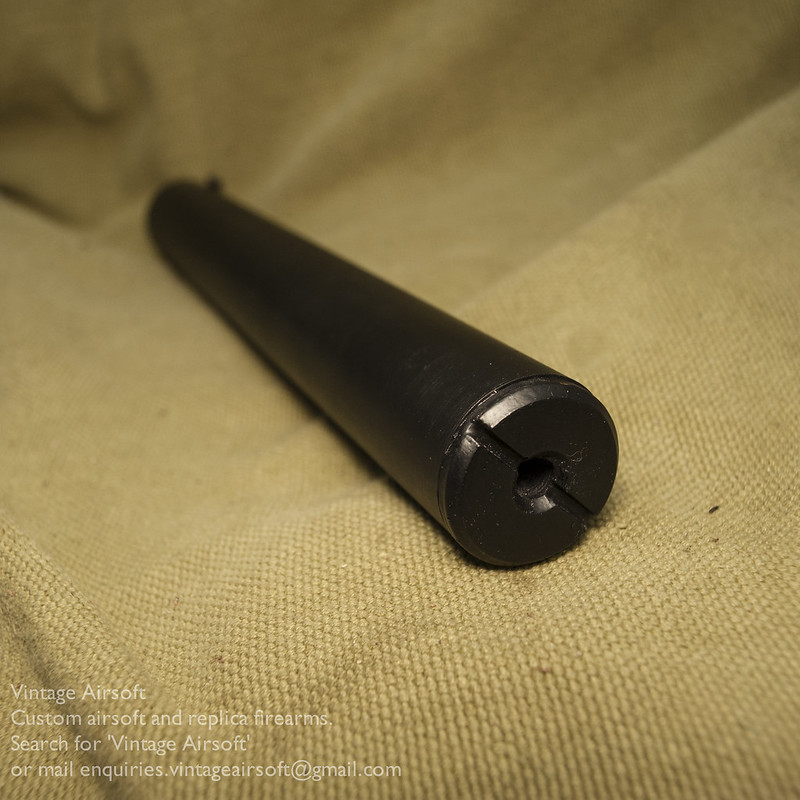
The front cap is made from cast rubber.

_DSC8169


If you want a suppressor of your own, you can buy it here.

Don’t forget you can buy many of our smaller items via Etsy. Our larger items can be found here


If you have an idea of your own, drop us a line on enquiries.vintageairsoft@gmail.com to discuss. ‘Like’ our Facebook page or follow the blog to get regular updates on projects and interesting videos and articles.

Stopping Rifle: Build 3

Imperial Era, Sporting Arms, Stopping Rifle, Weapons, WWI

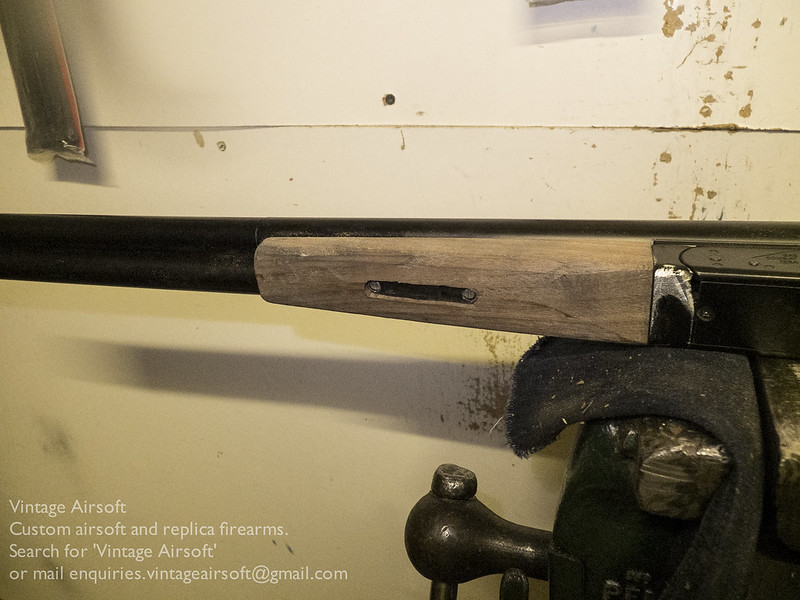
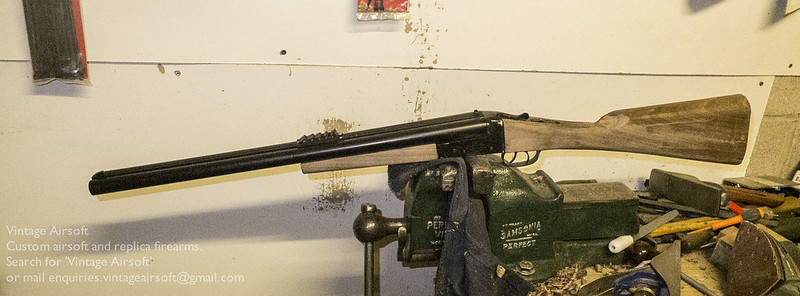
The forestock fitted in place is a little bit longer than the original but is fastened in the same way.

_DSF9949

This definitely improves the overall shape of the rifle.

_DSF9947

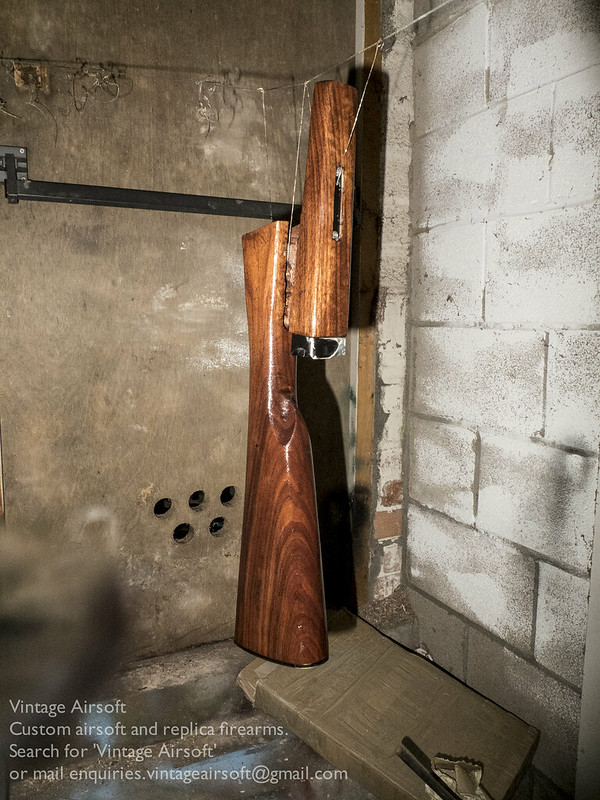
With the woodwork shaped and the buttplate fitted I applied a few layers of finish, leaving it to dry.

_DSF9980

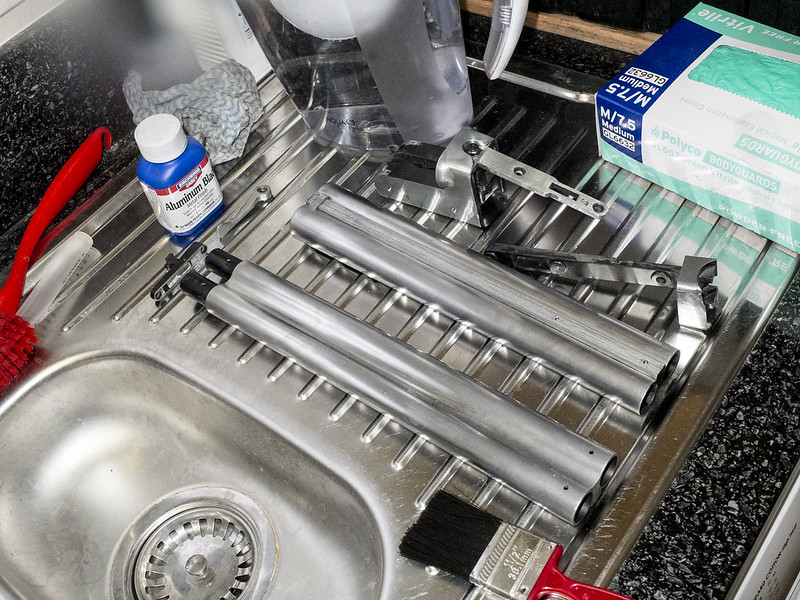
In the metalwork department, I stripped the original paintwork from it. Underneath is aluminium of some kind, though some parts are an odd coppery colour.

_DSF9983

I applied Birchwood and Casey’s aluminium black. A couple of coats later and I have a nice dappled finish across the surface.

_DSF9985

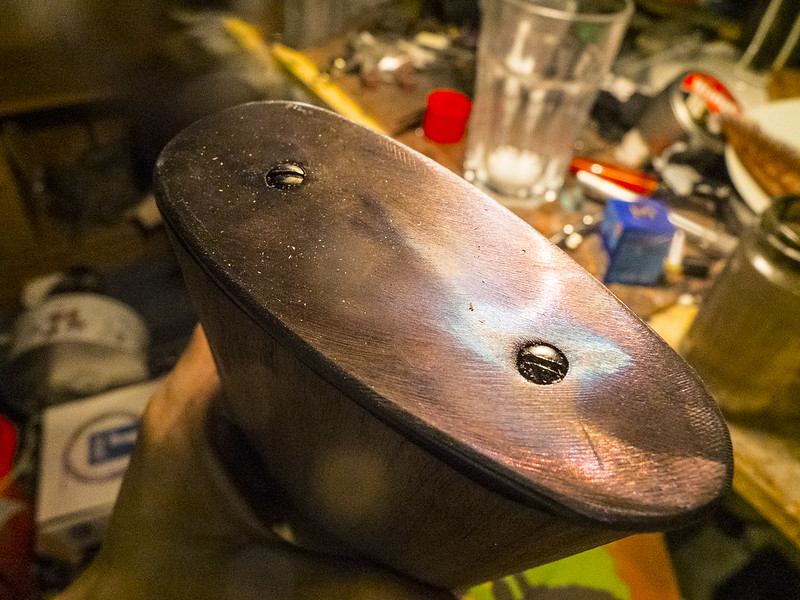
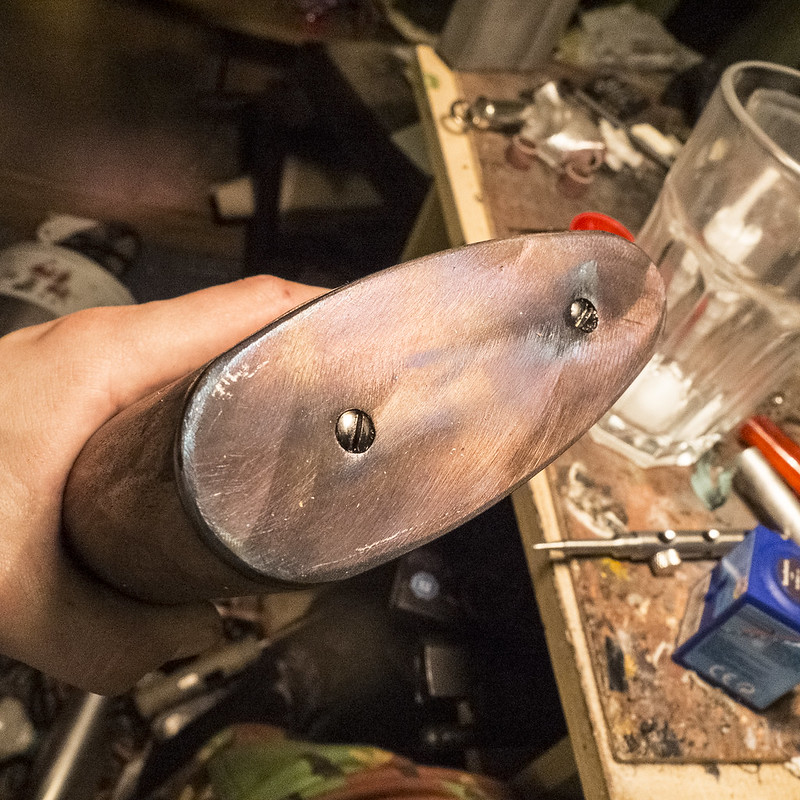
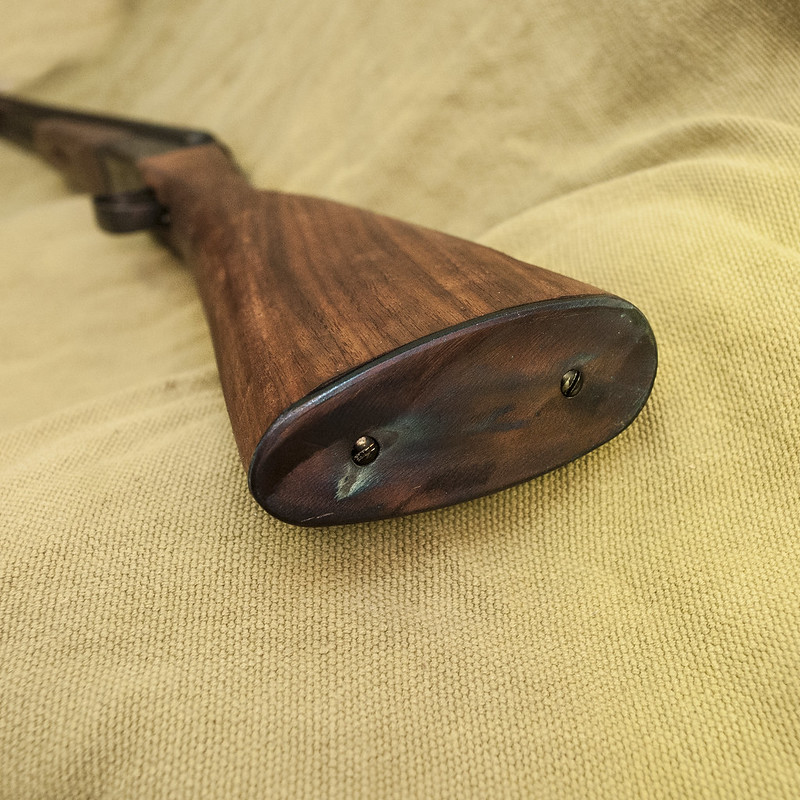
The buttplate, being steel, is brushed smooth (though with a swirling pattern of sorts left on for some semblance of grip) and heated to a dull red before being quenched in oil. This leaves a rather pleasing mixed-colour finish varying from straw to light blue.

_DSF9986

The screws are blacked to fit in.

_DSF9987

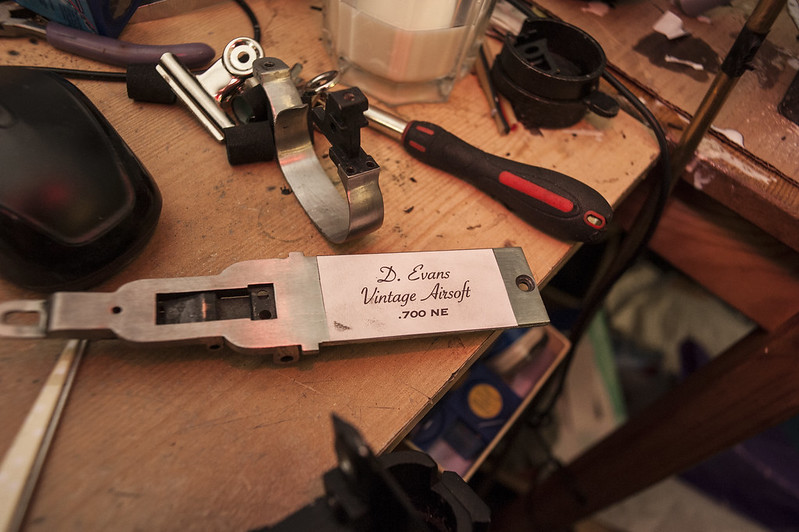
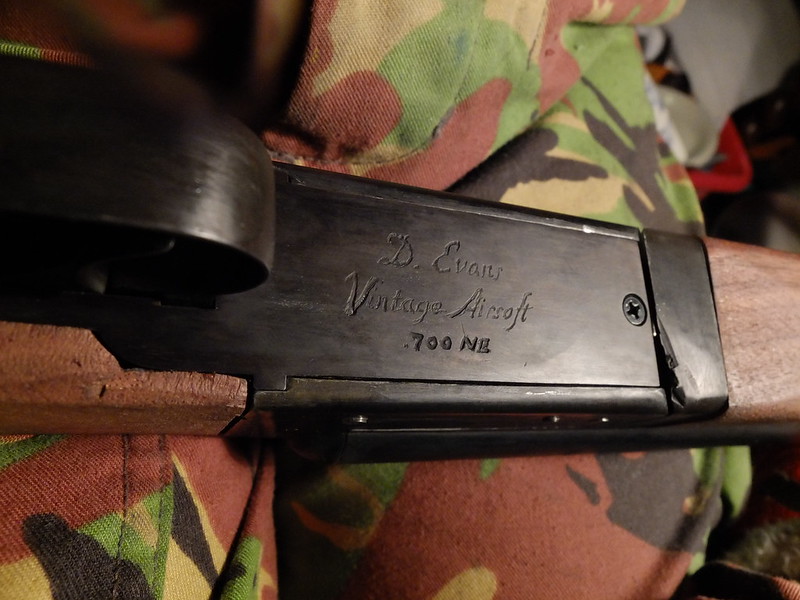
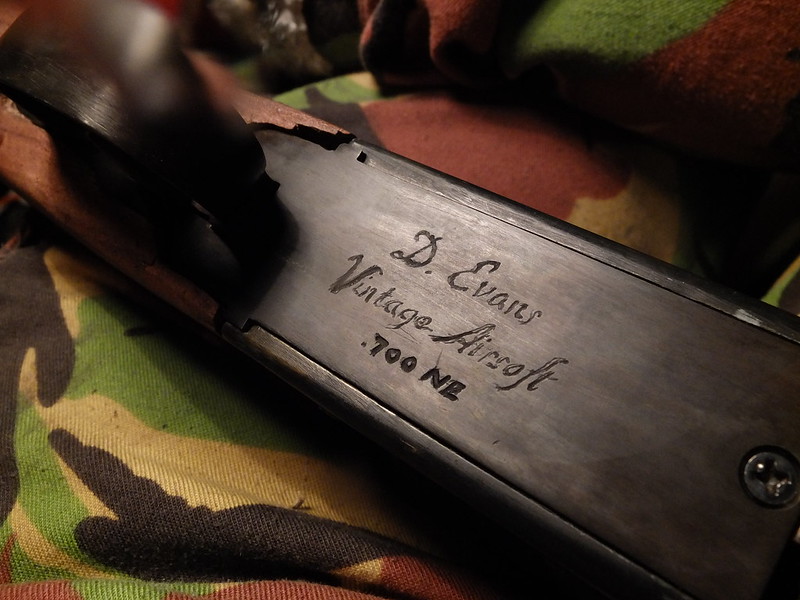
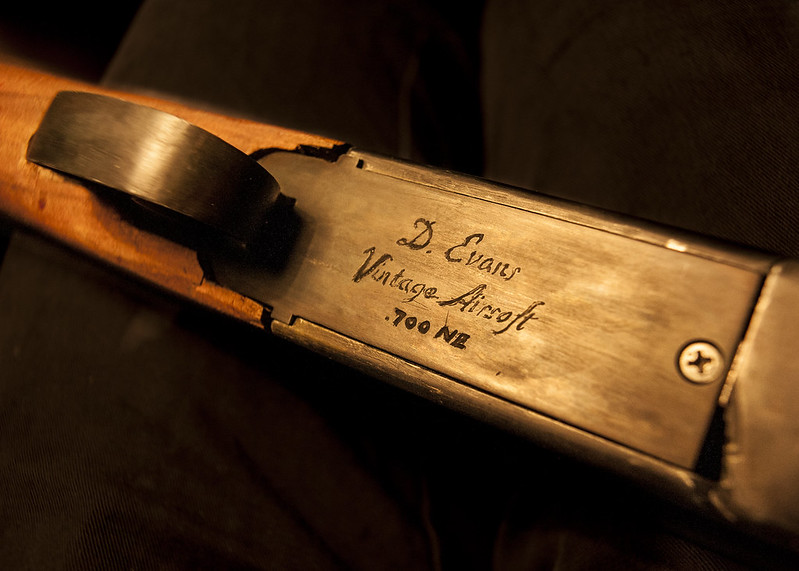
The last bit is to mark up the rifle appropriately. On the bottom plate I’m marking the gun with my details and the ‘calibre’. Though it’s not technically .700 NE, the shells are actually very close.

_DSC8301

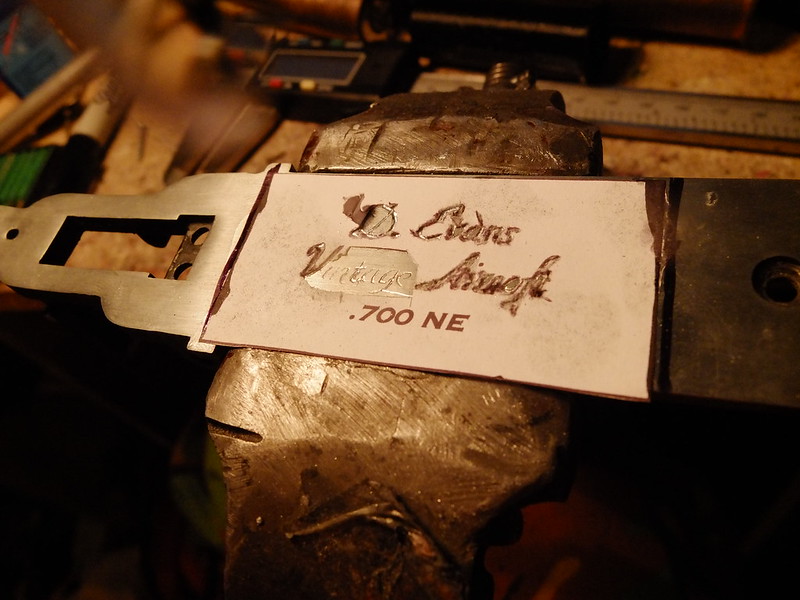
The first step is a quick going over of the script to give a shallow etch to follow. One can then lift the paper to check the etch is deep enough in a few places before removing the whole lot.

_DSF9988

With the paper removed, I add depth and boldness to the capitals and detailing in the few places I have the skill to add it.

_DSF9989

Once all the text is to depth, I used Birchwood Casey’s aluminium black as per the rest of the gun. In the picture below you can see where the back of the foregrip assembly had an argument with my planer, which was a sad event. That being said, I hope to make a replacement in the near future.

_DSF9990

I’m pretty pleased with how the script came out. This is only my second attempt at engraving work and I feel it is quite an improvement over the first. I’m not 100% happy with the calibre, but the script typeface isn’t too bad.

_DSF9991

This is basically finished now, so photographs of the complete item to follow!


If you are interested in this project you can see the rest of the project here. If you have an idea of your own, drop us a line on enquiries.vintageairsoft@gmail.com to discuss. ‘Like’ our Facebook page or follow the blog to get regular updates on projects and interesting videos and articles.


Don’t forget you can buy our smaller items via Etsy. Our larger items can be found here.

Stopping Rifle: Complete

Complete builds, Custom builds, Imperial Era, Products, Sporting Arms, Stopping Rifle, Weapons, WWI

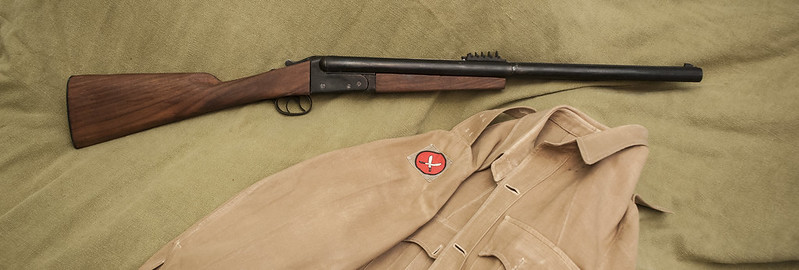
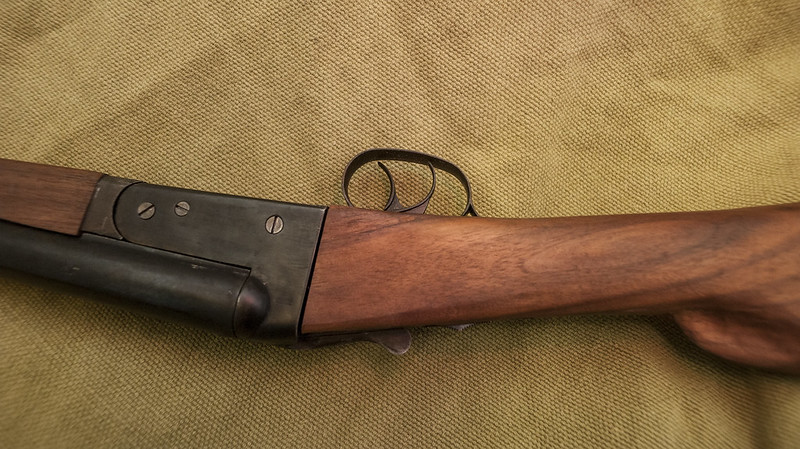
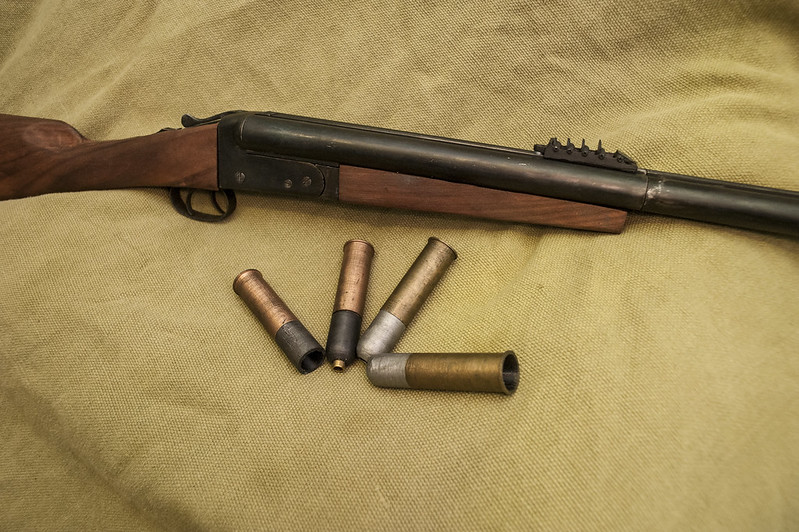
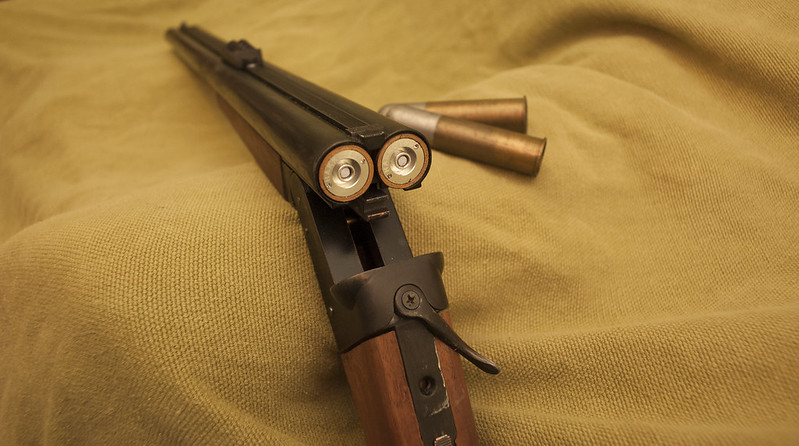
At long last, the Stopping Rifle is done. So anyone planning on bringing an elephant or tiger to a site near me had better watch out!

_DSC8332

This break action is very satisfying to carry broken over the arm and practice your swift mountings in the bedroom mirror.

_DSC8333

The buttplate, lightly oil finished. I’m yet to take a picture that does this justice, but that gorgeous selection of colours fading from one to another is very satisfying.

_DSC8337

The straight-wrist stock is a classic English side-by-side design. I’ll probably make other styles of stock in future versions.

_DSC8340

The shells are roughly based on .700 Nitro-Express. These are quite nice for extraction and pocketing, a nice handful in every pair.

_DSC8344

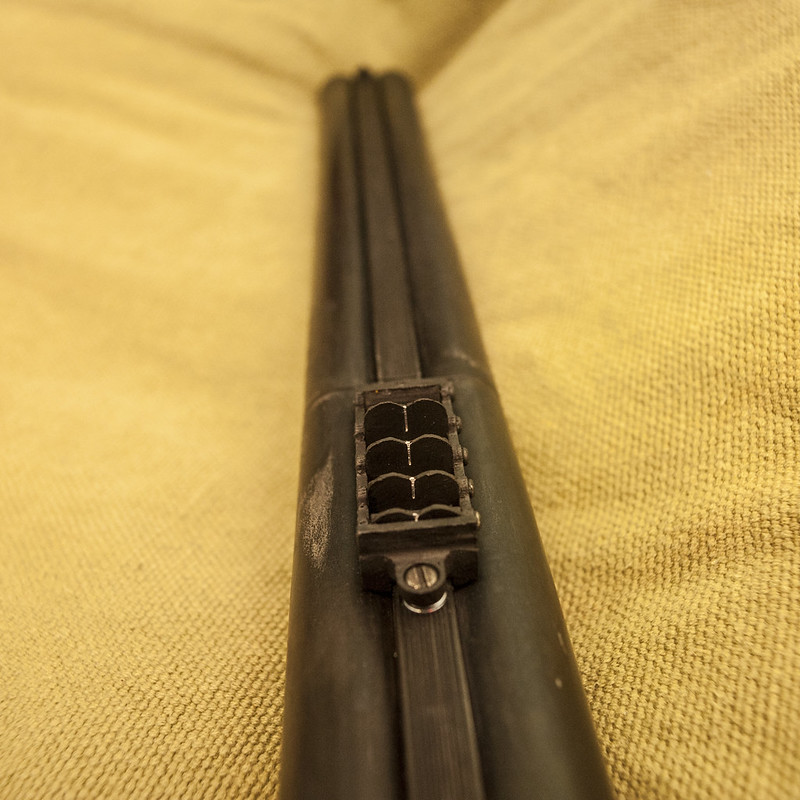
The Express sights deserve comment. Given the nature of express cartridges, heavy and slow, they have a somewhat rainbow trajectory. This style of sight allows the shooter to quickly select their range and fire without having to finely adjust a wheel or tangent.

_DSC8347

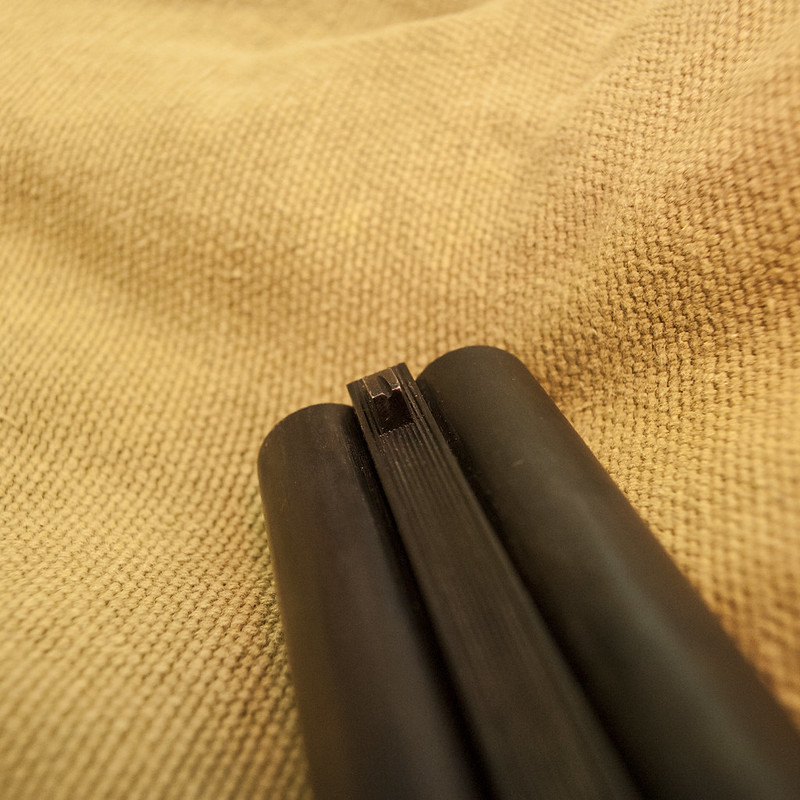
At the front, I’ve taken a leaf out of the French book of rifle design, a chunky front post (already there) for fast shooting and a finer notch in the middle for more precise shots, just in case I ever want to make them!

_DSC8348

Broken open, the shells look pretty good! APS cartridges are the heart of this system, though I may make some custom shells in the future.

_DSC8349

Finally, the etching. I felt that this was the sort of detail that really needed doing. At some point, I’d like to come back to this and redo it with more extravagant etchings, some scrollwork or an elephant or something. Maybe when I’ve had a bit more practice…

_DSC8350


If you are interested in this project you can see the rest of the project here. If you have an idea of your own, drop us a line on enquiries.vintageairsoft@gmail.com to discuss. ‘Like’ our Facebook page or follow the blog to get regular updates on projects and interesting videos and articles.


Don’t forget you can buy our smaller items via Etsy. Our larger items can be found here.

MAS 36: Introduction

Cold War, History, MAS 36, Rifles, Weapons, WWII

During the 1920s and 30s, the French Military undertook an extensive project of re-organising and updating their small arms. Although this seems rather contrary to the Treaty of Versailles, the French had a real hodge-podge of weapons after WWI.

RSC1917

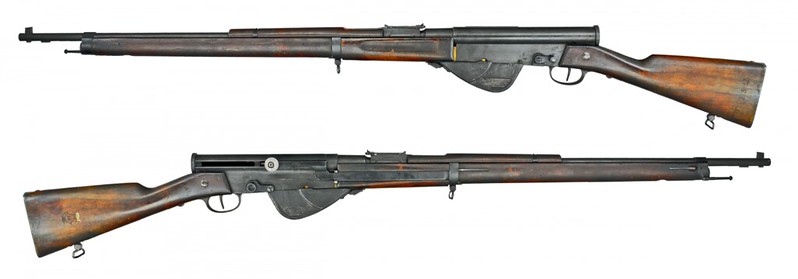
The Infantry rifle program had three tiers: Firstly to convert all of their existing rifles to a new cartridge 7.5mm rimless, a semi-auto rifle for frontline combat troops to follow up on the largely successful experience of the RSC1917 during the Great War and finally, when these developments took longer than expected, a new bolt-action in the new cartridge.

This bolt-action was designed to be a simple, cheap second line rifle to equip those not needing a semi-auto.

In spite of development starting in the 20s, the new rifle was adopted, as the name suggests, in 1936.

This rifle is an integral magazine, stripper clip fed rifle of epic simplicity, with 65 parts only. This was designed to have minimal user-operable and modifiable parts (what today may be called ‘soldier proof’), with most of these being the bolt and its components for cleaning.

The sights were armourer adjustable, with a simple elevation adjustment for range for use by the soldier. These were a rear mounted aperture and chunky front post protected by wings. Later versions had a fully encircled foresight.

sights

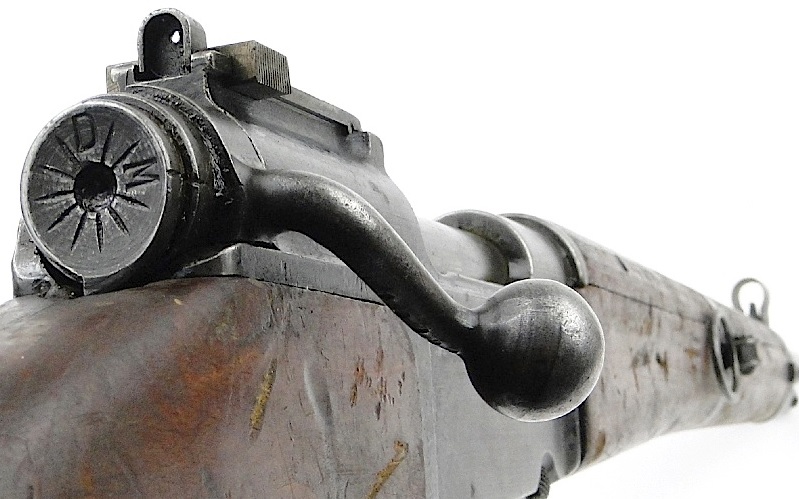
The bolt handle is bent forward  to be above the trigger for faster cycling, reminiscent of the Metford and Lee Speed series of rifles.

The locking lugs are at the back of the bolt, in the hope that they would be less prone to mud fouling and the bolt itself could be removed and stripped without tools.

An interesting feature carried over from previous French small arms: the MAS36 lacked a manual safety. The French taught soldiers to carry the rifle with an empty chamber, full magazine, so a manual safety was unnecessary.

MAS40

The MAS40, France’s intended frontline rifle.

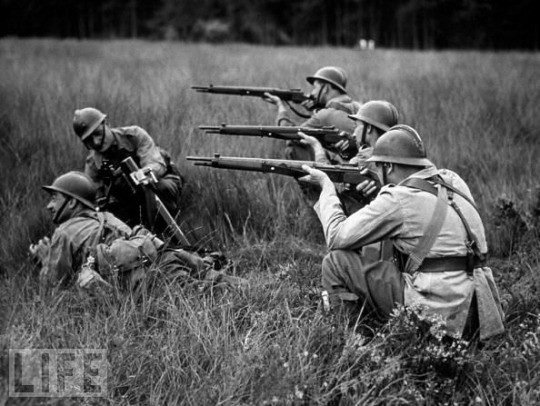
French rifle manufacture accelerated in the lead up to the German invasion in 1939/40, and a good number of MAS 36s were in solder’s hands by this time. The MAS 40 semi automatic being just ready for adoption but not for production, the MAS 36 was the most modern rifle available.

French WW2
With the capitulation of France, the MAS 36’s future looked bleak. The Vichy French kept theirs, Germany captured some and some made their way out of Dunkirk. A handful even ended up with the Resistance.

20416451cs

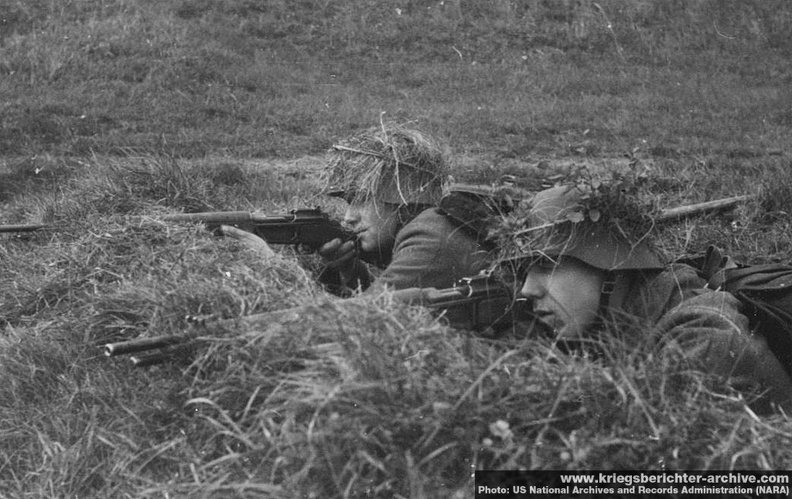
In use with Axis forces, here Latvian SS.

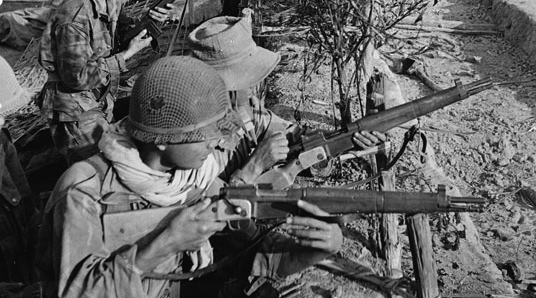
They saw service in some remaining French Colonies and some very limited use by the Germans. Postwar, the French picked up production again very quickly, producing the standard rifle, paratroop version as well as versions to fire French 50mm or 22mm NATO standard rifle grenades. The ’36 was sent out to Indochina from 1946 with French forces where it was used against Viet-Minh forces effectively until their war aid from the Soviets improved from bolt-actions to SKS self-loading rifles and AK47s. The ’36 was passed over to local forces and captured in reasonably large numbers by Viet-Minh.

Indochine-196

The paratroop version, shortened, lightened and with a folding aluminium buttstock.

The French were not finished with the rifle however. In Algeria and Morocco, it saw extensive use with French forces throughout the conflict even after the self loading MAS 49/56 started to be made available. It still took until the 1970s before this prewar rifle was relegated to its proper (and originally intended) place in the reserves.

49.56

A MAS49/56, the replacement

The penultimate version of the ’36 was developed by the Navy for line throwing, these were still in use during Desert Storm and are likely still in storage, with the last being a .22 conversion for training.

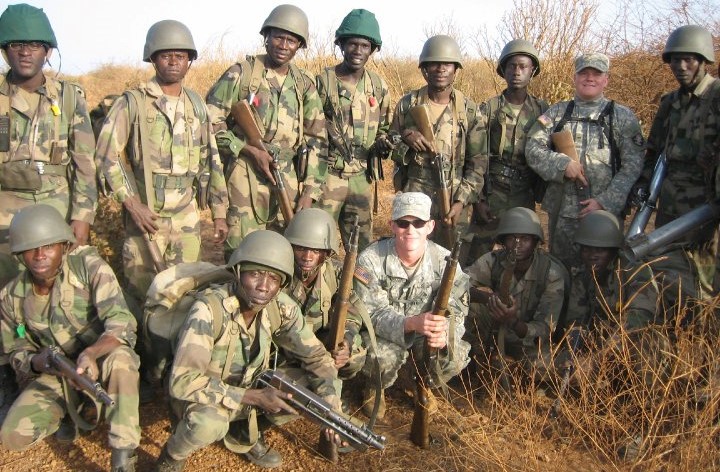
senegal2009

Senegalese soldiers with US Officer Cadets on exercise, 2009.

The MAS 36 ended up being distributed to and used by former French colonies in the main, with the highly unstable Central African Republic being the last to use it as a frontline combat rifle officially. It still serves in a number of countries as a second line or unofficial arm for militia units.


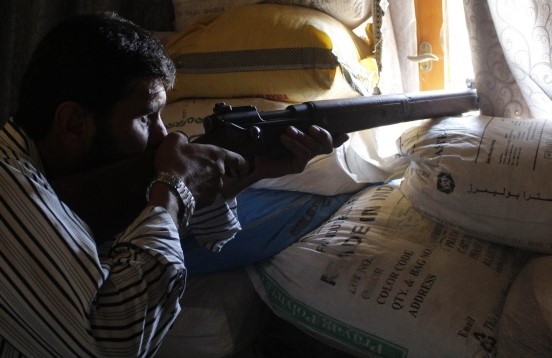
Or it did, until the Syrian Civil War. It was still in use as late as 2015 there with use only tapering off due to ammunition sourcing issues.
syria2013

I am of course working on an airsoft MAS-36. It is VSR based and will use the MkII magwell, 3D printed parts and original woodwork.

I would very much like to recommend these articles 1 and 2 if you want to read more about MAS 36 use.

You will be able to follow the build progress here as it is published.

If you are interested in this project or have an idea of your own, drop us a line on enquiries.vintageairsoft@gmail.com to discuss. ‘Like’ our Facebook page or follow the blog to get regular updates on projects and interesting videos and articles.

Don’t forget you can buy our smaller items via Etsy. Our larger items can be found here.

MAS 36: Build

Cold War, MAS 36, Rifles, Weapons, WWII

The first step was to fit the woodwork as far as possible. Due to the split woodwork I have to estimate it to some extent as I’ll have to fill the gap with a receiver.
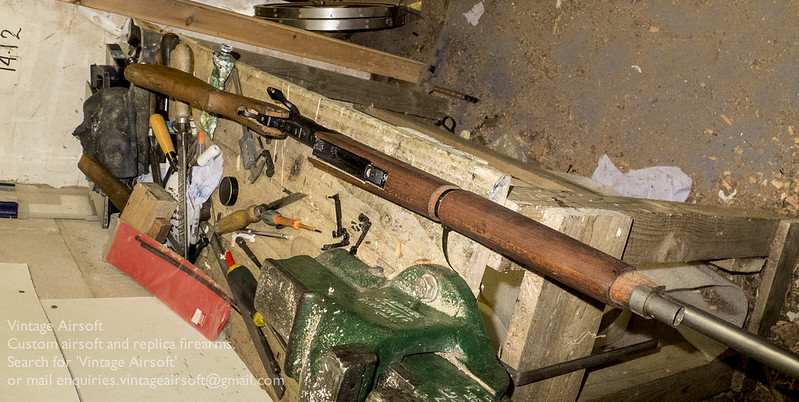
_DSF9975

I’m using the MkII magwell, a much easier design to fit than the previous version.
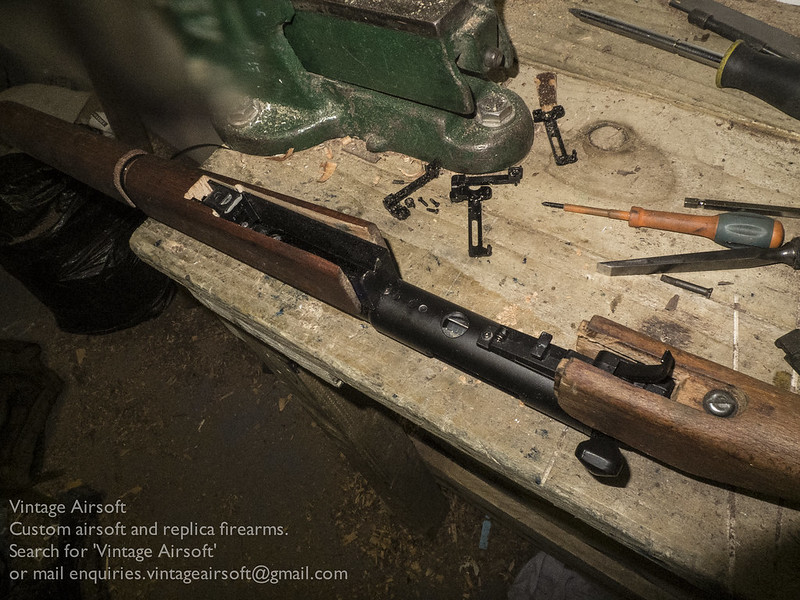
_DSF9977

Rough fitted, I can design the receiver.
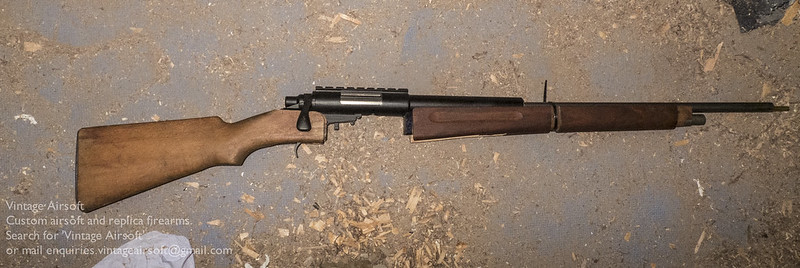
_DSF9978

Three days and many cups of tea later…
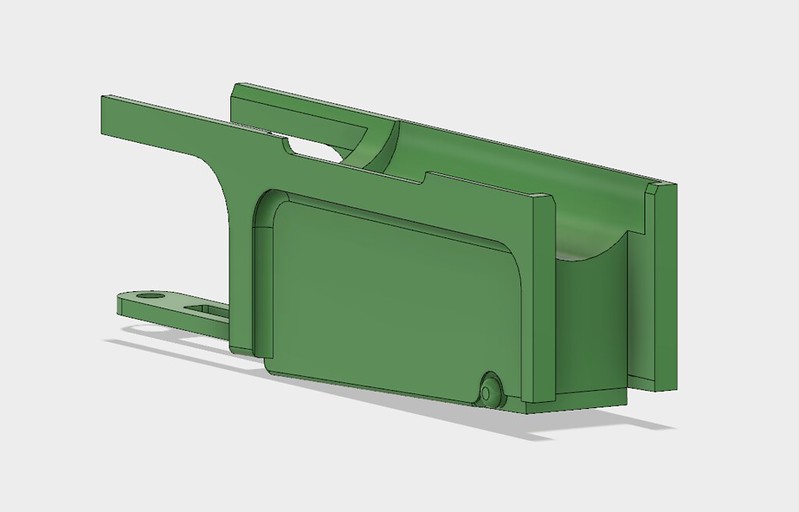
Screen Shot 2018-04-01 at 23.30.03

This has been done in two parts, the trigger guard tang is being done separately, which gives me a bit more flexibility if a dimension is out slightly.
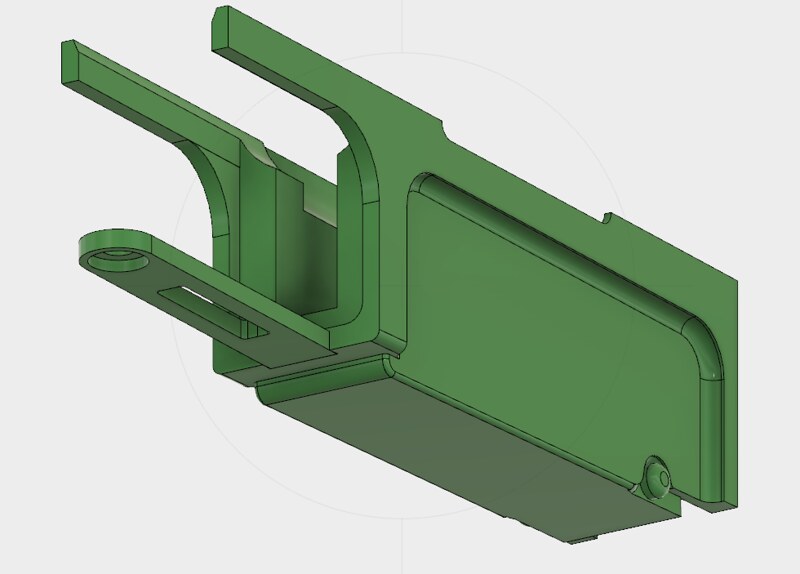
Screen Shot 2018-04-01 at 23.30.21

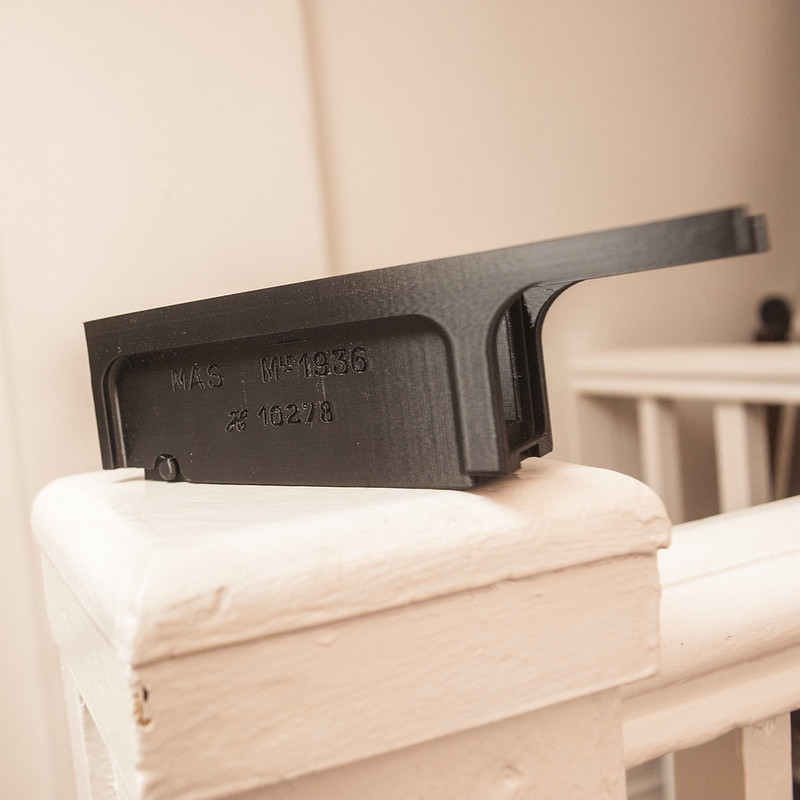
And on the other side, markings. I’ve really got into doing these lately, they are satisfying to reproduce and add an air of authenticity to the replica.
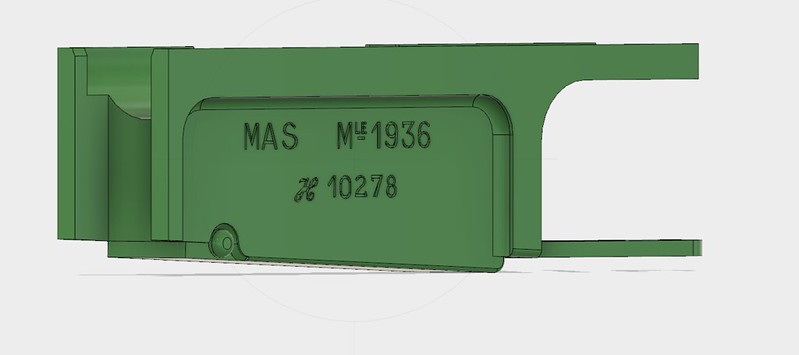
Screen Shot 2018-04-02 at 00.35.15

The rear sight is the early pattern one to go with the rest of the gun. Finding photographs of this variant to work from was very tricky, but the end result works just like the originals.
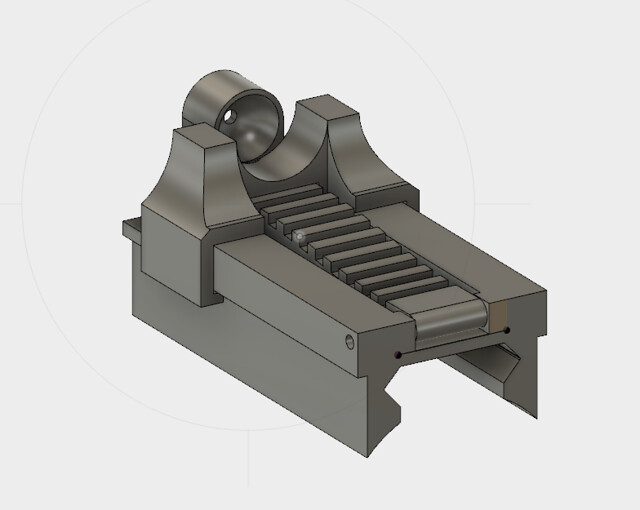
Screen Shot 2018-03-23 at 01.50.15

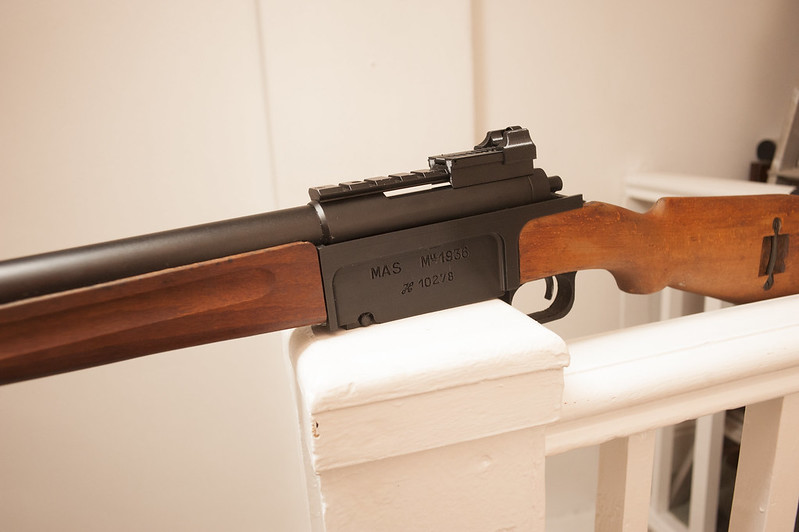
The receiver, now printed, arrives!

_DSC8324

And amazingly, this fits first time. As does the rear sight unit.
_DSC8326

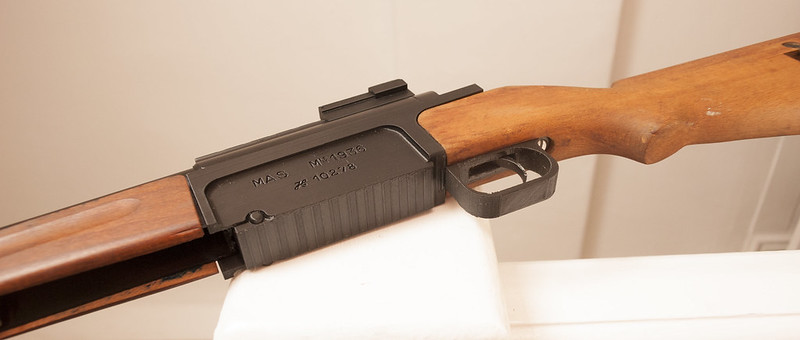
The underside looks a bit rough now, but a bit of filing down will smooth it off nicely.
_DSC8329

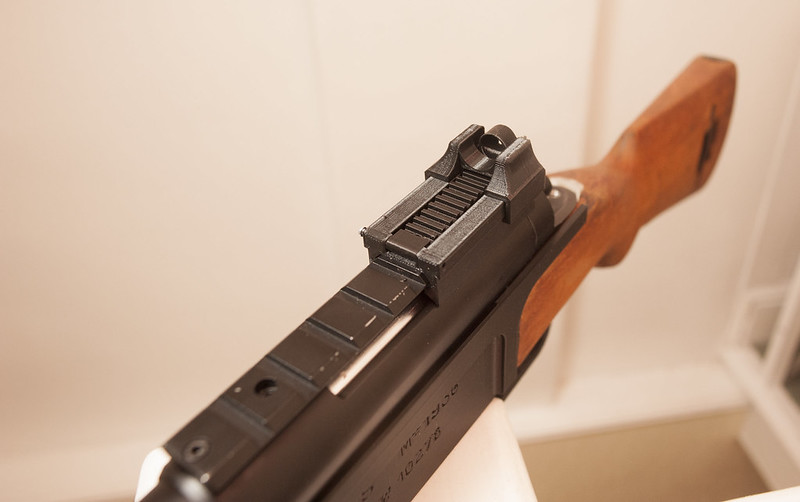
The rear sight is adjusted by pushing the leaf down and adjusting the slider forwards and back, a pretty unusual system.
_DSC8328

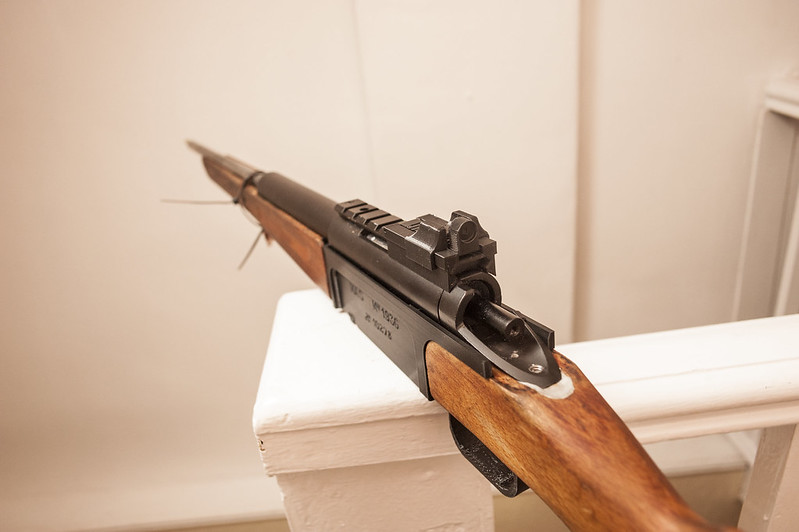
Once I’d cleaned out the peep hole it’s quite a nice light sight.
_DSC8330

The top hand guard was a bit of a puzzle. The wood of the original stock was a mystery, certainly not like anything I’ve worked on before, it has the appearance of beech but is much easier to work. I’ve decided it must be something tropical, given the French had Colonies in Africa and the Far East it’s not beyond the pail to think they may have shipped in some durable, rot-resistant timber that would be perfect for gunstocks.
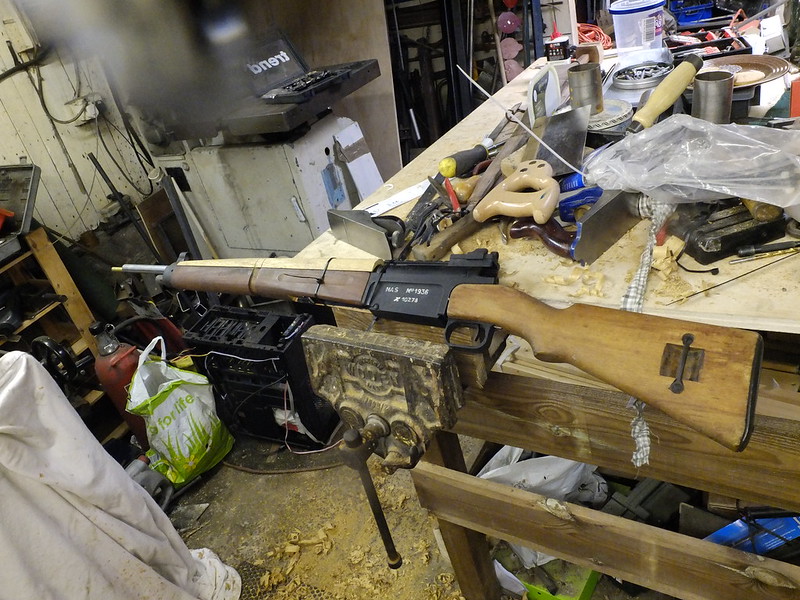
_DSF0004

The timber I have used is also a mystery wood. Given to me by a friend its previous life was as some window frames, but this use is much better. Nothing else matched the original wood quite as well in grain structure and once stained or oiled to match it should blend in nicely.
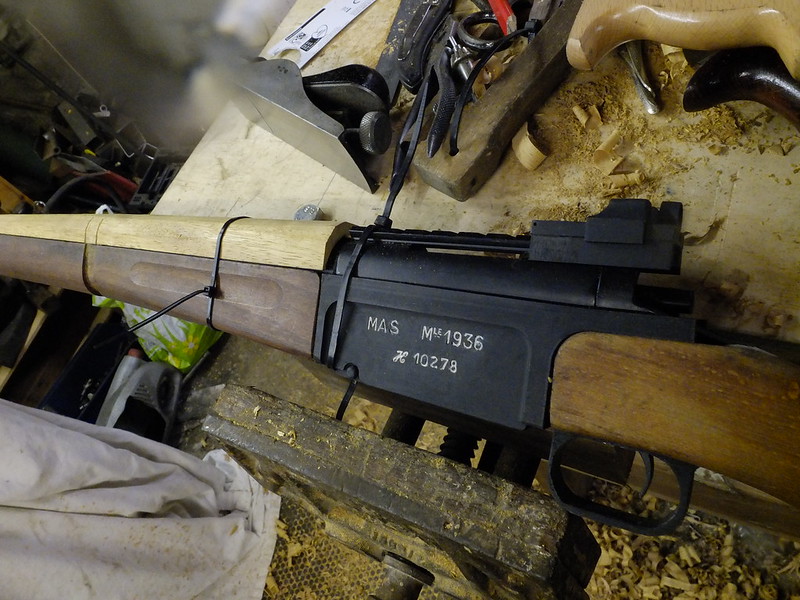
_DSF0005

Unfortunately due to having to house the VSR I couldn’t be completely true to the original shape of the rifle. Once the middle band is in position it should break up that slight slope quite nicely though.
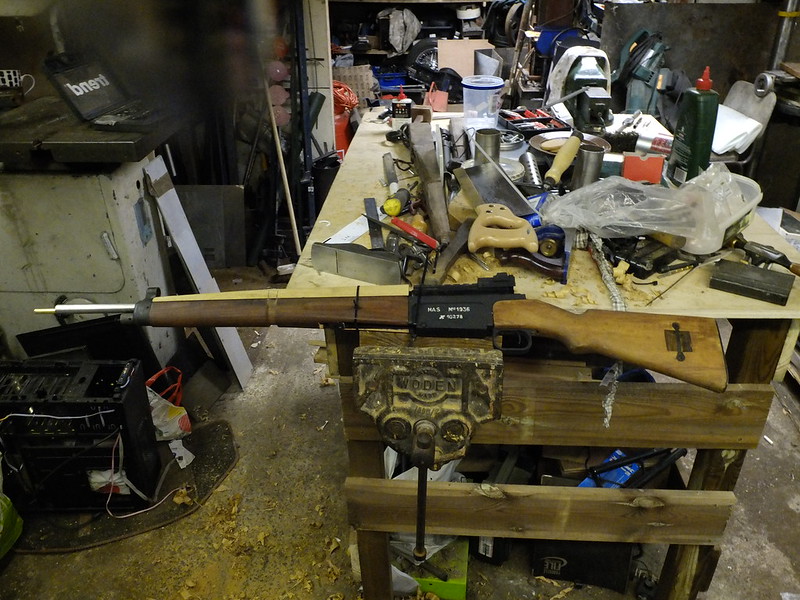
_DSF0007

And the nose cap or, as the French call it: Mouthpiece. This is the late type as the early type (when they are available) are about £50 at the time of writing. Understandable as they were only used on the first two/three batches of guns or so compared to the six or seven runs that came later. I’ll be modifying it to look correct for this early model.
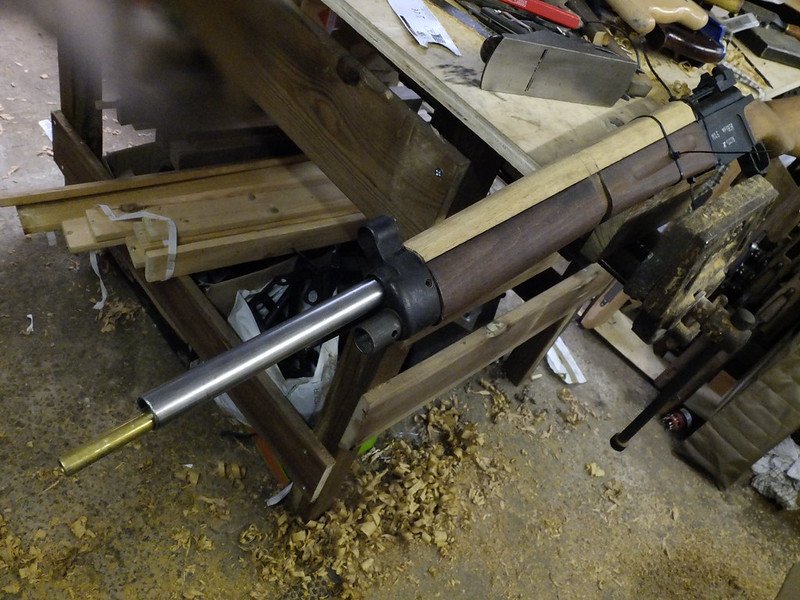
_DSF0006

The next step was the bolt handle, as I was making a batch of Enfield bolts already I added this to the parts list. The main shank was turned on the lathe, left just a smidgen longer than an Enfield bolt. The haft is 8mm steel bar bent to the correct shape.
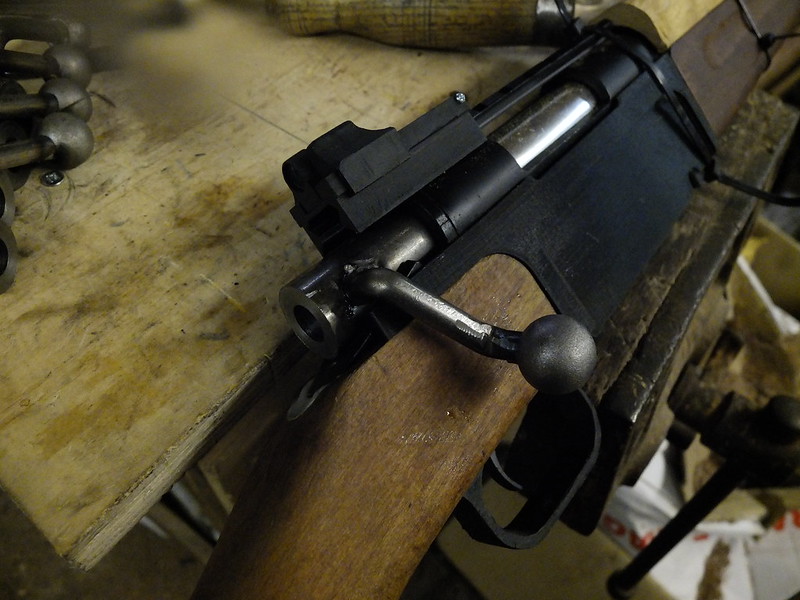
_DSF0030

This was a really tricky one to do, most bent bolt handles  have one bend in them and are then straight down or slanted back. This one is not only slanted forward, but has a kink outwards from the rifle as well, this with bolt operating speed in mind as the rifle was designed at a time where the replacement of bolt actions with self-loading rifles was imminent.
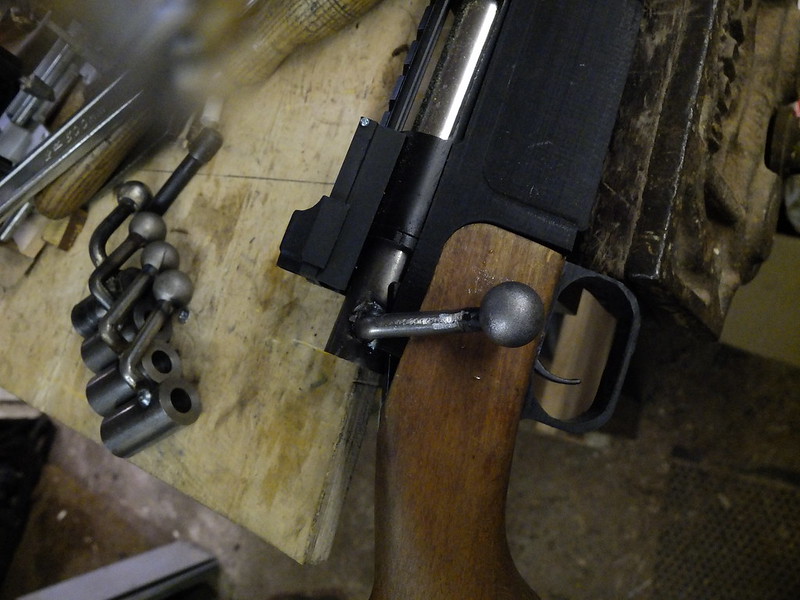
_DSF0031

From this angle you can see the outwards kink. I feel I’ve got this pretty darn close to the original though I say so myself.
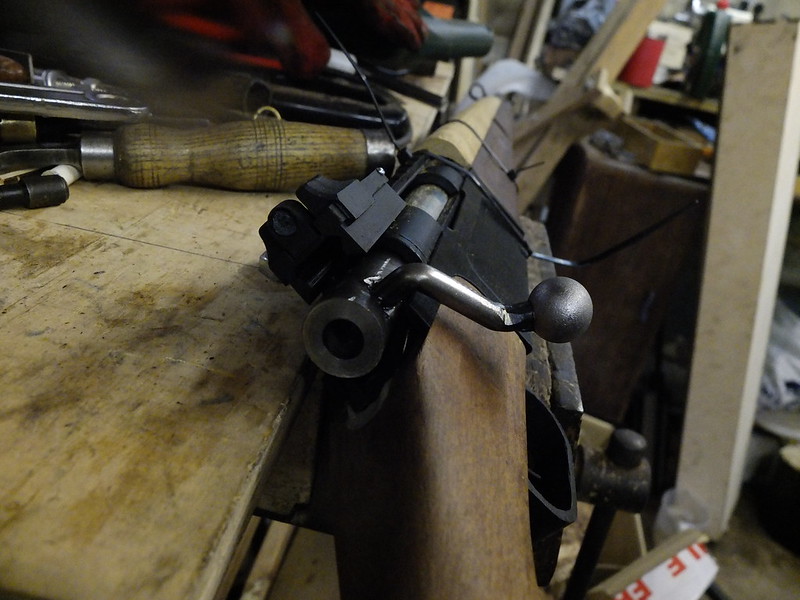
_DSF0032

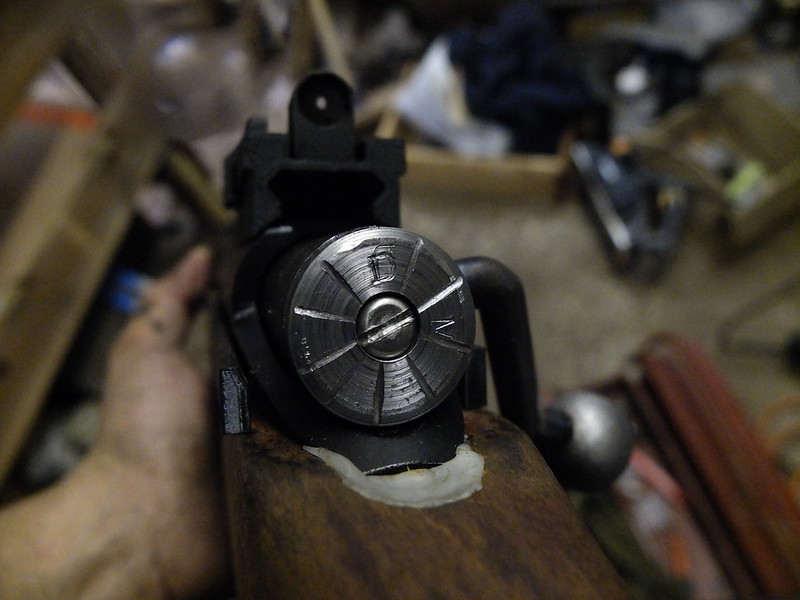
The back cap made, I’m going to have to add some detailing to this to make it look right.
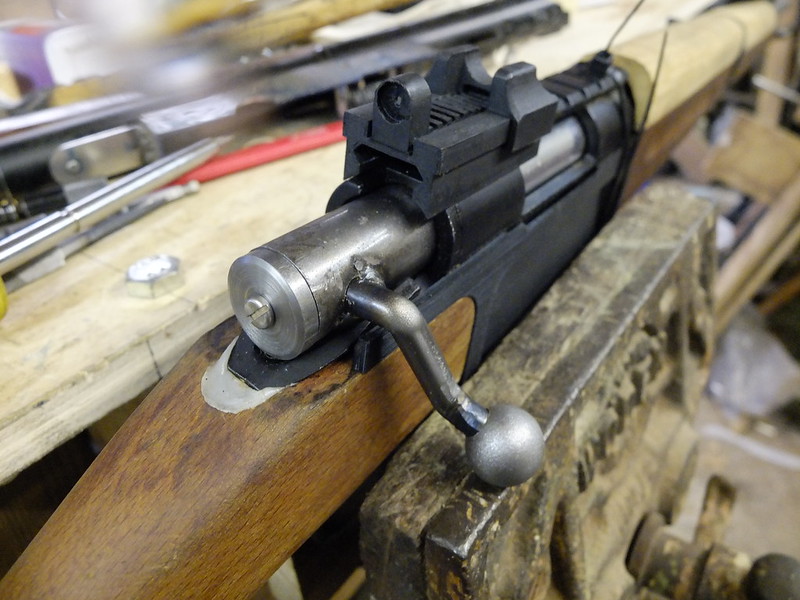
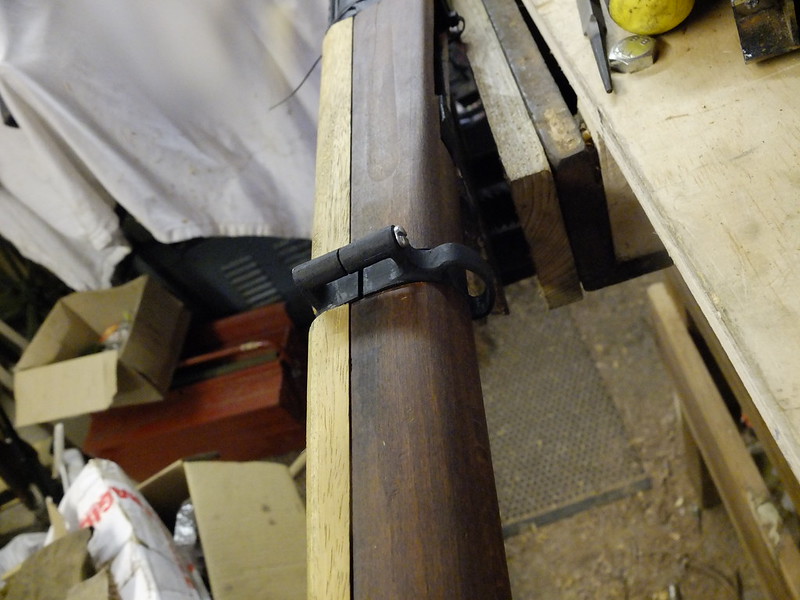
_DSF0036

The new middle band/sling swivel arrangement. This had to be 3D printed as there were absolutely none to be found.
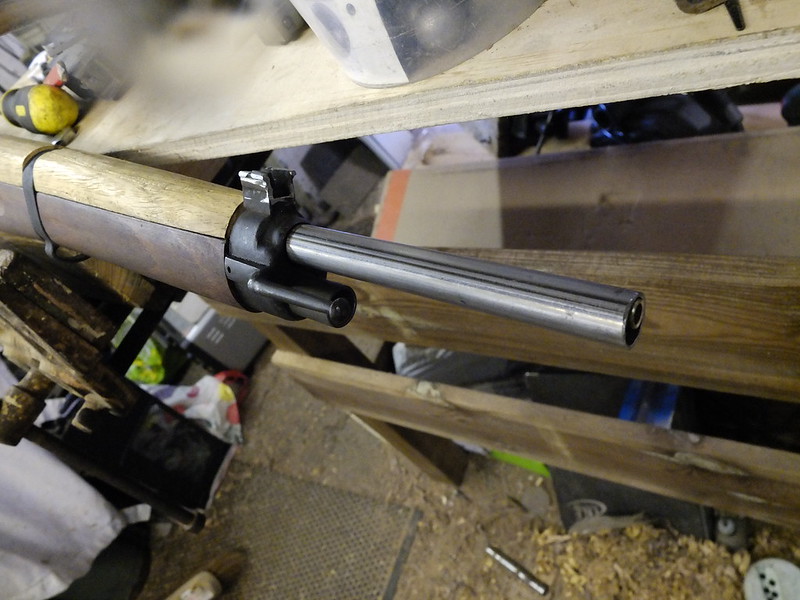
_DSF0035

The mouthpiece and front sight guard has finally been modified. I cut the top of the hood off, straightened the steel and added the lips to the wings with the MIG welder.
_DSF0034

The back cap details added, I put the straight lines in with the hacksaw, the letters with stamps. If I did this again I’d probably soften the metal before doing these as it turned out to be a little harder than expected resulting in stampings that weren’t as deep as I’d like.
_DSF0046

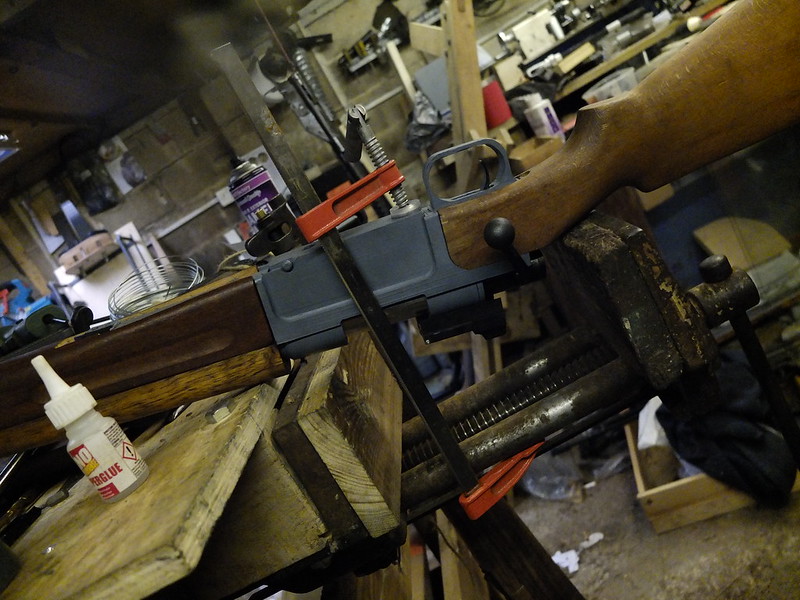
Fitting the trigger guard permanently in place. You may also notice I’ve done the first paint coat on the receiver, oil finished the bolt and added a finish to the top guard.
_DSF0060


This is pretty much the job done. There are a few bits of detailing and last touches to complete the rifle but I’ll let you enjoy the overall effect of the finished item.


If you want to see the finished item, you can see it here when it’s posted.

Don’t forget you can buy many of our smaller items via Etsy. Our larger items can be found here

If you have an idea of your own, drop us a line on enquiries.vintageairsoft@gmail.com to discuss. ‘Like’ our Facebook page or follow the blog to get regular updates on projects and interesting videos and articles.