New pattern K98k and K98k scoped

Add-on kits, Complete builds, K98k, Products, Rifles, Weapons, WWII

Most of the previous model of VSR K98k has been carried over to the new design, the only major change is the magazine well.

_DSC6273

But I never pass up the opportunity to share more pictures of pretty pewsticks.

_DSC6274


_DSC6275

The rear sight unit and, concealed beneath the leaf, the hop adjustment grub screw for the TDC.

_DSC6276

The 3D printed foresight block and oil-finished barrel.

_DSC6277

The new VSR magazine well (MkII, printed) is far neater and more intuitive to use than its predecessor.

_DSC6278

Sniper Variant

Loosely based on the ZF39 mounted rifles, this was an inexpensive workaround to buying and fitting an original or repro scope and mounting system. While that is something I would like to do, this is good for the player who wants to snipe in style on a bit more of a budget.

_DSC6283

The sight hood is included with the standard K98ks as well, but suits the scoped rifles particularly well.

_DSC6286

The scope mounts have been modified to look slightly less modern. Square edges have been rounded off, hex screws replaced with oil-finished slotted screws and the chunky thumbscrew replaced with nuts.

_DSC6287

The buttplate has been chequered for extra grip. This could be neater, unfortunately the buttplate curved across its face as well as down the length which I didn’t expect and this threw me off.

_DSC6290

Several of the K98k stocks I have received recently have had shorter-than standard hand guards. In order to ensure a secure fit I have made a polymorph hand guard retaining piece.

_DSC6293

And last but not least, a custom reticle for the scope. You can’t have a German Sniper rifle without a German Post. This is a prototype, I’m looking to get some laser cut for a sharper profile.

_DSC6291

If you are interested in the history of the K98k, you can check out the introduction article here, or see the whole build process here.

If you like this project or have an idea of your own, drop us a line on enquiries.vintageairsoft@gmail.com to discuss. ‘Like’ our Facebook page or follow the blog to get regular updates on projects and interesting videos and articles.

Don’t forget you can buy many of our complete products via The website.

Sten Suppressor MkII

Cold War, Complete builds, Sten, Sten Suppressor, Sub Machine-guns, Suppressed, Weapons, WWII

I realised the other day that I hadn’t updated my Sten Suppressor pictures in about two years, in spite of making this much nicer model for some time.

_DSC8351

This replica can be used correctly on the MkII and Mk5 Stens, the latter format would make it a Mk6 if you were so inclined.

_DSC8353

_DSC8244

I’m using a thicker canvas for the cover than before and a thick cotton cord, ready laced up in the correct format (straight laced, like British Army boots).

_DSC8245

A securing screw locks it into place on the barrel.

_DSC8246

The front cap is made from cast rubber.

_DSC8169


If you want a suppressor of your own, you can buy it here.

Don’t forget you can buy many of our smaller items via Etsy. Our larger items can be found here


If you have an idea of your own, drop us a line on enquiries.vintageairsoft@gmail.com to discuss. ‘Like’ our Facebook page or follow the blog to get regular updates on projects and interesting videos and articles.

Enfield No.4: Introduction

Cold War, History, Lee-Enfield, No. 4 L-E, Rifles, Weapons, WWII

The British had been looking at replacing the Short, Magazine Lee-Enfield No.1 MkIII for some time. In fact from the adoption of the Lee-Metford, the general design had been replaced in general service at least twice and with dozens of minor modifications to boot.

Lee-Enfield_Mk_III_(No_1_Mk_3)_-_AM.032056

Trials had even taken place to find its complete replacement before 1914, though the outbreak of the Great War (along with some problems with the .276 Enfield cartridge) prevented the Pattern 1913 Rifle from being adopted and issued. For those not familiar with the P13, it was very much a departure from the Lee design.

DJC85-S-F1W-L

  • It used a Mauser type bolt, front locking rather than rear locking (greater potential for accuracy)
  • It had a rear-mounted aperture sight, rather than a notch mounted halfway down the barrel. This longer sight radius improved accuracy potential and the aperture is a much more natural sight for acquiring mobile targets
  • A 5-round built-in magazine well rather than 10 round detachable. Given the Lee design was put up against Mausers of the 5 round built in magazine type during the Boer Wars and been found drastically wanting it clearly wasn’t seen as much of a disadvantage

These concepts did see some use in the form of the P14 rifle which was almost a .303 version of the P13 and later in the M1917, a version produced by the US in .30-06.

After the end of the Great War, once armies had begun their conversion back to a peacetime footing it was clear that there would be more SMLEs and P14 rifles than they had any use for and the idea of replacing such a plentiful inventory with yet another rifle built from scratch did not hold much water with the Brass. Doing so would also require political motivation and this was lacking in a war-weary country, member of the disarmament-prone League of Nations.

Lee-Enfield-Mk.V-sides


There were some attempts to bring in the valuable aperture sight, with the added benefit of cheaper manufacturing (the SMLE is an expensive design to produce), though the No.1 MkV of the 1920s proved to actually be more expensive than its predecessor with the rear mounted aperture being quite fragile, though the No.1 MkVI of the 1930s is the predecessor of the No.4, even though it wasn’t adopted (well, sort-of).

As a result, Great Britain and the Empire began WWII with exactly the same rifle as they began WWI. Not an alteration, updated or refined version. Exactly the same. They had even put the magazine cutoff back in place to spite that bit of efficiency saving made during the last war.

However as before, the rifle was still expensive to manufacture and a replacement had to be found. While there were some reserves of SMLEs and P14s (and the US shipping over their unloved M1917s for use with the Home Guard) after the fall of France, Britain needed lots of rifles, fast.


Lee-Enfield_No_4_Mk_I_(1943)_-_AM.032027

The No.4 MkI was the answer. Adopted in 1941, this design ditched a lot of unnecessary machining on the left side of the receiver and charger bridge and had a simpler stock design. The barrel was heavier and free-floating, meaning greater potential accuracy and last but not least: the aperture sight was mounted on the receiver and was here to stay.

Savage Enfield No. 4 Mk I


Further modifications were made during the war for efficiency resulting in the MkI* and postwar the No.4 Mk2 (note the change from Roman Numerals to Arabic in 1944) made improvements to the trigger by attaching it to the action itself rather than suspending it from the trigger guard. A number of MkIs and MkI*s were modernised in this way and the buttplates swapped back to brass after the war efficiency saving of zinc alloy models.


The No.4 didn’t make it to the Far East during the War. India and Australia just kept making the SMLE and these were used throughout the campaigns against the Japanese. Postwar No.4s were used in Korea, but by the Malayan Emergency in the late 50s British soldiers were at worst carrying the No.5 Mk1 and much more likely to be seen with the SLR L1A1.


This was a long introduction, but the Rifle No.4 was a long time in coming and it seemed a shame to not cover its long and rich design history. If you want to see the very sexy No.1 MkVI trials rifles you can see them here at Forgotten Weapons.


I am currently building a No.4 MkI from a VSR for a customer, you will be able to follow the build progress here as it is published.

If you are interested in this project or have an idea of your own, drop us a line on enquiries.vintageairsoft@gmail.com to discuss. ‘Like’ our Facebook page or follow the blog to get regular updates on projects and interesting videos and articles.


Don’t forget you can buy our smaller items via Etsy. Our larger items can be found here.

Sten MkIV: Build

Custom builds, Sten, Sten MkIV, Sub Machine-guns, Weapons, WWII

The first major hurdle for me was that my Sten was missing the massive chunk of aluminium that houses the barrel and hop up unit. I measured up one from another gun and created a 3D model to be printed. I added a section to the front for the flash hider which is a separate piece. Running through this and the other part is some 16mm steel tube for strength.

_DSC7456

The stock is made from pieces of laser cut steel. For the very sharp bends I made cuts with the angle grinder, made the folds and welded them up.

25286946_10213410104599833_1018159191_n

The locking bar is kept in place with two screws. These ride in slots that stop it from travelling too far back or forwards.

25346365_10213410104799838_380360761_o

The pistol grip slotted into place, welded on the bottom which was then ground flat to allow the stock to pivot. The trigger guard is huge, the bend was made with wooden formers and the shape was checked against my paper template.

25344367_10213410107479905_1901161622_o

A close-up of the locking system. This is a pretty solid system, with only the wobble you would expect from a typical Sten stock.

25397994_10213410106679885_612810655_o

Once the stock unit was welded onto the backplate, this really started to take shape. Shown below with the stock stowed.

25353157_10213409215617609_250685353_o

And the stock deployed. So far it’s more comfortable than it looks, the next step is to make the wooden grips.

_DSC7579

These are made from some leftover walnut I had sitting around. I printed a paper template, cut them out and drilled the screw holes. Then fine fitting and shaping was done with files and the electric hand sander.

_DSC7590

Then it was time to strip everything and finish her up.

_DSC7592

The grips got a quick soaking with some dark red woodstain, followed by hardwax oil.

_DSC7594

All that’s left now is reassembly, fitting a foresight and doing some internal work on the Sten. I’ve swapped the barrel out already for a shorter one but the trigger needs some TLC.

You can see the complete item here.

If you are interested in this project or have an idea of your own, drop us a line on enquiries.vintageairsoft@gmail.com to discuss. ‘Like’ our Facebook page or follow the blog to get regular updates on projects and interesting videos and articles. 

Don’t forget you can buy our smaller items via Etsy. Our larger items can be found here.

Sten MkIV: Introduction

Sten MkIV, Sub Machine-guns, Weapons, WWII

The Sten MkIV has very little written on it, so this introduction will be rather short.

11. Mk 4 sn 3_Web

It was an experimental design to make Britain’s Sub machine gun more compact. This has several possible reasons, but the most likely seeming to my eye (lacking access to original documents) is the Airborne theory. A more compact sub-machine gun than the standard Sten MkII and MkII would make sense for airborne troops and this definitely meets that requirement.

This was ultimately met by the Mk5, which could have its buttstock removed and replaced with a blank backplate.

There were two versions of the MkIV, the ‘A’ which had a hand guard style trigger guard (some say to accommodate arctic mittens) and the ‘B’ which has the trigger and pistol grip advanced to halfway down the receiver. This was apparently an improvement but not enough it would seem!

fjktqa

The reason the MkIV was rejected during trials was that it was ‘uncomfortable to fire’. This does seem a little bit ironic seeing it was designed to replace the ergonomics-violating MkII and MkIIIs, but judging by what was eventually adopted the general effort was towards a significantly better gun comfort wise rather than a slight improvement.


The other possibility is that, being much smaller in the body than a ‘normal’ Sten (especially in the barrel) the recoil, muzzle blast or ejection may have been pretty bad. It’s pretty much impossible to say without access to trials reports or getting to fire the (so far as I can tell) only remaining piece at the Royal Armouries. I suspect it will grow legs and walk out before I am allowed to do that however!

large_DI_2012_0648

I’ll be making a MkIVa replica based on the example in the Royal Armouries, as a bit of  change of scene from the bolt actions and machine guns I’ve been building a lot lately!

You can see the build and completed item here. You can see more Sten projects here.

If you are interested in this project or have an idea of your own, drop us a line on enquiries.vintageairsoft@gmail.com to discuss. ‘Like’ our Facebook page or follow the blog to get regular updates on projects and interesting videos and articles. 

Don’t forget you can buy our smaller items via Etsy. Our larger items can be found here.

P.S.: Bonus photo of a suppressed MkIVa apparently in the NFC, Leeds.

Suppressed Mk 4A(S)Sten - National Firearms Centre, Leeds, UK (Photo by Frank Iannamico)

State of the Vintage Airsoft 2017 1 of 2

Complete builds, Custom builds

So, the New Year has come round once again. It’s time to look back at the last year’s work and forward to what’s coming in 2018!


2017’s top projects

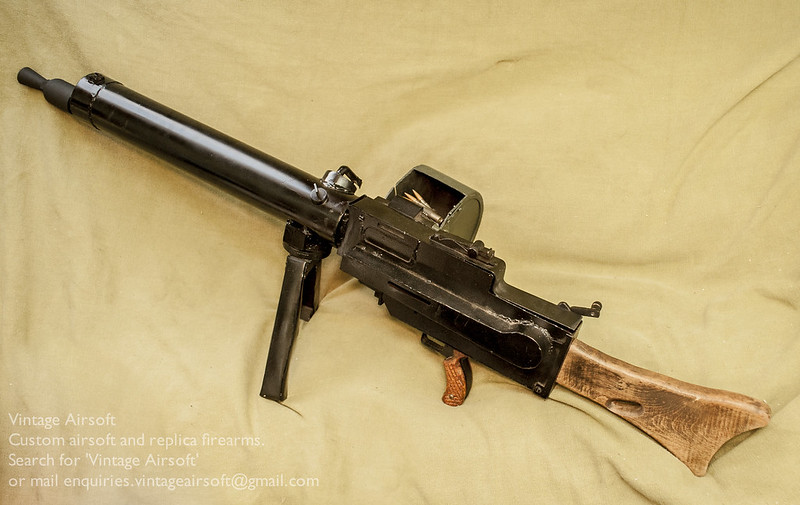
The MG08/15 is FINALLY FINISHED! Hurrah! This thing has been the bane of my life for three years. If something could go wrong, it did go wrong. Several times.

_DSC7491

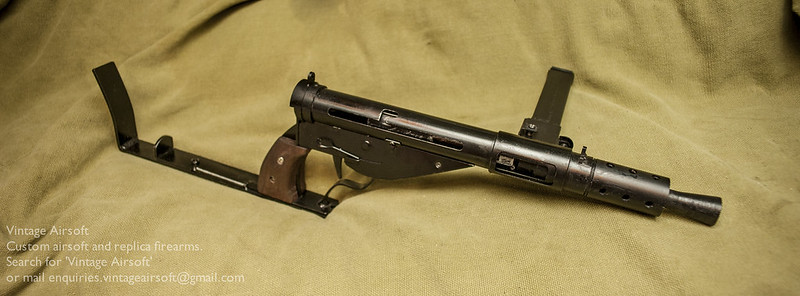
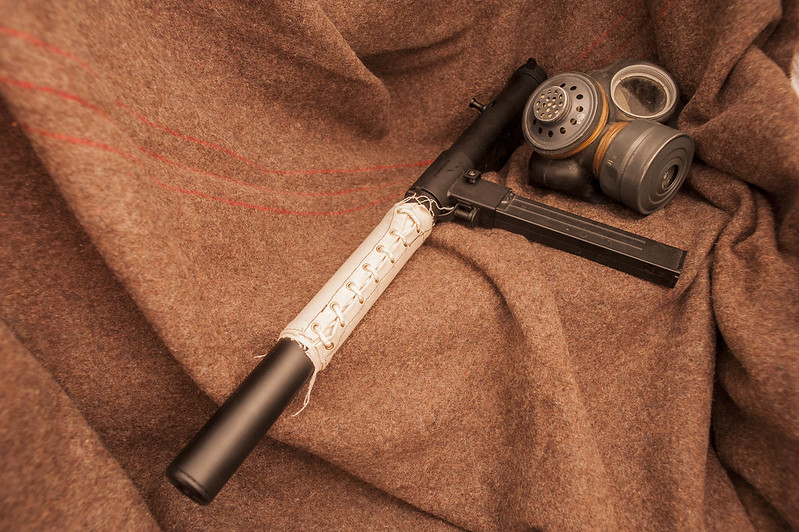
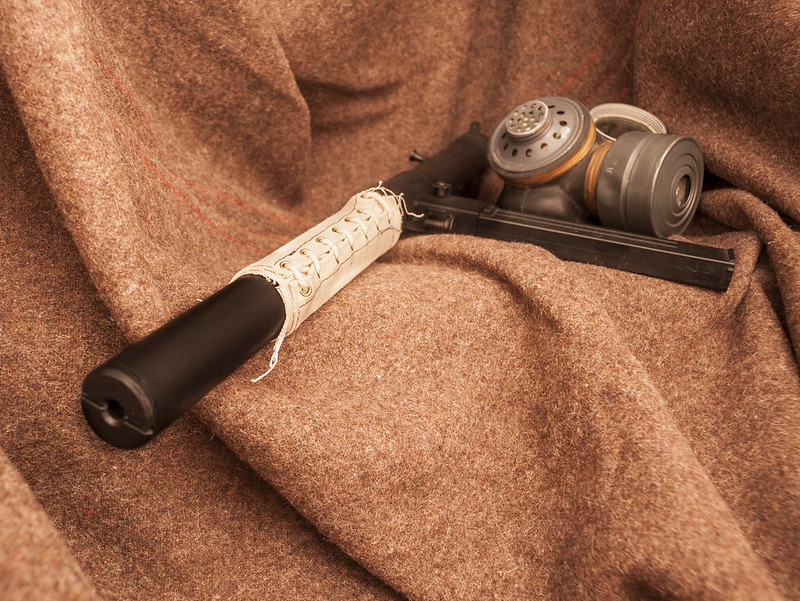
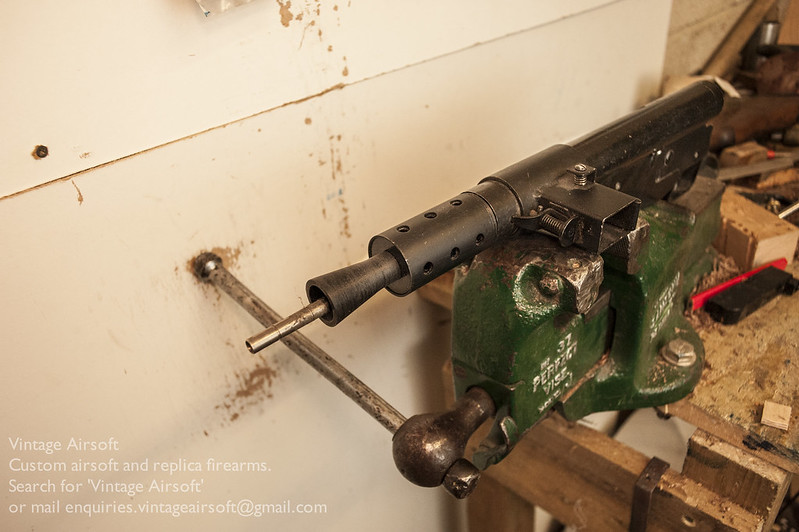
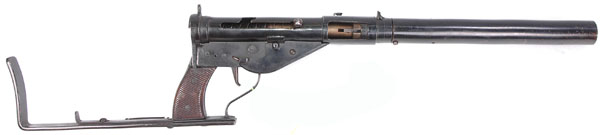
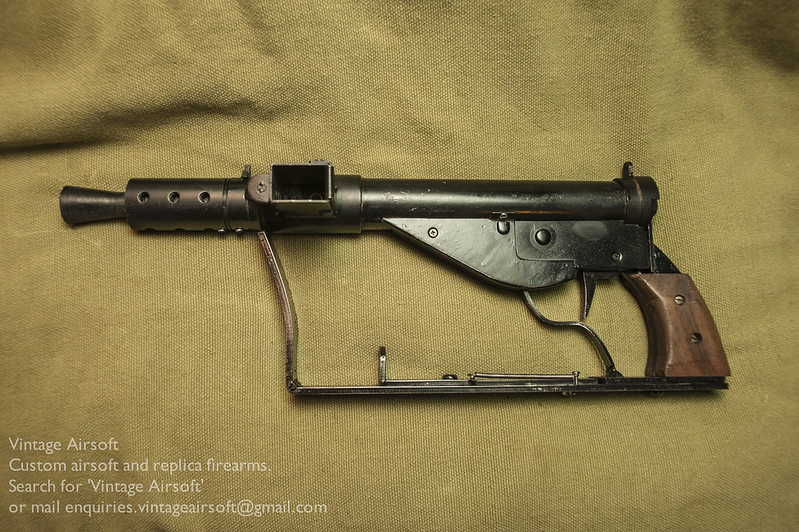
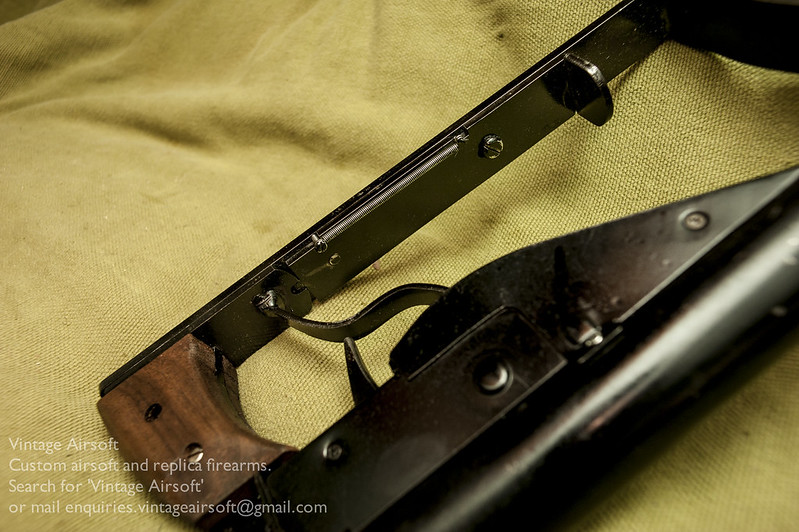
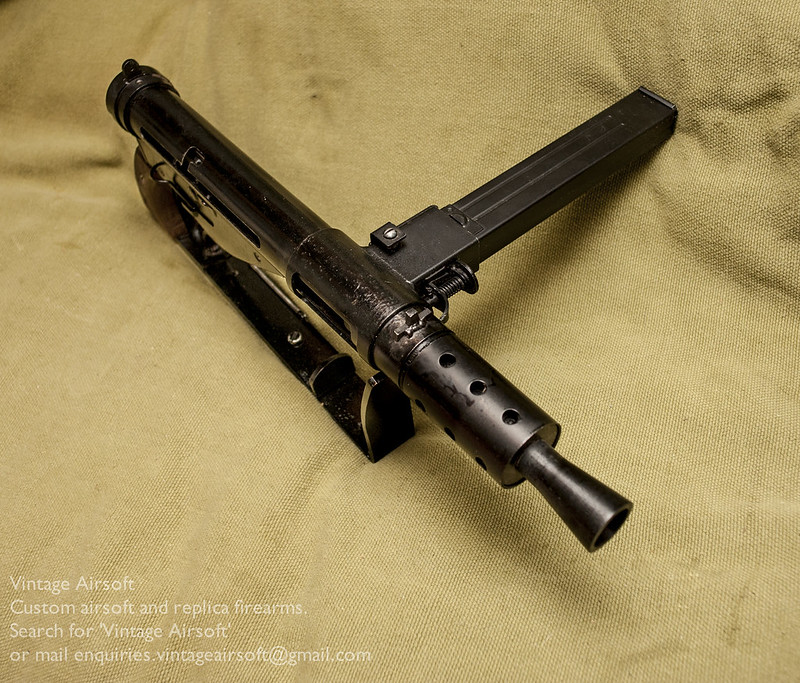
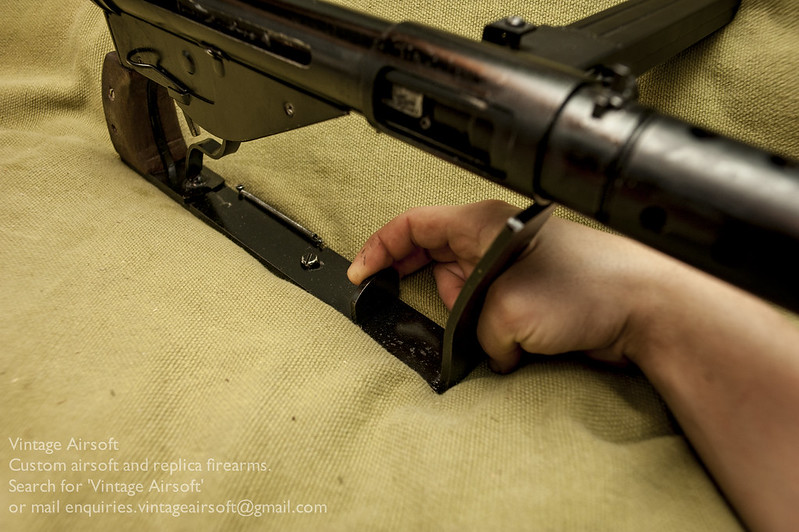
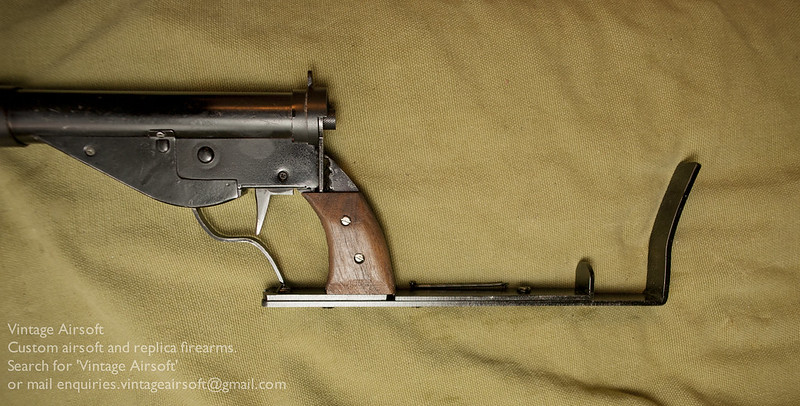
The Sten MkIV. I’ve not shared the build for this yet as it was a quick side project. This is very fun to use and the ability to make it compact very quickly is a really nice feature.

_DSC7844

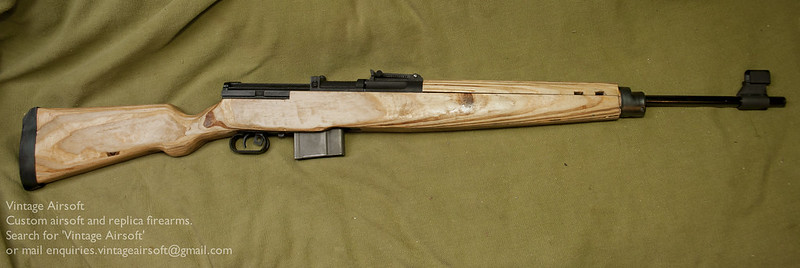
The G43 (MkII version!). I know there is some excitement around this, although it’s not a world first by any means, I am very pleased with the end result.

_DSC7821

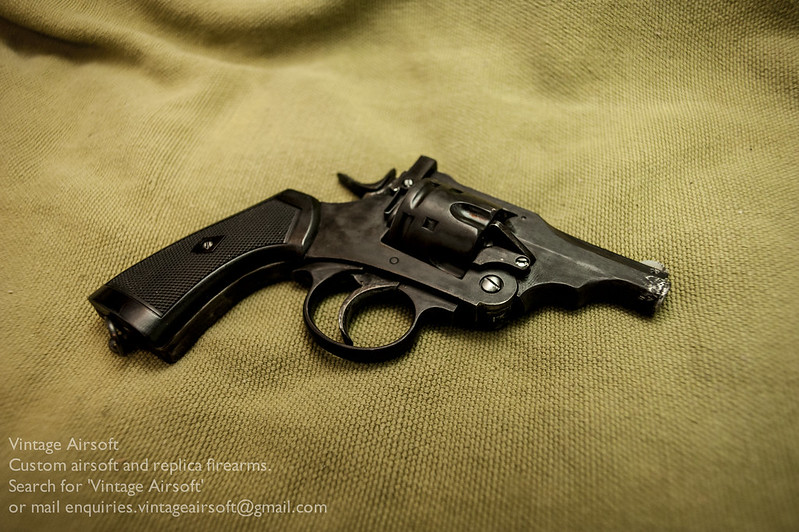
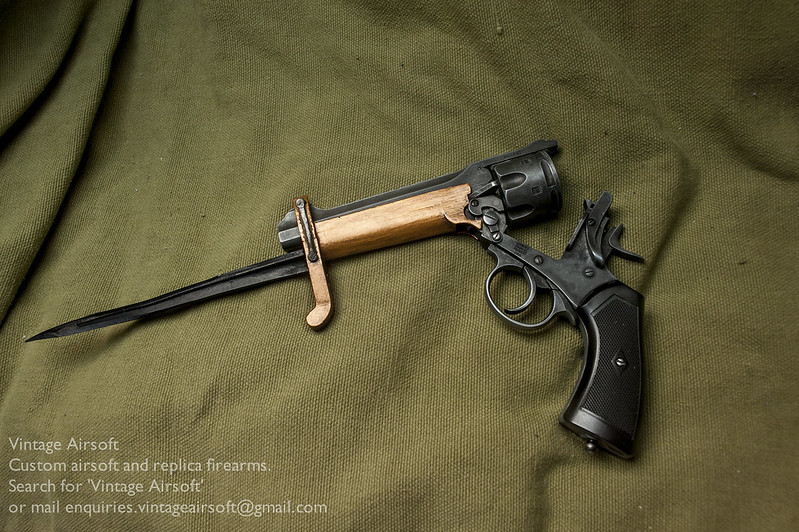
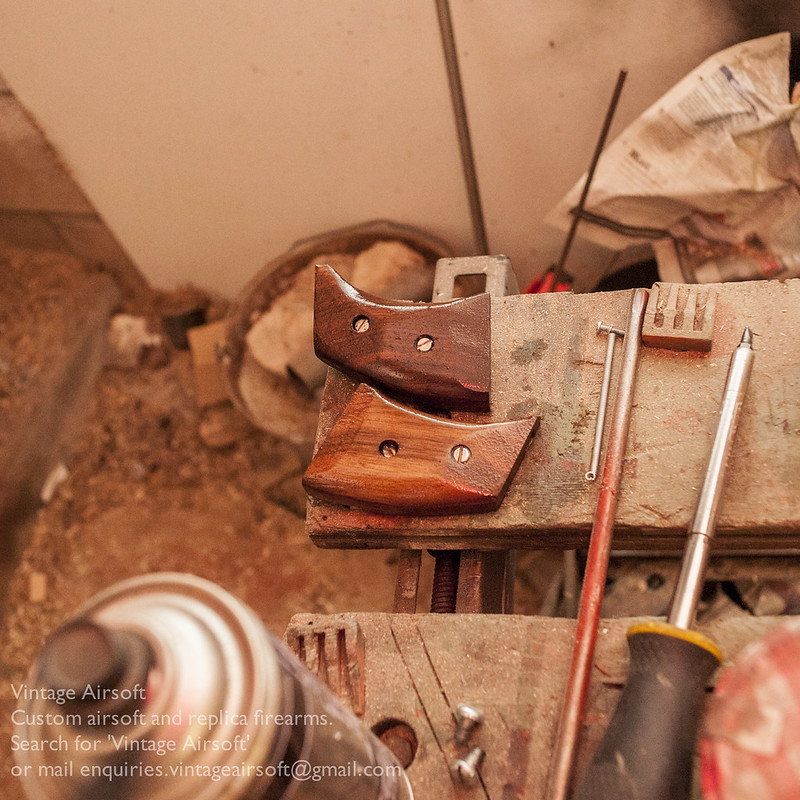
The Webley snubnose was another side project, starting out life as a Well Webley this is now a useful little sidearm to tuck into my battledress for emergencies!

_DSC7570

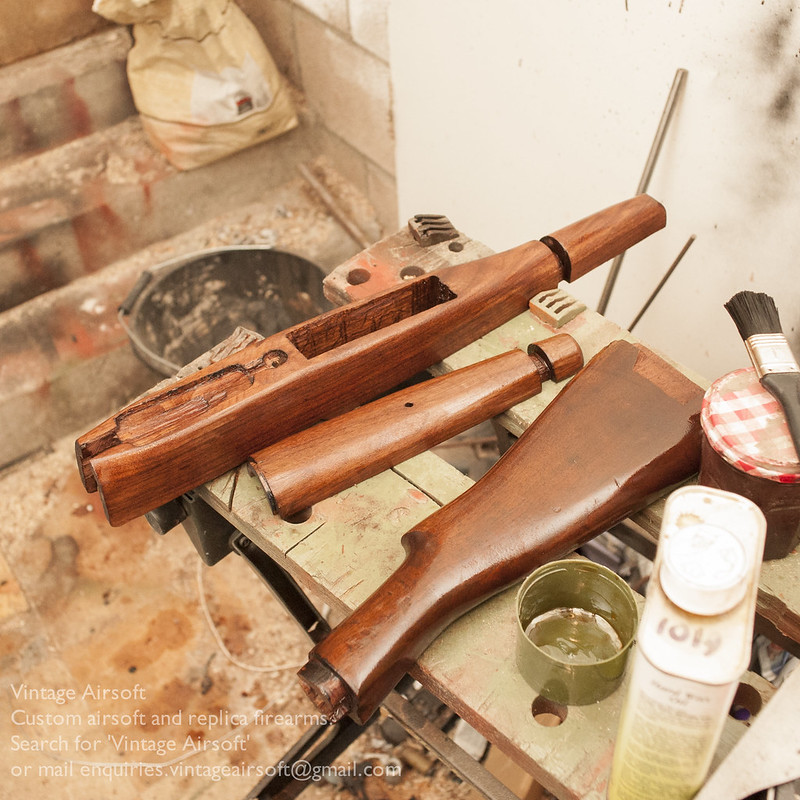
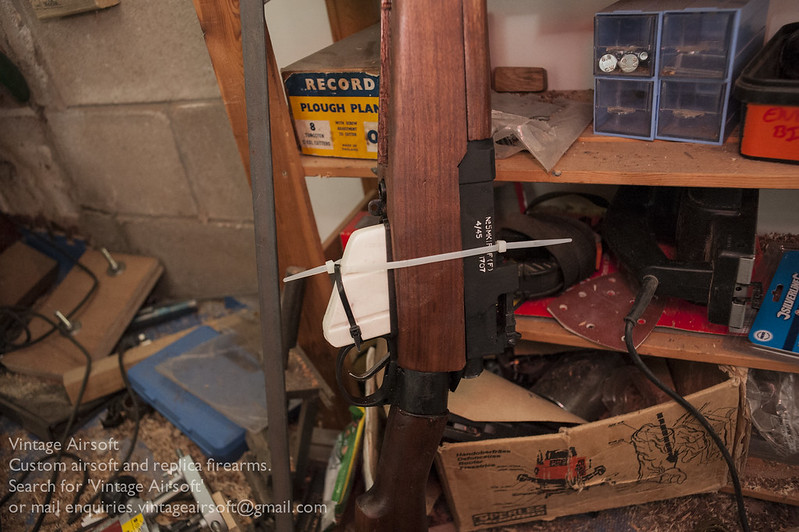
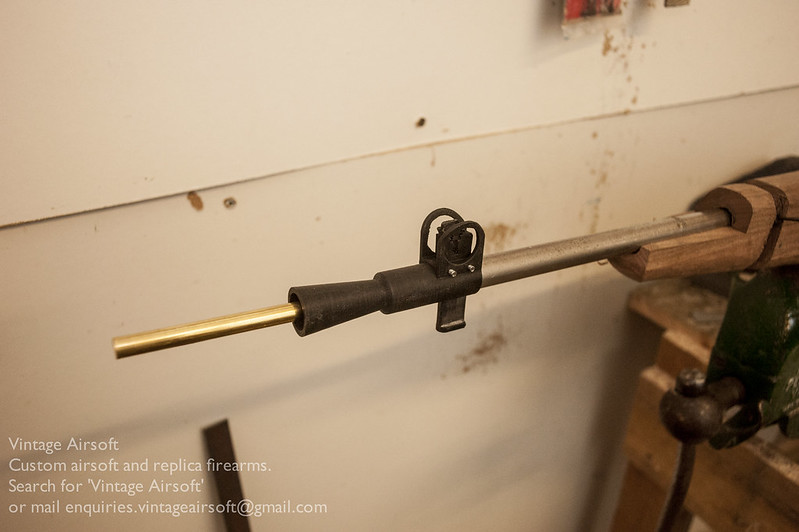
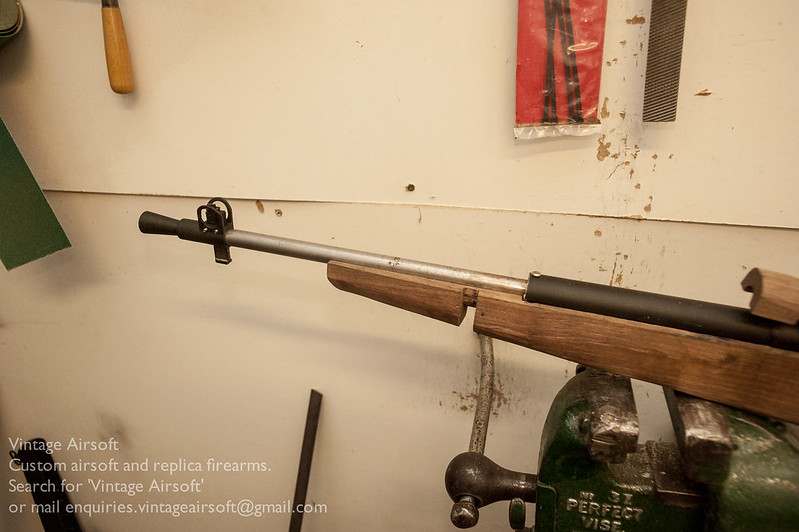
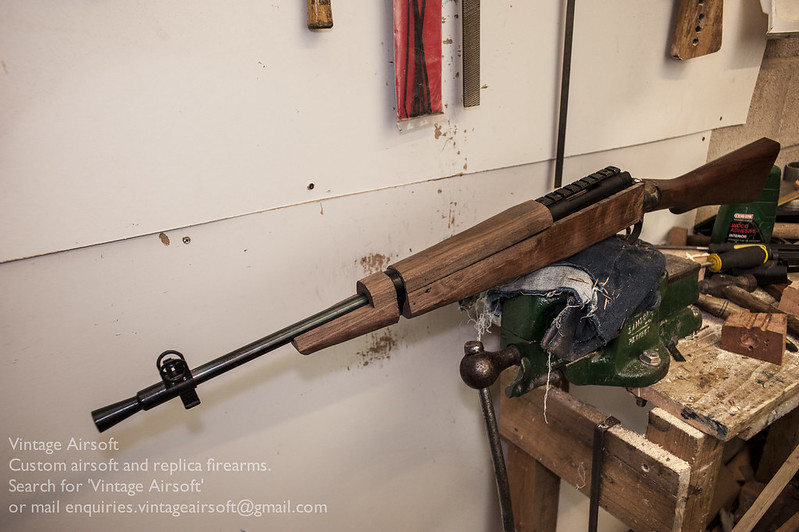
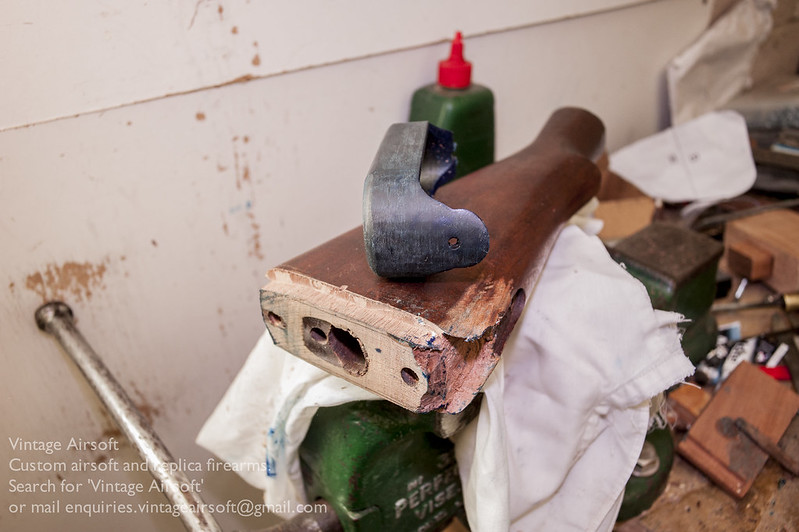
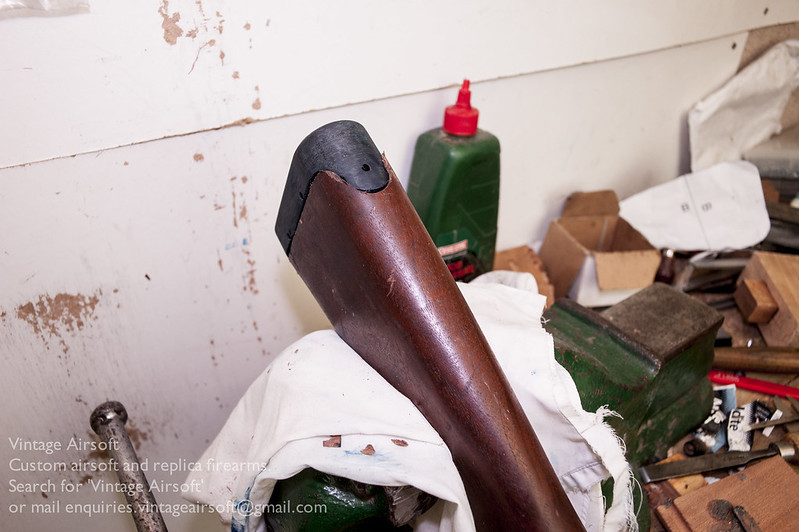
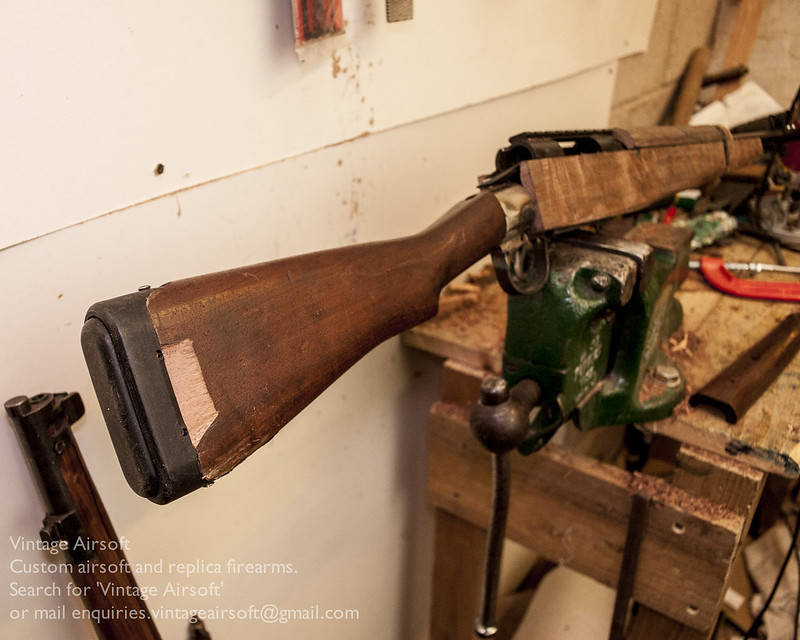
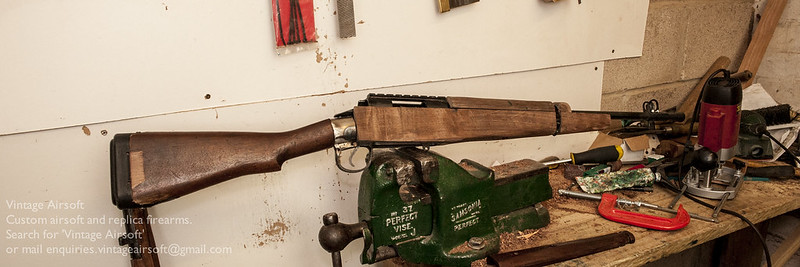
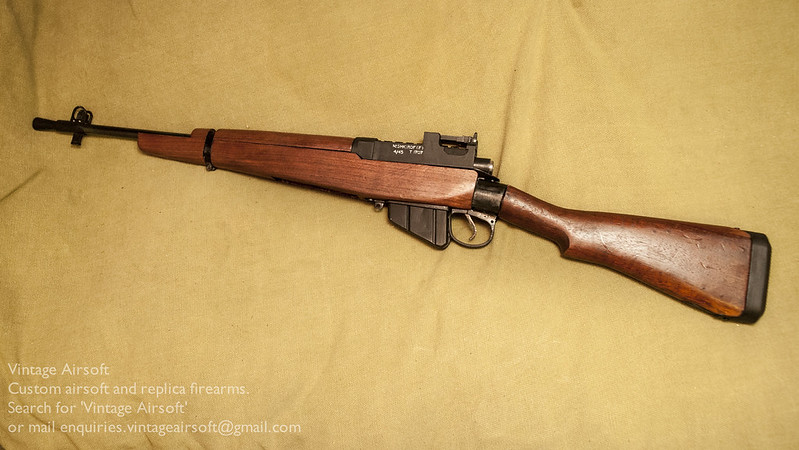
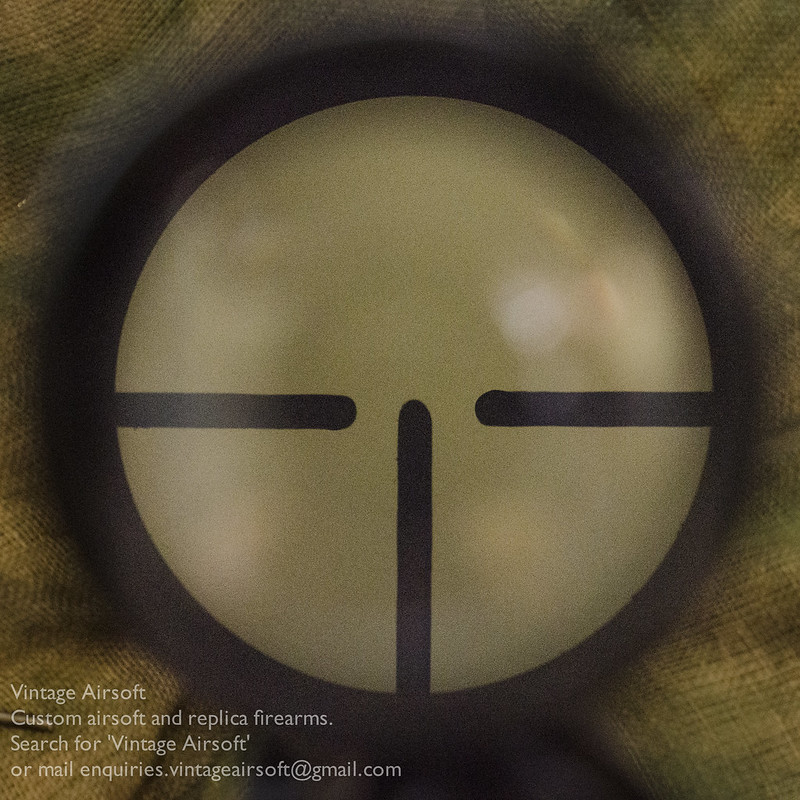
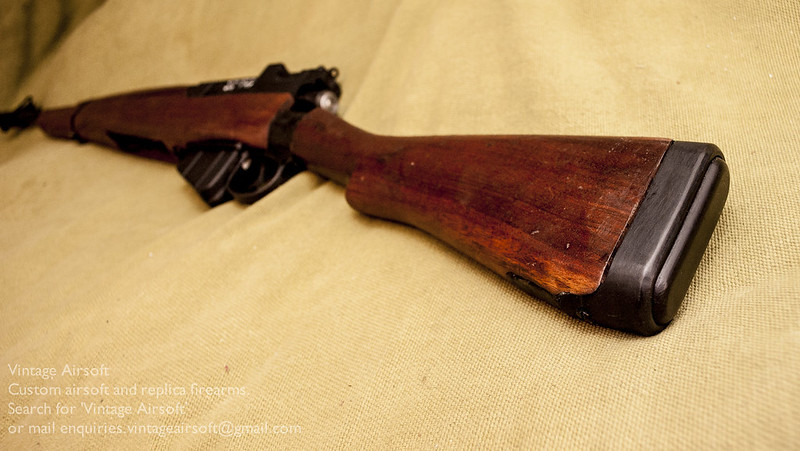
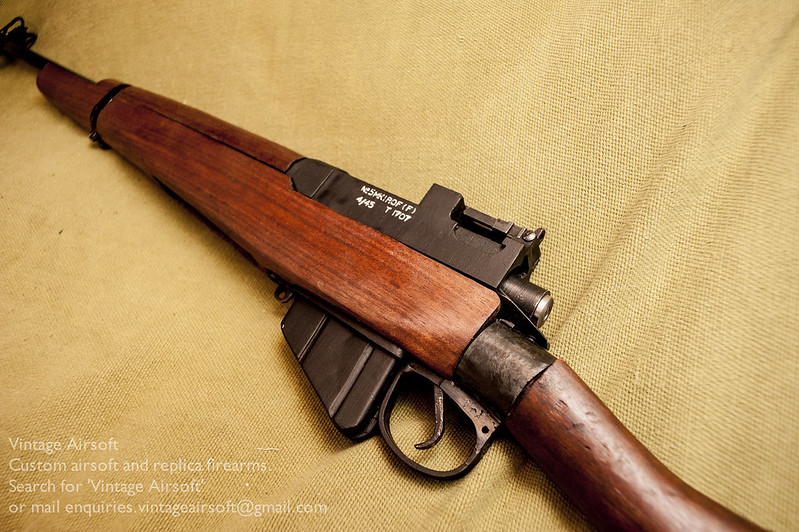
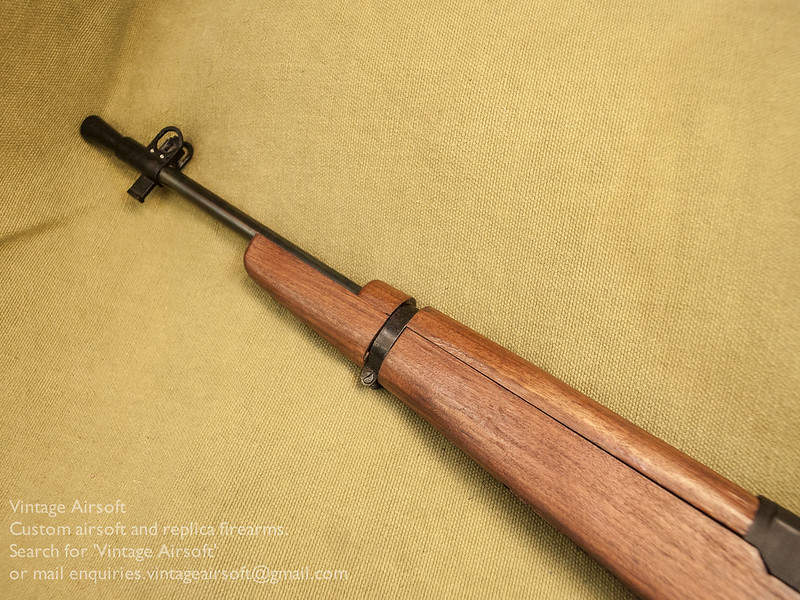
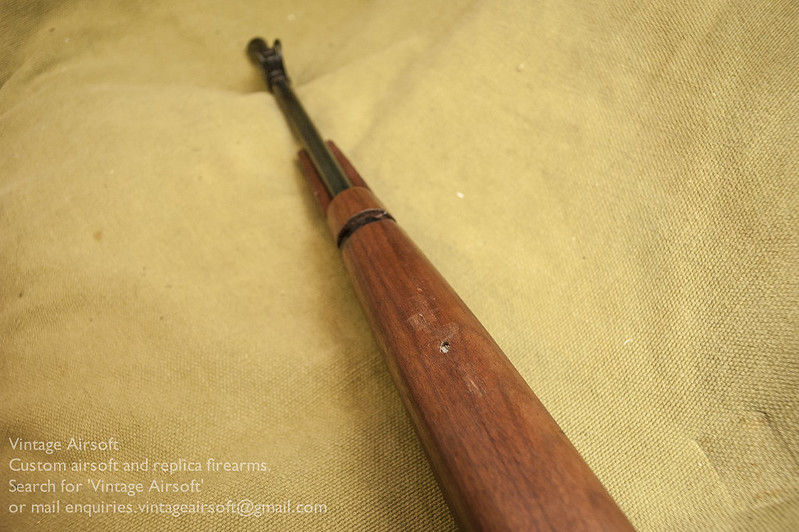
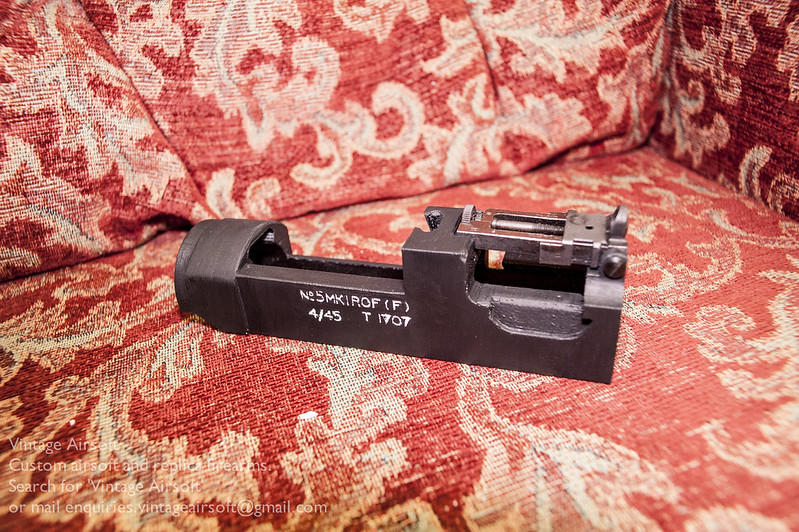
The Lee-Enfield No.5 Mk1 ‘Jungle Carbine’. A personal build, quite a few people have asked for them but no-one has committed, so I decided to make one anyway! This is my up close and personal sneaky rifle, with a custom piston and cylinder head to keep noise to a minimum. In that respect rather unlike the original…

_DSC7471

The Pritchard-Greener bayonet has proven very popular. Its novelty value and iconic design is so appealing and I’m sure it will prove popular in Great War Airsoft circles. You can find it on the Etsy store here.

_DSC7270

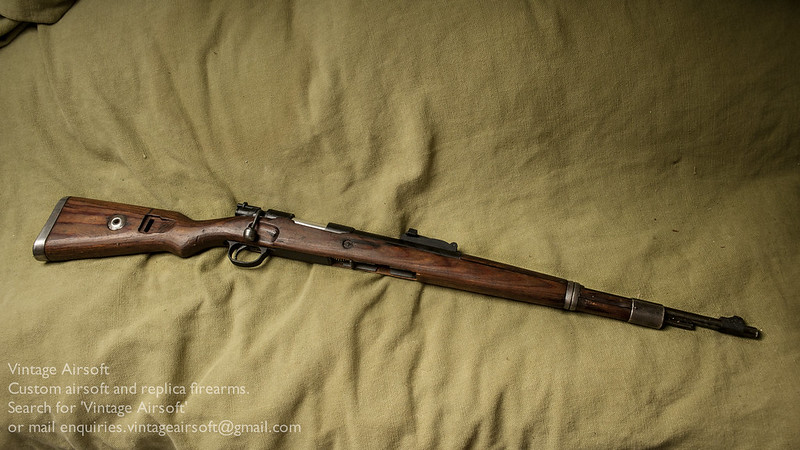
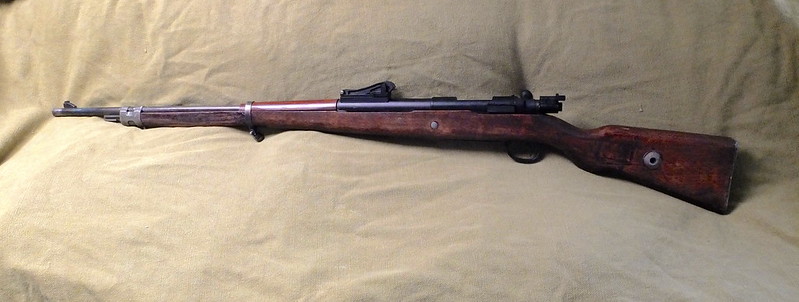
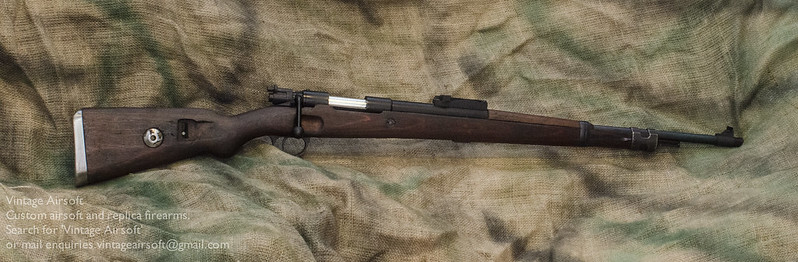
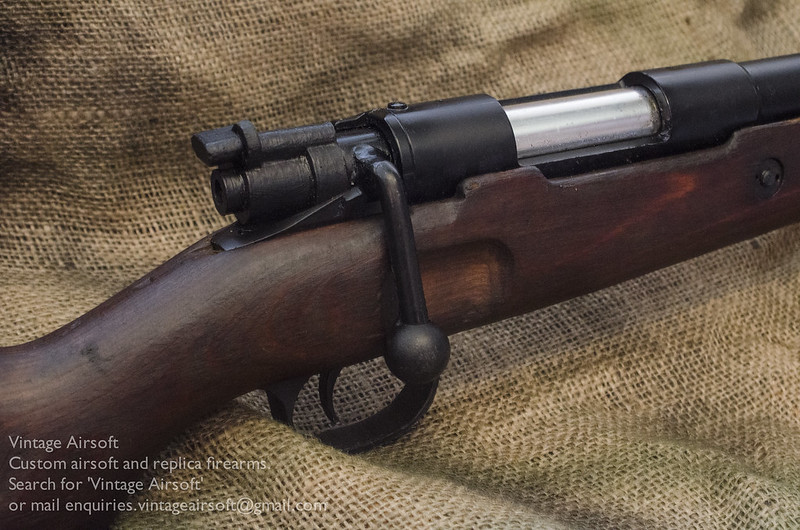
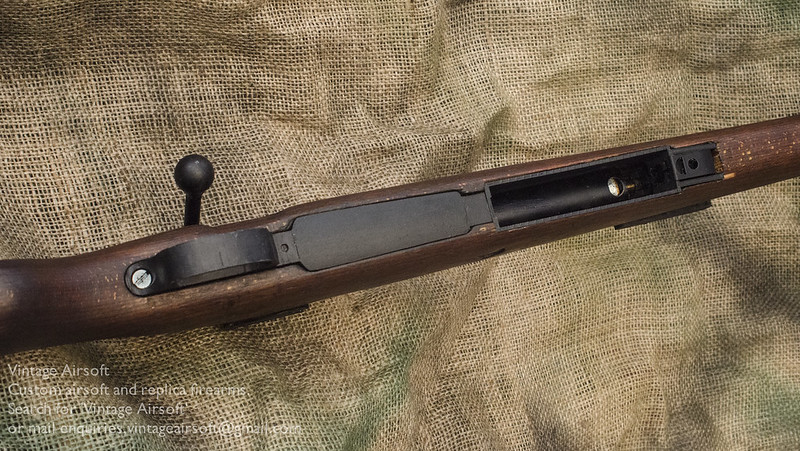
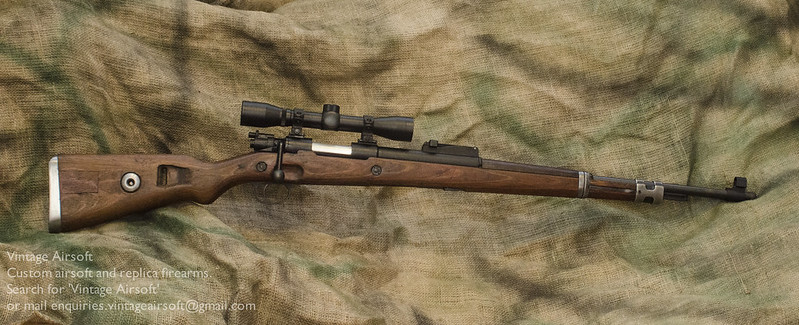
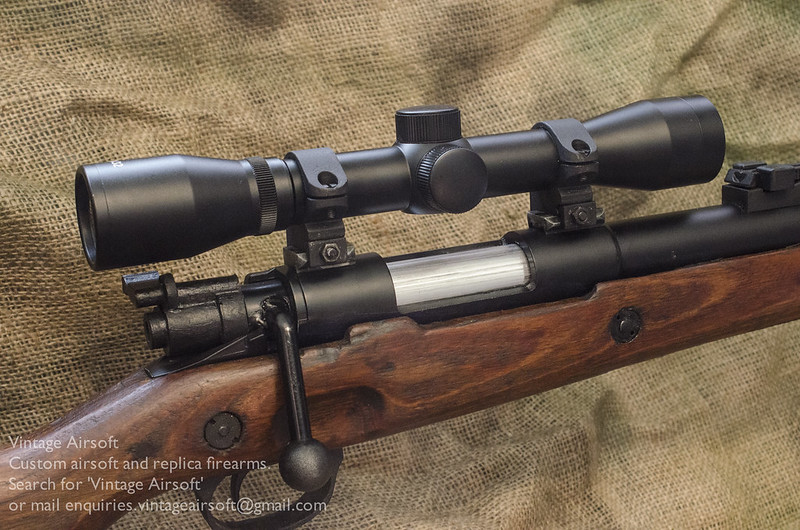
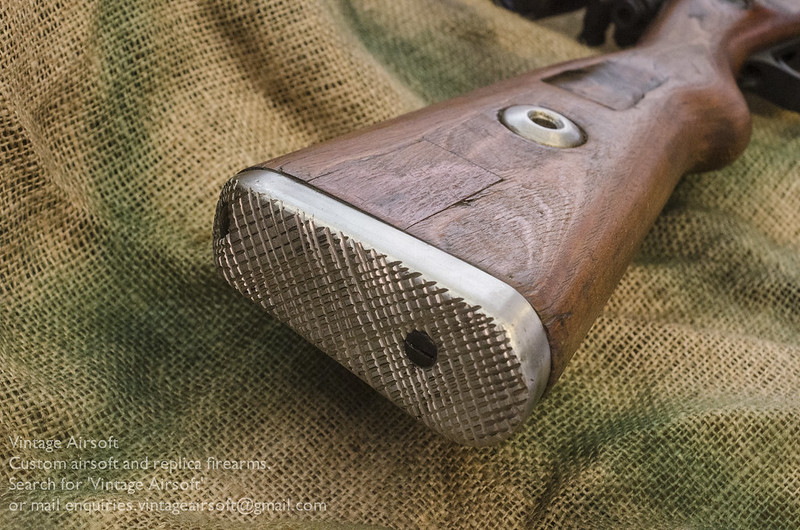
The K98k VSR conversion is a beauty (though I say so myself). This gun was for a friend of mine, I can see these being a great first conversion job for a rookie airsoft gun builder and I’ll be offering kits to help people do this.

_DSC7255

This LMG25 is I believe a unique airsoft piece. Taking AK magazines, this was built for a contingent of Swiss Border re-enactors so you may see it on the UK show circuit this year.

_1010002

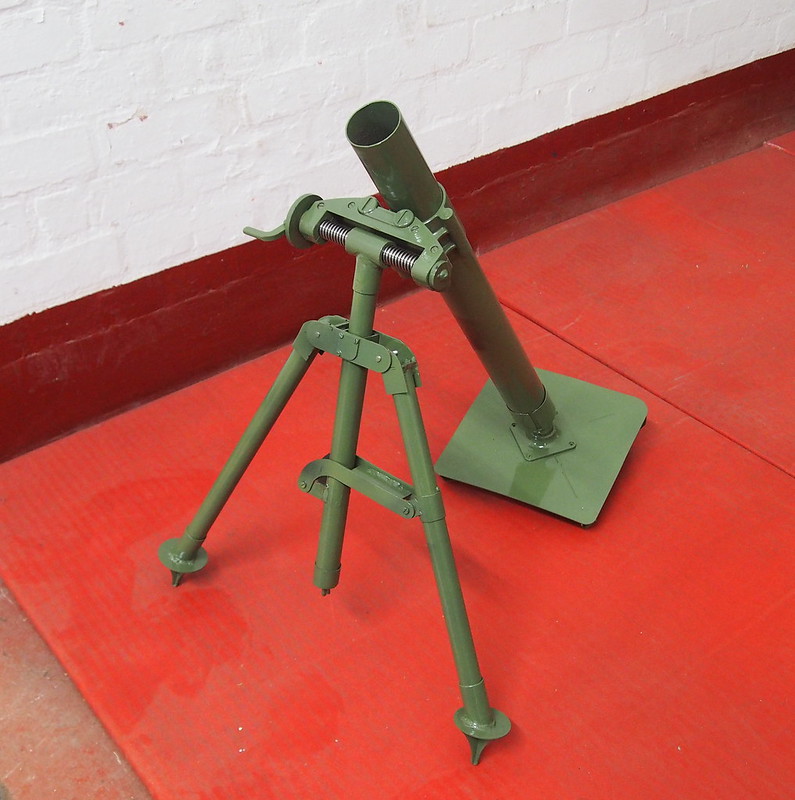
I’ve done a few infantry portable artillery bits this year. I did a light version of the SMBL 2″ mortar, ideal for mid-late WWII units, this is one of the more practical mortar designs for regular skirmishing.

_DSC6282

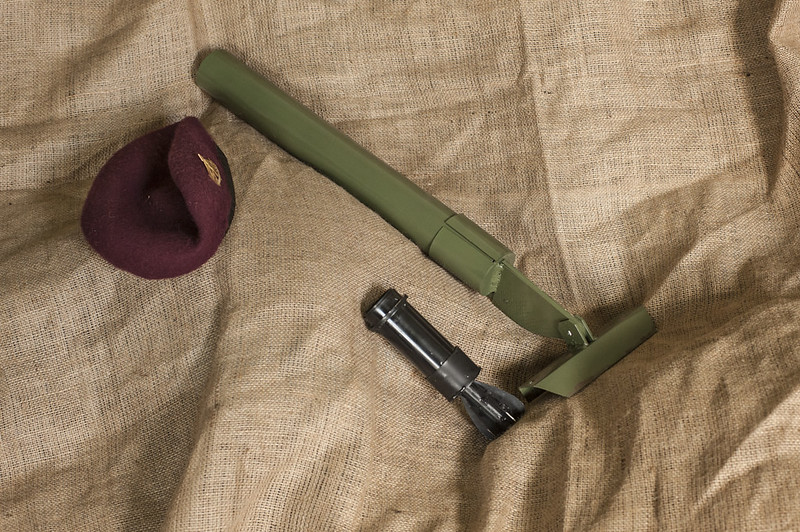
A more sophisticated light mortar was the M2 60mm mortar, this has full elevation and windage control to allow for very precise targeting of enemy positions.

P1010094 copy

I converted the D-Boys G98 conversion to VSR, I now use this myself with a Mancraft kit.

_DSF9746

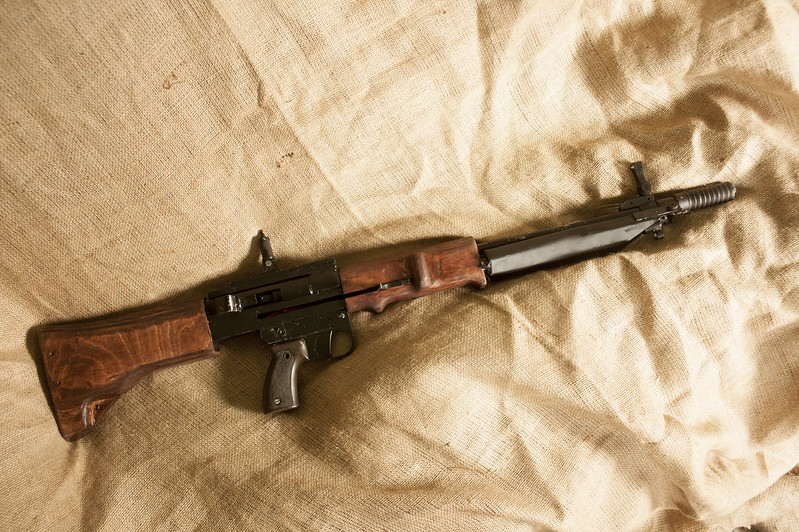
The FG42, probably the second most popular project, only beaten to the top spot by the G43. A lot goes into this build, the details of the folding and adjustable sights, trigger unit and bipod, not to mention the intricate hollow furniture makes this an involved process but with a very satisfying result.

_DSC5990

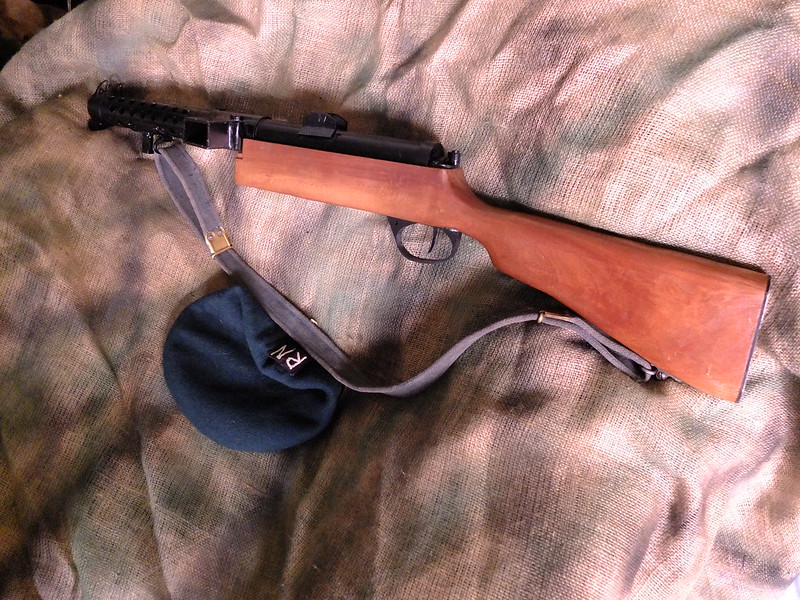
The Lanchester was probably my favourite customer SMG this year, I’ve been wanting to do one for ages, and would love to see it paired with a Royal Navy Commando load out.

_DSF9334

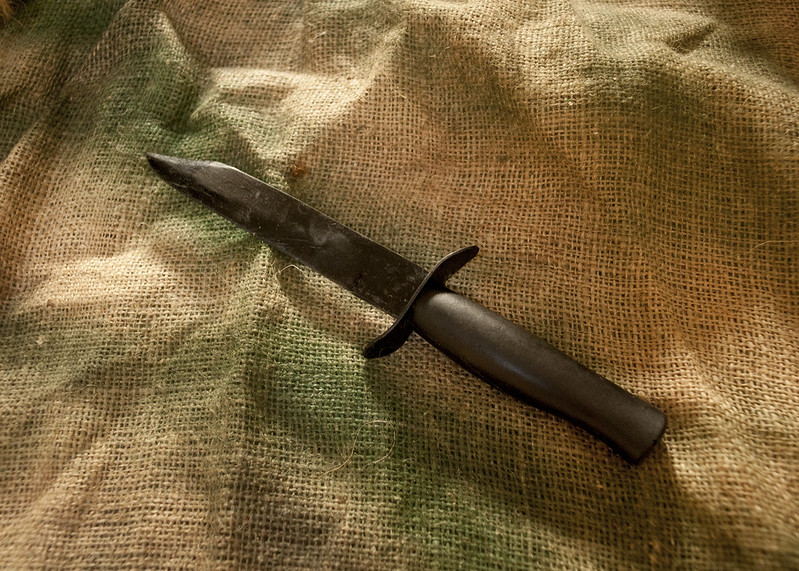
I’ve also expanded the range of rubber knives this year, including this NR-40, for Russian re-enactors and airsofters.

_DSC5998

Stuff I’ve done that isn’t building guns (directly)

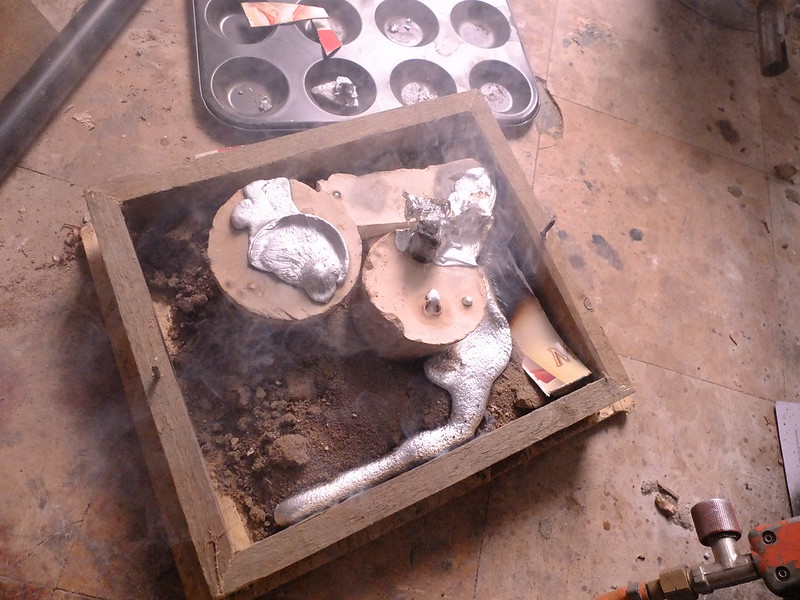
One of my major advances this year is building a furnace in which I can melt aluminium. The next step is to build an oven so that I can heat up and dry out my investment moulds more effectively to get production quality castings.

_DSF9307

I got chance to play American Civil War Airsoft in the latter half of 2017, muzzle loading guns and blatting off three shots per minute is so much more fun than it sounds. I sincerely hope to see more of this in 2018.

ACW Photo Day-6187

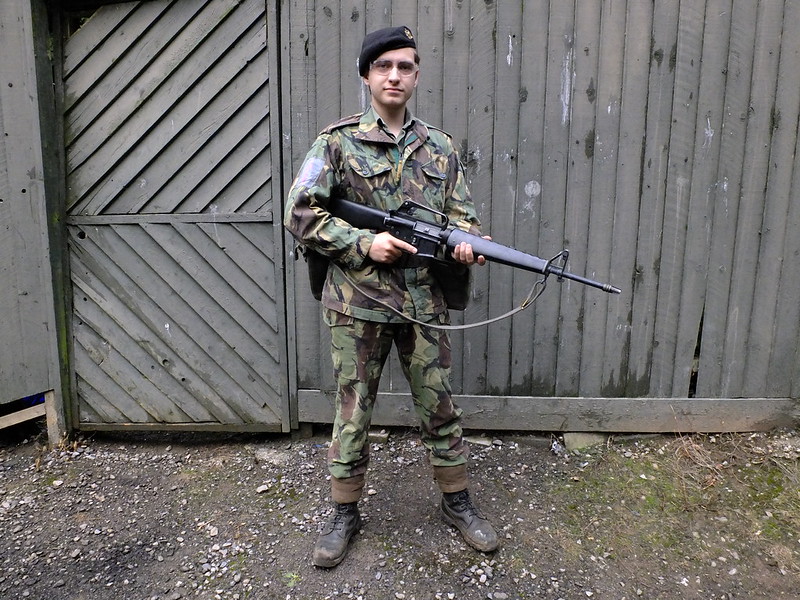
I also jumped forward in time from my usual WWII-era equipment to something a bit more modern. My mid-1970s impressions are developing slowly, with the next major step being to sort a helmet. Then I’ll be covered for most of my Cold War impressions.

_DSF9595

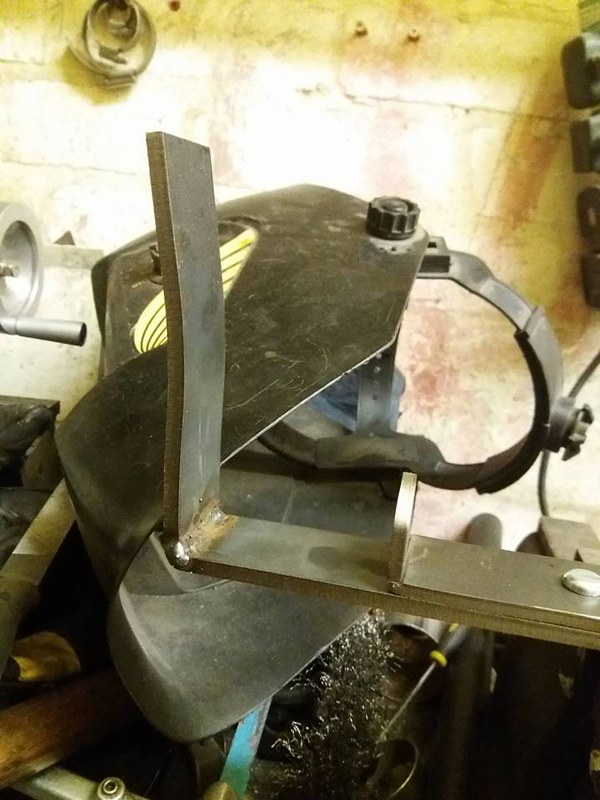
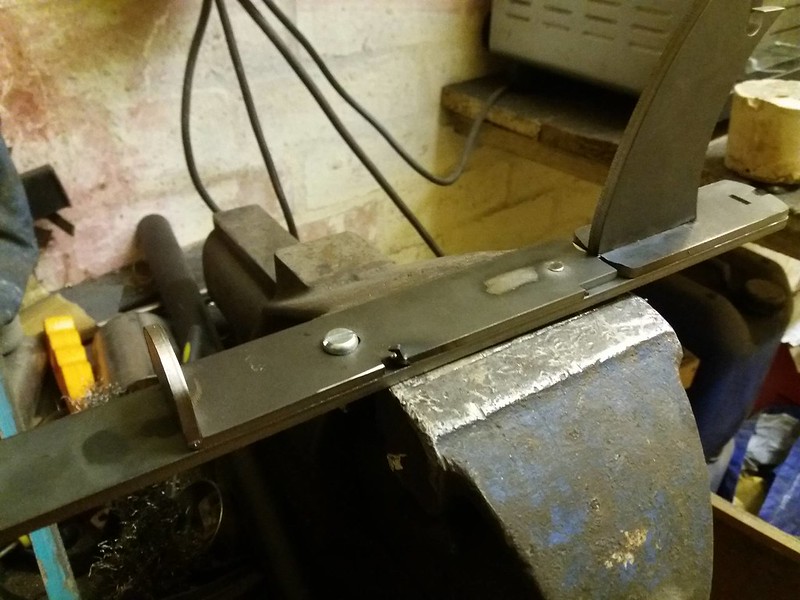
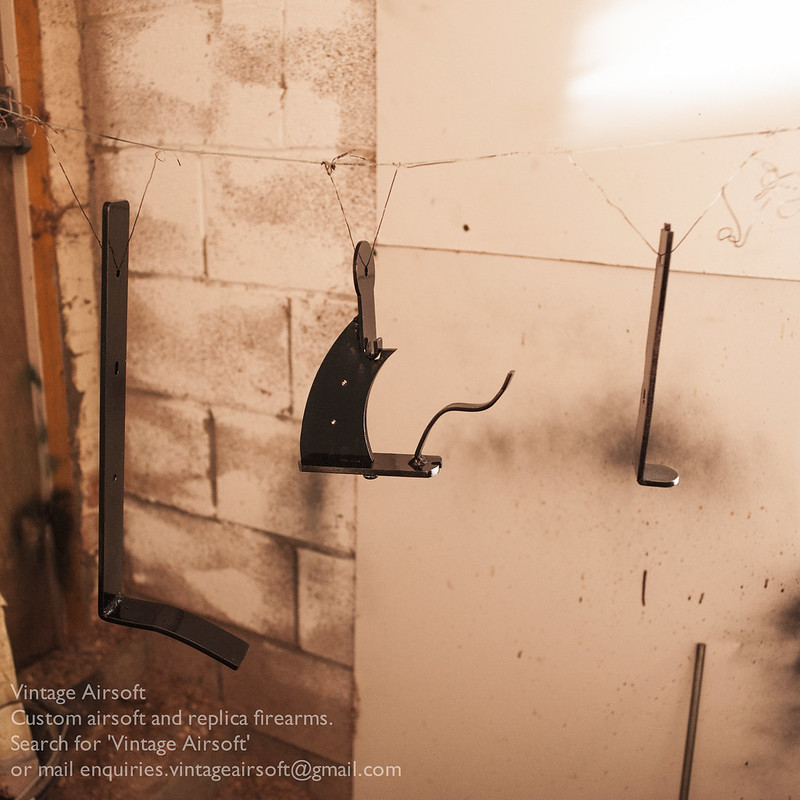
And I finally lost my rag trying to balance my webbing on normal coat hangers. I made a heavy duty, straight backed hanger so that the webbing would stay on it in the wardrobe. 20 minutes well spent preserving my sanity.

_DSC7362

Upcoming in 2018

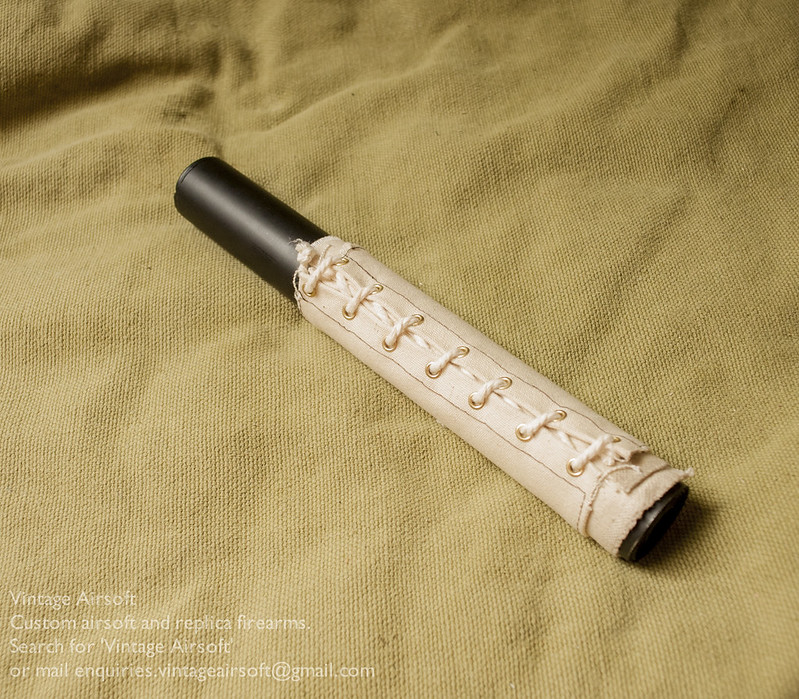
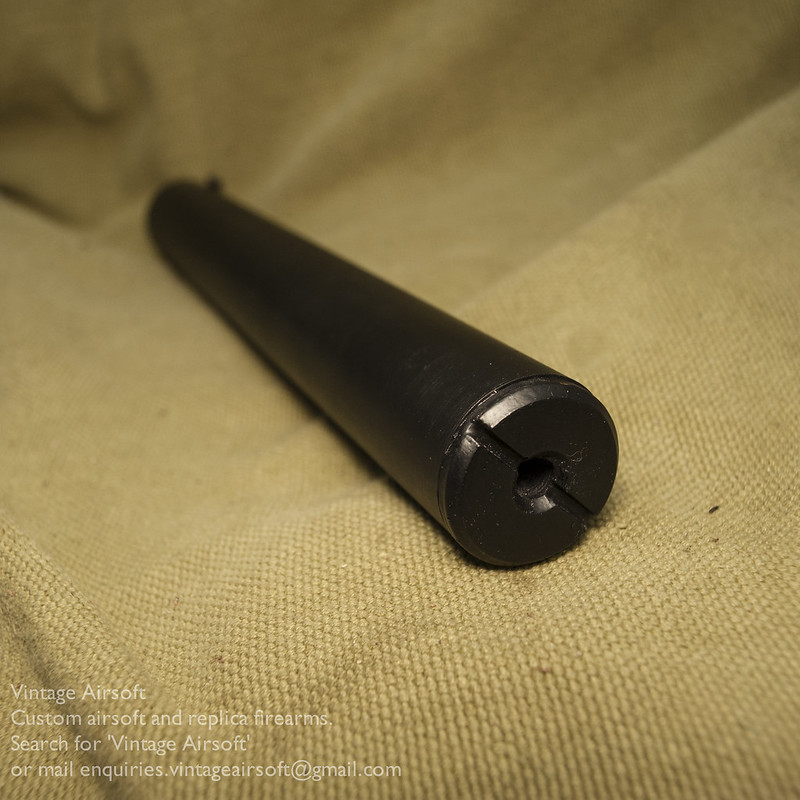
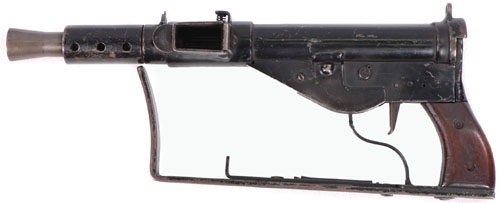
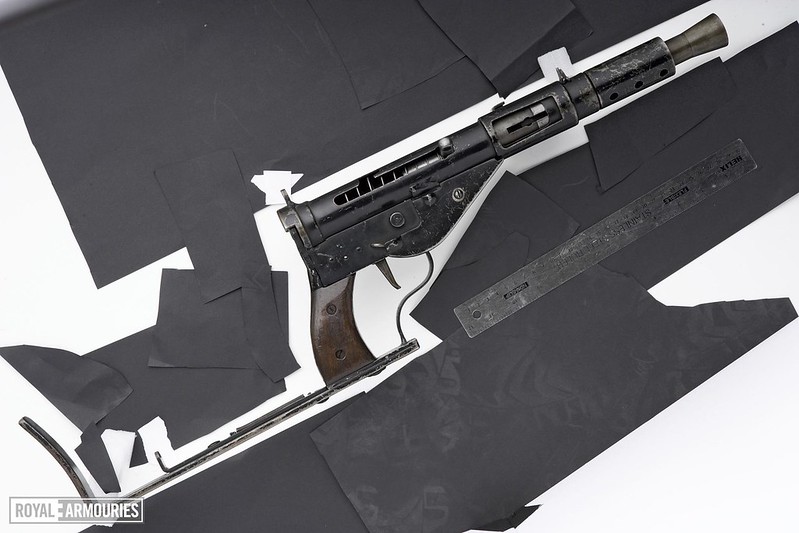
2018 already has some exciting projects for me. I’ve already got another unusual LMG underway, a couple of rifle builds in the works and I’m hoping to finally have the Welrod done.

I’m also hoping to have a Vintage Airsoft meet up event, once I’ve secured a site I’ll be sharing details here and over at the Facebook page.


Wishing you all a happy and interesting 2018,

Dom


Sten MkIV: Complete

Complete builds, Products, Sten, Sten MkIV, Sub Machine-guns, Weapons, WWII

The completed Sten MkIV. Perhaps not a looker, but definitely one of the most practical SMGs I have built to date. When folded, this easily fits in a backpack making it a much more portable choice than my usual long rifles.

_DSC7835

The large trigger guard makes it ideal for use with gloves in cold conditions.

_DSC7836

The buttstock when folded also makes a handy foregrip. In CQB this is very practical for when poking round corners.

_DSC7838

When  you want a little more shooting precision, just grab the inner tongue and pull it towards the buttstock.

_DSC7840

You can then unfold the stock and lock it into position at the back.

_DSC7844

This is pretty comfortable in this layout, though I am not sure if recoil would be easy to control. I can see how the flat steel would be uncomfortable for prolonged periods of shooting, but no more so than many of the previous models of Sten gun. Frankly compared to the prolific T-stock this would still be a huge improvement so I don’t understand how this was rejected due to being uncomfortable while shooting.

_DSC7846


If you missed it, you can see the build post for this project here.

If you are interested in this project or have an idea of your own, drop us a line on enquiries.vintageairsoft@gmail.com to discuss. ‘Like’ our Facebook page or follow the blog to get regular updates on projects and interesting videos and articles. 

Don’t forget you can buy our smaller items via Etsy. Our larger items can be found here.

Enfield No.5 Mk 1: Complete

Cold War, Complete builds, Custom builds, Lee-Enfield, No. 5 Enfield, Rifles, Weapons, WWII

Well, the No.5 Enfield is complete! And she ain’t a bad looker though I say so myself. Not to mention as far as I know the world’s first Airsoft Enfield No.5.

Let’s talk through her from back to front.

_DSC7471

The buttpad is hard rubber, in an ABS 3D printed cage re-enforced with Polymorph.

_DSC7475

The 3D printed receiver covers the VSR internals for the most part. The trigger is a little square, I’ll probably round it off more for a comfort.

_DSC7476

The rear sight. A bit of tinkering and I may even make it so that I can use the ladder sight for longer range use. For my purposes at present however (a 1 Joule rifle for close, quiet use) the battle sight is just what I need.

_DSC7478

When testing, the windage adjustment in the foresight was very useful. I’ll have to add some elevation adjustment as well as that would come in handy.

_DSC7477

The hop adjustment the most discrete I’ve done on an Enfield yet. That little hole in the top guard is the TDC hop adjustment.

_DSC7479

The magazine well is my standard VSR quick-load magwell. Ideal for the close work I intend to use it for.

_DSC7568

Last but not least, the rear sling bracket. Distinct and unique to the No.5 carbine, this makes an odd pairing with the conventional forward sling swivel. That said I have found it quite comfortable in use, with the gun swinging around less than with conventional swivels.

_DSC7566


If you have enjoyed this project or have an idea of your own, drop us a line on enquiries.vintageairsoft@gmail.com to discuss. ‘Like’ our Facebook page or follow the blog to get regular updates on projects and interesting videos and articles.

You can see the build for this rifle here.

Don’t forget you can buy our smaller items via Etsy. Our larger items can be found here.


Enfield No.5 Mk 1 Build: Part 2

Cold War, Custom builds, No. 5 Enfield, Weapons, WWII

Part two starts with the receiver which has been 3D printed. I’m very pleased with the way the markings have come out on this, especially after painting up.

_DSC7433 
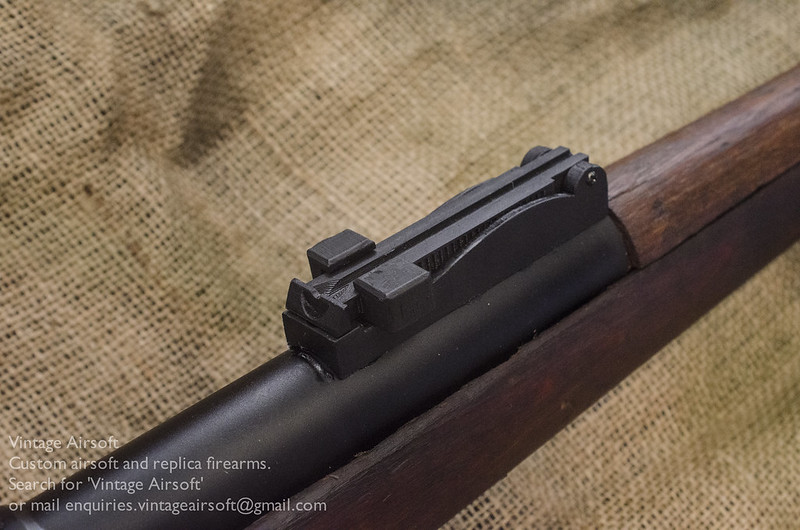
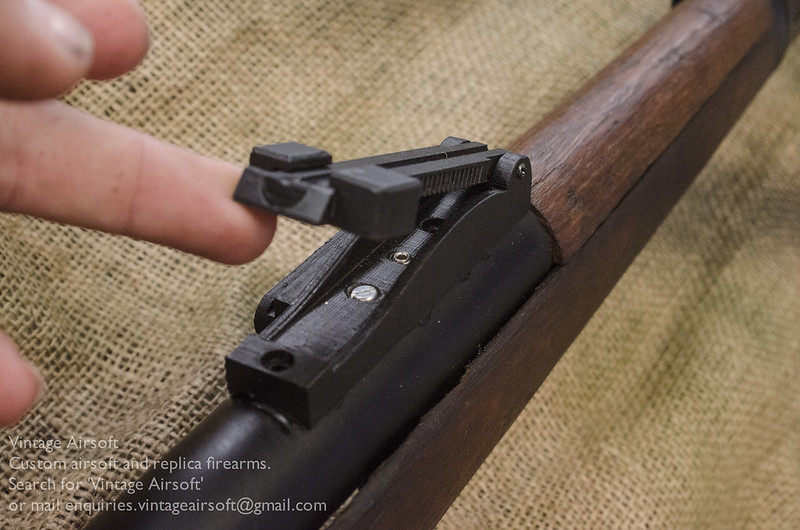
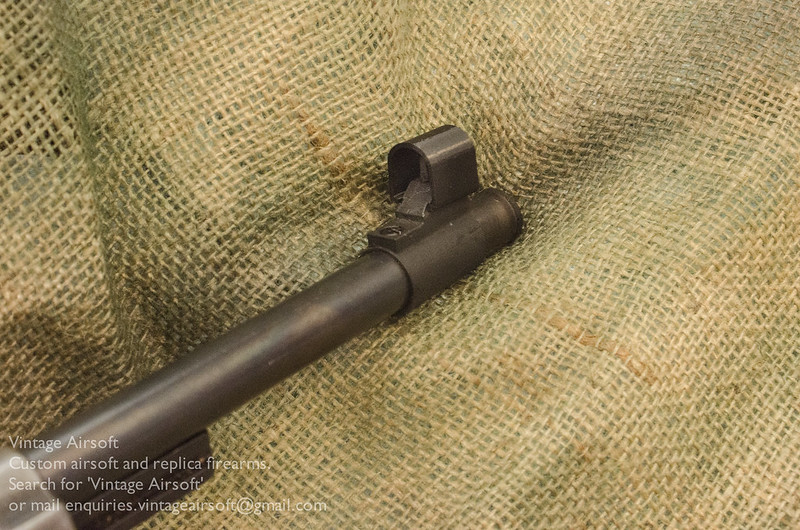
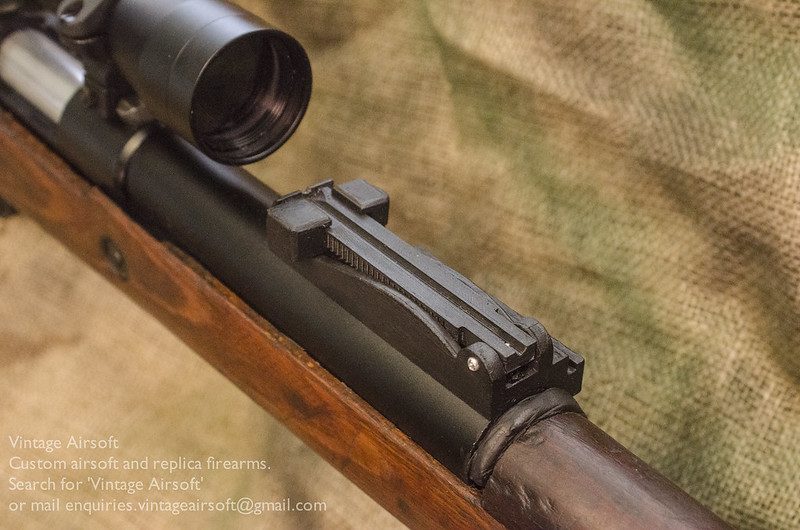
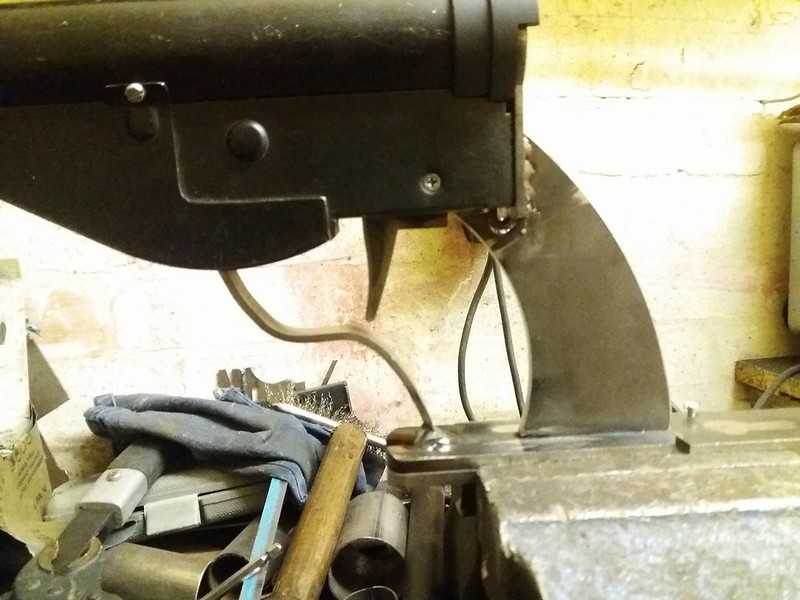
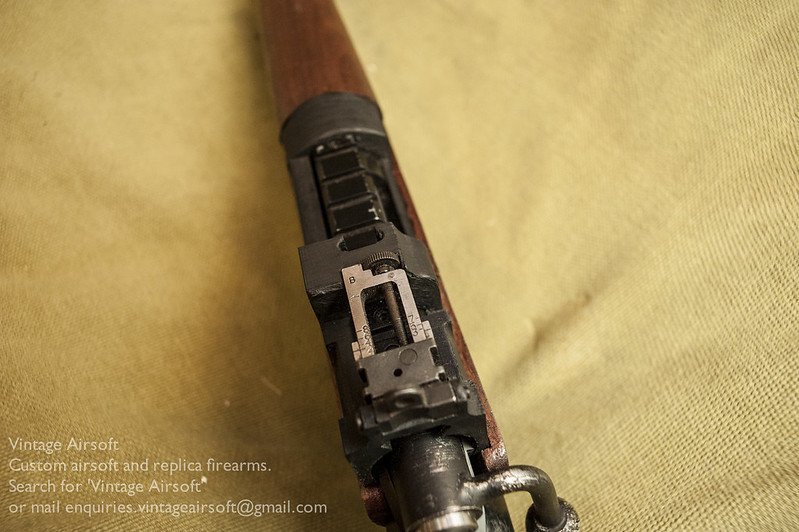
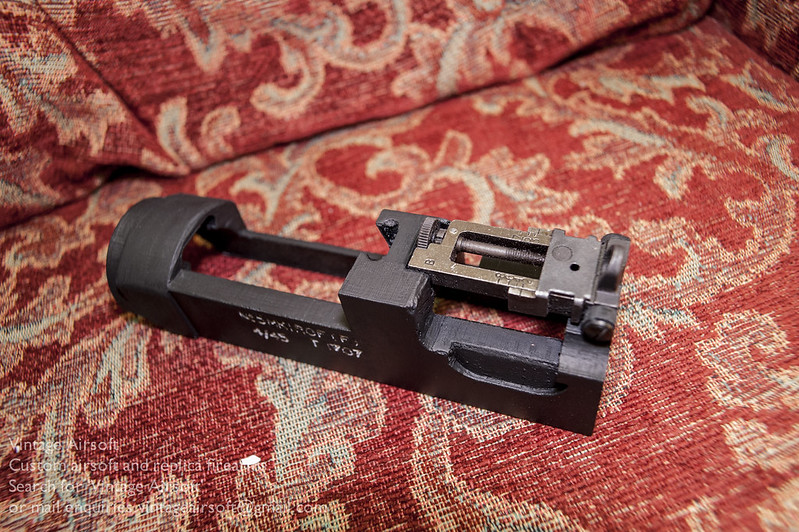
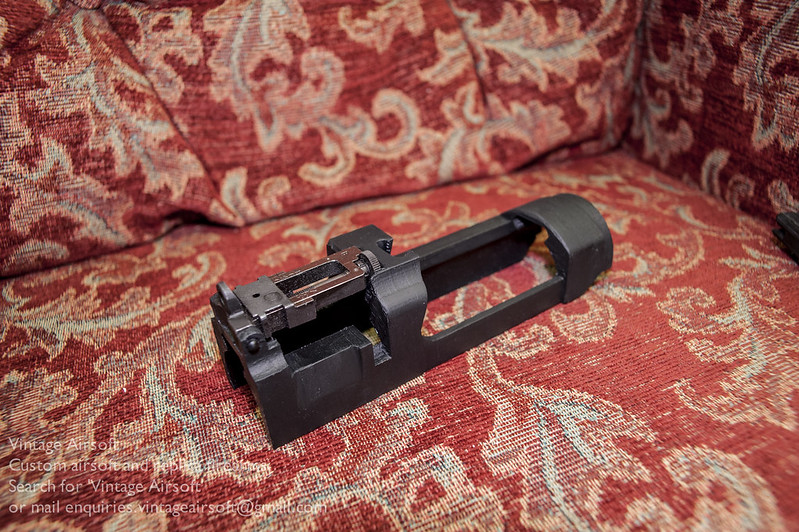
The rear sight fits in quite well, just needing a little filing down in the mountings for a snug fit.

_DSC7434   _DSC7435  

Fitted in the stock, the receiver sits in a cutout on the left, the right is concealed in the stock itself.

_DSC7451

It took a little tinkering to get the top guard to fit, but it is now secured under the front of the receiver and at the front by the front band.

_DSC7453

Once I checked all the parts fitted well, I stripped the wood away. I applied my red-brown stain blend that I use for my Sten Mk5 kits. 

_DSC7455

Once this had settled in, I applied a coat of slightly thinned hardwax oil, for a fairly hardwearing semi-gloss finish. 

_DSC7458

Finally, the resin faux magazine is expoxied into place. Once set, I’ll paint it up and she’ll basically be done!

_DSC7467


Pics of the completed rifle to follow soon.


If you are interested in this project or have an idea of your own, drop us a line on enquiries.vintageairsoft@gmail.com to discuss. ‘Like’ our Facebook page or follow the blog to get regular updates on projects and interesting videos and articles. 

Don’t forget you can buy our smaller items via Etsy. Our larger items can be found here.


Enfield No.5 Mk 1 Build: Part 1

Cold War, Lee-Enfield, No. 5 Enfield, Rifles, Weapons, WWII

The buttstock I am using for the No.5 is a damaged SMLE stock, as a result I don’t feel guilty about the chopping I’ll be doing to it!

I make the rear band unit in the same way as in all the other Enfield builds: ERW beaten to shape and welded to the trigger guard.

_DSF9810
 

The No.5 trigger guard/magwell housing is slightly different to the other Enfields, being thinner and lighter. This makes it an even more awkward shape to cut out!


_DSF9811
 

The VSR gets its special parts added. The standard Vintage Airsoft quick-load VSR magazine well and the Enfield trigger that takes the trigger back into the correct location. I’ll also be using the TDC mod for this rifle of course, along with the Enfield bolt mod.


22496956_10155993089243623_536568108_o

In place in the roughed out stock, the gun already starts to take shape.

22555839_10212957125275633_589420679_o

I smooth out the shape and improve it a little. I still have to finish the back end where the receiver fits and around the rear band.

_DSC7308

At the front I need to create space around the outer barrel as it is free floating on the original. The top guard also needs rounding off at the front.

_DSC7309

Working on the receiver now, no standard typeface is quite right for the markings. I find some clear images to work from and create a file I can work from and tidy up in Qcad.

Screen Shot 2017-10-19 at 18.13.21

Once the basics of the typeface have been finished up, I transfer them onto the side of the receiver to be 3D printed.

Screen Shot 2017-10-19 at 20.20.00

I got the muzzle brake/foresight unit 3D printed. As well as looking the part it also holds the inner barrel centred nicely. It’s held in place with two screws that lock it in place through grooves in the top of the barrel.

_DSC7320

The outer barrel is secured in the ‘traditional’ way for my VSR builds.

_DSC7322

I’ll have to spin up the barrel on the lathe to clean it and get a consistent polish, then I can oil finish it which will be nice and wear-resistant.

_DSC7324

Polished up and oil finished, the only problem is the muzzle brake doesn’t look as good now! You will also notice that the inner barrel has been cut down and re-crowned on the lathe by this point.

_DSC7372

At the back end, I start the modifications to the butt.

_DSC7386

The buttpad and cage have been 3D printed and are fitted by hand to the wood.

_DSC7387

I’m fairly pleased with the standard of the fit. The buttpad cage is a little more fragile than I would ideally like so some tinkering may be needed.

_DSC7388

I carved out the recess needed for the sling loop in the buttstock. 

_DSC7429

The assembly so far. The receiver needs fitting, plus there are some finishing bits to do. Inevitably there will be a bunch more things that I can’t think of right now. I am very excited to finish this build and get her in the field!

_DSC7426


If you are interested in this project or have an idea of your own, drop us a line on enquiries.vintageairsoft@gmail.com to discuss. ‘Like’ our Facebook page or follow the blog to get regular updates on projects and interesting videos and articles.