The Fairbairn-Sykes Commando Knife Part two

Edged Weapons, Fairbairn-Sykes Knife, Products, WWII

I have been experimenting with making replica Fairbairn-Sykes for quite some time now (since my introductory article here in fact). I was fortunate to find a copy of the original design by Fairbairn himself including dimensions.

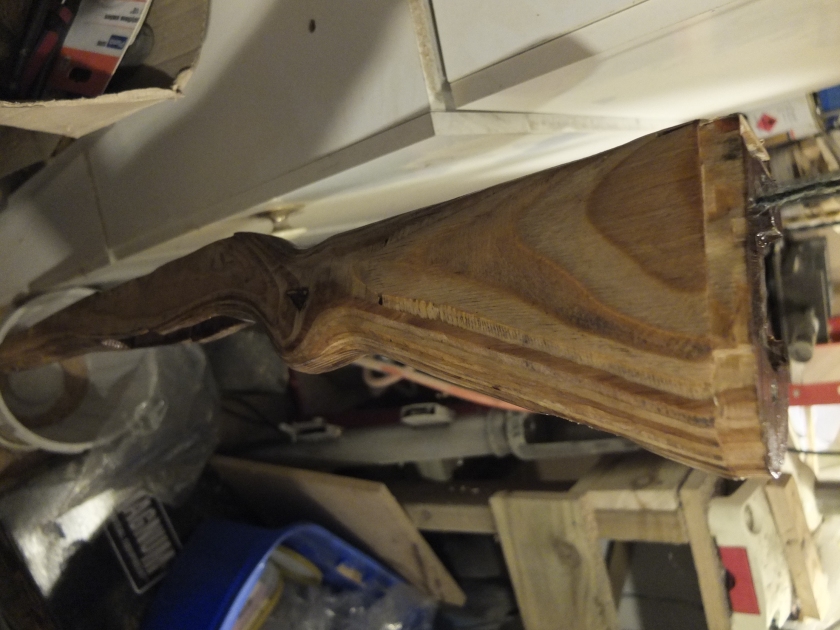
My first attempt came out quite well:

_DSF5363_DSF5367_DSF5365

_DSF5368

_DSF5371_DSF5369

However at the time I did not have all the lathe tools required to finish the workpiece. There are some very fine private purchase knives that have this smooth finish so I shall leave it much as in this image.

I moved onto my next attempts recently after a long hiatus caused by a broken lathe.

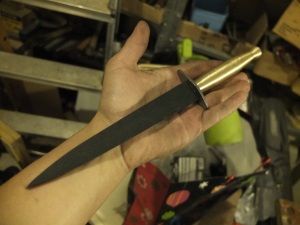
I used the same dimensions as before, though achieved a much higher level of accuracy this time.

_DSF6231

I cut two, one in brass, one in steel. This time I was able to drill perfectly central holes all the way through and knurl the outsides. These handles are based on the Second and First pattern knives rather than the more common third pattern, which have deep parallel grooves. As the third pattern would be more work to produce and are readily available I decided to focus on these.

_DSF6236

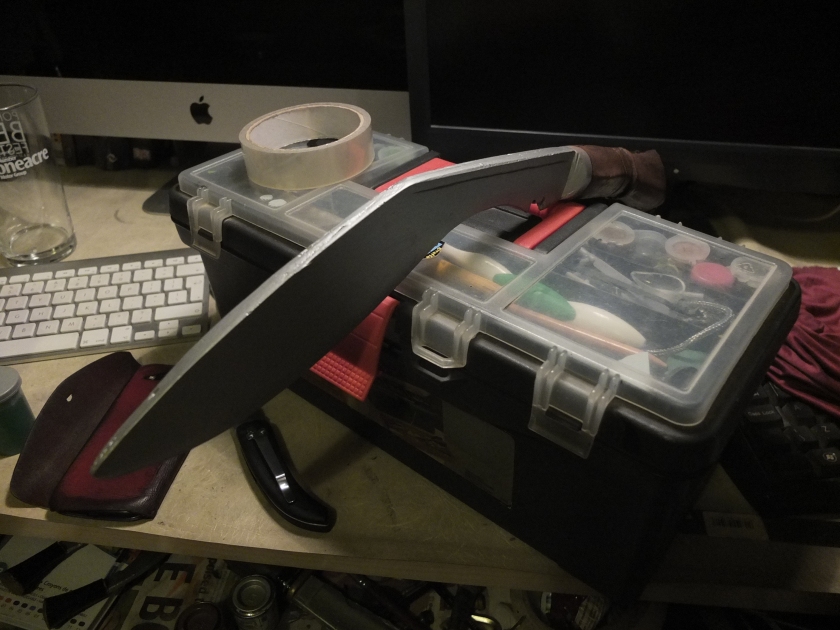
The blade blank was laser cut (as was the hand guard). I then shaped it with the grinding disk and polishing disks to develop the shape. Finally, several grades of sharpening stones put a smooth finish on it. This blade has not been sharpened and has flat profile edges to make it legal to carry for reenacting. This also means that it is slightly thicker overall which is an advantage later on…

_DSF6232

The handles are oil blacked. Steel is much easier to black than brass due to the recognisable colour changes that are very distinct. However I only had one blade profile so finished the brass handle first.

_DSF6249

_DSF6304

_DSF6305

The next step is to work on a rubber solution to the very thin blade. Most (all in my experience) rubber F-S knives bend when wielded and this really removes any sense of threat or realism which can ruin immersion in-game.

If you like the look of these blades, drop us a line on enquiries.vintageairsoft@gmail.com to place an order. We can customise the knife to your preferences and provide them sharpened or unsharpened.

You can also find us on Facebook. Don’t forget to follow the blog and get updates straight to your inbox!


Kukri-Replica

Cold War, Edged Weapons, Imperial Era, Kukri, Products, War on Terror, Weapons, WWI, WWII

The first job is to create a mould from which I can make a resin casting.

_DSF6325 _DSF6331

Mould making has been quite well covered elsewhere on the net by people much more expert than I so I shan’t go into detail here. I then poured a resin into the cavity which, when hardened produced a hard but semi flexible blade.

_DSF6332 _DSF6333

Much like an airfix model, once the flashing is removed it takes shape very quickly. A bit of filing and sanding here and there gets a smooth surface overall. I then sprayed it black as a base coat.

_DSF6339

I then layered up the paints as I would for a plastic model.

_DSF6340

_DSF6341

Blue-tack makes a great masking tool, allowing a really clean, sharp edge to certain areas._DSF6342

_DSF6343

After an initial dark brown coat on the handle, I dry brushed a light brown paint over then top to create the impression of the light tropical woods used in older kukris.

_DSF6347 _DSF6348

A finishing touch was the varnishes, different types for different parts of the knife to give the correct finish for the materials the paint is impersonating.

I’ll be making a few of these as training knives and airsoft knives. Just email us on enquiries.vintageairsoft@gmail.com and join us on Facebook. Don’t forget you can follow the blog and get updates straight to your email inbox!

Kukri- Introduction

Cold War, Edged Weapons, Era, History, Imperial Era, Kukri, Products, War on Terror, Weapons, WWI, WWII

The Rev. J. G. Wood in The Natural History of Man (1870):

“The Goorkha ‘kookery’ is of a very peculiar shape. Both the blade and hilt are curved. The blade is very thick at the back. From the back it is thinned off gradually to the edge, which has a curve of its own, quite different to that of the back, so that the blade is widest as well as thickest in the middle, and tapers at one end towards the hilt and at the other towards the point. The steel of which the blade is formed is of admirable temper, and for the greater part of its surface is burnished like a mirror. The point of the kookery is as sharp as a needle, so that the weapon answers equally for cutting or stabbing. In consequence of the great thickness of the metal, the blade is exceedingly heavy. It may be imagined that a blow from such a weapon as this must be a very terrible one. The very weight of the blade would drive it half through a man’s arm, if it were only allowed to fall from a little height. But the Goorkhas have a mode of striking which resembles the ‘drawing’ cut of the broadsword, and which urges the sharp edge through flesh and bone alike. In the hands of an experienced wielder, this knife is about as formidable a weapon as can be conceived. Like all really good weapons, its efficiency depends much more upon the skill than the strength of the wielder; and thus it happens that the little Goorkha will cut to pieces a gigantic adversary who does not understand his mode of onset. The Goorkha generally strikes upwards with the kookery, possibly in order to avoid wounding himself should his blow fail, and possibly because an upward cut is just the one that can be least guarded against.“Years ago, when we were engaged in the many Indian wars which led at last to our Oriental empire, the Goorkhas proved themselves most formidable enemies, as since they have proved themselves most invaluable allies. Brave as lions, active as monkeys, and fierce as tigers, the lithe, wiry little men came leaping over the ground to the attack, moving so quickly, and keeping so far apart from each other, that musketry was no use against them. When they came near the soldiers, they suddenly crouched to the ground, dived under the bayonets, struck upwards at the men with their kookeries, ripping them open with a single blow, and then, after having done all the mischief in their power, darting off as rapidly as they had come. Until our men learned this mode of attack, they were greatly discomfited by their little opponents, who got under their weapons, cutting or slashing with knives as sharp as razors, and often escaping unhurt from the midst of bayonets. They would also dash under the bellies of the officers’ horses, rip them open with one blow of the kookery, and aim another at the leg of the officer as he and his horse fell together.”

_DSF6196

First things first, I admit I have a bit of an obsession with the kukri. They are really stunning tools as well as formidable weapons. For those unfamiliar with the kukri, they have their origins in Northern India. Here the Goorkhas, a local tribe, dominated their neighbours in battle and forged their own respectable little mountain empire which we would now call Nepal. When the British East India Company came into conflict with these vicious mountain men they learned the hard way what they could do:

“A British officer, armed with a long regulation ‘spit’, ran his sword through a Goorkha. Notwithstanding his agony, the wounded man literally forced his way up to the weapon’s hilt, until he could close with his adversary, cutting him down with his kookri (Nepaul knife) and falling dead beside him.” (Gen. Orfeur Cavenagh, The Native Army in India, 1879.)

As a result of this they made the unusual decision to make peace and ally themselves with the Goorkhas and even employed them as soldiers, considered widely in much higher esteem then the average sepoy (Indian soldier in Colonial pay). Since then they have served British interests loyally up to this day. ‘Ghurkas’ as they are now known also serve in the Indian Army and Shanghai Police.

_DSF6091

Their weapon of choice has always been the Kukri, a complete history of which could take a whole blog, never mind one post. Suffice to say that this blade has been used to pacify Indian mutineers and rioters, Europe in WWI and WWII and in the East against Japan. Even in recent years Gurkhas deployed to Afghanistan have used their Kukris in close quarter combat with the Taliban.

Gurkhas at kit inspection showing kukri in France during World War I[1/4th] Gurkhas at kit inspection showing kukris [Le Sart, France].

I have been experimenting with replica knives for Airsoft and re-enactment purposes for a while now and thought this would make a fun project. More to follow next time…

ASG Sten-Safety catch

Add-on kits, Products, Sten, Sub Machine-guns, WWII

_DSF6334

First things first, the new operating handle. Although the one provided with the ASG Sten is close enough to correct, I preferred the small, rounded operating knob as it is less likely to catch on clothing. For this build it is perfectly possible to use the original handle.

Screen Shot 2015-12-24 at 17.08.38

In order to make the gun ‘safe’, the operating handle is pulled a little further back than the regular ‘cocked’ position. It is then pushed up into the lug above the channel where it usually runs when firing. On the real steel Sten, this simply stops the bolt from being able to reciprocate and therefore ‘safe’. In reality this was a far from perfect system and these guns still had a reputation for going off when dropped.

As this is an AEG, this safety mechanism uses a microswitch to control current flow.

SAFE:

_DSF6335


FIRE:_DSF6336

The operating handle will be oil blacked for use, but it wouldn’t have shown up for the photos here to demonstrate so I left it unfinished.


If you liked the look of this, drop us a line on enquiries.vintageairsoft@gmail.com to discuss or find us on Facebook. Don’t forget you can follow the blog and get updates straight to your email inbox!

G43: Part 4

Add-on kits, Battle Rifles, Custom builds, G43/K43, Weapons, WWII

While skimming the stock to remove the varnish one thin area gave way in the pistol grip. This proved quite difficult to fill as there was no support to speak of underneath.

_DSF6144

Eventually, I managed to fit a piece of shaped wood into the space and affix it with wood glue. To re-enforce it I filled the space with resin. Once sanded and varnished it should disappear fairly quickly.

_DSF6188

I could then varnish the wood all over to seal it.

_DSF6194 _DSF6195

I then oil blacked the remaining parts. I’ll be putting together a video on this process very soon.

_DSF6256

The oil blacked receiver in place. You can see the small, irritating gap between the top heat guard and the stock. I have managed to fix it by shaving some of it off in just the right place and adding a brace inside.

_DSF6269

_DSF6268

Looking quite close to finished now! I’m tweaking a couple of bits to make it a little more usable and will be testing it soon. I also have to finish the scope mount for this client.

_DSF6312

This project has sparked a lot of interest so this model will be available as a kit. If this post has inspired you to want a gun of your own, do drop us a line on enquiries.vintageairsoft@gmail.com to discuss or find us on Facebook.

MG08/15: Internals

Custom builds, Machine-Guns, MG08/15, Weapons, WWI, WWII

Some of my followers will remember that I have had many, many issues with my lathe. Recently I have managed (with not a little help) to get it back into working order! There were quite a few jobs waiting for this, one of which was the MG08/15.

This required a hop-up chamber. I turned this from a piece of 20mm aluminium. One hole drilled through the centre all the way kept everything aligned as I bored out the front and back to their appropriate diameters to take the nozzle and barrel.

_DSF6235

I then filed down the top create a flat surface, then drilled a feed hole to allow BBs to feed into the chamber and another hole that was tapped to adjust the hop-up. A second screw holds the barrel stable.

_DSF6242

I attached two barrel spacers to the barrel to centre it in the outer barrel. This done I attached the gearbox to it. I could line up the gearbox mounting plate with the holes used to attach it to the frame and marked out their locations.

_DSF6246

These could then be drilled and fitted permanently.

More to follow soon! If this post has inspired you to want a gun of your own, do drop us a line on enquiries.vintageairsoft@gmail.com to discuss or find us on Facebook.