The LMG25 is a Swiss Light Machine Gun adopted, as the name suggests, in 1925. It is a real oddity, even for a time when LMG designs were far less standardised than today.

This Swiss soldier will get a very warm thumb if he opens fire now.
It was developed at Waffenfabrik, Bern by Adolf Furrer over seven years and was produced until the end of WWII. It served into the 1970s with the Swiss military, so must have been a pretty serviceable firearm to have hung around for so long.

So, why is this an oddity? Well, the magazine is on the right-hand side, when most side-feeders (though not all) feed/fed from the left. There was a monopod at the back for support during sustained fire which wasn’t an uncommon idea at the time, but this could be moved to the front and used as a foregrip, which was.

Monopod used as a fore-grip in the assault role.
But most interesting of all, this is a toggle-locked design. There are very few toggle locked guns due to the complexity and expense of manufacture as it is. There are even fewer rifle-cartridge toggle-locked guns (especially that went into production). As well as the high level of accuracy required for these to function, they also need to have a very strong recoil spring and a conventional toggle-lock doesn’t provide great purchase when cocking. The LMG25 has a separate operating handle to aid with this.

The LMG25 is also interesting because as well as being toggle-locked it fires as you would expect a support weapon to do, from an open bolt. It is the only firearm of which I am aware that is both of these.

The open toggle. When opened, it kicks open the two-part dust cover. Anyone familiar with the Luger will recognise the parts of this.
Just in case this wasn’t different enough for your liking, it is also unconventional in that the barrel does not stop once the toggle is broken open but keeps moving backwards. The shell is still ejected as the toggle moves much faster than the barrel.
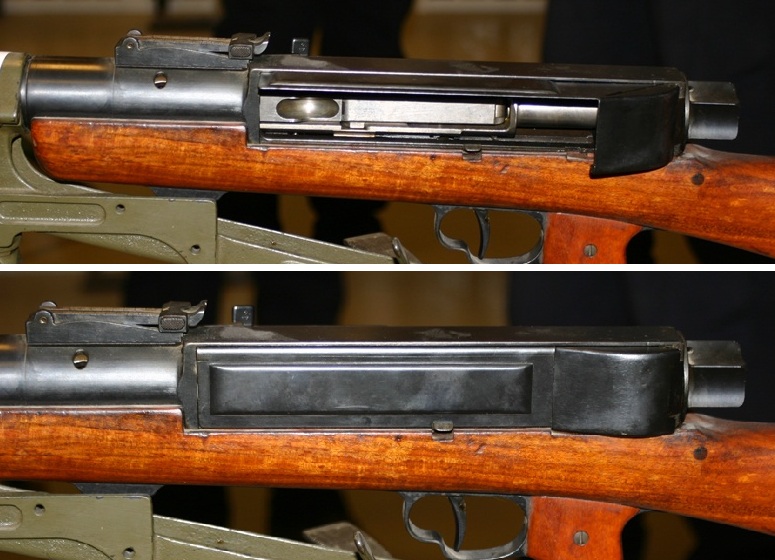
The dust cover in the closed position below, and open above. It is in two parts to fit around the toggle. Very Swiss.
In spite of all this strange-ness and the alleged complexity of toggle-locked guns (over-egged by those who have spent no time with them) it is very simple to field strip. One large nut at the back of the receiver allows you to remove the recoil spring, then pull out the barrel assembly. What about the bolt? Well the bolt/locking mechanism is all part of the barrel assembly on this so the whole lot pulls out together. Neat for cleaning in the field.

The barrel/bolt/locking unit, showing the extravagant fluting on the barrel normally hidden by the shroud.

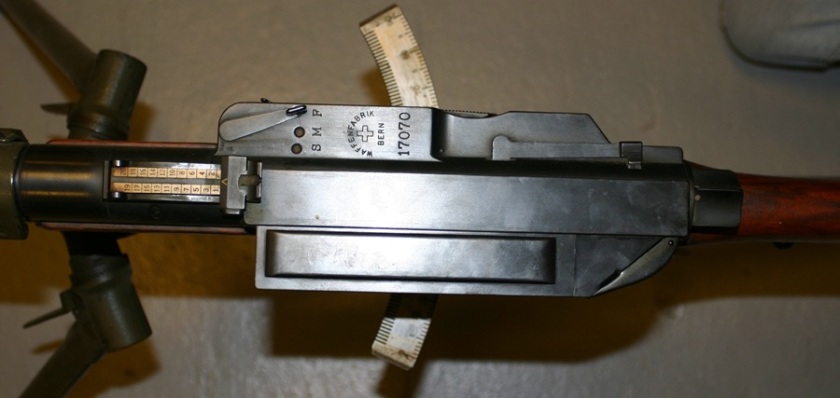
Top view of the toggle when removed from the receiver.
While beautifully made, this type of gun never really caught on. It served the Swiss well, where money was no object for a relatively small army but for any other military the expense would have far outweighed any advantages.
Of course due to never being adopted outside of its home country, which didn’t participate in any conflicts during this period (or ever since about 1847) it never saw active service so it is difficult to say how it would have performed.
If you want to see some footage of the LMG25, Ian at Forgotten Weapons has a nice video talking through one in Belgium here:
He also has some awesome footage of another LMG25 firing, including a lovely bit of slow-motion:
Don’t forget to check out Forgotten Weapons’ page on the LMG 25 here for more information on the gun and high-res pictures.
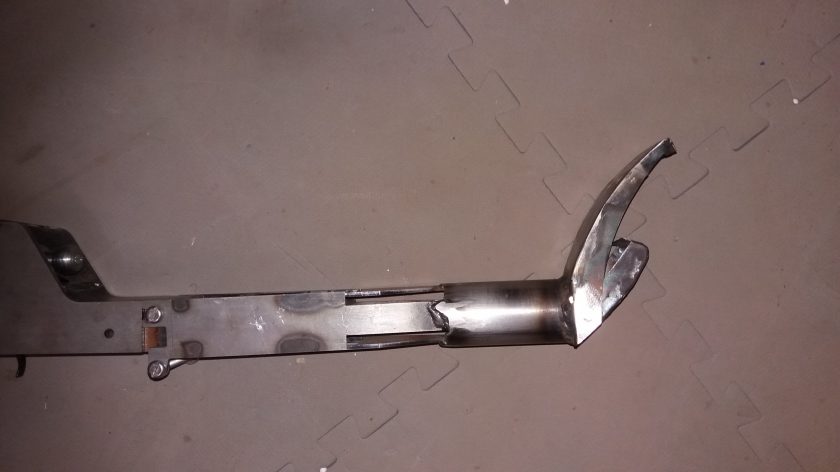
Vintage Airsoft will be building an LMG25 over the next few months with progress posted up here.
If you are interested in this project or have an idea of your own, don’t forget to subscribe to the blog or drop us a line on enquiries.vintageairsoft@gmail.com to discuss. ‘Like’ our Facebook page or follow the blog to get regular updates on projects and interesting videos and articles.
Don’t forget you can buy our complete products through Etsy.